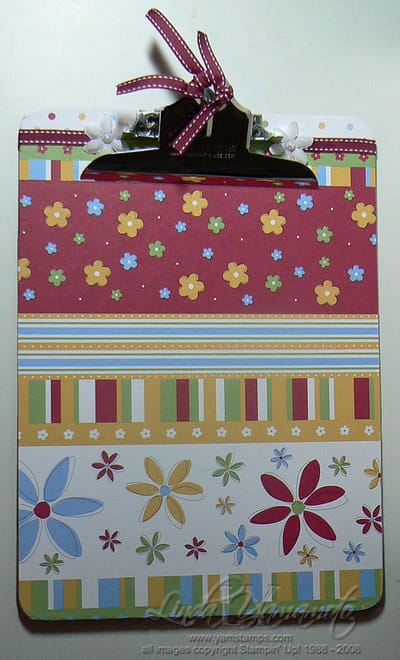
 I’ve always been inspired by those who can "alter" everyday items and make them "WOW" – but I’ve also been slightly intimidated by the whole process. I’m a simple/clean stamper for the most part, and many of the altered projects I’ve seen seem so involved.
I’m taking an online course and part of our pre-class assignment was to alter a clipboard (if we wanted to). I knew that if I tried to do too much, I’d get bogged down & either never complete it, or get frustrated and set it aside, never to complete it, or get distracted and never complete it….you get the idea. So – the goal was to complete this project!! With that in mind, I chose Stampin’ Up!’s Cutie Pie Designer Series Paper. I love the bright colours, and the various patterns on this sheet makes it look like I’ve worked harder than I actually did (that’s key to most of my projects! LOL).
So….I cut the paper to fit the clipboard, nudging up to the clippy thing at the top, and adhering with some Mod Podge. I then cut 2 strips (the multi colour dots) to fit at either side of the clippy thing and used my hobby blade to trim close to the clippy thing. (I really don’t know what else to call that thing). I used my paper snips to trim around the corners of the clipboard (and anywhere where it wasn’t quite flush), then used my sanding block gently to smooth the edges.
The over achiever in me didn’t like the seam where I’d joined the two papers at the top of the board (which really weren’t _that_ bad), but I covered it with some purely pomegranate double stitched ribbon. I added flowers and half pearls from the pretties kit, because they’re pretty….and because they cover up any not so perfect cutting around the clippy thing at the top. (It’s all about the cover up). I actually used the Tombow Multi purpose adhesive that SU now carries to adhere the flowers and make sure the ends of the ribbon were tacked down. I love the little pen tip to put some glue just where I want it (especially because I tend to be a bit of a messy glue-er).
So; to answer the question – it took me less than half an hour from start to finish (and less than one sheet of the paper). TADA! Oh, and because I was so energized by this, I went on to do a chipboard book that has been sitting naked on my shelf for ages. I’m going to post pics of that in my March newsletter, so watch for that in your "inbox" next week!


LOVE IT!!! You did a FANTASTIC job on this — don’t you just love Cutie Pie DP?