
Cracking Up…..
 Club projects this month featured a technique called "Cracked Glass". We stamped an image, coated the cardstock with versamark and then repeatedly heat embossed with Glassy Glaze, an ultra chunky/thick embossing powder. If your image is small enough, you can melt your powder, then dump more on right away and it will "stick" until you reheat the image and melt the next layer of powder. If you can't manage working at that speed, or if your image is larger, it may be easier to simply allow the cardstock to cool slightly, then re-ink with versamark and re-coat with the Glassy Glaze. As for me, well, if I can skip that extra stage….I will!!
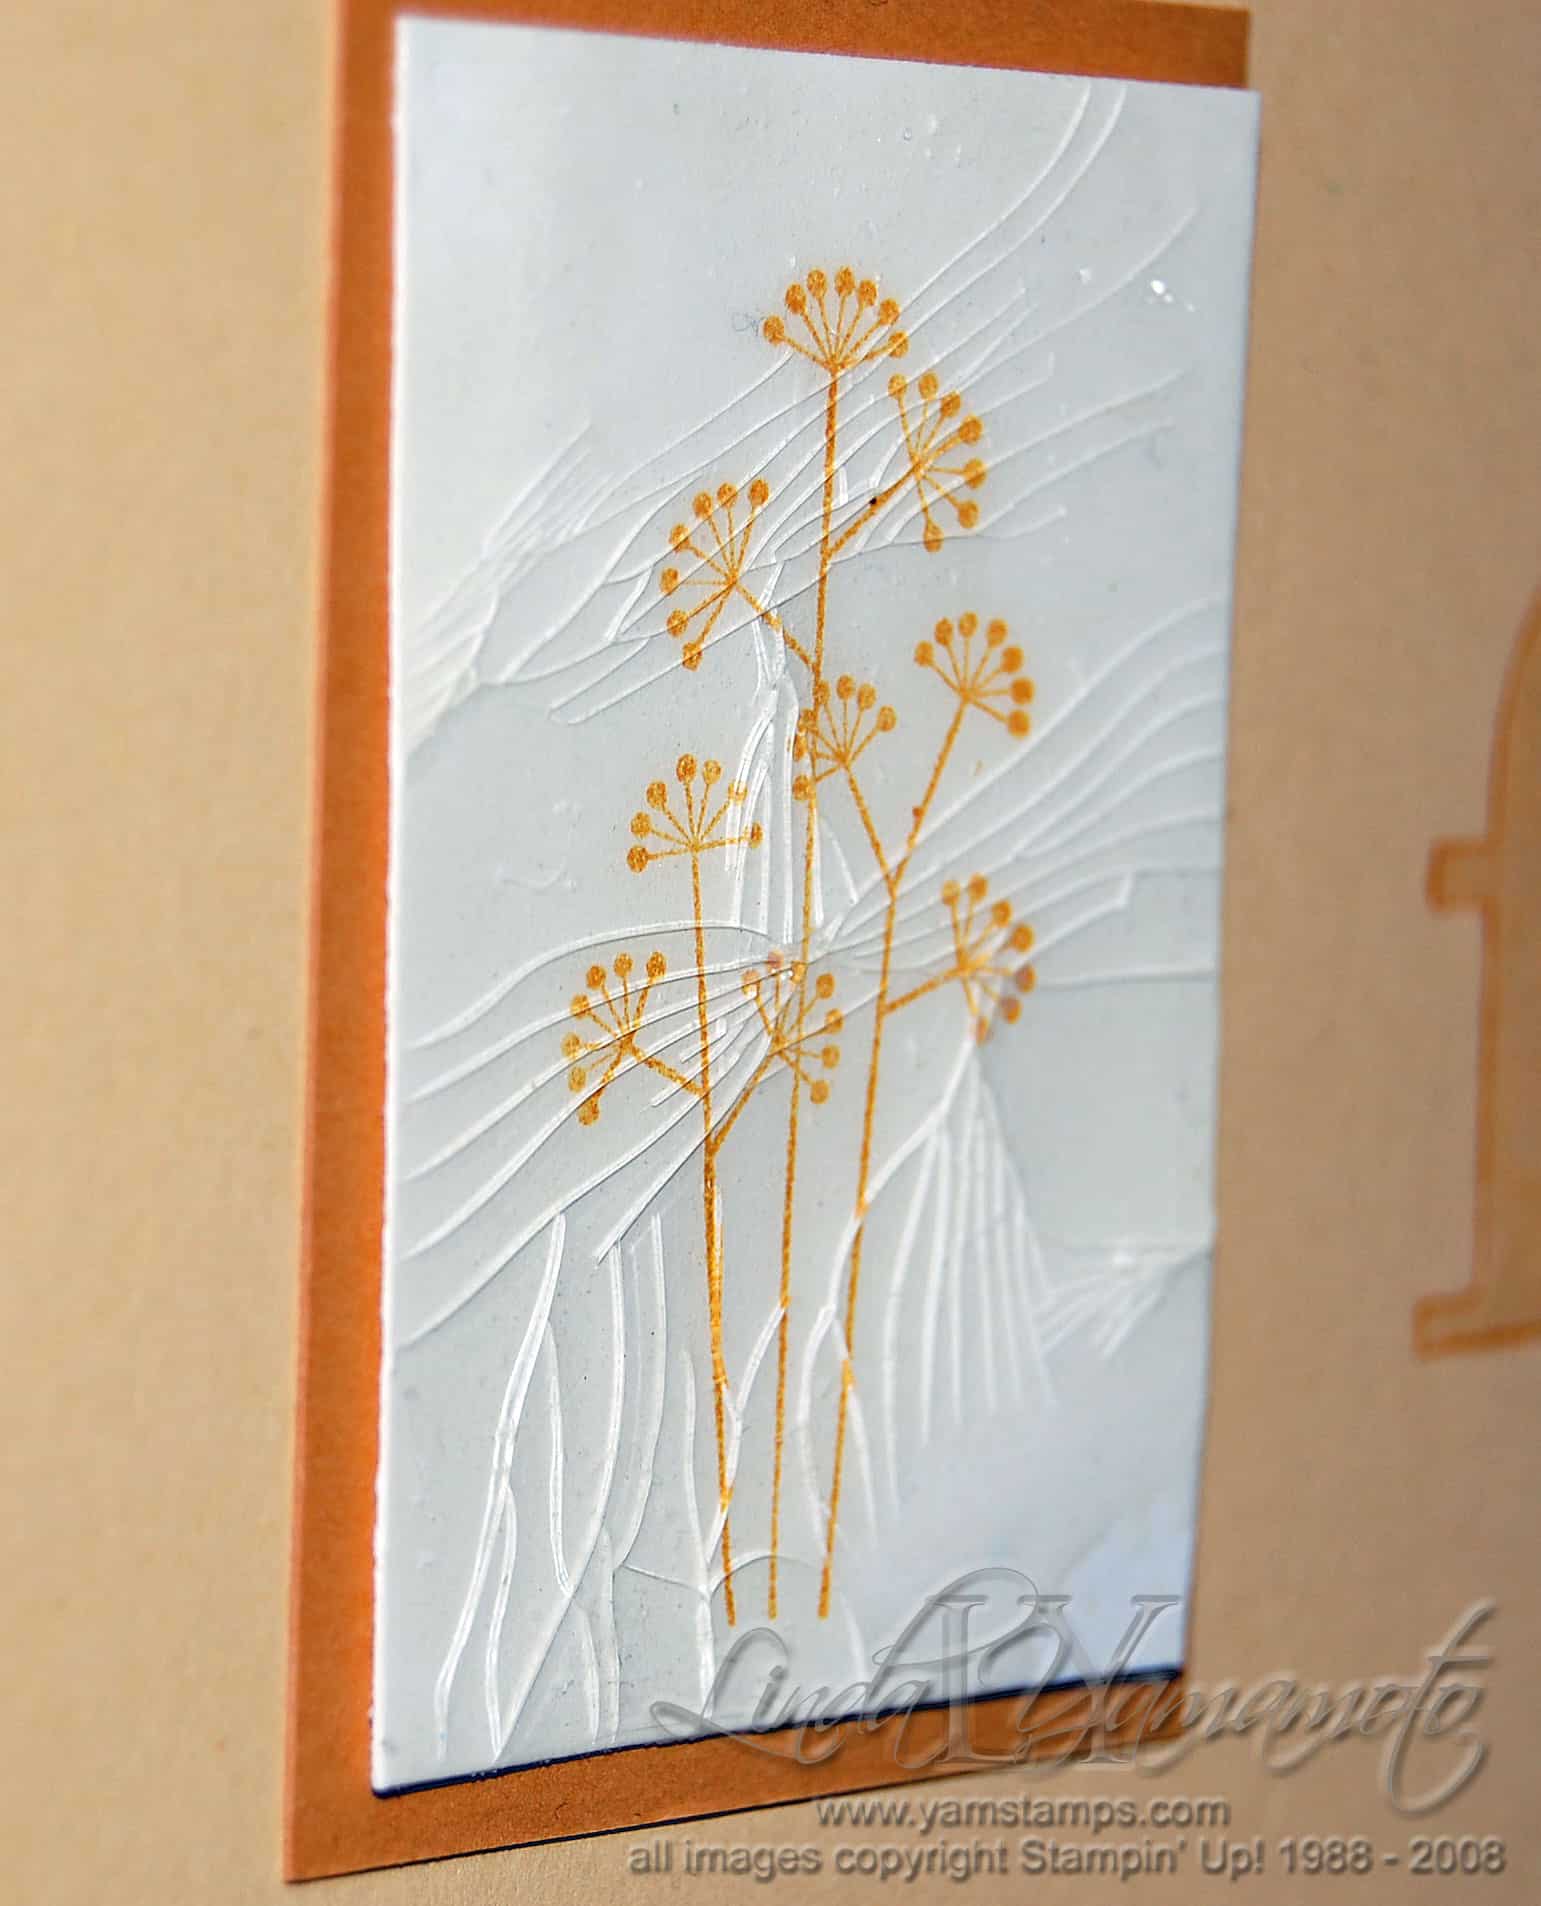

Once your image has a good thick layer (about 3-4 coats), stick it in the freezer where it will curl up slightly. After about 10-15 minutes (minimum), take it out and immediately bend and manipulate (not TOO rough though), and the embossed layer will crackle, giving you the cracked glass effect. If you want it to be even more pronounced, you could gently sponge ink over top to get stuck in the cracks (creamy caramel could give a nice "antiqued" look).
These projects feature the Pocket Silhouettes stamp set – on sale for 15% off but ONLY until the end of September (that would be TUESDAY)! Contact me if you'd like to place your order – or try the online ordering feature at my business website – www.yamstamps.stampinup.net !


