
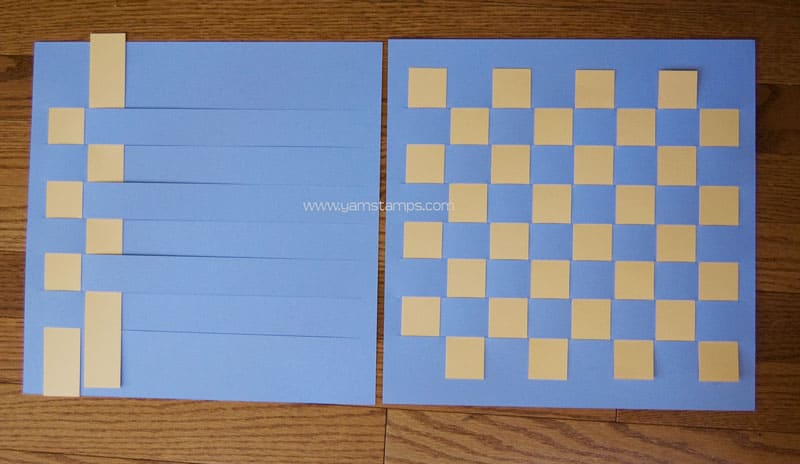

Here's the checkerboard from my CH Morning Live appearance. Great to create on rainy days (which, unfortunately are in the forecast for the southern Ontario area). I took a 12" x 12" piece of cardstock, then used my papercutter to cut 7 slits 11" long (leaving 1/2" on either end), spaced 1-1/4" apart, starting 2-1/4" from one end. I cut 8 strips of contrasting cardstock 1-1/4" x 12" (only because I was too lazy to calculate what they should be…lol). Weave the strips of cardstock through the larger piece, and then adjust the ends & trim to size so you end up with a checkerboard that is 8 squares by 8 squares in size. Adhere the ends of the strips in place and you're done! To create the checker pieces, I stamped the star image from the Stampin' Up! set "Wanted" on whisper white cardstock and punched them out with the 1-1/4" circle punch. Use the 1-3/8" circle punch to create backing circles from the 2 cardstock colours you used. In my example, I used Apricot Appeal and Almost Amethyst. The joy of creating your own projects – you can use whatever colour you'd like!!!
Feel free to email me if you have any questions about this project. Don't forget the new Stampin' Up! Deal of the Week will be revealed Monday at 12 noon EST (or is it EDT??!!). I'll post an update here, but if you're anxious, check www.yamstamps.stampinup.net at noon tomorrow if you want the hot off the press info!


