Manic Monday Organization Tip
For Manic Monday, I thought I could share an organization tip – because it might help the day be a little less crazy, AND it’s something you can do in a minute or less!
I have a love/hate affair going on with my stamp room. I do love it, lots of room and light, though it’s in sheer chaos most of the time – which is where the hate portion steps in. Nothing more frustrating than having to search for that item you need! Many of my friends have undertaken the “empty out the entire room, sort through everything and then put only what you love/need back into the room” approach. (You can read more about that in the Marie Kondo book, The Life-Changing Magic of Tidying Up: The Japanese Art of Decluttering and Organizing ) (and from this title, it’s SO obvious to me that I am far removed from my Japanese roots ROFLOL). I haven’t been able to muster up the courage to do that YET. In the meantime, I’m going to start using my Organizing Pinterest Board a bit more often! (Procrastinate much, me?!)
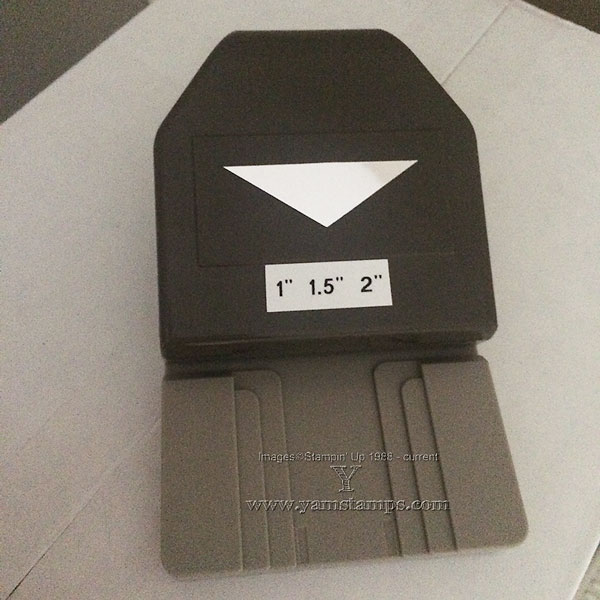
If you’re like me, when you get your new Stampin’ Up! products, you are so excited you tend to whip open the packaging to get to the fun new item inside…and then can’t find that little piece of folded paper in the chaos that gives you more information or instructions for your new item. In my case, it’s the Banner Triple Punch. Well, I did actually know where the piece of paper was, yay me, but I can see it easily getting waylaid or thrown into the recycling when I hit the “I can’t TAKE this mess anymore” level in my stamp room. Here’s my solution:
 I recently got more tape (and batteries!) for my labeller (similar but different to this one in case you’re wondering: Brother PTD200 Home and Office Labeler
) so have been able to use it a bit more in my office and stamp room area. I decided that the best place for information about a tool would be with the tool – so in this case, I printed a label with the size of the channels in the Banner Triple Punch, and adhered it in plain sight (though not on the top edge of the punch where I tend to grab it). Yay! No searching for the paper or trying to hold the punch by my Grid Paper to guesstimate the size – which means I’ll be faster and happier when creating something! Don’t forget though, you probably want to cut your cardstock a “smidge” narrower than the listed widths to be sure it fits snugly in the channels.
Happy Crafting!


