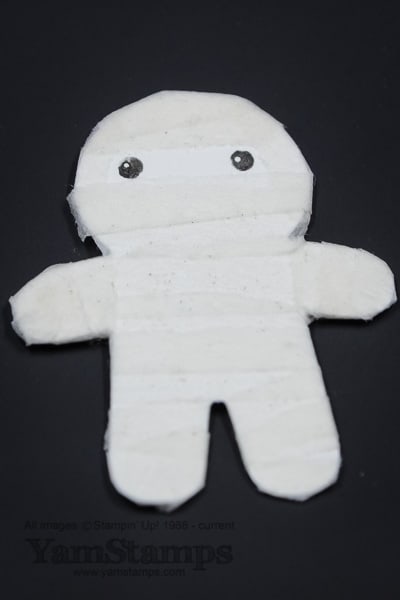
I don’t really send Halloween cards – it’s not that huge in our household, but I do recognize that it’s a big deal to others! (My American friends, not to generalize, but I’m looking at most of you!) Anyway, I thought I’d make up a quick embellishment for a card or candy treat, and was looking around the craft room for something that would suit. Again, realizing that I don’t have many/if any Halloween themed stamp sets….I remembered another demo friend, Ann Brown, mentioning that she had done a mummy with washi tape. Well, the only washi tape that I had was all pretty and coloured, and somehow I didn’t think it suited a mummy. So I tried masking tape (FAIL, the masking tape was beige so didn’t look quite right). I found some rolls of paper tape – the medical type that you can use to hold gauze bandages in place, and BINGO! It worked easily, even if it’s a little hard to see in the picture. The bonus with the paper tape, like washi tape, is that it’s tear-able. I tore length wise along strips of the tape to get a more ragged edge, and then just stuck pieces down, overlapping, to create the mummy bandages. The base is Stampin’ Up!’s Cookie Cutter Builder Punch, which I purchased as part of the Cookie Cutter Christmas discounted bundle with the Cookie Cutter Christmas Photopolymer Stamp Set. There is actually a coordinating Halloween set (available in wood mount or clear mount) but I hadn’t purchased it – hence my need to improvise! I used the brush end of the Stampin’ Write Basic Black marker to colour just the eyes from the bear face in the Christmas set to create the eyes for the mummy.
On a side note, current convention is to spell Halloween without any punctuation, and I realize that I’m revealing something about my age (and my grammar police side), but I have to retype the word every time because I automatically include the apostrophe. You know, Hallowe’en. I will go console myself with some chocolate now, I think. Good thing we have some extras here!
There’s a special starting on November 1st, so something to look forward to! I will post more details that day, so please come back to www.yamstamps.com and check it out!
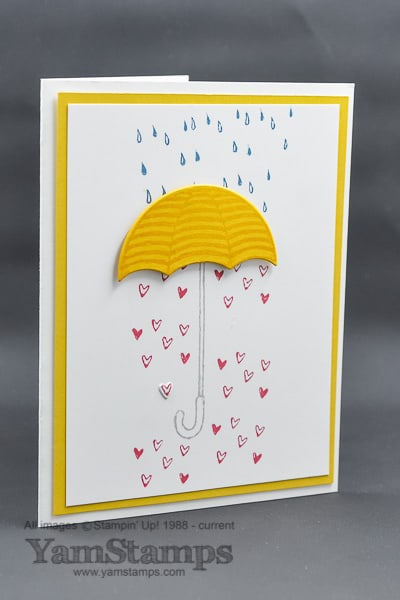
I’m sure you can relate (perhaps especially on a Monday?). One of those days where nothing seems to work in your favour and you’re constantly swimming up stream. Like Dory, my mantra is often “Just keep swimming”. Here’s a great card to send to someone who’s going through a bit of a rough patch, and it’s perfect for a Manic Monday, I think! This card is easy to reproduce and a perfect way to brighten someone’s day. It uses the Stampin’ Up! Canada Weather Together Bundle which includes the Umbrella Weather Framelits and Weather Together photopolymer stamp set.
Colours used are Crushed Curry for the background and umbrella top; Island Indigo for the raindrops, Real Red for the hearts and Smoky Slate for the umbrella handle. I did the usual thrifty trick of stamping the umbrella top in the centre of the Crushed Curry cardstock, and die cutting it before using the remainder of the cardstock as the backing for the main image piece. Noone sees the umbrella shaped hole behind the other layers! Since this set has coordinating images and framelits, I was able to cut out a few hearts easily, and add one or two to the front of the card with the Fine-Tip Glue Pen. I combined Thick Whisper White cardstock for the cardbase and regular Whisper White for the top layer. This way, the whole card feels substantial, but it’s not too bulky or heavy, especially since the umbrella top is raised with Stampin’ Dimensionals.
I’m off to continue on my Manic Monday….prepping for the Christmas Card Class on Wednesday – going to be a fun one with lots of bling! The registration deadlines for the November Christmas Card Class and the Tin of Tags Class are coming up soon – visit the YamStamps Events page for more details and registration information. Hope to see you in class soon.
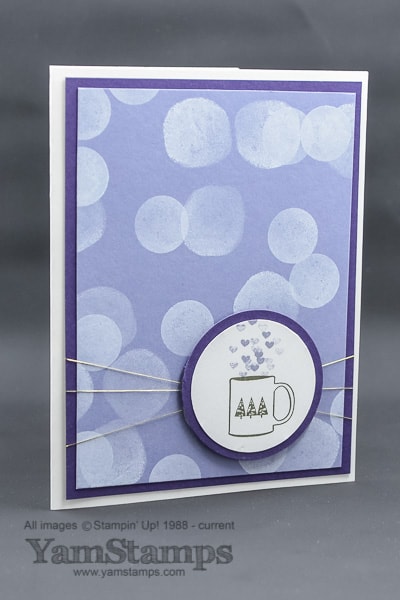
I love the Bokeh effect – in photography and in crafting – where the out of focus highlights are twinkling in the background of the shot…. and this stamp set makes it easy! Twinkle Trees, from the Stampin’ Up! Holiday Catalogue is a great holiday set, and I love when I can use a holiday set in a way that doesn’t scream CHRISTMAS!!!! (Though I have nothing against that, but it just makes the sets even more versatile, in my opinion!). The large circles stamped randomly in the background recreate a bokeh effect, and the little hearts rising from the mug also have a bit of the same effect. This is my Thank You card for September orders (and I’m working on getting them mailed out or handed out!). On some of the cards, I used the Gold Baker’s Twine from the Baker’s Twine trio, and I love that it’s a bit more substantial than the Metallic Gold Thread on this sample, but not too bulky. Of course, this card also uses my thrifty trick of punching something out of the background layer – so the circle that backs the mug circle is cut from the Elegant Eggplant layer that backs the bokeh piece.
I did a video a while back showing another way to do a bokeh background, with a watercolour wash and circles cut from a window sheet. Click here to visit the YamStamps YouTube channel if you can’t see it embedded below.
I was having some internet woes for a while, but it seems like they’re all resolved now (FINGERS CROSSED) so I should be able to get back to a regular schedule with online sites. Today is Stamper’s Club – always a fun time – and of course the ongoing Christmas Card Classes. (See the YamStamps Events page for upcoming events). If you’re in the Burlington Area and are attending the Black Cat Masquerade in support of the Burlington Humane Society, look for the basket of goodies I’m donating! It includes a free card making class for 6 people so please bid high and bid often. I’m happy to once again be supporting this event and organization. Ok I’m back to prepping for classes – but as always, if you have any questions, feel free to contact me or leave a comment below!
Don’t forget to sign up for the YamStamps papercrafting newsletter – free ideas and inspiration each month, plus special editions, like the Twelve Weeks of Christmas!
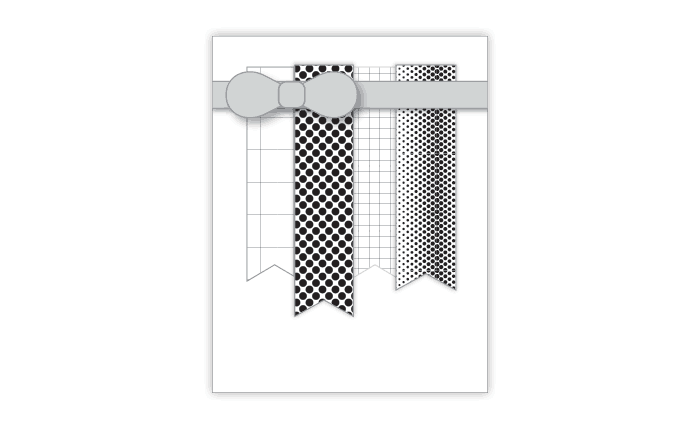
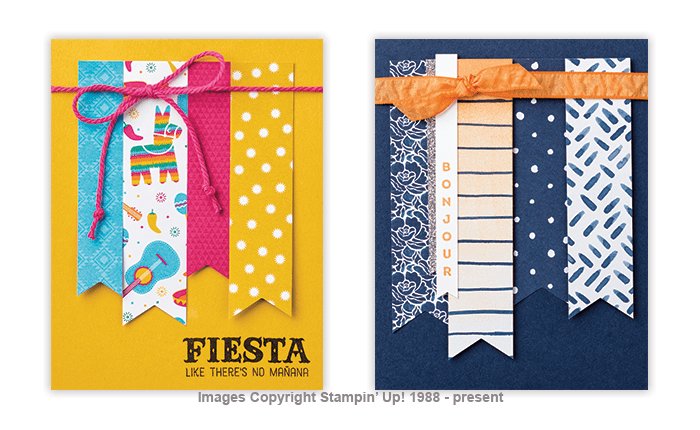
This card sketch and samples show off Stampin’ Up!’s Designer Series Papers. How fun are these? You can use the Banner Triple Punch to make the symmetrical banner cuts at the bottom of the strips of Designer Series Paper (“DSP”) easily. If you use the papers from one package, they’ll coordinate with each other; the colours used in each package are also listed on the backing sheet, so you can pick out coordinating cardstock easily….or just purchase the coordinating cardstock package which features 8 sheets from 3 coordinating colours! (You can find the cardstock by looking up the name of the DSP – e.g. By the Shore – in the search box on the online store). Designer Series Papers are on sale – buy 3 get 1 free during October, so it’s a great time to stock up! Week 2 of my Twelve Weeks of Christmas mailings featured a card that used some Designer Series Paper – so if you purchased it now, you’d have lots of materials to make your Christmas cards!
If you use this sketch to create something, I’d love to see your results! Feel free to share it on the YamStamps Facebook page.
Here in Canada we are celebrating Thanksgiving. Wishing you and yours a happy Thanksgiving! Taking time today to count my blessings and be grateful for friends and family.