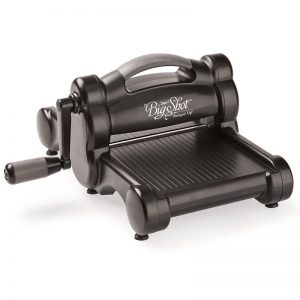
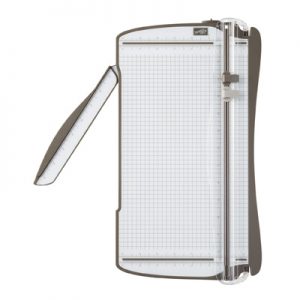
Stampin’ Up! Retiring Product News! While the full retiring list won’t be released for a few days yet, we do know of a few items that will be retiring – notably the Big Shot Die Cutting Machine and the Stampin’ Trimmer!
What to know:
Stampin’ Up! will still continue to offer dies and embossing folders, and moving forward these items will be made by a different supplier, so you will notice some difference in them. Exciting – the dies will have an inner edge or lip so that they will line up right against the stamped image – making them easier to align perfectly, rather than having to judge the amount of space you’re leaving around the stamped image. In the meantime, carry over dies and embossing folders may be the “old style” when ordered, until current stock is depleted.
Stampin’ Up!’s Trimmer and all associated tools will be retiring – which means the replacement blades and mats. There is currently a 3 item limit on replacement blades, but after April 15th, it will move up to a 6 item limit. This means that you can stock up on the blades and they should last you a long time still.
While neither of these items will be in the 2019-2020 Annual Catalogue, Stampin’ Up! is moving forward with coming up with new offerings in these categories (and will let us know when they’re ready to be released!).
I know that this Stampin’ Up! Retiring Product News may be a bit of a surprise – I personally LOVE my Big Shot – but I know that Stampin’ Up! is working toward offering their own product that will fill the paper crafter’s needs, and I’m looking forward to see what they will be offering.
In the meantime, as always – if you have any questions, you can either leave a comment below or message me. If you need to grab these items (or associated accessories) – please visit yamstamps.com/shop (or click on the images above to see them in the YamStamps Online Stampin’ Up! Canada Store).
On this Manic Monday I thought I’d highlight a few crafting tips that I shared in the recent Live session I did on the YamStamps Facebook Page. The shortened video version is below, but thought I’d highlight a few things if you like to read vs watch…
full video below….
Distinktive Stamps are more photorealistic and have multiple depths on the same stamp. Crafting Tips for good distinktive images: To get a clear image of all the different depths, it helps if your ink pad is not too juicy – you can rub the surface of the ink pad with the back of a spoon or your bone folder to push excess ink into the pad vs having it on the surface to get better definition in your stamped image. The stamp set used in the video is Forever Lovely; another distinktive stamp set example is Baby Bear.
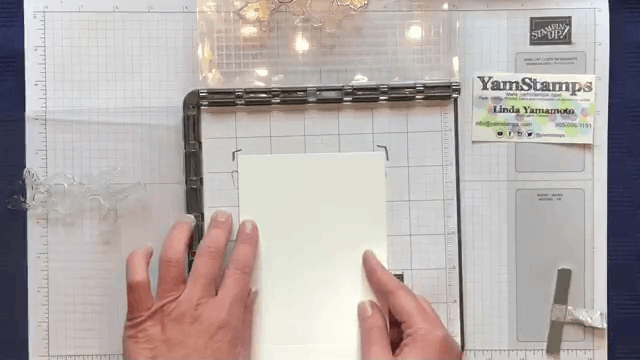
Crafting Tips with the Small Grid Paper: Positioning multiple step stamps and coordinating framelits. In the video, I use the Stamparatus to stamp the images – because once they’re in the right place on the plates, you don’t have to think about it again! My tip – stamp onto the Small Grid Paper so you can see where your image will end up. Position your card stock and mark where the corners of the cardstock are on the grid paper so you know where to place it for future reference.
You can also position the framelit over the stamped image and mark where the side edges of the framelit are on the grid paper so you have it for reference. You can use the grid paper when stamping with the stamparatus, then remove it and place it onto your Big Shot plastic cutting plate as a reference for placement of the framelit – just be sure to remove it before you cut!!
That way, your reference sheet will be intact and ready for future use.
Last tip you might have picked up in the video – put your Big Shot Die Brush and foam pad into a small shallow box to catch all the bits (and store everything together! I used an old cardboard box (it actually held my carvable stamp set, remember that one?), but you could also use one of the full wide stamp cases.
How do you prefer to get your crafting tips & tricks? Video? Written format? Let me know so I can be sure to have you covered for future tutorials – leave me a comment below or message me!
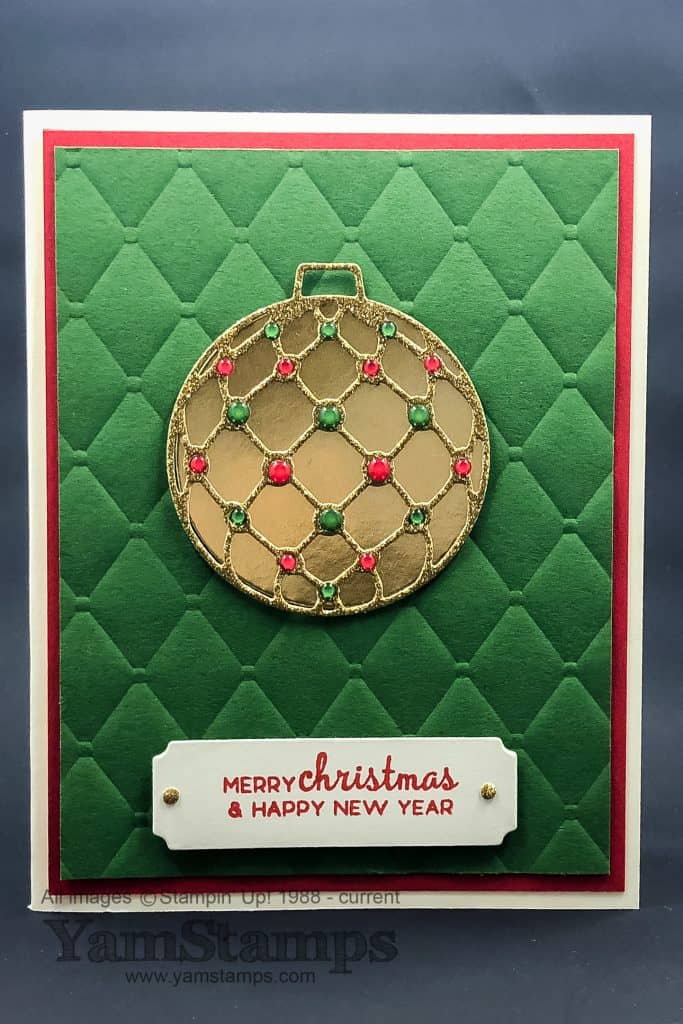
I don’t think I shared this card here! I made this one a while back – here’s some Christmas Card Inspiration. It takes a little more time than my usual quick cards, but I think it’s worth it in the end! True to my usual style, though, it looks like it’s more work than it actually is….
Unfortunately, a number of Holiday Catalogue Items are now unavailable to order – they’ve been overwhelmingly popular! Currently unavailable to order: Santa’s Workshop Enamel Elements, Festive Farmhouse Elements, Joyous Noel Specialty Designer Series Paper; Framelits: Alpine Sports, Santa’s Signpost; Santa’s Workshop Memories & More Card Pack – and anything that uses that card pack (like the kit). A few items are running low, but the good news is that Stampin’ Up! has let us know that they are going to be carried over: these items include the framelits In the Woods, Detailed Deer and Merry Christmas. The Swirls and Curls Embossing Folder will also be available to order after the Holiday Catalogue Sales Period. You’ll notice that there are NO stamp sets included in this list – mostly accessories/tools – since these are items that are not directly manufactured at Stampin’ Up!’s facilities in Utah. Their stamps are produced in Utah, so they have more direct control over production numbers.
Coming soon – Online Extravaganza. Download the flyer here. Three consecutive 48 hour sales featuring different selected items from the Annual Catalogue. November 23-24 is Paper & Embellishments, November 25-26 is Stamps & Kits, November 27-28 is Tools & Ink. Each sale runs until 1150pm Mountain time and then the next set of products will be available at special pricing. Please note that there are a set number of selected products available at the Online Extravaganza price, and once that allottment is gone, the product will not be available to order until after the sales period. Excluded from this sale – Paper Pumpkin Kits, bundles (which are already discounted anyway), the Big Shot and the Stamparatus. There are a few other items that are not included in the sales pricing, but you’ll be able to tell once you’re shopping online during the sale! If you need assistance placing your order, you are always welcome to contact me for assistance or to place the order for you. Please note, though, that I can’t guarantee availability, so if you’re really anxious to get your hands on some sale product, your best option is always to place the order yourself online at the YamStamps Online Stampin’ Up! Canada store. Shortcut is yamstamps.com/shop .
Last but not least – there’s still some space in the Festive Farmhouse Elements Christmas Card Class happening on Wednesday, November 28 at 1pm or 7pm. Yes, you read that correctly. I do have a supply of the sold out wooden elements that each class attendee will receive with their $30 class fee. Contact me ASAP to reserve a spot, and one of the sold out packages of elements! You can check out upcoming events on the YamStamps Events Page. Hope to see you in class or club soon!
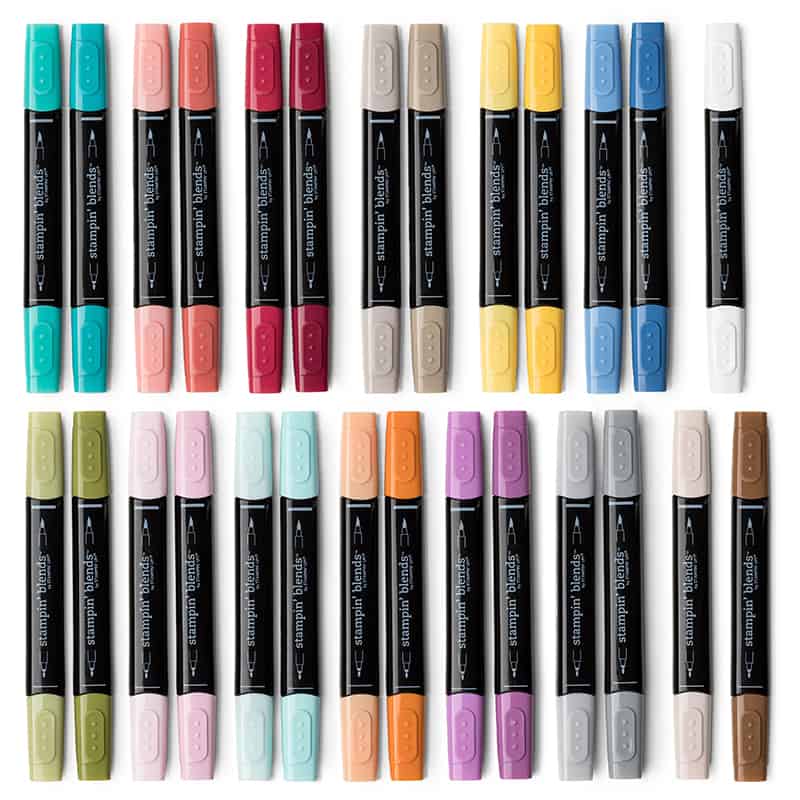
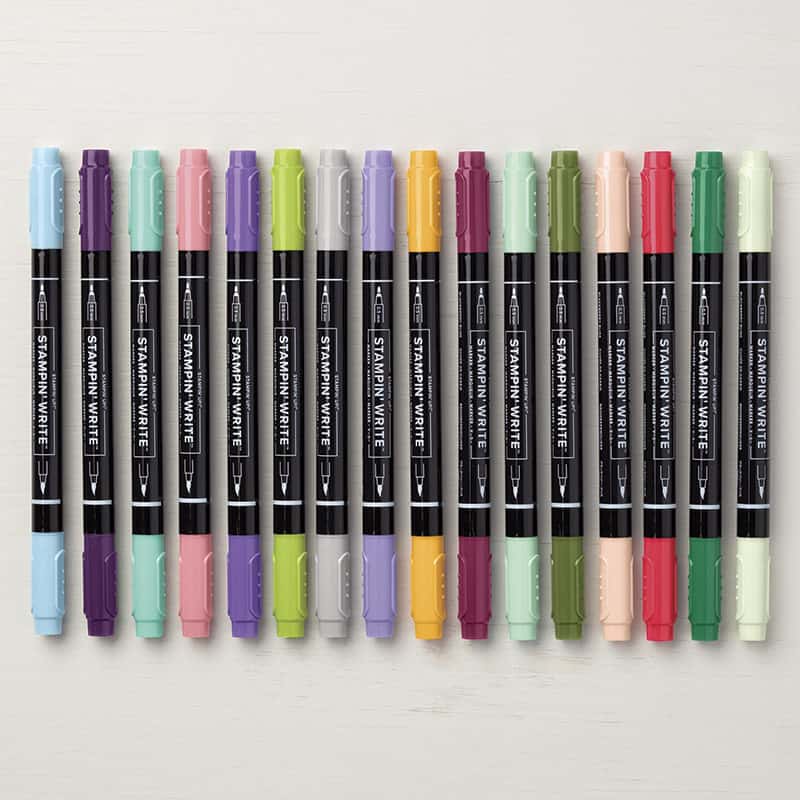
Tuesday Tool Tip (while it’s still – barely – Tuesday LOL). What’s the Difference between Stampin’ Blends and Stampin’ Write Markers?
Colouring is still such a popular past time and stress reliever! Stampin’ Up! products are great for colouring – you can stamp images of your choice and then colour them in – for bonus points you can even use them on a project instead of hoarding them….but one question that has popped up in my classes lately – what’s the difference between Stampin’ Blends and Stampin’ Write Markers?Here’s a quick rundown:
Stampin’ Blends
What’s the Difference: Stampin’ Blends Markers
Rectangular shape marker
Double ended – bullet tip and brush tip
Alcohol Based Colouring Tool – best used with images stamped in Memento Ink
Ivory, Bronze single shades and Colour Lifter available
Purchase Individually or in Coordinating Shade Duos
Stampin’ Blends tend not to show “streaks” or colouring lines – as with most alcohol based markers, they blend well to give a more “solid” colour image. The coordinating light and dark shades make it easy to blend and create shadows and highlights for more professional looking results. You can layer the colour to increase the intensity and add more shadows as well. There may be a bit of “bleed” or spreading of colour with these tools, so best to leave a tiny margin by the image line until you know how much your colour will spread. The intense colour will also tend to bleed through the cardstock. The Colour Lifter tends to “push” the colour out of the way, so may help create highlight areas or disguise small areas of spread. These colouring tools are great for colouring, but not suitable for use directly on rubber stamp or photopolymer stamp surfaces. Alcohol based markers are often used by manga / comic book type illustrators.
Stampin’ Write Markers
What’s the Difference: Stampin’ Write Markers
Traditional round barrel shaped marker
Double ended – brush tip and fibre tip fine point (great for writing)
Dye Based Colouring Tool – best results with images stamped in StazOn, but can be used with dye based inks as well
Available in all 50 Stampin’ Up! shades (all 4 Colour families and all current In Colours), plus Basic Black
Stampin’ Write Markers are a great way to get your hands on all the base Stampin’ Up colours for your crafting needs. They are dye based inks, so can be used to colour images on cardstock, or you can use them to apply colour directly to the surface of your stamps before stamping. Great for quick colouring, or colouring in traditional colouring books – there may be bleed if a lot of colour is laid down, but not to the extent of the Stampin’ Blends. I also love using the brush end of these markers for brush lettering. Don’t overwork the surface when you’re using these to colour as you may end up with the paper “pilling”.
Both types of these colouring tools can have a place in your crafting room! There are advantages to each of them. If you’re just dabbling in adding colour to your stamped images, you may want to start with the Stampin’ Blends, since you can start with just one or two colours and shades – for example, if you like floral images, pick a green and a red or pink to start. If you want to get your hands on many coordinating colours quickly, perhaps start with the Stampin’ Write markers since you can get a colour family (or even better – the new colours assortment) to build your collection quickly. Once you’ve been able to “play” with the tools, you’ll know how they fit into your crafting style and won’t be wondering “What’s the Difference?” any longer!
Hopefully this has helped a bit – but if you have any lingering questions, feel free to contact me! You can also check out the recording of the Facebook Live I did a little while ago on the YamStamps Page, showing how Memento and Staz On inks react with both of these types of markers as well as an Aquapainter. If you “like” the YamStamps Page, you’ll get notifications of whenever I go live with a video in future! See you in cyberspace…
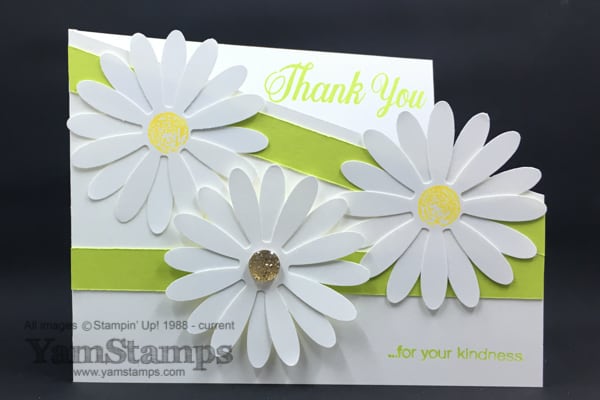
This is a swap card I created using the Daisy Bundle – Stampin’ Up!’s Daisy Delight stamp set and Daisy Punch. Angled lines on a card helpto give a bit of interest, as well as the added bling of a Gold Faceted Gem. I love the images and coordinating punch, and the good news is that it’s also available as a discounted bundle. The bad news? YOU CAN’T ORDER THE BUNDLE RIGHT NOW! Waaaaah! The punch has been SO popular that it’s sold out a couple of times already! Punch sales are way beyond projected, so for the time being, Stampin’ Up! has turned off the ability to order the punch and the bundle. It’s estimated that the next shipment will be in around August 1st. The stamp set is currently available to order, but the punch (and therefore the discounted bundle) are not.
HERE’S WHAT TO DO. You have a couple of options
Order the stamp set now, along with other craft supplies, and be sure that the total product adds up to $60. All July orders that have $60 in product earn you a $6 coupon code that you can use in August to purchase the punch once it’s available again.
Wait for the bundle to be order-able once again in August and place an order once it’s available.
2. I can place an order for you once the punch is available – PLEASE CONTACT ME. I will get your information (including payment choice) and then place the order for you. Payment will be processed when the order is placed. It can be shipped directly to your door, or if you’re close to Burlington ON, I can have it shipped to my place and we can make arrangements to make a hand off!
If you have any questions, please contact me. In the meantime, stay tuned for other cards and creative ideas that will keep you occupied while we await the return of the punch….
Are you on the YamStamps list? Be sure to be registered to receive monthly paper crafting project ideas, information on events and Stampin’ Up! specials, plus more on a regular basis. We’ve had to discontinue the YamStamps App, so if you used that, you will want to be sure to check the mobile friendly YamStamps website, www.yamstamps.com and be on the YamStamps mailing list so you won’t miss anything!