There are some items that will “carry over” – some items will be available to order until the beginning of May, but won’t appear in any catalogue. There are some items that will return in a future publication.
You can grab retired product at a discount – including some of those limited time coordinating dies like the Birthday Piggies! Check out the Clearance items here. Again, these items are available while supplies last.
As always, if you would like assistance placing your order or want to pay by etransfer, you can contact me with your list! If you are local to Burlington ON and have a smaller order, you can also take advantage of any group orders I have going in – I’ll add your order to ones I have from other people. It saves you a bit on the shipping costs, but you do run the risk of items selling out before we hit the threshold for the 11% shipping rate, so depends on how much of a gambler you are! If you have any questions, just let me know.
In the meantime, happy December! Stay warm! I’m off to a few Santa Claus parades this weekend, so you know I’ll be bundling up and looking for my hot chocolate afterwards!
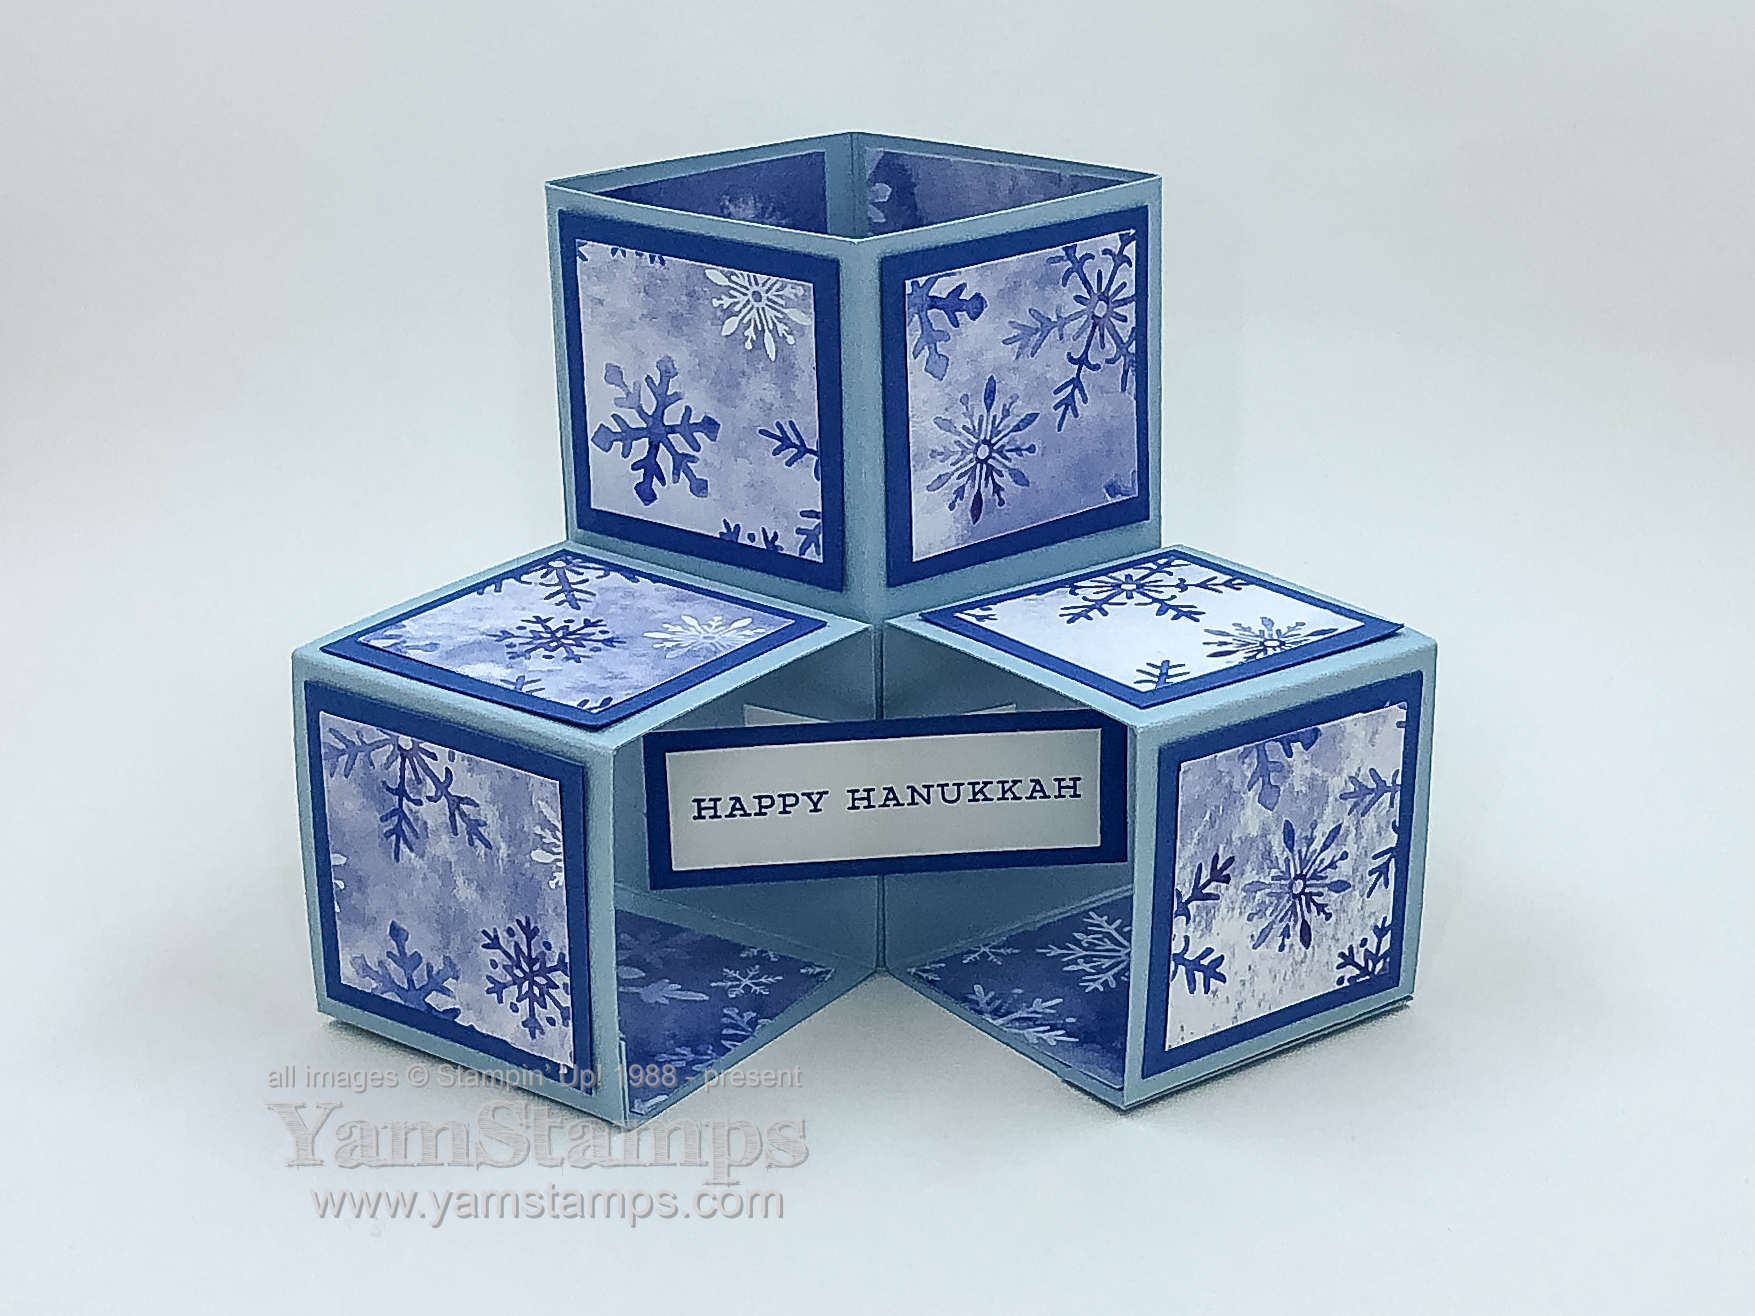
Sharing a version of a triple cube card that we made in Stampers Club and Card Class to Go. This is a fun 3D pattern, and once you’ve made one, it’s pretty straightforward (really!). I used this sentiment from the Snowflake Wishes stamp set to create a Hanukkah Card.
Hanukkah Card
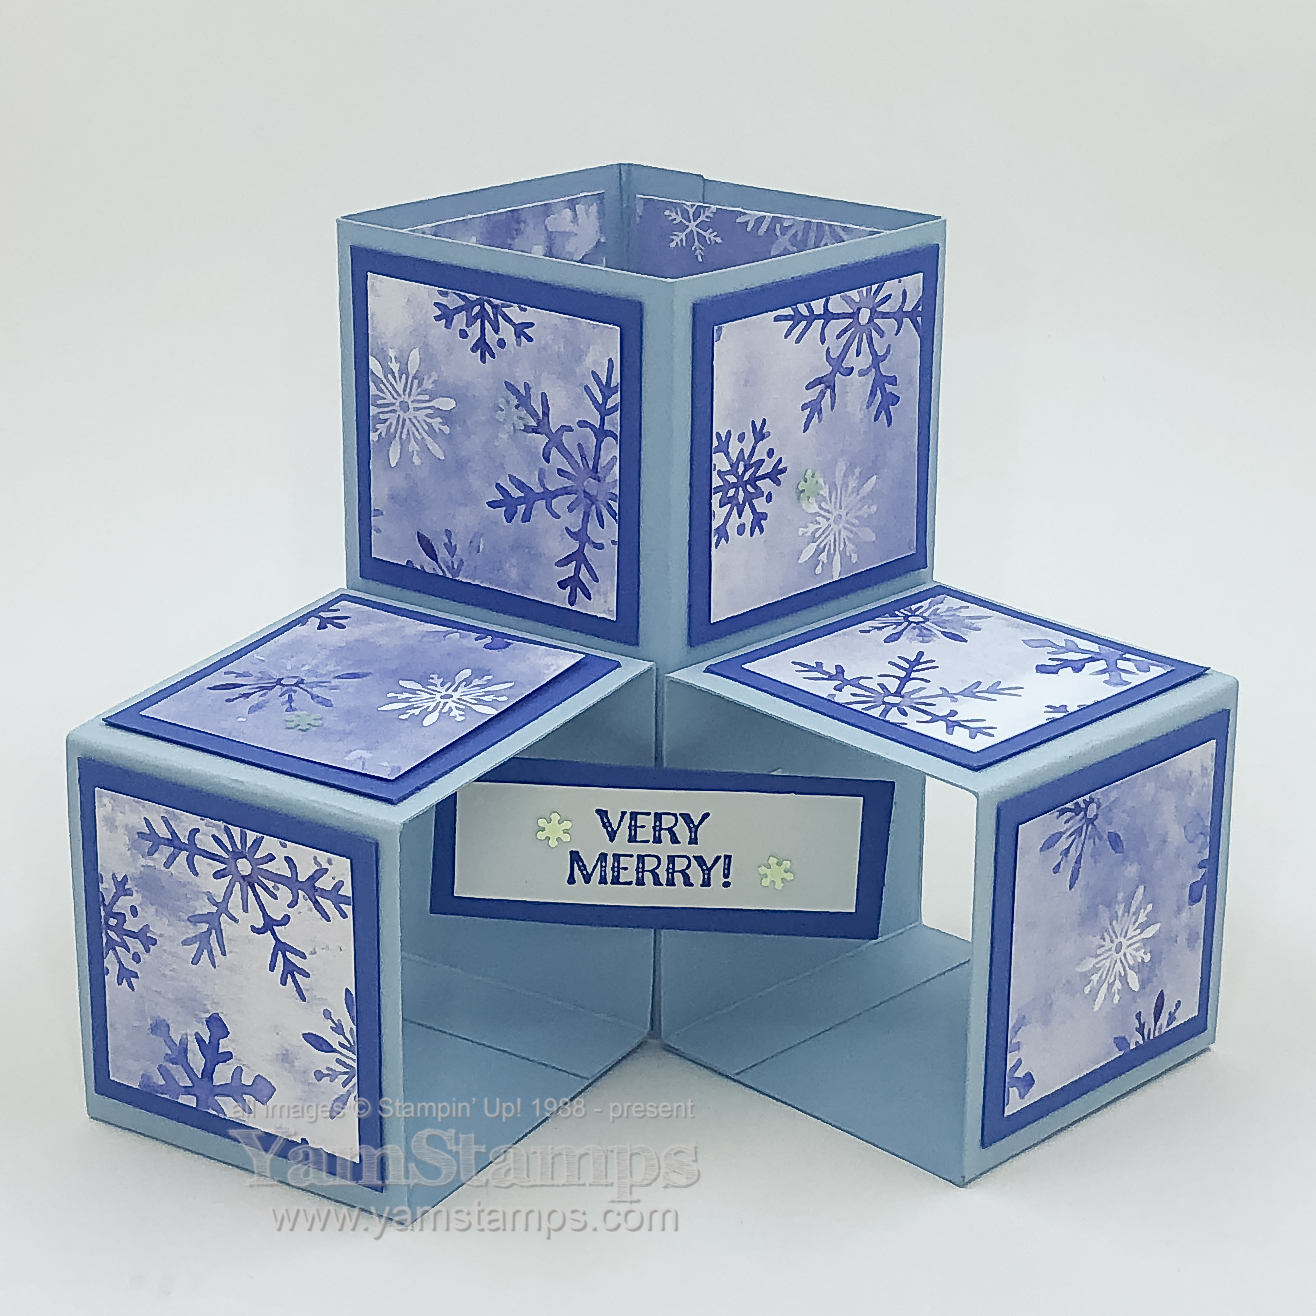
The lovely thing about this design is that if you fold/flatten the bottom cubes upward, the card will fit in a medium Stampin’ Up! envelope for easy mailing! If you were at Stampers Club, you will remember that it had to be pointed out to me… LOL. I thought I’d messed it up because it didn’t fit in the card, but I was flattening the bottom boxes down vs up – so that the flat card was 6″ long rather than 4″….*sigh* If you’ve been around the Stampin’ Up! / cardmaking world for a while, this is a variation on the “2-4-6-8″ box design (your cardstock is scored at 2” increments, then folded to create a box/cube).
Here’s one where you just change out the sentiment…
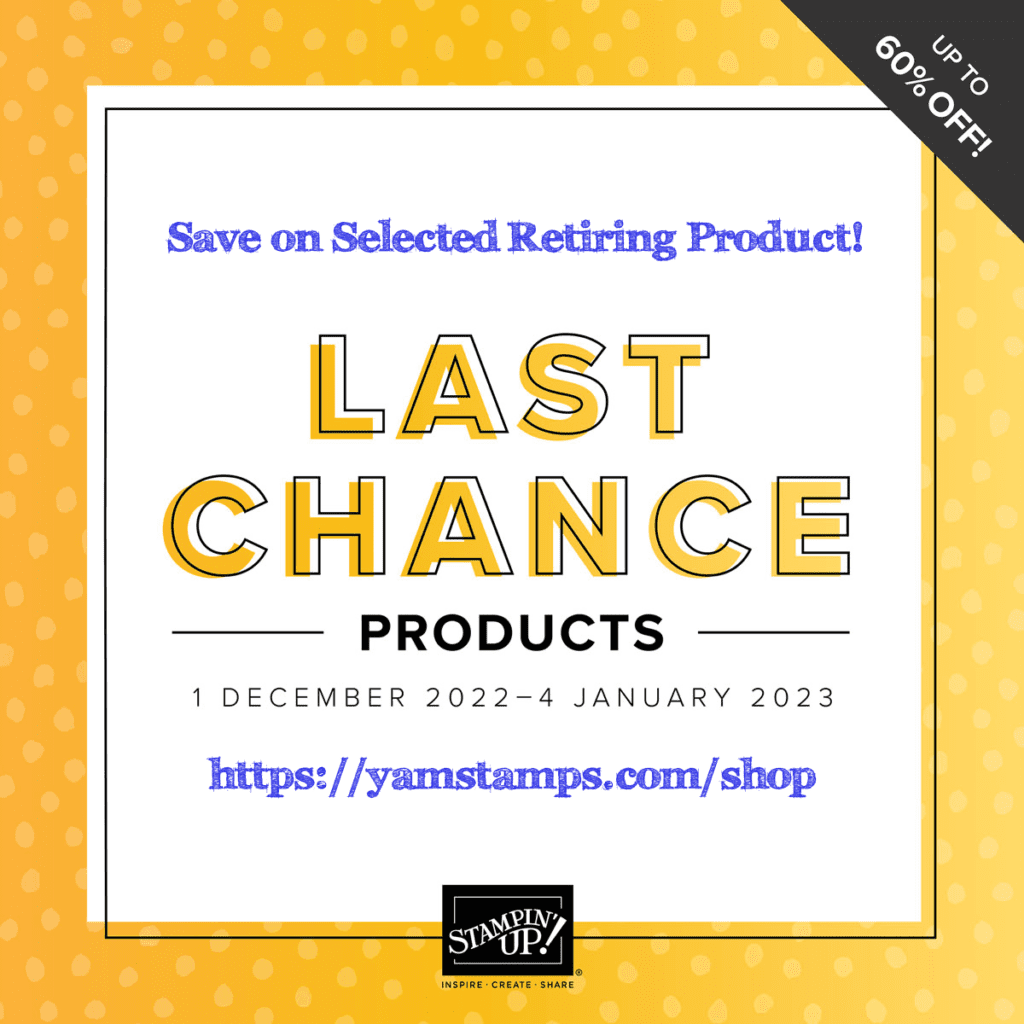
I love the Snowflake Splendo(u)r Designer Series Paper that’s decorating this card, and it’s part of the Year End Closeout Sale – so it’s on sale until the end of the August-December Catalogue sales period (January 4) or while supplies last – whichever comes first.
So probably the only thing I’d change on this Hanukkah Card is the placement of the Designer Series Paper in the bottom boxes. I put it on the bottom portion – but next time I would put it on the “back” portion, to cover the little “legs” that hold the sentiment in the centre. The things you notice when you go to take photos of your projects…LOL. (Either that or next time I take the photo from a different angle…).
As well as the Year End Closeout Sale, the Clearance Rack has been refreshed – so there’s plenty of bargains to be had right now. I noticed that there are some individual Stampin’ Blends Markers up for grabs – because they’re currently only sold in pairs – so if you need a replacement or really like a certain colour you should get it while supplies last! As always, please contact me if you have any questions, or need assistance placing an order. Sometimes technology does not play nicely – believe me, I know – so if you’re having issues trying to complete an order at YamStamps.com/shop , please contact me. I can often enter orders from the “back end” of the Stampin’ Up! system for you, and still have it shipped directly to your door.
In the meantime – stay warm, happy shopping and Happy Hanukkah!
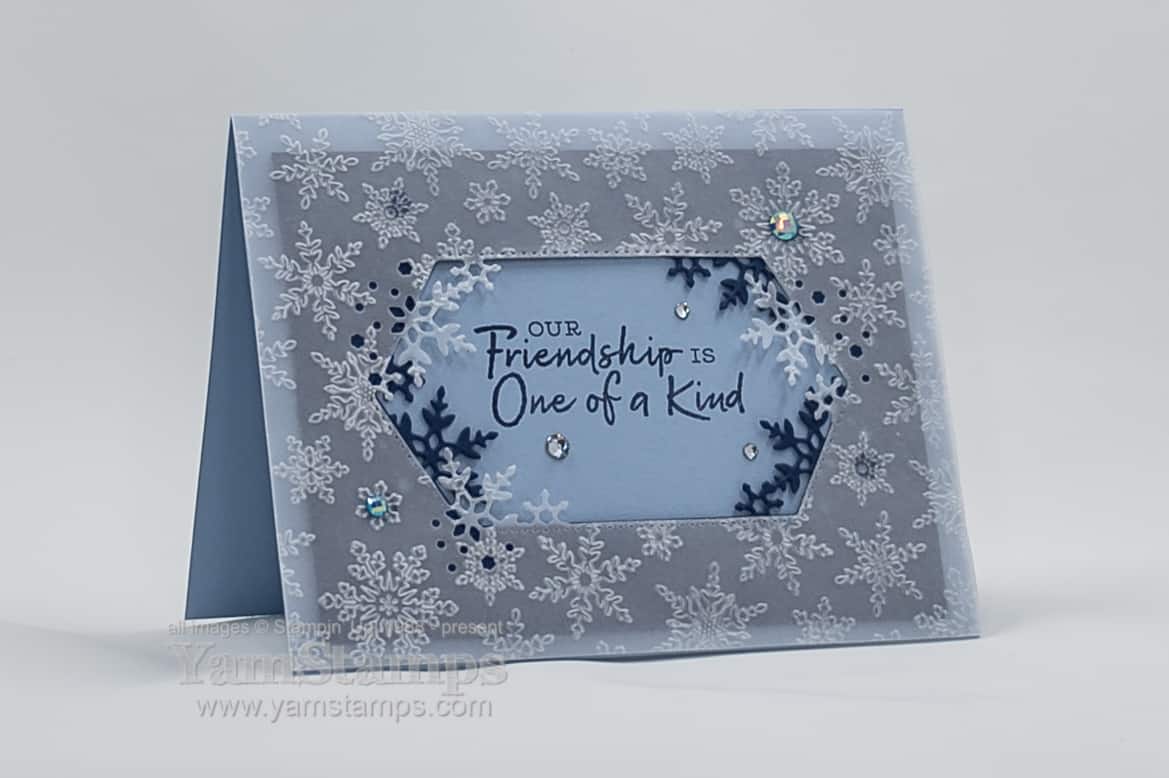
While I know that I’ve been doing the Twelve Weeks of Christmas Projects for YamStamps subscribers, I’m still caught off guard with the fact that Christmas is a month and a half away! Today’s snowflake card for a friend was one that I created for a Stampin’ Up! Demonstrator only swap featuring products from the August-December 2020 Mini Catalogue. Snowflakes are one of my favourite “themes” for seasonal and holiday cards.
I adhered the Vellum to the cardfront with Glue Dots and tried to place them behind snowflakes so they weren’t quite as visible. I hid a couple of them with the gems, and now that I look at this photo, could have added a few more gems?!
I love the fact that this snowflake card for a friendcould be a holiday card but could also be a birthday card, friendship card or just because card during this season. Burlington is entering “Red Zone Status” for the pandemic as of Monday, so I think it’s an important time to keep in touch with people while keeping socially distanced.
If you’re looking for ways to keep busy, consider purchasing one of my Card Classes to Go – the “regular” versions feature a variety of projects, and the Holiday Card Class to Go focuses on holiday cards only. Each class has the precut materials for four different cards, plus a printout with a photo of the completed project and step by step instructions. You can add sentiments from your own stash or shop the YamStamps Online Stampin’ Up! Canada store (shortcut:YamStamps.com/shop) for the ones I use in the samples. Contact me for payment links and more information. Each class cost is $20 and includes postage within Canada.
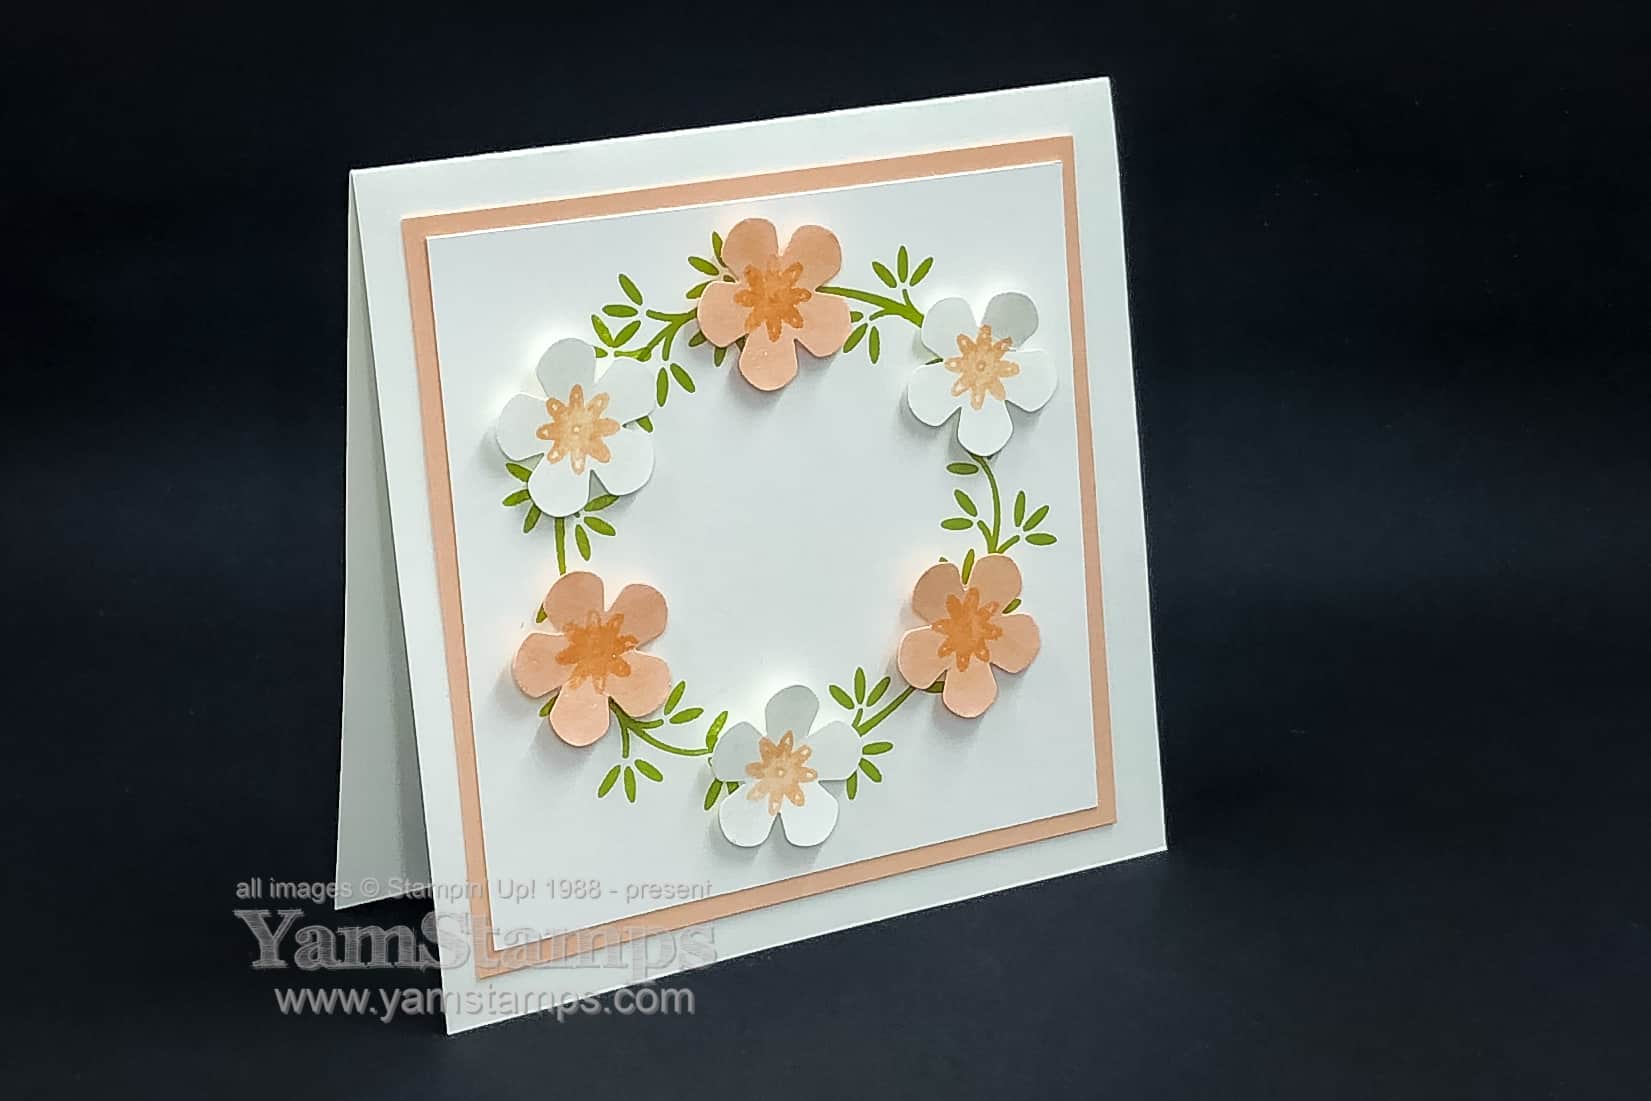
I am on a bit of a floral wreath kick(like this previous card) Or maybe it’s a circles thing. Who knows. Anyway – here’s another take on a floral wreath card! This one uses the Ornamental Envelopes Bundle…which I have not yet used for envelopes…LOL
While the bundle actually has dies to cut out the flowers that are in the set, I chose to add in something different. I combined the Ornamental Envelopes stamp set with the Small Bloom Punch instead, as I wanted more substantial flowers – primarily to hide the gaps in my wreath!!
I stamped the branches bough three times on a 3.5″ piece of cardstock so they formed a circle. I used the brush end of my Petal Pink Stampin’ Write marker (from the Subtles Markers) to colour in just the largest of the 3 flowers on the stamp from the Ornamental Envelopes stamp set. I stamped the flower onto scraps of Whisper White and Petal Pink Cardstock, and then centered them in the Small Bloom Punch so they became the centre of the flowers. Use the punch “upside down” so you can see the image when you’re punching.
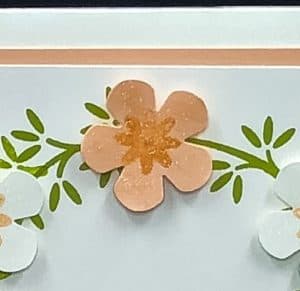
Once assembled, I used the Wink of Stella Clear Glitter Brush to add a bit of sparkle to the flowers (you can kind of see it in the close up shot above). I was really pleased with how this project turned out! Perhaps when I get around to mailing it I’ll actually decorate the envelope as well!
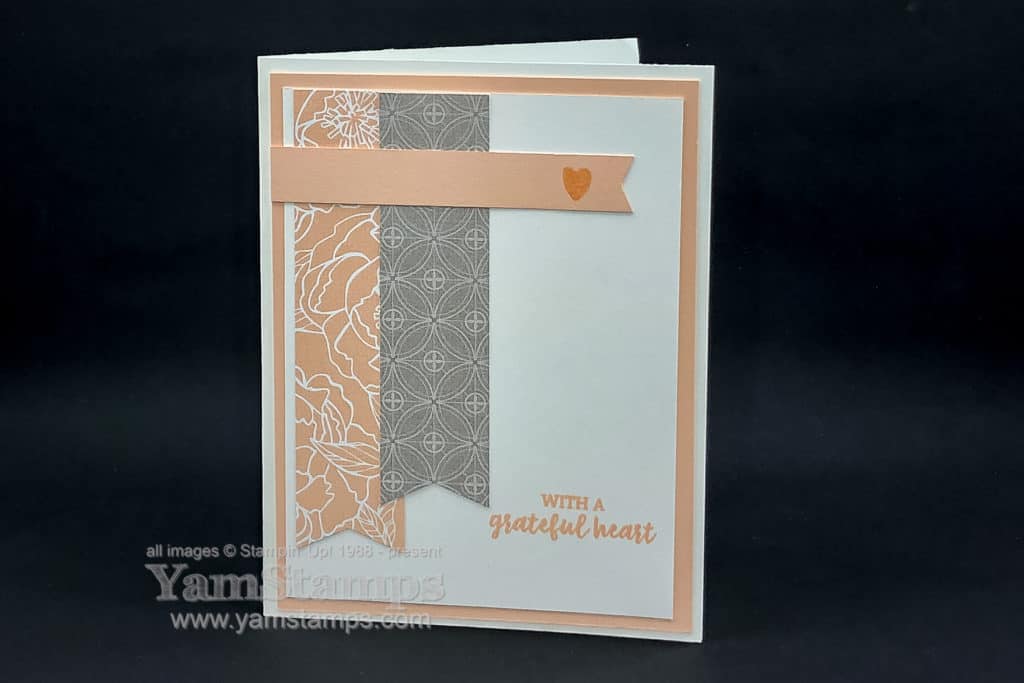
One of the things I love about being a Stampin’ Up! Demonstrator is the chance to get a head start on crafting with new products. Demonstrators were able to preorder from the August-December Mini Catalogue last month, so I’ve been able to create some projects to have ready to go this month. Here’s a pink and grey banners card with some new product – slightly different shade of pink than this pink & grey card that I made a little while back.
Stampin’ Up! has a number of punches that are designed to work with varying widths of cardstock. In all honesty, I can’t count on remembering what those widths are when I’m in the midst of creating something – so I’ve gotten into the habit of labelling those punches like in the photo below.
The Banners Pick a Punch will work on 0.5, 0.75 and 1 inch widths, so I labelled the top of the punch with those measurements. Makes my crafting quicker and easier! (Plus it makes me look organized…which is not always the case in reality haha). For the pink and grey banners card, I used a 0.5″ wide strip of Petal Pink Cardstock and 1″ wide strips of Designer Series Paper.
Have you checked out the new Stampin’ Up! site and store lately? The shortcut to shop online with me in Canada is still yamstamps.com/shop – and exciting – the new store supports online shopping if you’re living in Quebec!! If you’re a returning customer, you’ll have to enter your password the first time you go shopping, since your browser will not recognize the site since it’s been overhauled. If you can’t remember your password, you can always hit the password reset button (and then be sure to check your spam folder just in case – so you don’t miss the email!). If you have any questions or need assistance placing an order, you can always contact me.