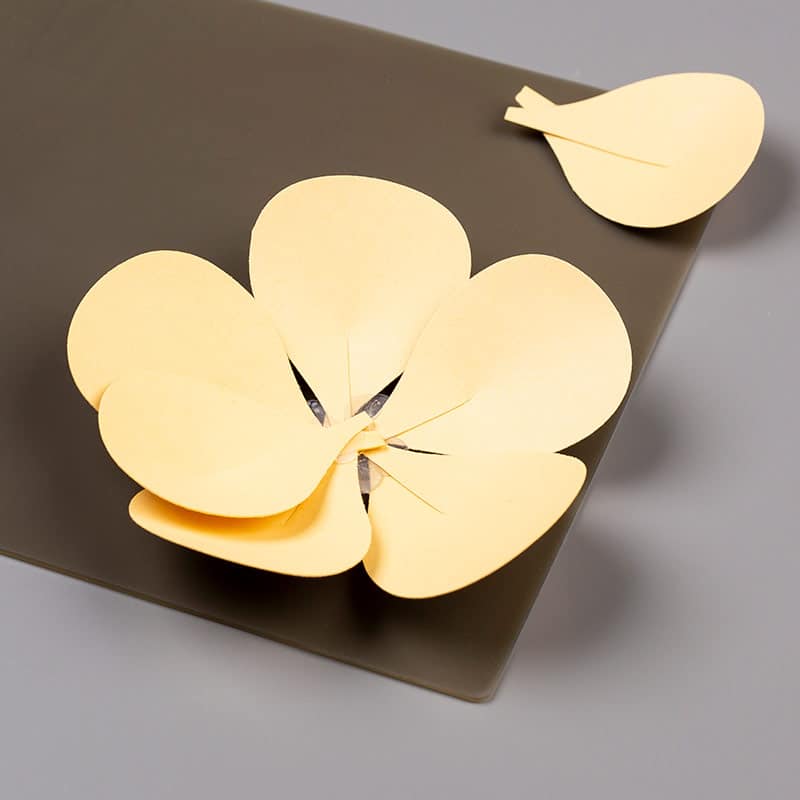
If you watched my recent Facebook Live, you’ll have seen me using the Silicone Craft Sheet. I thought I would highlight it today, and because I also like alliteration, I thought I would title this post “Tool Tip Tuesday“. Also because I’m lazy and I can’t think too hard LOL.
So here is Stampin’ Up!’s Silicone Craft Sheet in all its glory…
OK it looks fancy because there’s something on it, but it’s fairly unassuming in real life… It’s 6″ x 6″ so it’s easy enough to travel with in your crop bag, and at $8.25 CAD (plus shipping/tax) it’s cheap enough to have a few.
Why do I love this craft mat?
Non Stick
- You can use messy adhesives on it and peel up whatever you’re working on – like the image above, where it’s being used to construct a 3D flower – leave the flower in place until the adhesive is dried, then peel up your flower!
- You can use messy media on it and lift off – like the Frost White Shimmer Paint from the Facebook Live, or when you want to add ink splatters, watercolours when you want to do a wash right to the edge of your cardstock or watercolour paper
- Once you’re done you can rinse it off in your sink and pat dry and it’s good as new and ready to get messy again!
Heat Resistant
- You can heat emboss on top of this Craft Sheet
- No fear if you want to use your Heat Tool to speed up drying for shimmer paints, watercolours etc
My Tricks and Tips for the Silicone Craft Sheet
- Applying messy adhesive – you can squeeze a blob of Liquid Adhesive onto the mat (in a corner), pick it up with a sponge and dab it on the back of a die cut shape before applying it to your project, and THEN
- Use a second sheet (or the clean underside of your sheet) and lay it over the die cut on the project to be able to apply pressure without getting stuck to the project yourself, or getting inky/sticky finger marks all over the project
- You can create accents for your projects with liquid glue/hot glue etc – draw out the design on the sheet, let it dry, then peel it up and apply in place on your project!
- Rinse your sheet under the tap with warm water. You can scrub it a bit with your finger tips for stubborn residue that may have dried in place from the project you did last week with it….(ask me how I know this…)
- If you need a little padding under your cardstock when you’re stamping to ensure a good image (or to keep you from pushing down too hard on the stamp!)
- I’ve also used it in my Stamparatus keep ink from getting all over the base if I’m not using the small Grid Paper in it, or if I need a teeny bit of extra padding to ensure the image is perfect the first time.
We will be using it in a future Christmas Card Class to do one of my favourite retro techniques as well (I’ll share after the class).
Do you have any tips or tricks with the Silicone Craft Sheet that I didn’t cover? Please share if you do! (Not that I need more reasons to love it…). Happy Tool Tip Tuesday!


