Sweet Treats for Hallowe’en!
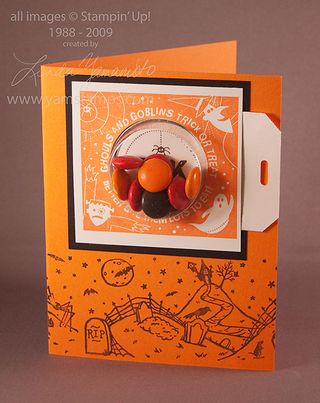
Stampin' Up!'s Sweet Treat cups are so neat! This tricky Hallowe'en card comes complete with a treat… I designed this one so that the recipient could easily access the candy in the cup without totally destroying the card! Use the 1-3/4" circle punch to create openings in the image, Basic Black cardstock & Only Orange card. Adhere the sweet treat cup to the back of the image by using mini glue dots on the top rim. Don't remove the adhesive cover on the back of the Sweet Treat cup rim. Adhere the image to the Basic Black cardstock with a strip of Sticky Strip along the top & bottom only. Create a tag by re-stamping the image & trimming so it can slide between the image and black cardstock. Use the tag corner punch and horizontal punch to finish the tag effect. Position this over the hole you punched in the card – tada! (oh, don't forget to fill the cup….LOL). The jumbo wheel on the bottom of the card is Haunting Hill, and the image is from Sweet Centres – both from Stampin' Up!'s Holiday Mini Catalogue.
I've got a busy weekend plan – finalizing designs for the Holiday Stamp a Stacks, creating a Hallowe'en costume, trying not to eat all the Hallowe'en candy before it's supposed to be given out…. but if you have any questions, please feel free to contact me – or if you need some crafting supplies, don't forget that you can shop 24/7 at www.yamstamps.stampinup.net!


