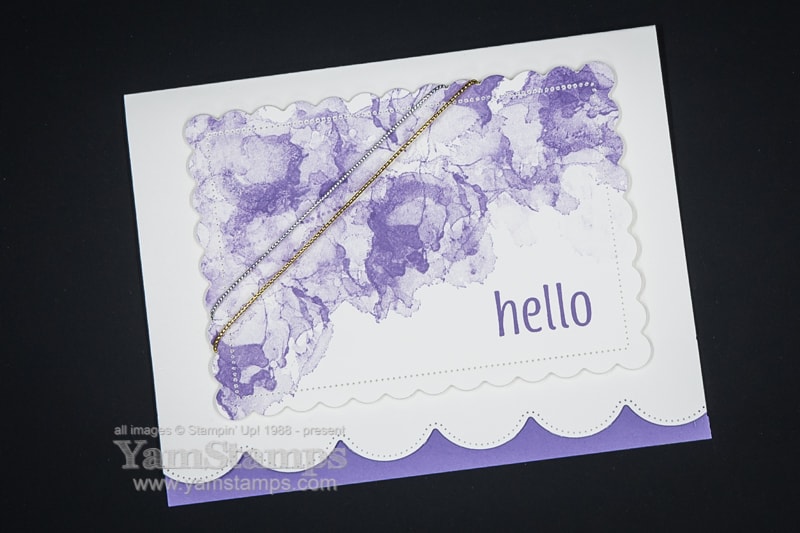
This is a purple hello card that I made recently and have been working on sending out in the mail! Honestly, the most difficult part for me is the getting the envelope delivered to the mailbox…so in the meantime, here’s the card.
Purple Hello Card
I coordinated a scalloped edge on the cardfront with the scalloped rectangle for the main sentiment/image area, and added a Highland Heather strip of cardstock along in the inside of the card to show off the detail. I love this abstract stamp! It’s from the Artistically Inked Stamp Set.
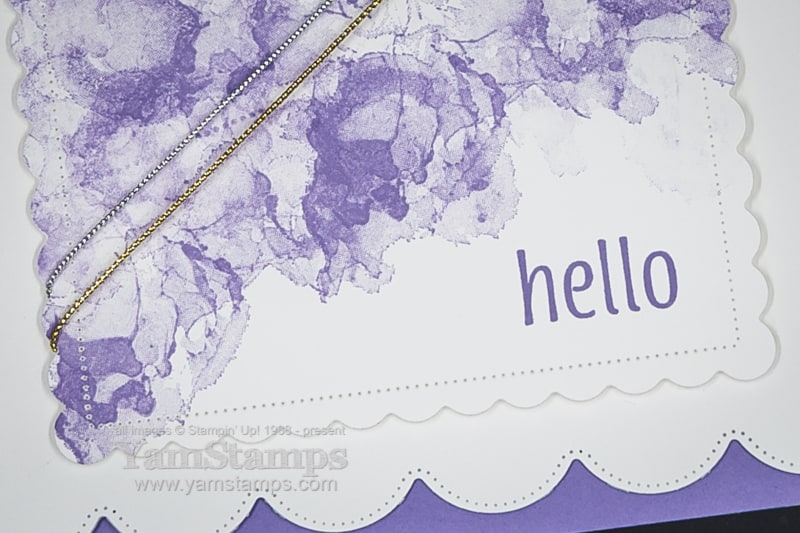
closeup – can you see what I see?
I stamped the abstract swirl numerous times on the diagonal across my die cut piece. Posting this closeup I discovered something – can you see what I see? I stamped the swirl and then would restamp to get different depths of ink and colour coverage…. Now that I post it – I can see the line of dots from where I had stamped over the stitched die cut area, and then restamped – so there was more ink left on the stamp in the area of the stitched marks that transferred to the next image! Ah well. I don’t think it’s the end of the world…and as I always say – if the recipient critiques a handmade card, they don’t deserve it!!
(by the way, if you received this particular purple hello card – sorry, oops, and consider it a unique little mark of the maker).
I mass produced a number of these for my Demonstrator Team reward recipients and recent customers. After I die cut the scalloped rectangles, I kept one outline of the rectangle (with the scalloped rectangle hole in it) and put that into my Stamparatus. I used it as a guide for placing the scalloped rectangles and lining up the “hello” stamp on the stamping plate. I only had to fuss over the alignment and placement at the beginning, and after that, I could watch Netflix and stamp cards at the same time!! Simply put a scalloped rectangle into the hole of my template, ink up the stamp on the plate and close the Stamparatus. Remove and repeat!
Hopefully that mass production tip helps you with your holiday cards…since today marks 2 months until Christmas!!! This week’s Twelve Weeks of Christmas email will be the last card project – we move on to giftables/packaging next – you can still catch the remaining weeks if you subscribe to the YamStamps newsletter today!
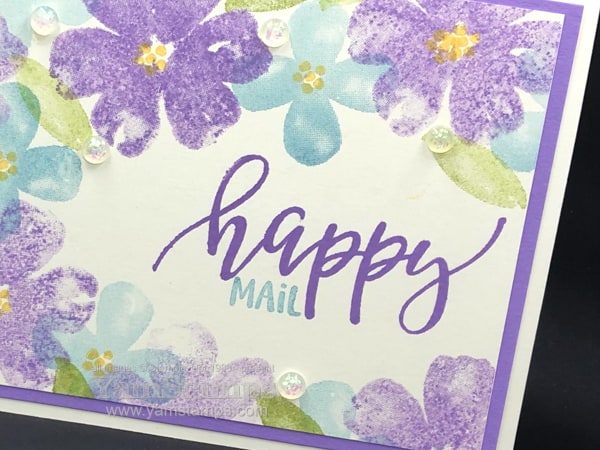
This Happy Mail Floral Card made me…happy! It was fun to create a card that primarily used stamps and ink. Sometimes I’m so focused on designing card for club and class that feature Designer Series Papers or different techniques that are not stamp-centric that I make a point of making a card that relies more on the beauty of the stamped images. (oh and read to the bottom to help me share my wealth of accumulated card samples…)
I love the watercolour effect of the images. By stamping full strength images (first generation) or stamping off onto scrap paper first and then onto the card (second generation images), you can vary the intensity of the tones and provide a bit more interest and dimension to the card. I had just re-inked my Highland Heather ink pad and was a little impatient so there was a lot of ink on the stamp initially so left a bit of a texture when I stamped off on scrap paper….but I personally don’t mind it! I added some Opal Rounds as a subtle accent for this Happy Mail Floral Card – kind of looks like dew drops I think?! If you are making this card, I might leave off the rounds if you’re planning on mailing it – kind of bumpy….
If you are looking to get some happy mail in your email inbox, be sure to be signed up for the YamStamps Newsletters!You’ll receive a video tutorial when you sign up, and then you’ll receive weekly emails featuring ideas and inspiration for your paper crafting. You can find out more details here or go straight to the sign up here.
I’m also looking to share the wealth of card samples that are starting to accumulate in my craft room – so starting with this post, if you leave a comment, I’ll select someone to receive a sample from my stash of cards!
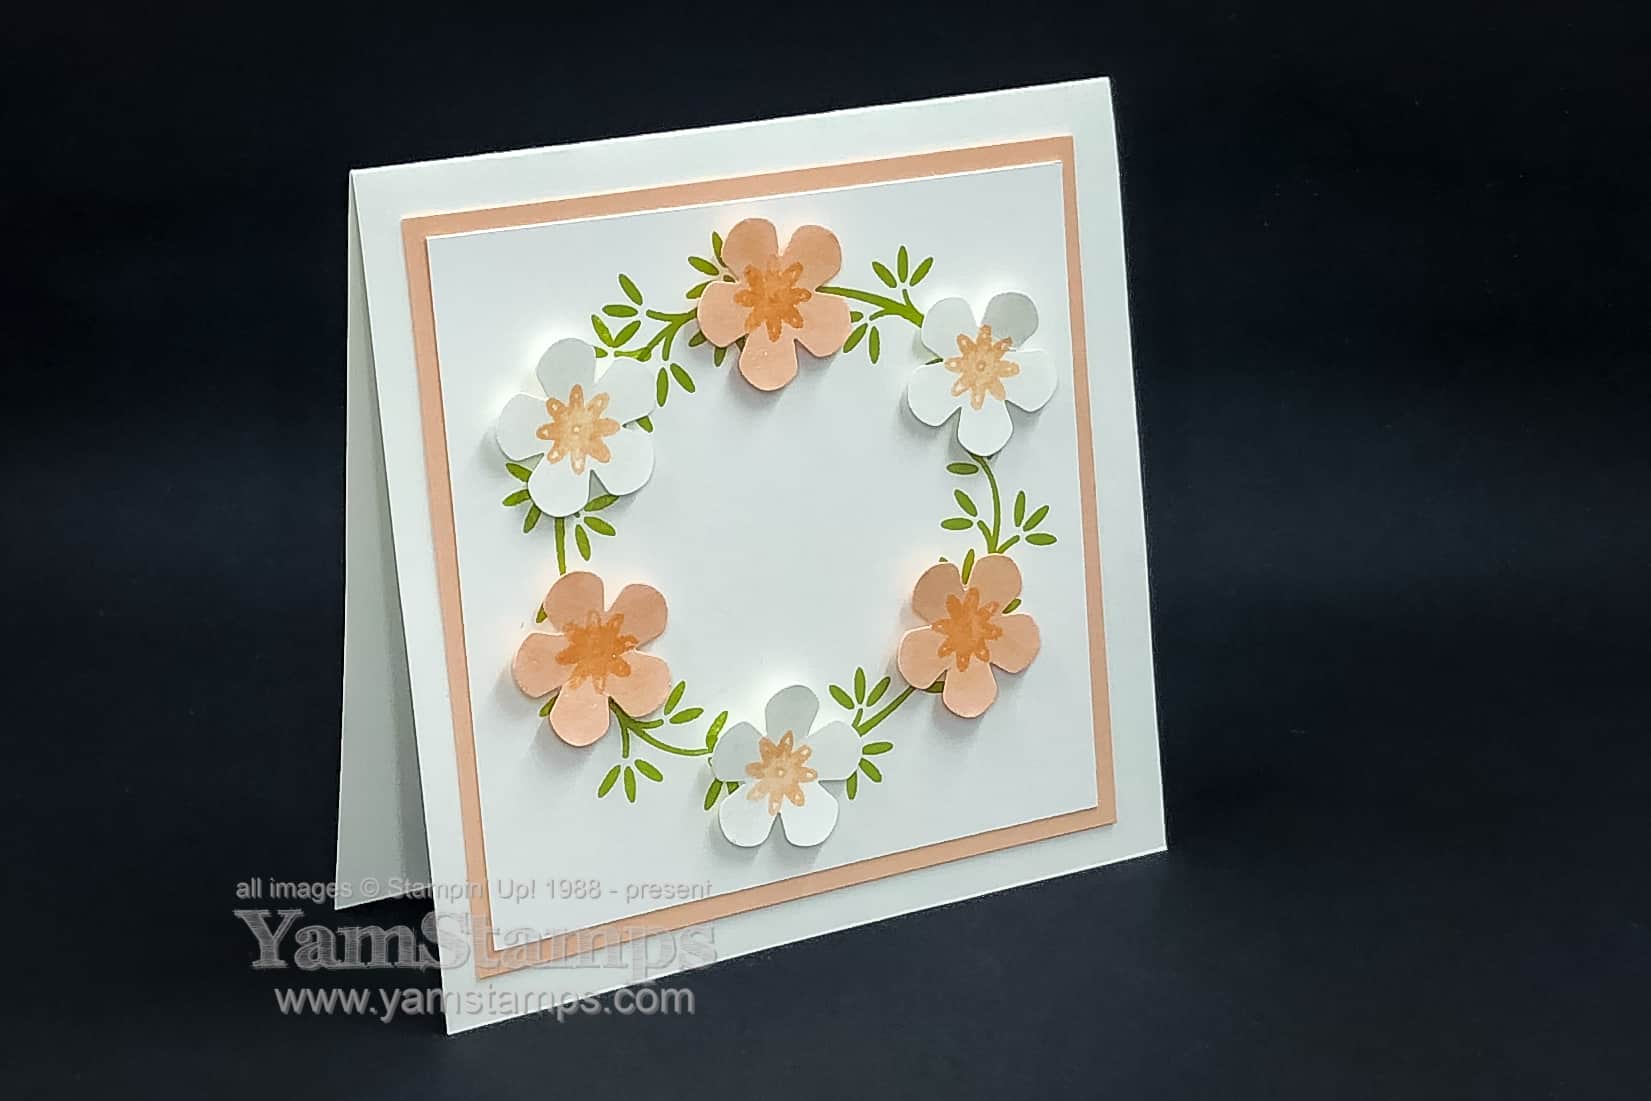
I am on a bit of a floral wreath kick(like this previous card) Or maybe it’s a circles thing. Who knows. Anyway – here’s another take on a floral wreath card! This one uses the Ornamental Envelopes Bundle…which I have not yet used for envelopes…LOL
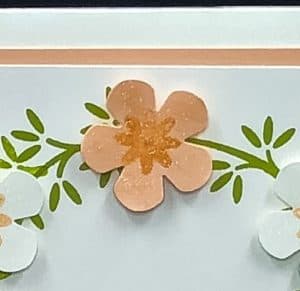
While the bundle actually has dies to cut out the flowers that are in the set, I chose to add in something different. I combined the Ornamental Envelopes stamp set with the Small Bloom Punch instead, as I wanted more substantial flowers – primarily to hide the gaps in my wreath!!
I stamped the branches bough three times on a 3.5″ piece of cardstock so they formed a circle. I used the brush end of my Petal Pink Stampin’ Write marker (from the Subtles Markers) to colour in just the largest of the 3 flowers on the stamp from the Ornamental Envelopes stamp set. I stamped the flower onto scraps of Whisper White and Petal Pink Cardstock, and then centered them in the Small Bloom Punch so they became the centre of the flowers. Use the punch “upside down” so you can see the image when you’re punching.
Once assembled, I used the Wink of Stella Clear Glitter Brush to add a bit of sparkle to the flowers (you can kind of see it in the close up shot above). I was really pleased with how this project turned out! Perhaps when I get around to mailing it I’ll actually decorate the envelope as well!
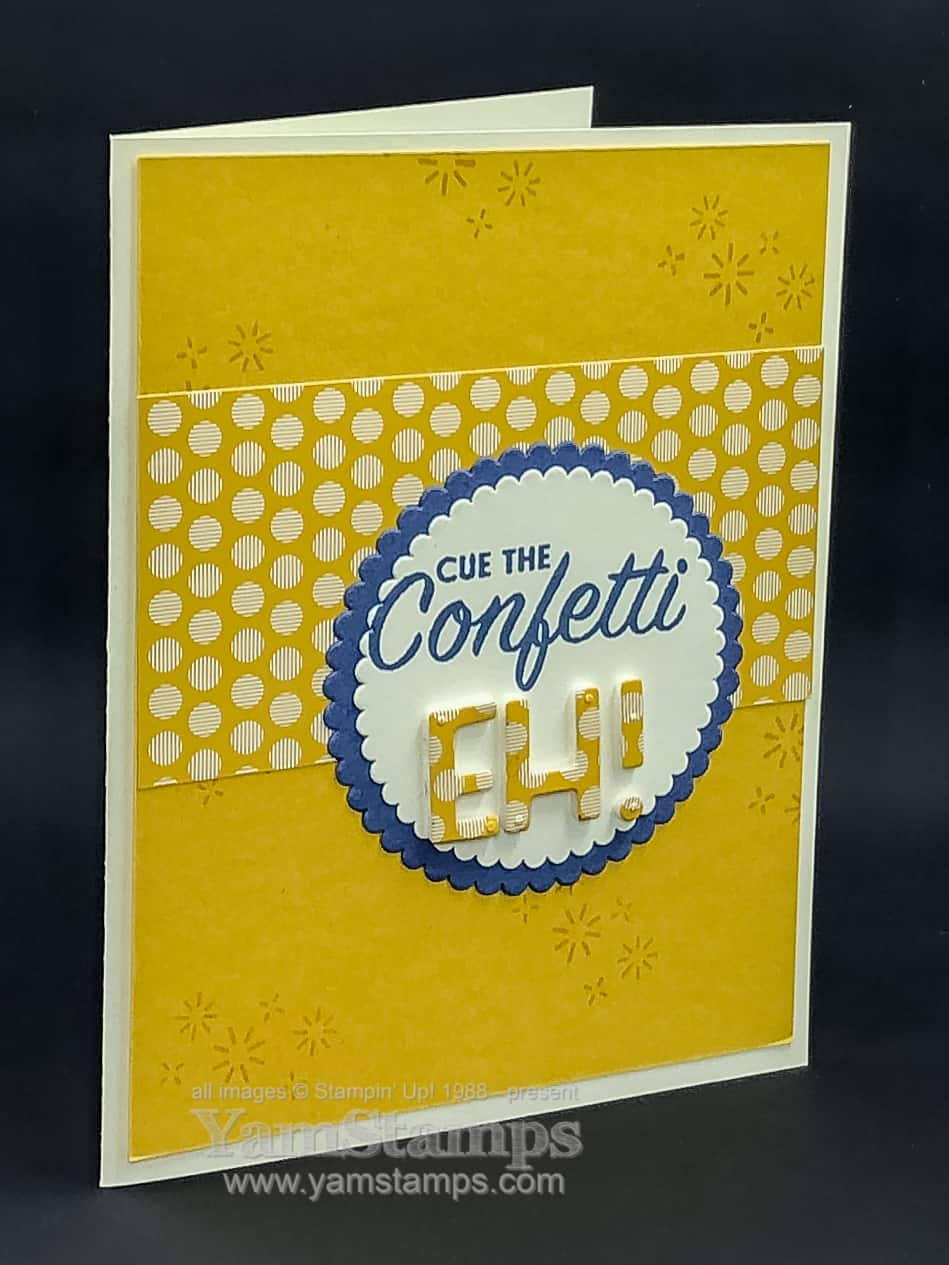
Sometimes you need a celebration card, but it’s something outside of the more common occasions to celebrate, like birthdays or weddings. This sentiment is great for any reason to celebrate! It’s from the Pattern Play stamp set. I used the discounted Pattern Play Bundle that includes the stamp set and the Playful Alphabet Dies to further customize my card.
I made this card to send to some members of my demonstrator group, known as the “Eh” Team, so I used the dies and the Foam Adhesive Sheets to customize the card by adding the EH! I cut the 2020-2022 In Colour Designer Series Paper [DSP] to fit my card front, and then stuck the remaining scraps of the DSP onto a Foam Adhesive Sheet. I was able to cut through the DSP and sheet using the dies, and then positioned them onto the front of the card.
Part of the joy of making handmade cards is the fact that you can make a card that suits your specific occasion and can customize it for the recipient. These cards are to celebrate my team members’ achievements – like making their quarterly sales quotas, adding members to their own demonstrator teams or having a certain level of sales in a month. By using coordinating products and colours it makes it even easier – and that’s my kind of crafting!! I stamped the “sparkle” stamp in Bumblebee ink onto the Bumblebee cardstock, and die cut some scalloped circles from the Layering Circles Dies in VeryVanilla and Misty Moonlight. I could have used the Stamparatus to stamp the sentiment, but because the Pattern Play stamp is photopolymer, I just used a clear block because I can actually see through the stamp (and block) to where I am stamping.
My healthcare job has been increasingly busy over the past couple of weeks, and I’ve been able to take a few days off this week. During my staycation I’ve been able to relax a bit with family, and catch up on some crafting and mail sending! I’m getting the August-December Mini Catalogue ready for mailing as well – if you’re in Canada and don’t have a demonstrator that you already deal with, please fill in this form to request a copy! In the meantime, stay healthy and keep crafting 🙂 I’m back to finishing my celebration cards and mailing them out!
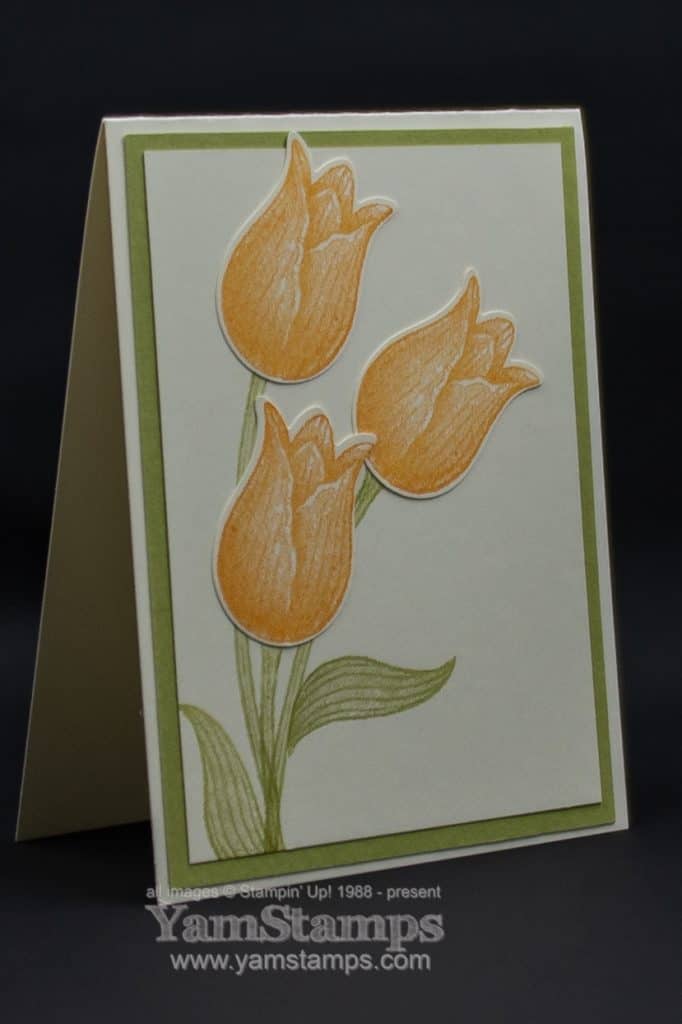
Happy Spring! The weather is definitely getting more mild, and today was filled with wind and rain, but also a bit of sun. Here’s a tulip card to celebrate spring – though I do know that tulips are one of the later blooming flowers, from my limited gardening experience. I gardened more when I was living in British Columbia because, well, it’s milder weather, so more enjoyable to be outside lots, and I had more time on my hands then….LOL.
This card features the Timeless Tulips Bundle which contains the Tulip Builder Punch and the Timeless Tulips stamp set. To make the positioning of the stems and flowers easy, I stamped & punched the tulip heads first, and then laid them out on the cardstock to figure out the placement. Once I was happy with it, I stamped the stems (working fairly quickly so I wouldn’t forget where I wanted them haha!!) and then added the leaves before adhering the punched tulips in place. It was a happy accident that the stems ended up converging in one area – that was not what I was going for, actually, but I’ll take it.
A design element I’ve been embracing a bit more is letting elements hang off the edge of the cardstock (but not the card, because then it won’t fit in an envelope if I ever get around to mailing it). It makes fitting everything on the cardfront a little easier. I left this card without a sentiment on the front because I liked the white space effect. Is it called vanilla space for this one since it’s Very Vanilla Cardstock? (oh dear – Can you tell I’ve been social distancing effectively?!!!)
I have done a couple of Facebook Lives this week on the YamStamps Facebook Page, because I have appreciated and been inspired by watching live videos from creative people that I follow on various platforms – it truly is a stress reliever! I will see how many I can continue to do – I had the luxury of being at home this week, since my travel plans were cancelled. I’m due to return to work next week so I imagine I won’t have quite as much time to myself as I’ve had this week! I did treat it like a vacation, and I am amazed at how little I can productively do in a 24 hour period…..LOL. Future me is not impressed with how little present me got done on those nagging jobs around the house….apparently my powers of procrastination are strong!!
I hope that you are keeping well, and doing things to keep your stress levels down. I need to work on a few new card designs so here’s hoping I find some creative inspiration and motivation somewhere….in the meantime, enjoy this tulip card until we get to see the real deal? Happy Spring and Hang In There!!
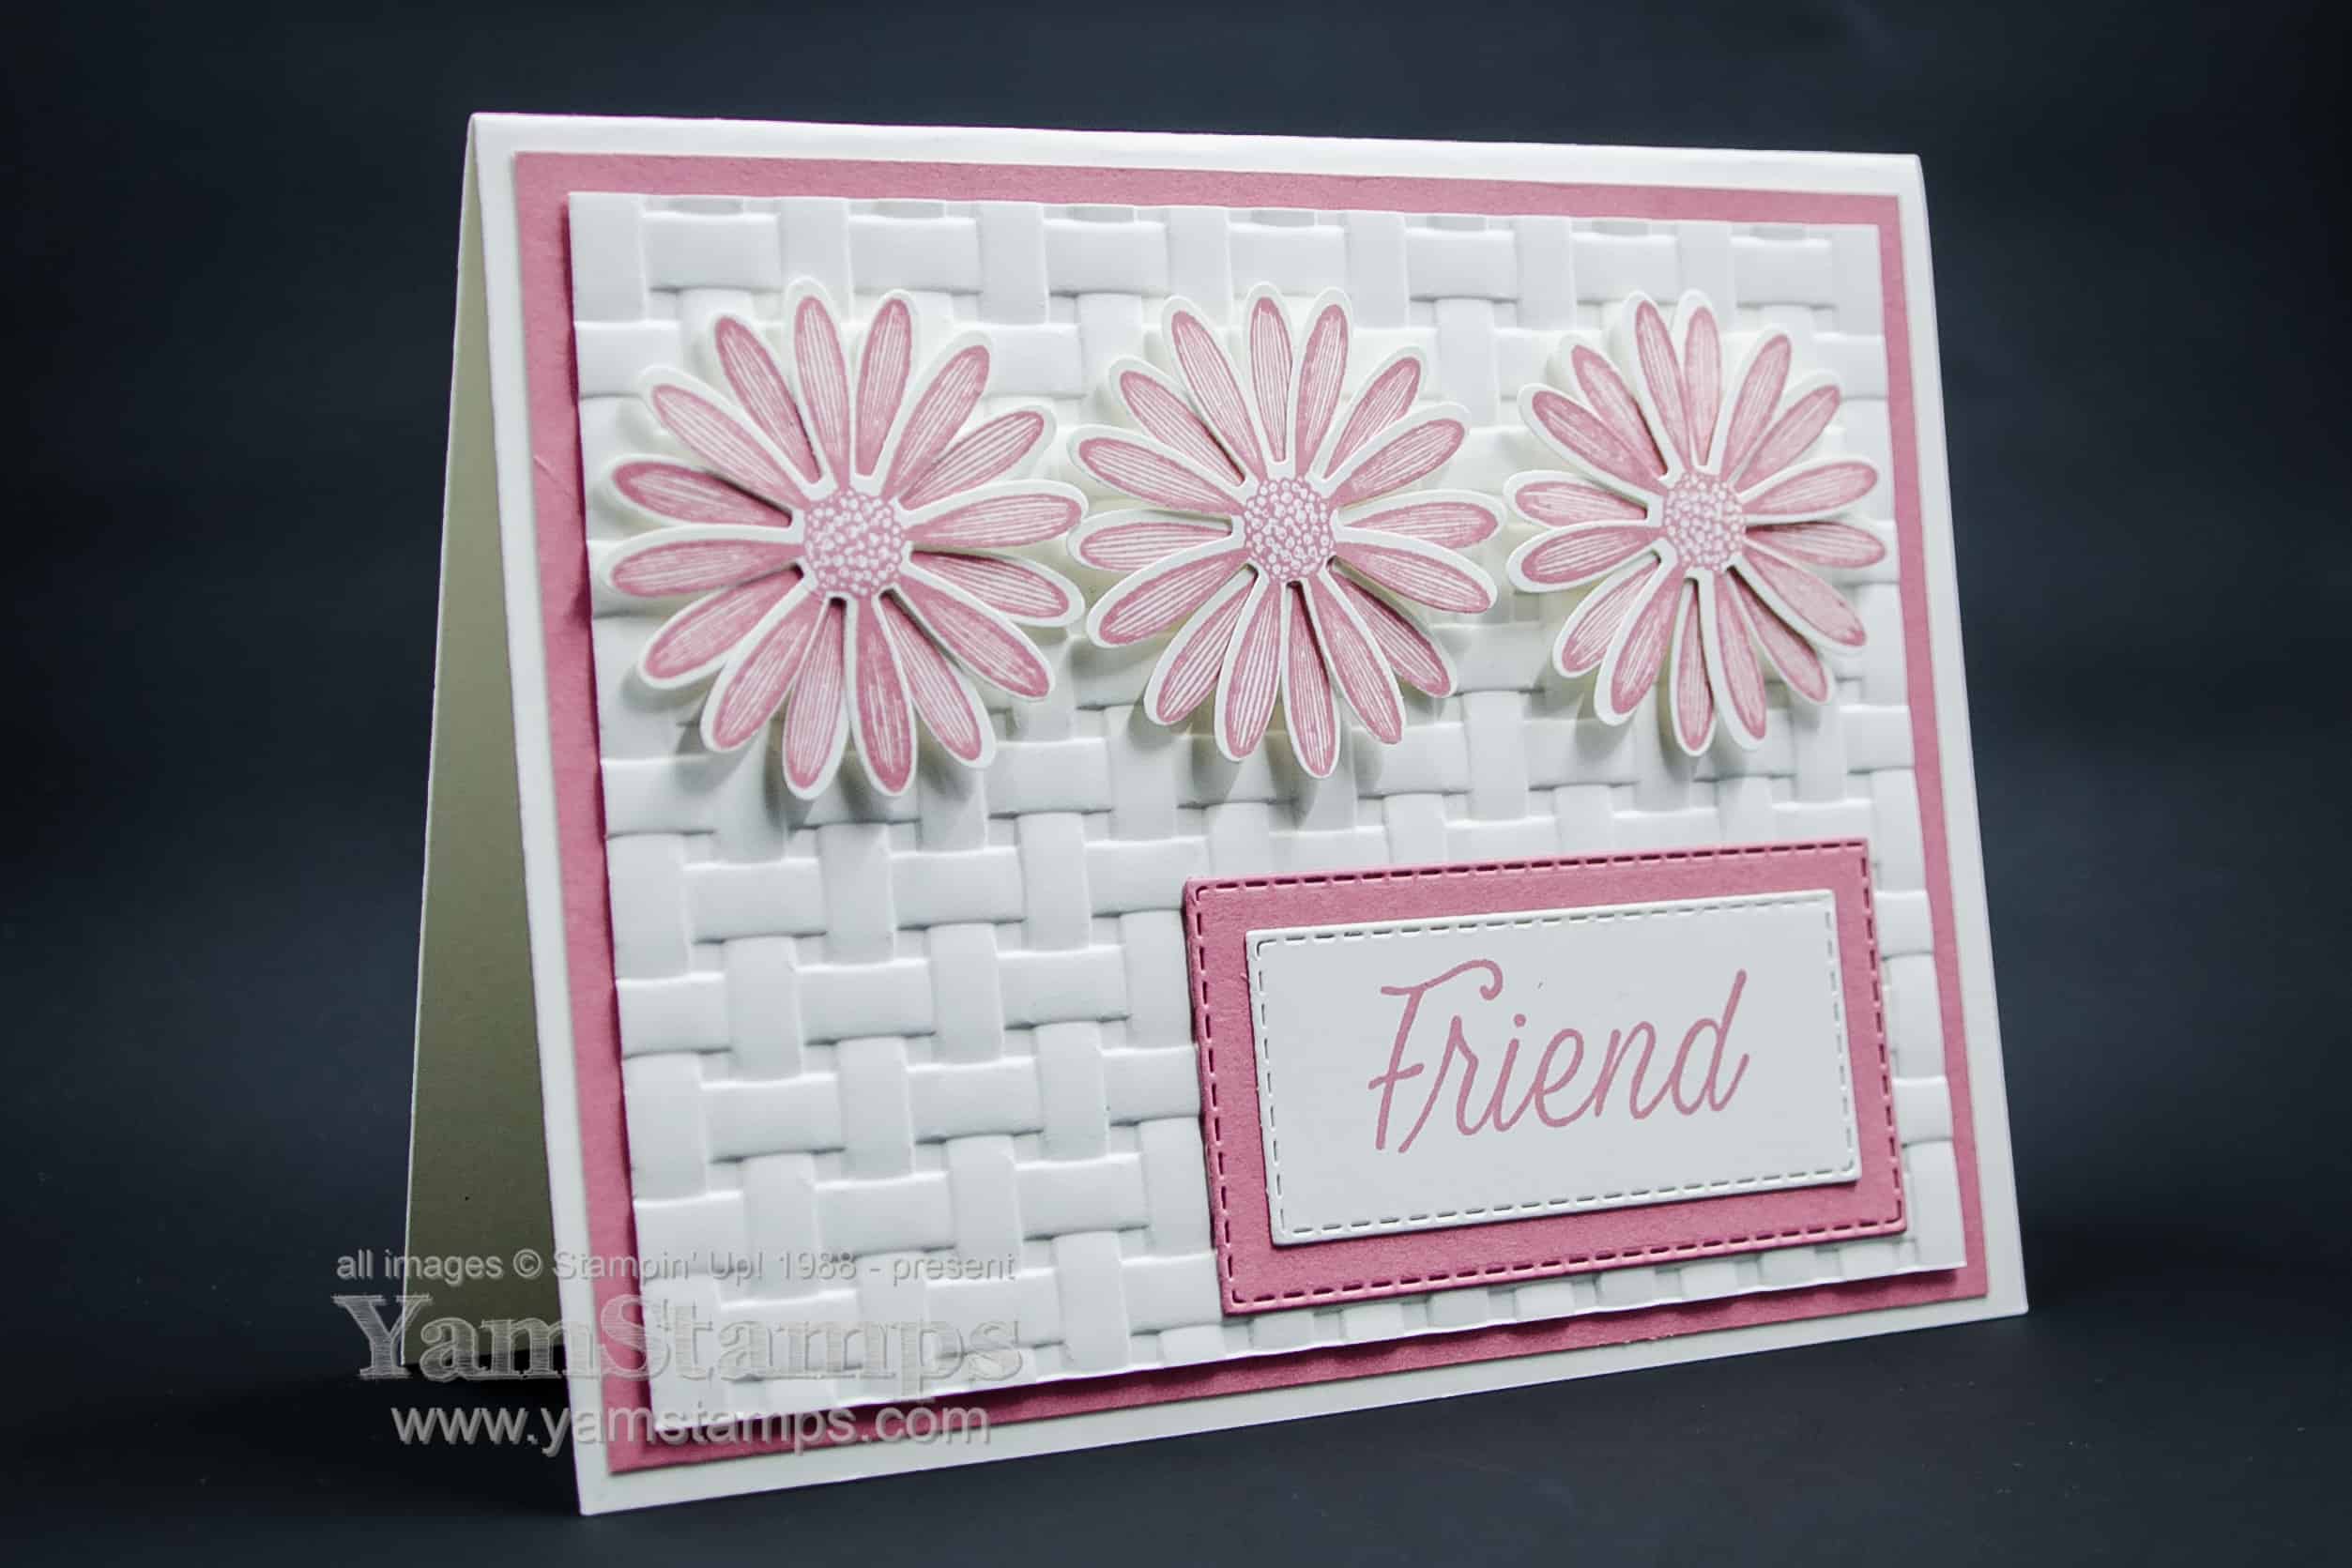
For this card for a friend, I stamped 6 daisies in Rococo Rose ink before punching them out (usually easiest to stamp first and align the punch rather than the other way around). The “Friend” was stamped on a scrap piece of Whisper White and then die cut with one of the Stitched Rectangle dies, and the backing for the word was die cut from the centre of the Rococo Rose cardstock that backs the Whisper White cardstock that was embossed with the Basket Weave 3D Embossing Folder (since the hole will be hidden anyway!).
I love using Embossing Folders to add a little more interest to the layers on a card. It’s a great way to give texture without drawing too much attention away from the main images or sentiments. I just have to remember that when using the 3D Folders, I only need the top Plastic Cutting Plate with my Universal Platform, not a top and bottom Cutting Plate – usually as soon as I try to roll it through my Die Cutting Machine I remember LOL. The new Stampin’ Up! 3D Embossing Folders are slightly thinner than the “old” ones, so you may actually find that you need to add a little “shim” either of cardstock, or the 3D Embossing Folder Plate to make sure that the images are really well embossed.
If you’re not in need of a card for a friend, you can always easily change out the sentiment or greeting on the cardfront – or not include any sentiment! Often in card classes I’ll leave the cards blank or use more “general” type of sentiments or greetings so that attendees can use the card for whatever occasion they might need. Or you can be like my mother who tends to finish a card only up until the sentiment part and then add on whatever sentiment suits just before you give the card to the recipient! (heehee sorry Mom).
Need a card for a friend or family member (or a few cards)? Come to one of the Monthly Card Classes, Christmas Card Classes (yes, they are starting), or join the Stampers Club! They are a great way to meet new people, learn some new techniques and try out different Stampin’ Up! products while you build up your card stash. Check the YamStamps Events Page for upcoming dates or contact me for more information/to register. Hope to see you in class soon!