Mar 18, 2007 | rubber stamping
 What’s with the SNOW?! At least it’s sunny today so hopefully it will encourage melting! Should have known that balmy mid-week weather was a little too good to be true….
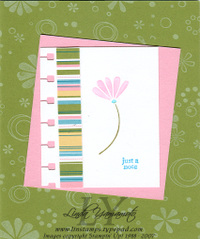
This is one of the cards we made yesterday. The scrapbook/stamping group at the Church of St. Bride in Mississauga invited me to do a workshop and we had a great time! This card uses the same colour palette as the double slider card I posted earlier, and it’s taken directly from the designer paper – we used a strip of it on this card, so you can see how it all coordinates! Featuring the petals & paisley bundle (are you sick of me raving about this yet?) – we used the petals jumbo wheel in white on the old olive cardstock; the strip of designer paper and the flower from Polka Dots & Paisley. We coloured directly onto the rubber with pretty in pink, tempting turquoise & old olive stampin’ write markers (because I love that look!). The "just a note" comes from All Year Cheer III one of my indispensible sentiments sets. We also used the spiral punch along the edge of the whisper white cardstock to create added interest. I’ll be posting more samples into the spring mini photo album, so check out the link when you get the chance. (and I promise to post cards that use sets OTHER than the petals & paisley bundle!!).
Mar 15, 2007 | Tutorial
Here’s my attempt at a tutorial! Dedicated to the Mississauga gang who went through the first edition of this class!! This is a revised version that I think is easier to manage (you can let me know if you agree or not!!)
Materials: 3"x3" whisper white to be stamped with image of choice *measure width of your cello bag to be sure – I had some that were actually narrower!!
cardstock for frame: 3.5" x 3.5"
small cello bag
micro beads
sticky strip
scotch tape
To make shaker:
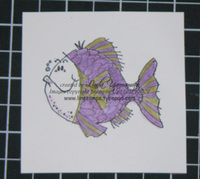
1) Stamp & colour image of choice. We used the fishy friends set and the metallic pencil crayons, blended with the blender pen (works well to smooth out the colour).

2) Apply sticky strip to the edges of the back of the image (as close as possible to edges). Leave liner on. This will keep the beads in front of the image.
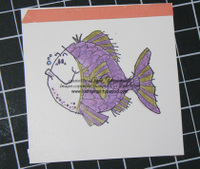
Apply a strip of adhesive along very top border of front of image. Leave liner on. This will prevent leakage of beads!
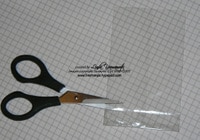
3) Cut off bottom seam of cello bag, and vertically along seam of bag to create open sheet with folds.
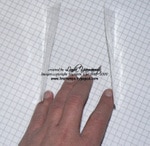
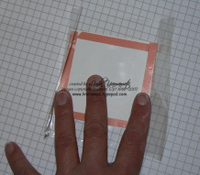
4) Remove red liner from sticky strip on back of image only & place face down in cello. (first pic: liner left on for picture purposes). Then, re-fold cello and adhere to sticky strip.
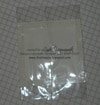
Refold along fold lines & adhere cello to sticky strip.
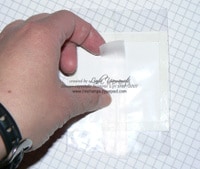
5) Apply scotch tape along back seam to ensure closure. (OK perhaps this is overkill, but I don’t want little beads all over the place when someone goes to shake the card!!)
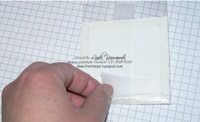
6) Fold up the bottom of the cello package & seal with scotch tape.
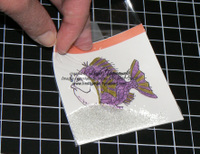
7) Insert about 1 tablespoon of microbeads in cello package. Note that the red liner is still on the front sticky strip.
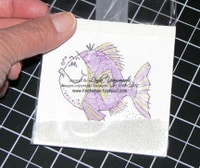
8) NOW remove the red liner from the front sticky strip, and press cello against it to seal closed.
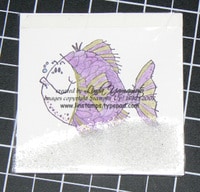
9) Fold down top of cello package & seal with scotch tape (at backside). TADA! A sealed shaker unit!
Create the frame:
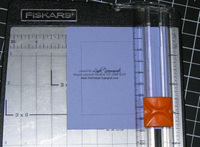
10) Use paper cutter to create frame for image. I used 3.5" x 3.5" square of brocade blue, and then cut 1/2" in from the edges to create frame. I prefer using my paper cutter when possible, vs a hobby blade….call me a klutz….
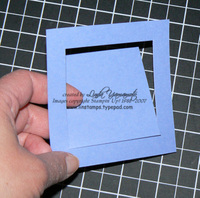
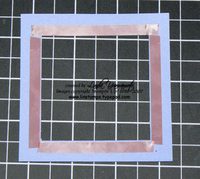
11) Apply sticky strip to inner edge of frame.
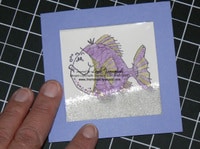
12) Remove liner & attach to shaker unit.
Construct the card
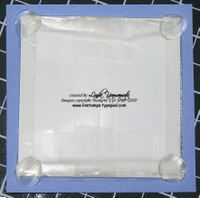
13)Apply pop up glue dots to back of package and then apply to cardfront – you’re done! We did a brocade blue card covered in the hot to dot wheel in brocade blue.
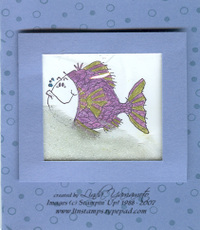 TADA! The finished product. Card is brocade blue, wheeled with the hot to dot wheel in brocade blue ink.
Mar 12, 2007 | Announcements
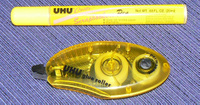 I was recently given the opportunity to try out a couple of products, in exchange for a review on my blog. Much as I love SU products, it’s always good to see what else is out there. (besides, it was a free sample! LOL). The two products were UHU glue roller & Creqtive Scrapbooker pen – liquid glue. My first instinct was to try the roller, because that’s usually my adhesive type of choice – dry & neat! Pros: It was dry & neat! I found that the adhesive held well & applied well. Con: The format I received is a disposable vs refillable. Maybe it’s from living in BC for those 8 or so years, but I can’t say that I’d purchase this item, solely for that reason, especially when there are refillable alternatives on the market. That being said, there is a refillable glue roller, so that would be the route to go, imo! The card that I made with this adhesive is under the March 1st post – the long notes card.
The other adhesive was a scrapbooker’s liquid glue. I must say that I am not a liquid glue kind of girl. (see comment under above adhesive – liquid glue is not dry, and, at least not for me, neat). That being said, it did apply easily, with a neat little chisel tip. However, messy girl strikes again and I ended up with glue on my finger tips which tended to transfer to other items or leave my finger tips stuck together… It does hold the paper well, but did not do well with the beads. I used it on the lion card that I posted back at the beginning of March. I’m now finding little beads all over the place. To be fair, though, the tube says nothing about anything other than paper, and it did do extremely well with this. It does dry a little stiff, however, so I’m not sure about “crackability” at some point. Wait, I will try in the name of testing. OK No cracking! So, if you’re constructing something out of paper/cardstock and want to be sure there’s good body to it, try the liquid glue if you’re up to it! If you have a blog and would like to try some products to review, check out Maria Filosa’s blog
Mar 9, 2007 | rubber stamping
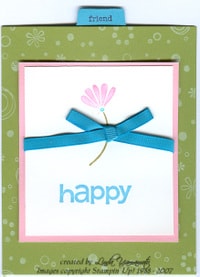 This is one of the cards we did at this week’s movers & shakers class. Everyone had a good time & was so impressed with themselves at the projects they created!! This is a double slider card, using the Polka Dots & Paisley set, plus the Petals jumbo wheel. We used the wheel with a white cartridge – love the effect. I think it looks just like patterned paper! I pulled the colour combination directly off one of the Petals & Paisleys double sided designer paper – old olive, pretty in pink & tempting turquoise. We used the stampin’ write markers directly on the flower stamp to get the three colours on the front image. The round tab punch creates the pull tab, and we used the word "friend" from the Everyday Flexible Phrases stamp set. I think if I were to do this card again, I might move the ribbon, or not include it at all…
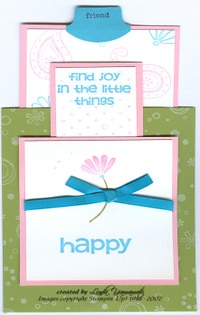
Don’t forget to take advantage of the Spring Fling promotion – purchase the Polka Dots & Paisley stamp set, Petals wheel and the Petal & Paisley designer papers – receive anything in the Spring Mini Catalogue for 50% off! Consider purchasing the Simply Sent kit, "Remembering You" and attend the free class April 19th using this set to create a few more fantastic cards!
Mar 2, 2007 | Information
 Can’t we all use a little money saving idea every once in a while? Introducing the Frugal Friday tip (and just to keep you from getting blase about it….it won’t be here every Friday! LOL). Today’s frugal tip is stretching your stampin’ up! dollar by using up your stampin’ dimensionals! I think they’re a pretty good deal to start with….but to make them last even longer – you can cut the dimensionals in half (handy if you’re popping up a small item). After using up the dimensionals, you’ll end up with an outside "frame" which is one solid piece. I usually just snip along at intervals to create more (albeit slightly oddly shaped) dimensionals! They still do a great job at taking a project to the "next level" (haha *groan*).
 What’s with the SNOW?! At least it’s sunny today so hopefully it will encourage melting! Should have known that balmy mid-week weather was a little too good to be true….


