
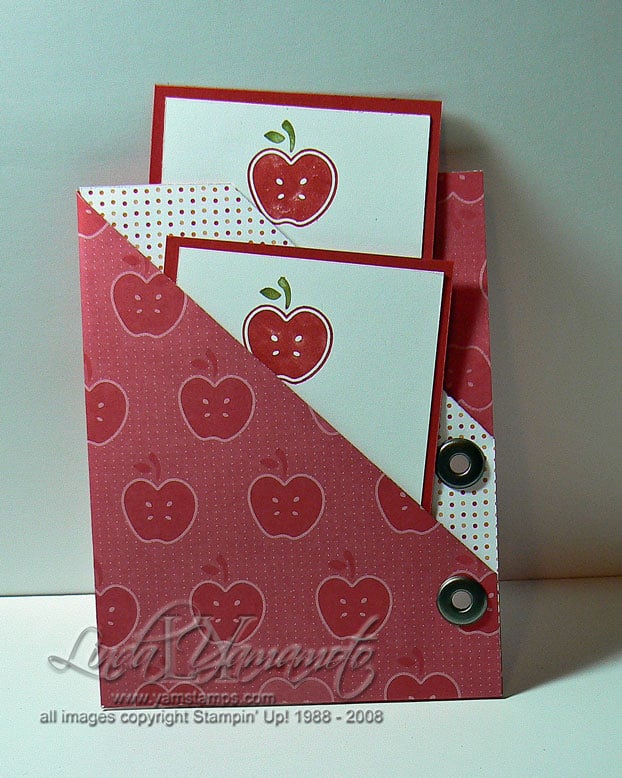
 The May video tutorial is here (just under the wire!). This one features my version of a double pocket card. I had promised the video so that club members (OK and anyone who watches!) could get a handle on how we did this. I think that the sound and lighting are better on this month, and I've learned how to do the "speed up" effect… feel free to leave feedback or ask questions! Photo is of the version that I think will become the "Thank you teacher" gift at the end of the school year! One tag can easily be converted to a gift card holder by using the slot punch, and the thank you note can be written on the other tag!
Even with my editing, the video is almost 5 minutes long, so grab a cuppa while you watch (or better yet, grab some designer series paper, jumbo eyelets and your crop-a-dile and play along!!) Enjoy 🙂


Great tutorial!
Well Golly Gee…I am so impressed with your video Linda! Guess what you’ll be doing when you visit me in July 🙂 LOL ????
Well done!
You did a great job with this tutorial… I totally understand how to do this card without all the fuss. Thanks look forward to seeing more of your beautiful cards. Tracy
Thanks so much for this great tutorial. I need to make a pocket card and this will make it so much easier now, Hugs, Nikki x
Linda, I’m now able to make these cards because of your great tutorial. I was not “getting it” until I saw the video. Thanks! I’ve made about 20 of them now, lol.
Thanks for all the great comments & so glad that this video helps you. Again, this is _my_ version of this style card. I was originally taught a version where you had to make a cut in the cardstock, but I couldn’t always get my head around what was going to end up where (a bit spacially challenged, I guess). I always like to simplify where possible, anyway.
Thank you so much for sharing this Linda.
I was dying to know how to make one of these.
Can’t wait to get started now!!! Viv xx