Producing cards en masse – easier when you get into a flow! Here are my tips…
We had a busy few months around our household with a number of family celebrations and a few concerts to attend…so being efficient with my card making was key!
I bulk produced thank you cards – a great way to help keep a wedding couple’s costs down (because weddings are not cheap overall!). I’ll share a few of my lessons learned – but first, the card…
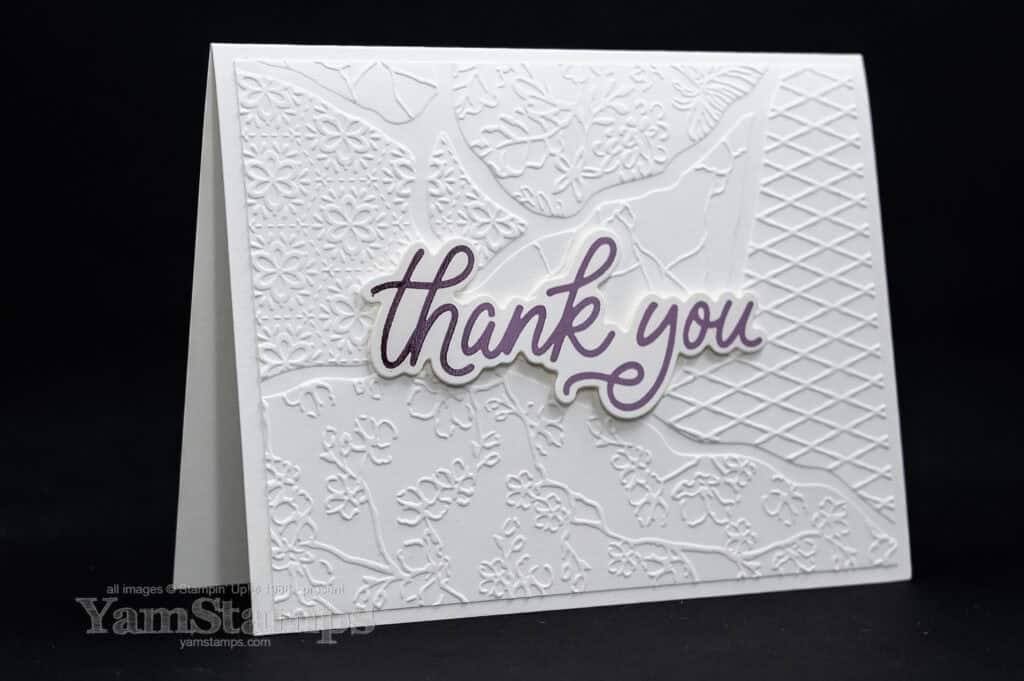
Monochormatic theme – I love using single coloured designs. For this card, keeping everything white but adding the texture makes it more interesting, and the pink foil thank you really stands out!
The pink hot foil thank you is from the Classic Greetings Hot Foil Dies that work with the Hot Foil System and Stampin’ Cut & Emboss Machine. The Embossing Folder is the retired Joined Together 3D Embossing Folder – it was part of the Kintsugi Inspirations Suite. I typically will part with retired products, but sometimes there are ones that I hang onto, and this is one of them.
Hot Foil is my latest obsession and I am finding that I like to use it on a lot of my projects – it adds shine and looks so professional! That being said….I might rethink it for a large card production situation, though I made it work. The reason? It’s a time limiting step. I had to plug in the platform, wait for it to heat, then wait for the die to heat before I could actually hot foil anything. It definitely controlled the speed at which I could work. I am, however, a multi-tasker, so I made that personality trait work for me! While the platform heated, I would dry emboss the background pieces or die cut the sentiments that I’d alreaady foiled.
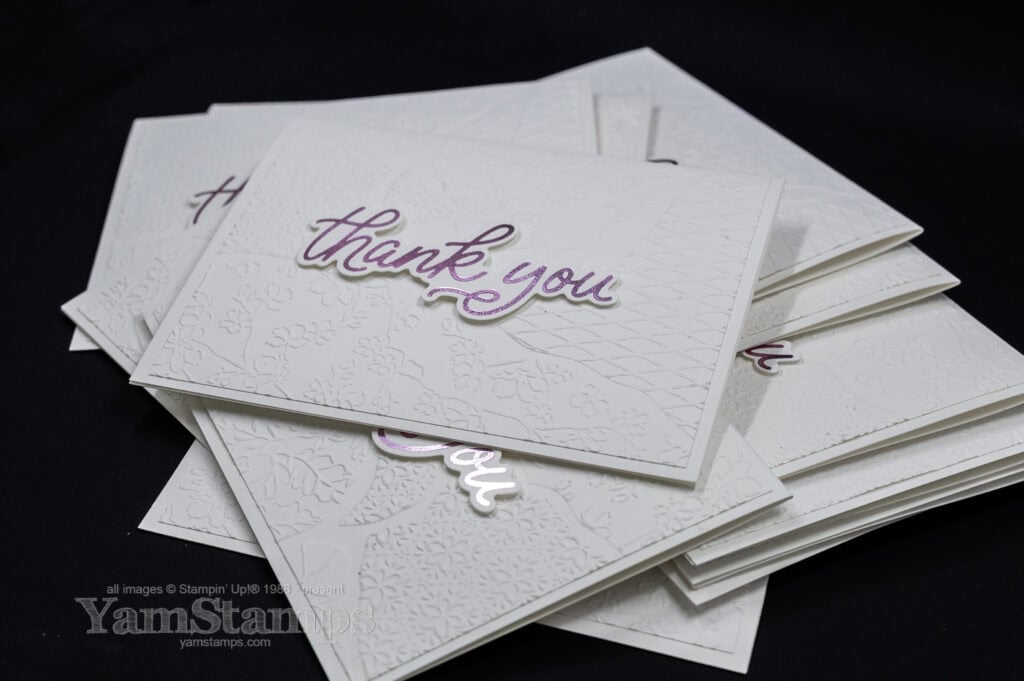
My workflow: I cut the cardstock first – so all the cardbases and the 5-1/4″ x 4″ layer for the embossing. I used up ALL my scraps of Basic White Cardstock for the sentiment! I cut the foil as well. I like to use my Paper Trimmer to cut the foil – it’s neater and keeps the edges straight. I honestly didn’t realize how much that mattered to me until I tried cutting a few by hand and ended up with diagonal ends! I cut a number of pieces of foil so that everything was ready to go. Then I settled in with a show playing in the background (I am currently working my way through the original Scrubs series) and got going. I started hot foiling sentiments right away, and then I would work on the other tasks – scoring the cardbases, dry embossing, die cutting or assembling. Once you get into a rhythm, it’s actually quite a peaceful way to spend some time!
One hint – if you’re die cutting these hot foiled sentiments, I learned that I didn’t have to fret too much if I got a bit of foil outside of the main sentiment area. The dies are perfectly coordinating and usually trimmed off the areas where I accidentally overfoiled!
October 21-23 FLASH SALE!
Stampin’ Up! currently has a FLASH SALE on select dies and die cutting tools, and the dies that I used for this card are part of that sale! Save 15% while supplies last. You can click here to shop in the YamStamps Online Stampin’ Up! Canada store, or the shortcut address (it may take a bit of time to redirect, but it saves some typing….) yamstamps.com/su
Happy Shopping and Bulk Card Making!