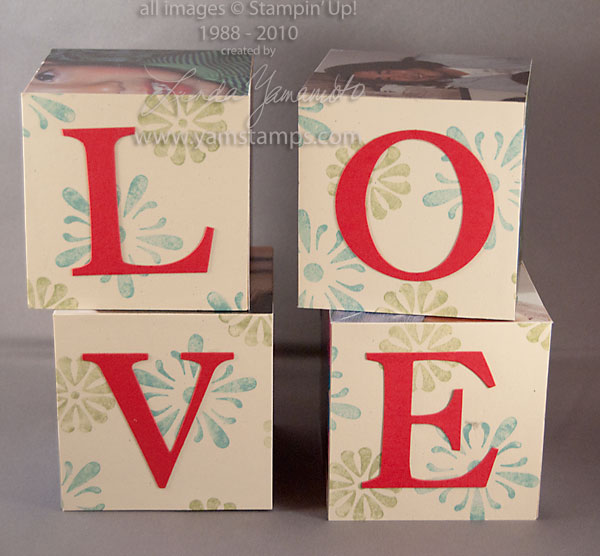
Awwwww, isn't he cute?! I have to admit, it was kind of weird, cutting up the photo, but in the end, it all comes back together and it's all good. (although now that I look at the blocks from this angle, the one photo isn't quite lined up correctly. oops).
Thought I'd share this shot to show how one of the photo sides looks on the finished product.
I've decided to offer this class on Tuesday, August 24th at 7 pm in Burlington. Cost is $25 and will include the blocks. You supply the photos (you'll receive specific info when you register). Contact me to register or for more information!
Stampin' Up! sells these MDF blocks that make a fun home decor item. I made one of the sides into word art, using my Big Shot Bigz alphabet dies – Serif Essentials. I stamped images randomly onto cardstock, cut that into 3" x 3" squares and then used Real Red cardstock to create the letters. The other sides feature photos – some I used 3" x 3" sized photos, and I used some 6" x 6" photos that I cut into 3" x 3" squares to make a puzzle.
To adhere the cardstock or photos, you could use Tombow Adhesive or a decoupage kind of glue.
I'm planning on offering a class featuring the blocks in the near future – email me if you want to be sure to hear about it!
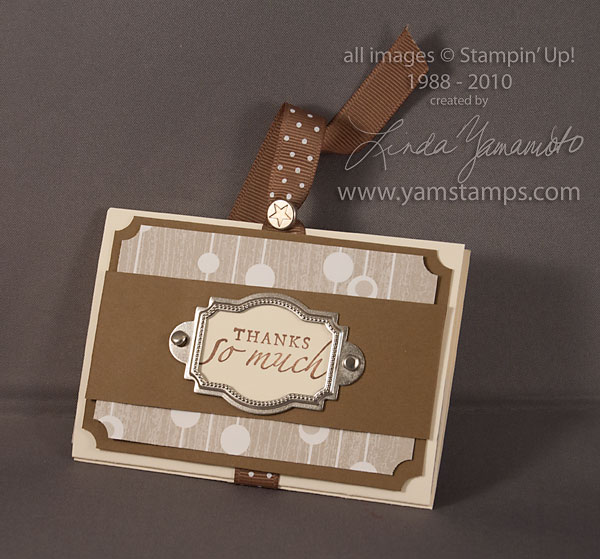
Here's another gift card holder – featuring Soft Suede Cardstock & dotted ribbon. Silver Hodgepodge hardware adds the finishing touches. Sentiment is from Sincere Salutations. The designer series paper is actually Holiday Lounge, but I like that it can be used in other situations and not scream "Christmas". This would be a great end of year present for a teacher… and in our case, it was, for my son's drum teacher!
In the meantime, I'm getting ready for the Information Night on Monday, June 14th at 7pm – still room if you'd like to join us and chat about the Stampin' Up! business…the mini starter kit is an economical way to kick it off! Please RSVP if you're able to make it.
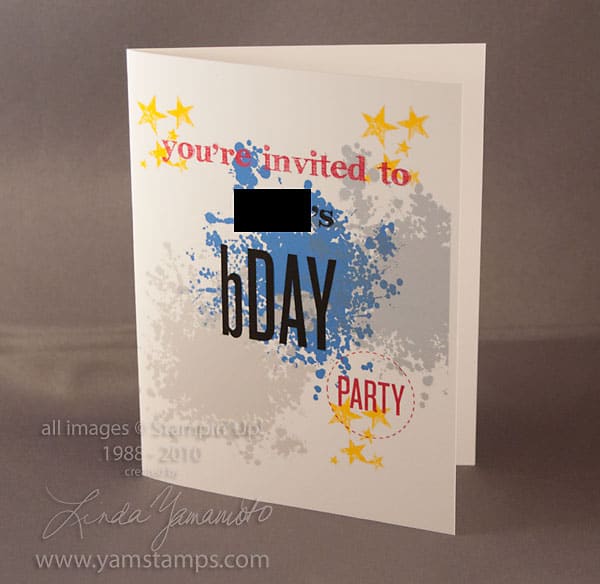
I used the My Digital Studio software to create some "boy" birthday invitations. I loved how easy and inexpensive it was to customize the invitations and print them out. I used Extreme Elements (recognize the stars & splotches?!) on the front of the card. The words bday and party are actually from Calendar Cues, and the other text is a font that was already on my computer. In My Digital Studio, there's a text tool, so on the inside of the invitation I was also able to include all the party details, in the same font and coordinating colour as the card. I printed these onto white cardstock in my inkjet printer, and quickly and easily whipped up a number of invitations.
Speaking of My Digital Studio, there are some new downloads available – a travel journal kit (item 121071 $13.25) that includes designer paper and stamps, and a Father's Day brush set (item 121070 $7.95). The nice thing about digital downloads? It's an instant download, and no delivery charges!! You can check out all the digital downloads available by going to my online store at www.yamstamps.stampinup.net and clicking on digital crafting and digital downloads. Actually, the Father's Day brush set is featured on the front page, so it's easy to find! Please contact me if you have any questions about MDS software or digital downloads.
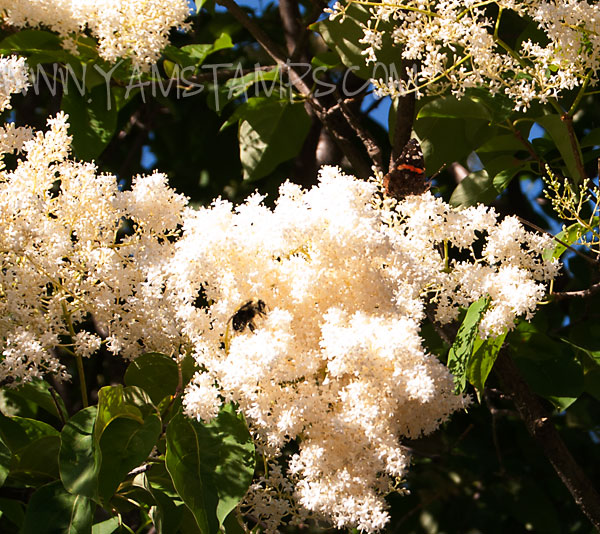
Came home the other day to find that the tree in the yard was a hotbed of activity. Lots of big bees and a butterfly enjoying the flowers. (I'm not a huge gardening expert and I don't even know what kind of tree this is…). I grabbed my camera and took shots, but by the time I was able to go and switch to my zoom lens, the butterfly was off to other gardens 🙁 though I have this shot to share (and thank goodness for digital photo editing software that lets you crop in closely!).
Will definitely have to take some time and get some of the shots scrapbooked!
If you are looking for some "me" time to do some scrapbooking or cardmaking, please consider joining one my Stampers & Scrappers Club. Our next session starts in September…contact me to reserve your spot. I'll also have some sign up lists at my Open House on Saturday July 3rd.
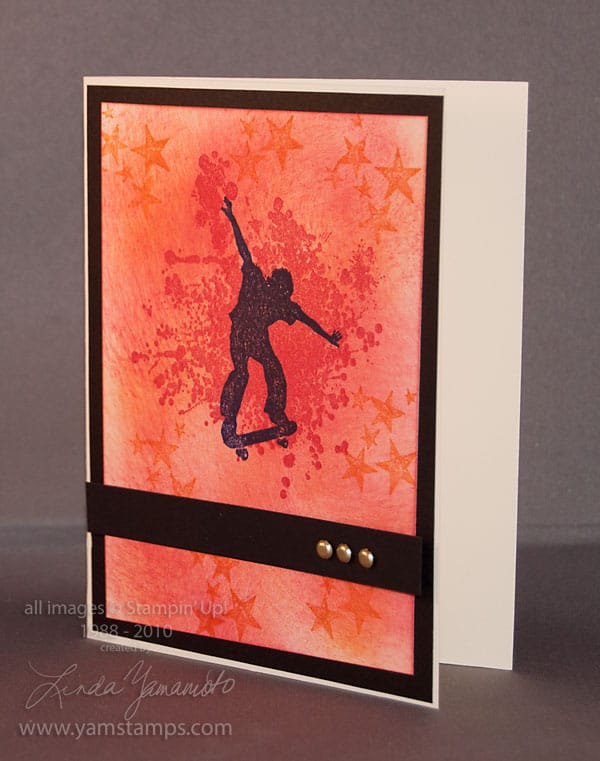
Well, I kind of hoped he'd like this one…(I was actually thinking of using it as his bday card! LOL).
This card uses Extreme Elements and Extreme Skateboarder. I sponged Pumpkin Pie and Ruby Red inks onto Very Vanilla cardstock, then stamped the Elements in the same inks. I stamped the skateboarder in Basic Black on top. If I were to redo this card, I may consider doing the skateboarder in craft ink so that I could emboss him.
This card was inspired by a "swap" I received a few years ago… unfortunately I can't find the original right now, so can't give credit. When demonstrators get together, we tend to swap cardfronts to share ideas and inspiration. I've said it before – you don't need to be creative to be a cardmaker (or a demonstrator, for that fact!!) – you just have to be able to copy and tweak!! (Need more proof? Come to my Info Night! LOL)
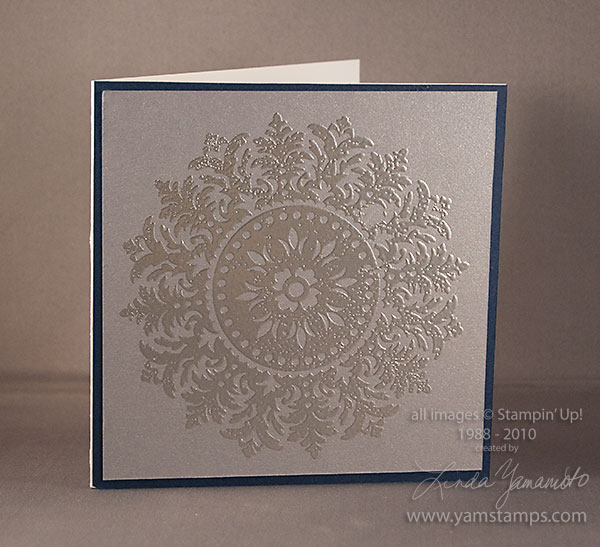
I love the effect of tone on tone heat embossing. This square card (fits in a Stampin' Up! medium square envelope) features the Medallion stamp. It's stamped onto Brushed Silver Metallic Cardstock and backed with Night of Navy cardstock. When we did this card in class, I opted to do a Night of Navy card with a smaller white insert on the inside of the card, which gives a much cleaner look to the finished product. I think this is a great "any occasion" card!
My upcoming events include the Information Evening, Monday June 14th at 7pm here in Burlington and the Birthday Bliss class, Weds, June 16th at 7pm also here in Burlington. If you're interested in attending either, please contact me! The Info Evening will provide you with…information…on having your own rubber stamping & scrapbooking business (or supporting your hobby!!). It's a great time to consider this right now – especially because there is a Mini Starter Kit special!
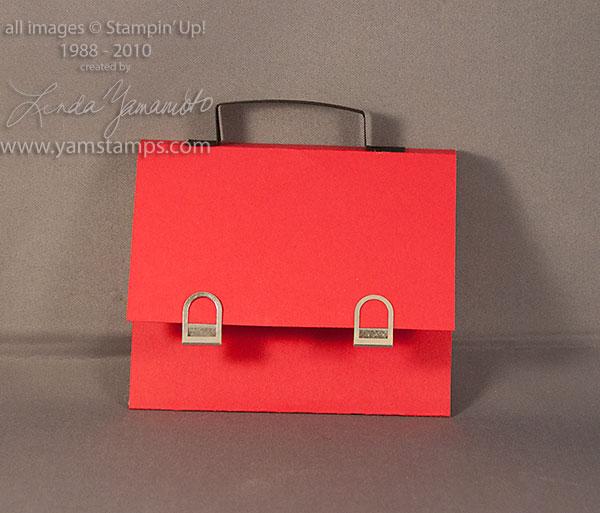
I personally love giving (and receiving!) gift cards. It allows the recipient the freedom to choose something they really want/need, and if you choose the store and make an effort with the presentation it can make a perfect choice.
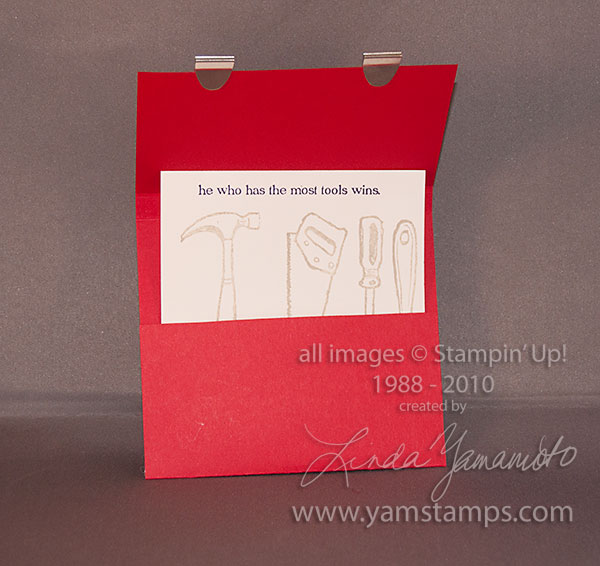
I designed this easy gift card holder for the home reno/tool person that you might be buying for. Real Red cardstock creates the toolbox, Basic Blac cardstock creates the handle and two wide clips from the Clips Assortment (p179 current Canadian Stampin' Up! Idea Book & Catalogue) create the latches. No adhesive required – just slide them on the edge of the cardstock! (I have to admit I squealed when it worked out).
The insert is created with the Totally Tool stamp set, stamped in Basic Black and Sahara Sand. The gift card could be attached to the insert or just slid in front of it in the pocket.
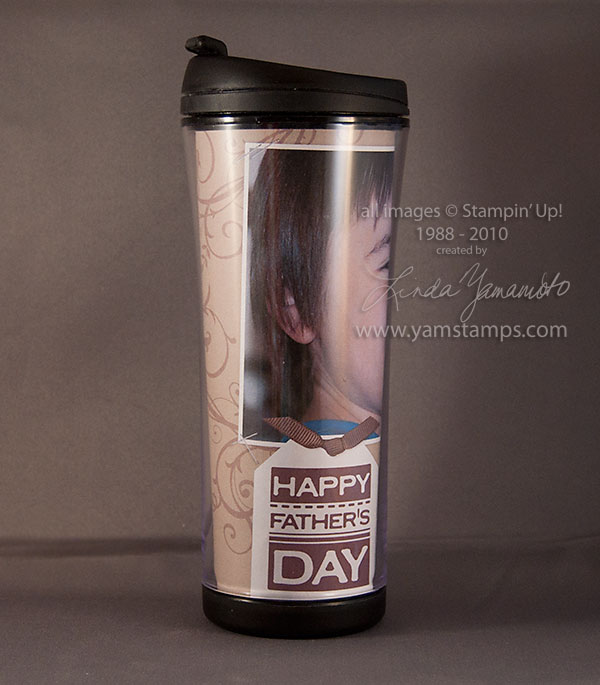
Hard to get a good shot of a cylindrical object… Anyway, this is one of the projects that might have been hard to see on the TV spot the other day. I have a collection of travel mugs – and I drink from them all the time, even at home, as I tend to wander around the house with my tea in hand. This way, if I put my drink down and walk away, when I come back (if I can remember where I left the mug…) the tea is still drinkable. This mug came from one of my fave coffee shops (think circular green logo and killer chai lattes LOL) and has a liner that you can replace. I created an 8.5" x 11" layout in My Digital Studio and printed it on regular text weight paper. I then used the original liner as a template for cutting. I was able to include features like staples and a tag with ribbon, but because they're all digital elements, the insert fits easily inside the narrow opening with no bulk. As you can tell, this insert is for Father's Day, but you can easily change the insert to suit the season / holiday / latest brag photo of family members.
If you're weeping over some of your favourite Stampin' Up! colours being retired, My Digital Studio is one way to ALWAYS have access to them! You'll be able to use designer papers, elements and accessories in those favourite colours without fear of running out of stock! Contact me for more information about My Digital Studio, or place your order online HERE.

 Awwwww, isn't he cute?! I have to admit, it was kind of weird, cutting up the photo, but in the end, it all comes back together and it's all good. (although now that I look at the blocks from this angle, the one photo isn't quite lined up correctly. oops).