Apr 14, 2018 | 3D samples, Business Opportunity, event, Events, Stampin' Up!
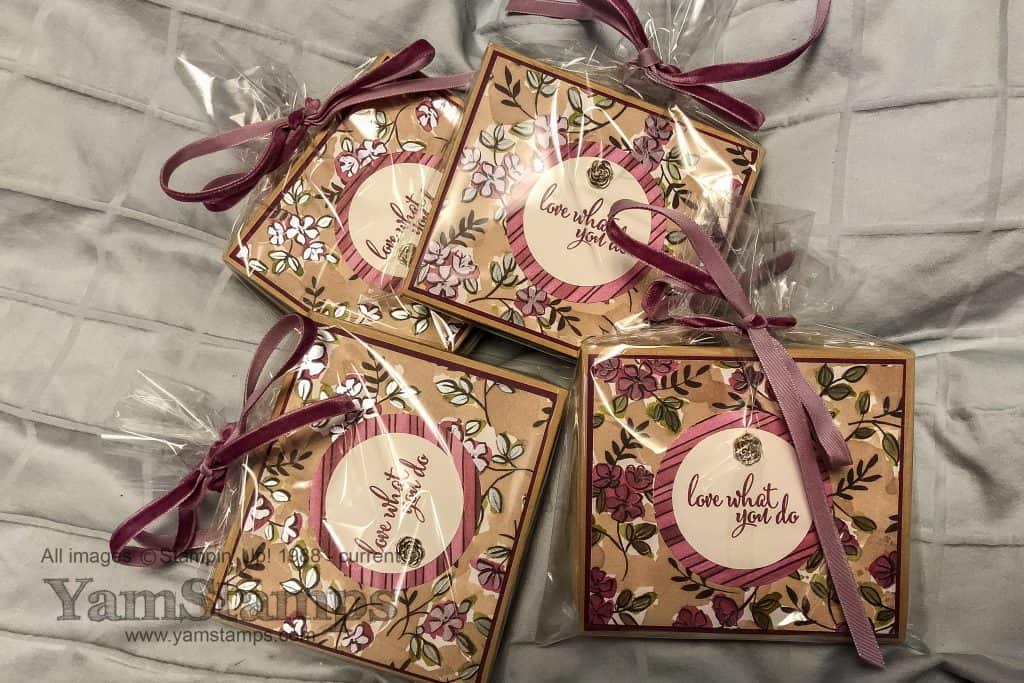
Sharing a bit more from Stampin’ Up!’s On Stage event in London Ontario last weekend. It was so much fun! This was my final official event as a member of the Events Council, and what a way to go out! I heard so many people say that they thought this was one of the best events they’d attended! (Though in all honesty, it kind of feels that way every time we go to an event run by Stampin’ Up! haha). The photo above is the gifts that I managed to get together for members of my demonstrator group, known as the “Eh” Team. They are boxed note pads, decorated with products from the Share What You Love suite. Demonstrators are able to order these products now (well, not the note pads…I already had those), and ordering will be available to everyone come May – with exclusive bundles at that time before they are available as part of the new Annual Catalogue! I think my favourite thing in this suite is the Share What You Love Designer Series Paper – it’s extra thick, and you get twice as much as in a regular package – plus it’s got a Pearlized coating on most of the sheets – you can kind of see the sheen on the flower images on a couple of the boxes above.
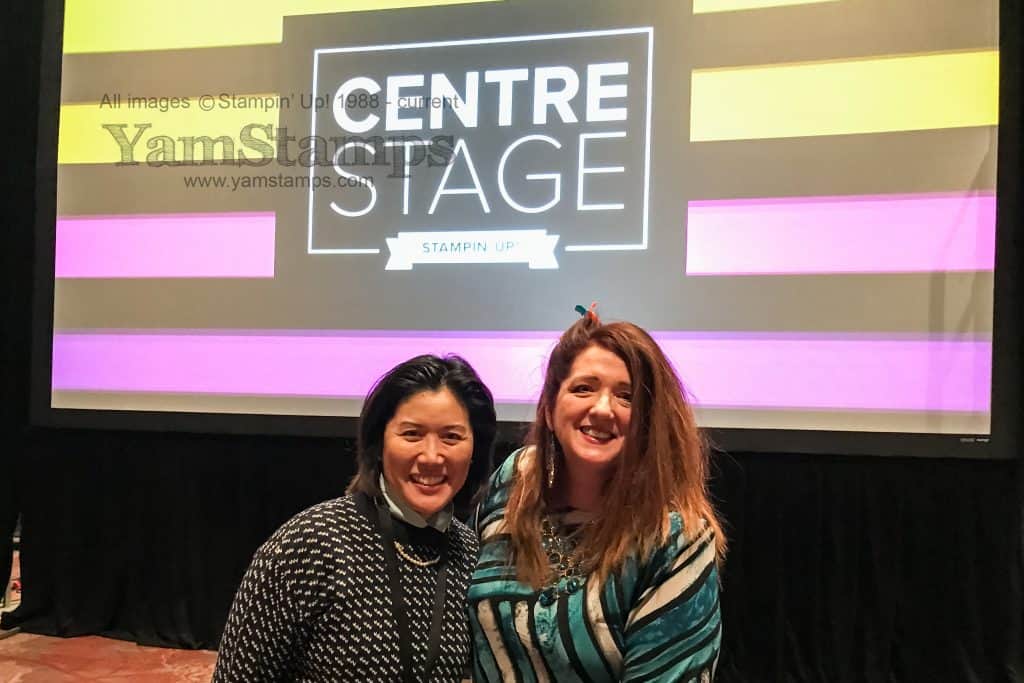
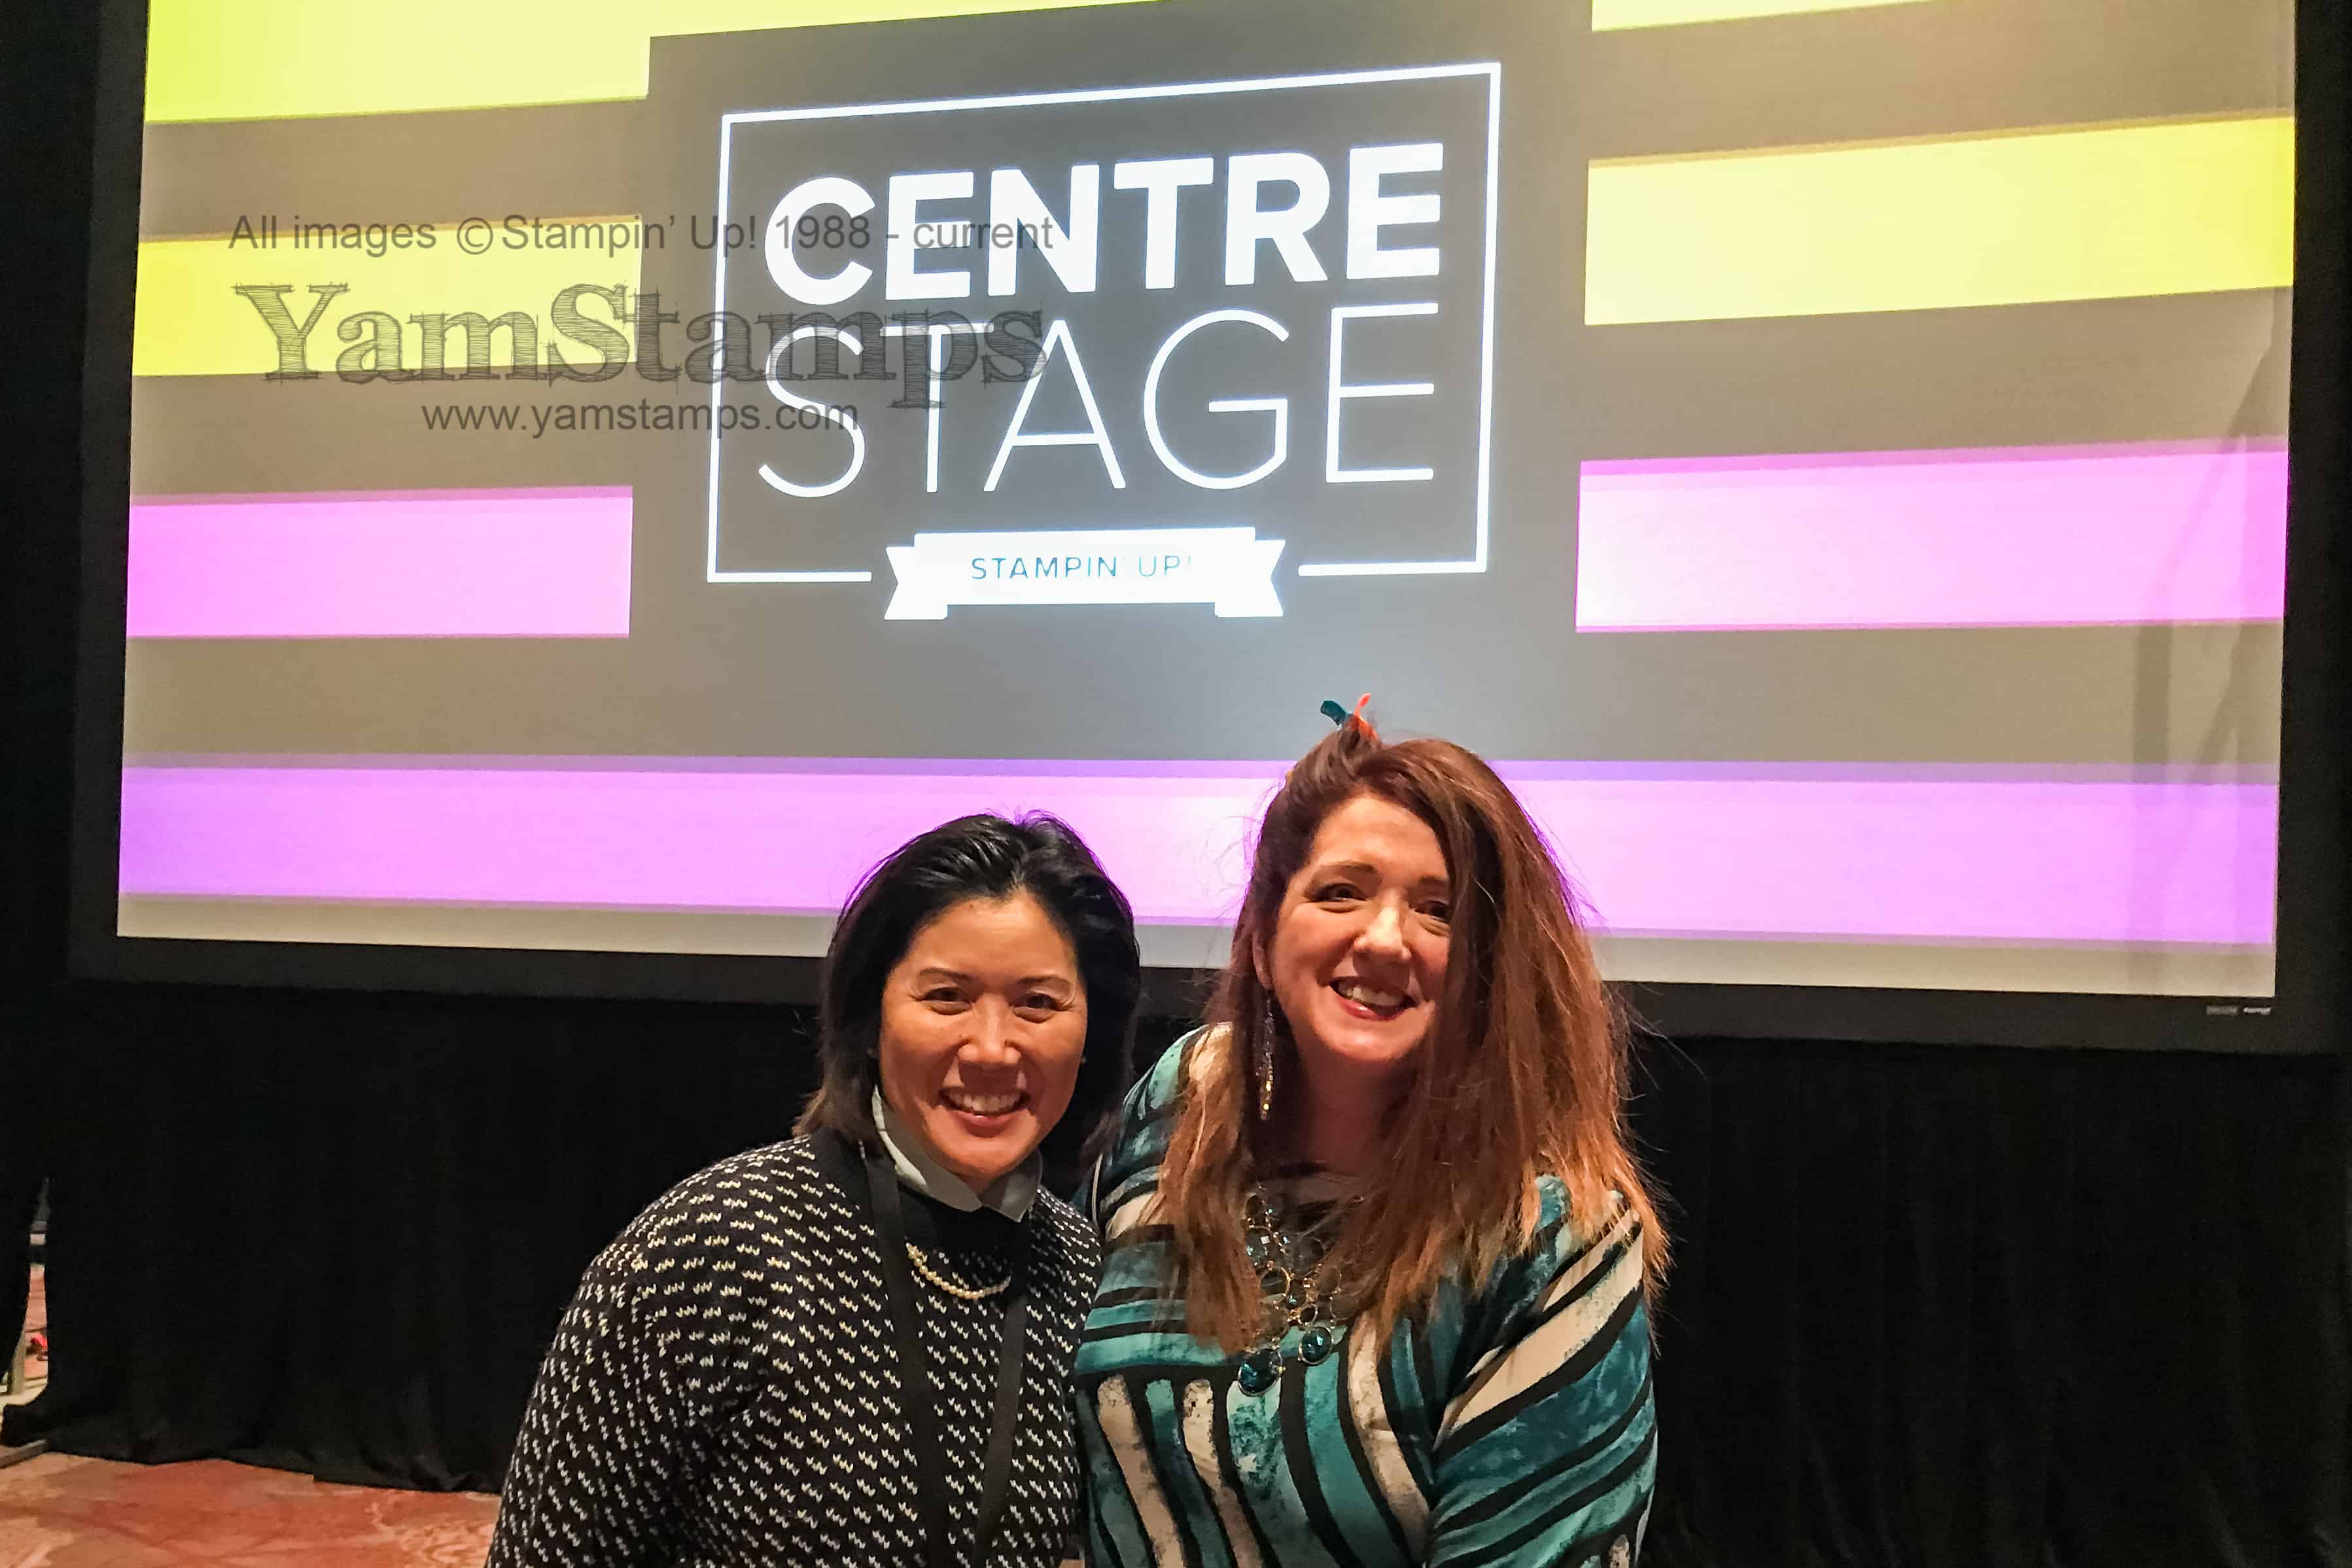
Here’s Leanne & I at the 80’s themed Centre Stage Event….my big hair did not keep its vertical height, sadly….This leaders’ event was the night before the On Stage Event, and it was a lovely dinner and information session, with great giveaways as well! (oh, and that’s a genuine LLBean sweater from the appropriate decade….).
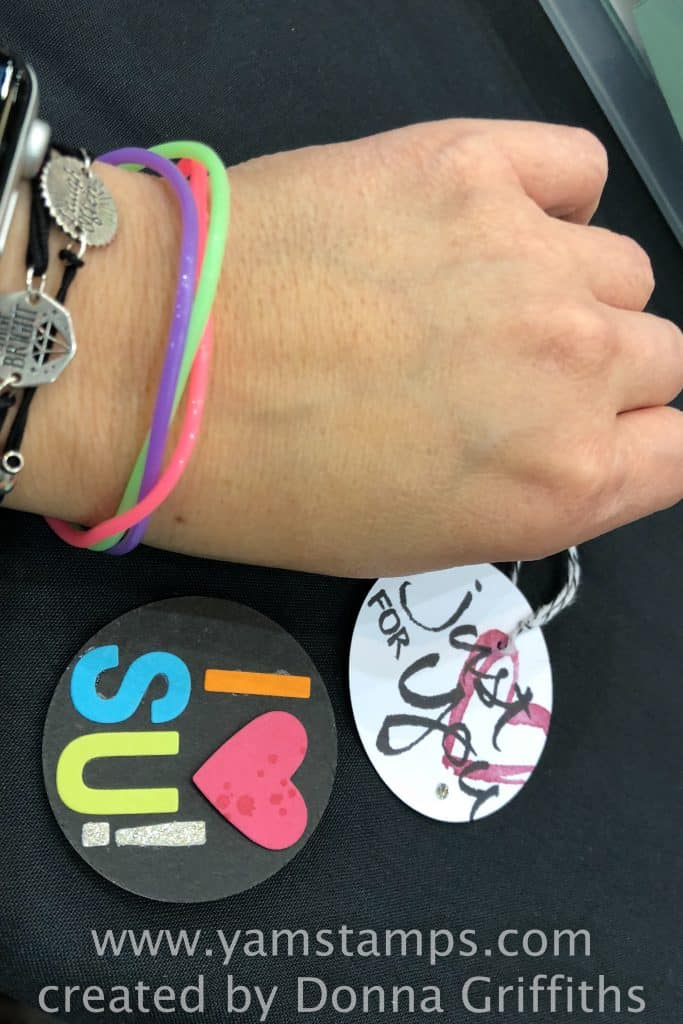
What’s an 80’s party without jelly bracelets (and bright coloured pin?!) Thanks to Donna Griffiths who spread joy to the Events Council members across North America with these fun gifts! Thanks also to Stampin’ Up! for the gorgeous lanyard they gave to Council members (you can kind of see mine in the photo below). I love that even though we were spread out over North America, it was still a feeling of a shared event. I am thankful that I was able to serve with these special ladies!

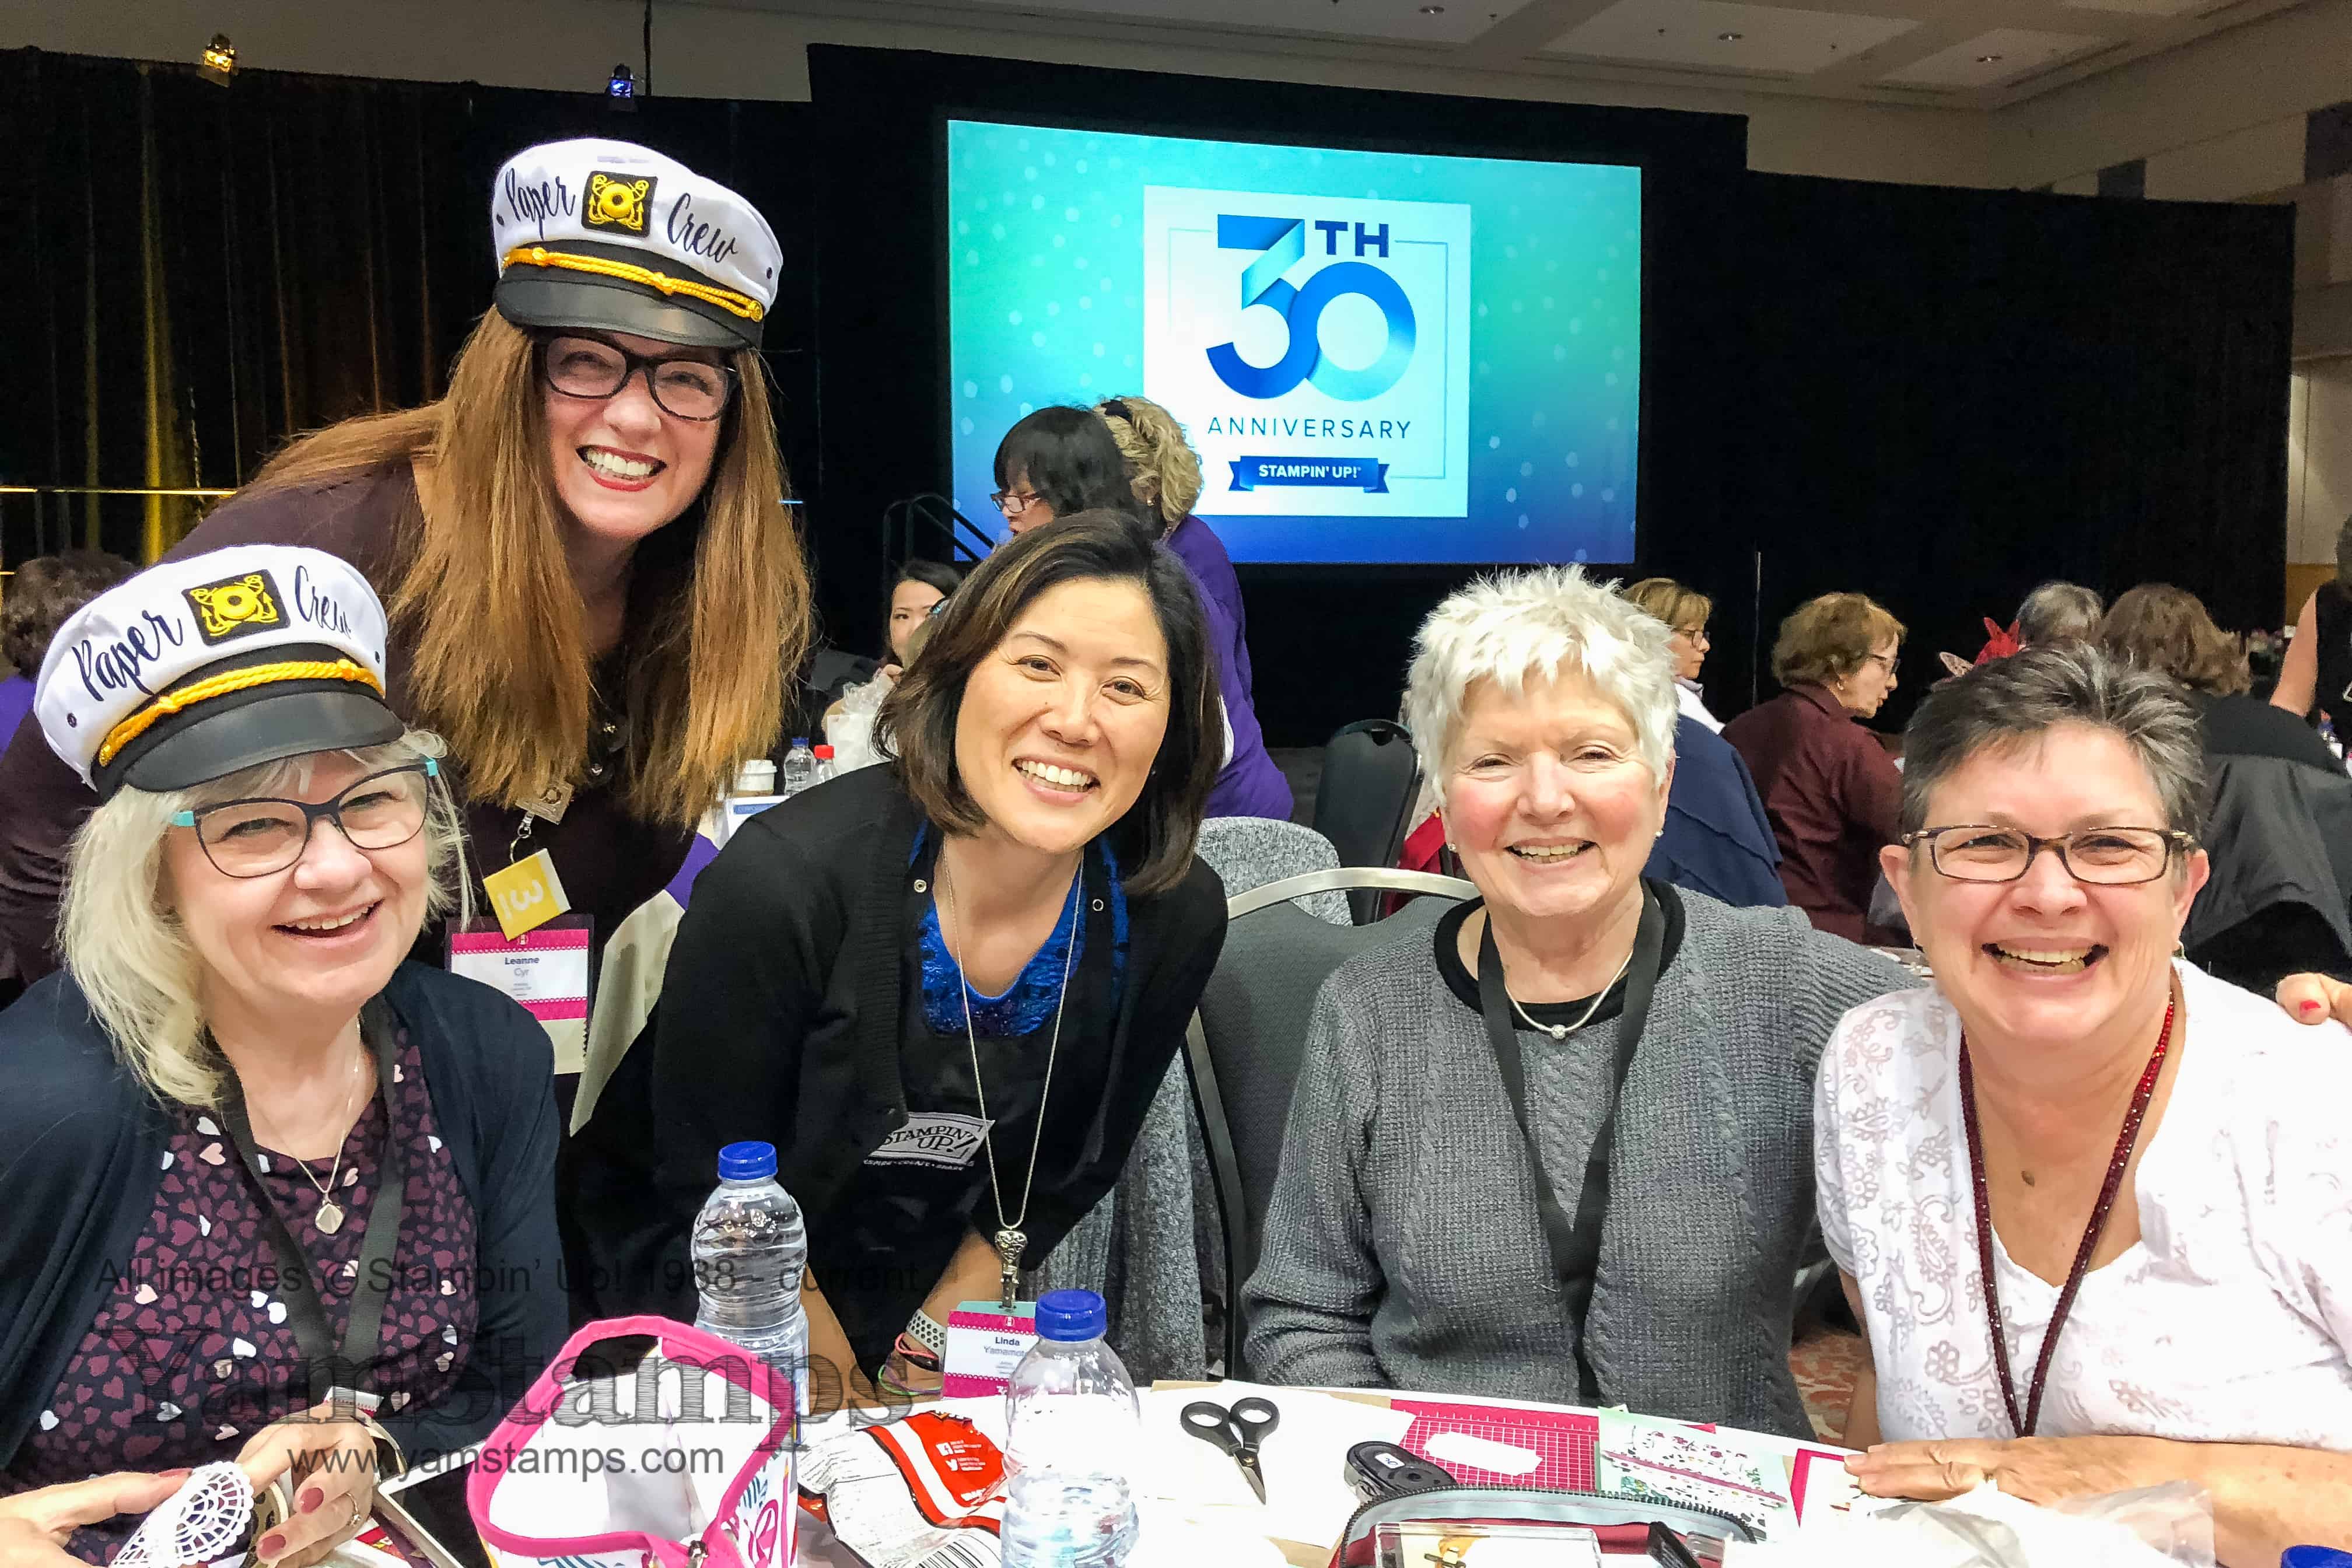
Above – a picture of the “Eh” Team members who were able to attend the On Stage Event in London – Anne, Leanne, me, Arlene and Gail. So much fun….all of these ladies also helped behind the scenes. HUGE thanks to Anne, Arlene, and Gail whose hard work above and beyond allowed the SU staffers to get sleep the night before the event. I presented during the event (check the YamStamps Instagram feed for my Britney mic photo!) and apparently stayed within my time limit, mic issues not withstanding (I managed to dislodge the Britney mic and had to adjust it before continuing…oops).
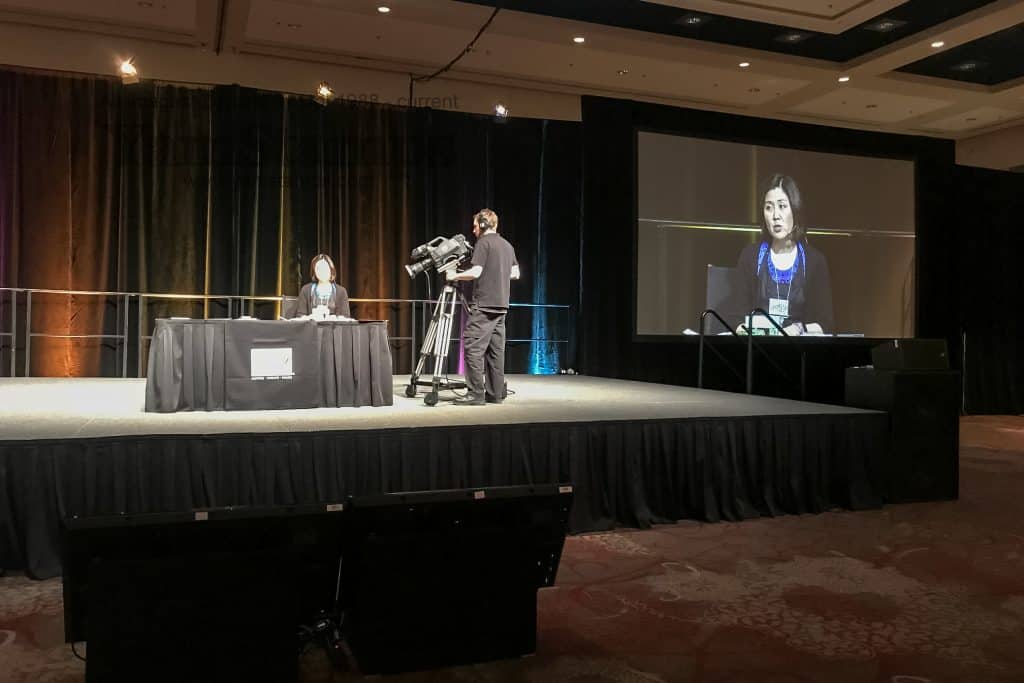
Thanks to Leanne for grabbing this photo during my presentation. I will say that presenting at the events has been a good growth experience, and lots of fun in the end. A little stressful initially, I won’t lie…but the room is full of supportive friends, and I got in all the required information…I think….haha!! One of the things I mentioned during my presentation – how much I love being a demonstrator, mostly for the inspiring and creative people that have been brought into my life because of it – and you see a few of them in photos in this post and elsewhere on the YamStamps Blog.
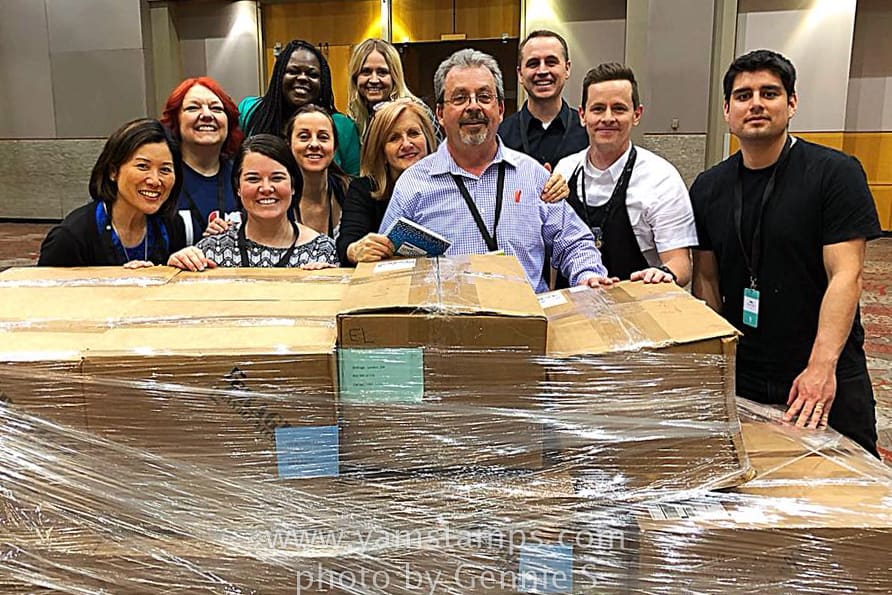
One final picture of everyone behind the scenes after loading one of the pallets. (I stole this picture from our fearless leader, Gennie…) – left to right – me, Kim, Gennie, Carrie, Valerie, Monica, Kathy (designer of that gorgeous Designer Series Paper!), Greg, Josh, Brett and Mike. The SU Staffers get sent out to all the events to help in front and behind the scenes – then go back to their “day jobs” in Marketing, Design, Transportation, IT, Demo Support, HR…you get the idea (I know I’ve also missed some of the departments…LOL). Such a great crowd to work with. Seriously. I would do this again in a heartbeat. The next On Stage Event is going to be a big one – Orlando, Florida in November, celebrating 30 years of Stampin’ Up! Can’t wait! If you’re interested in attending this event, contact me for more information about joining my team of demonstrators!
Apr 12, 2018 | scrapbooking, Stampin' Up!
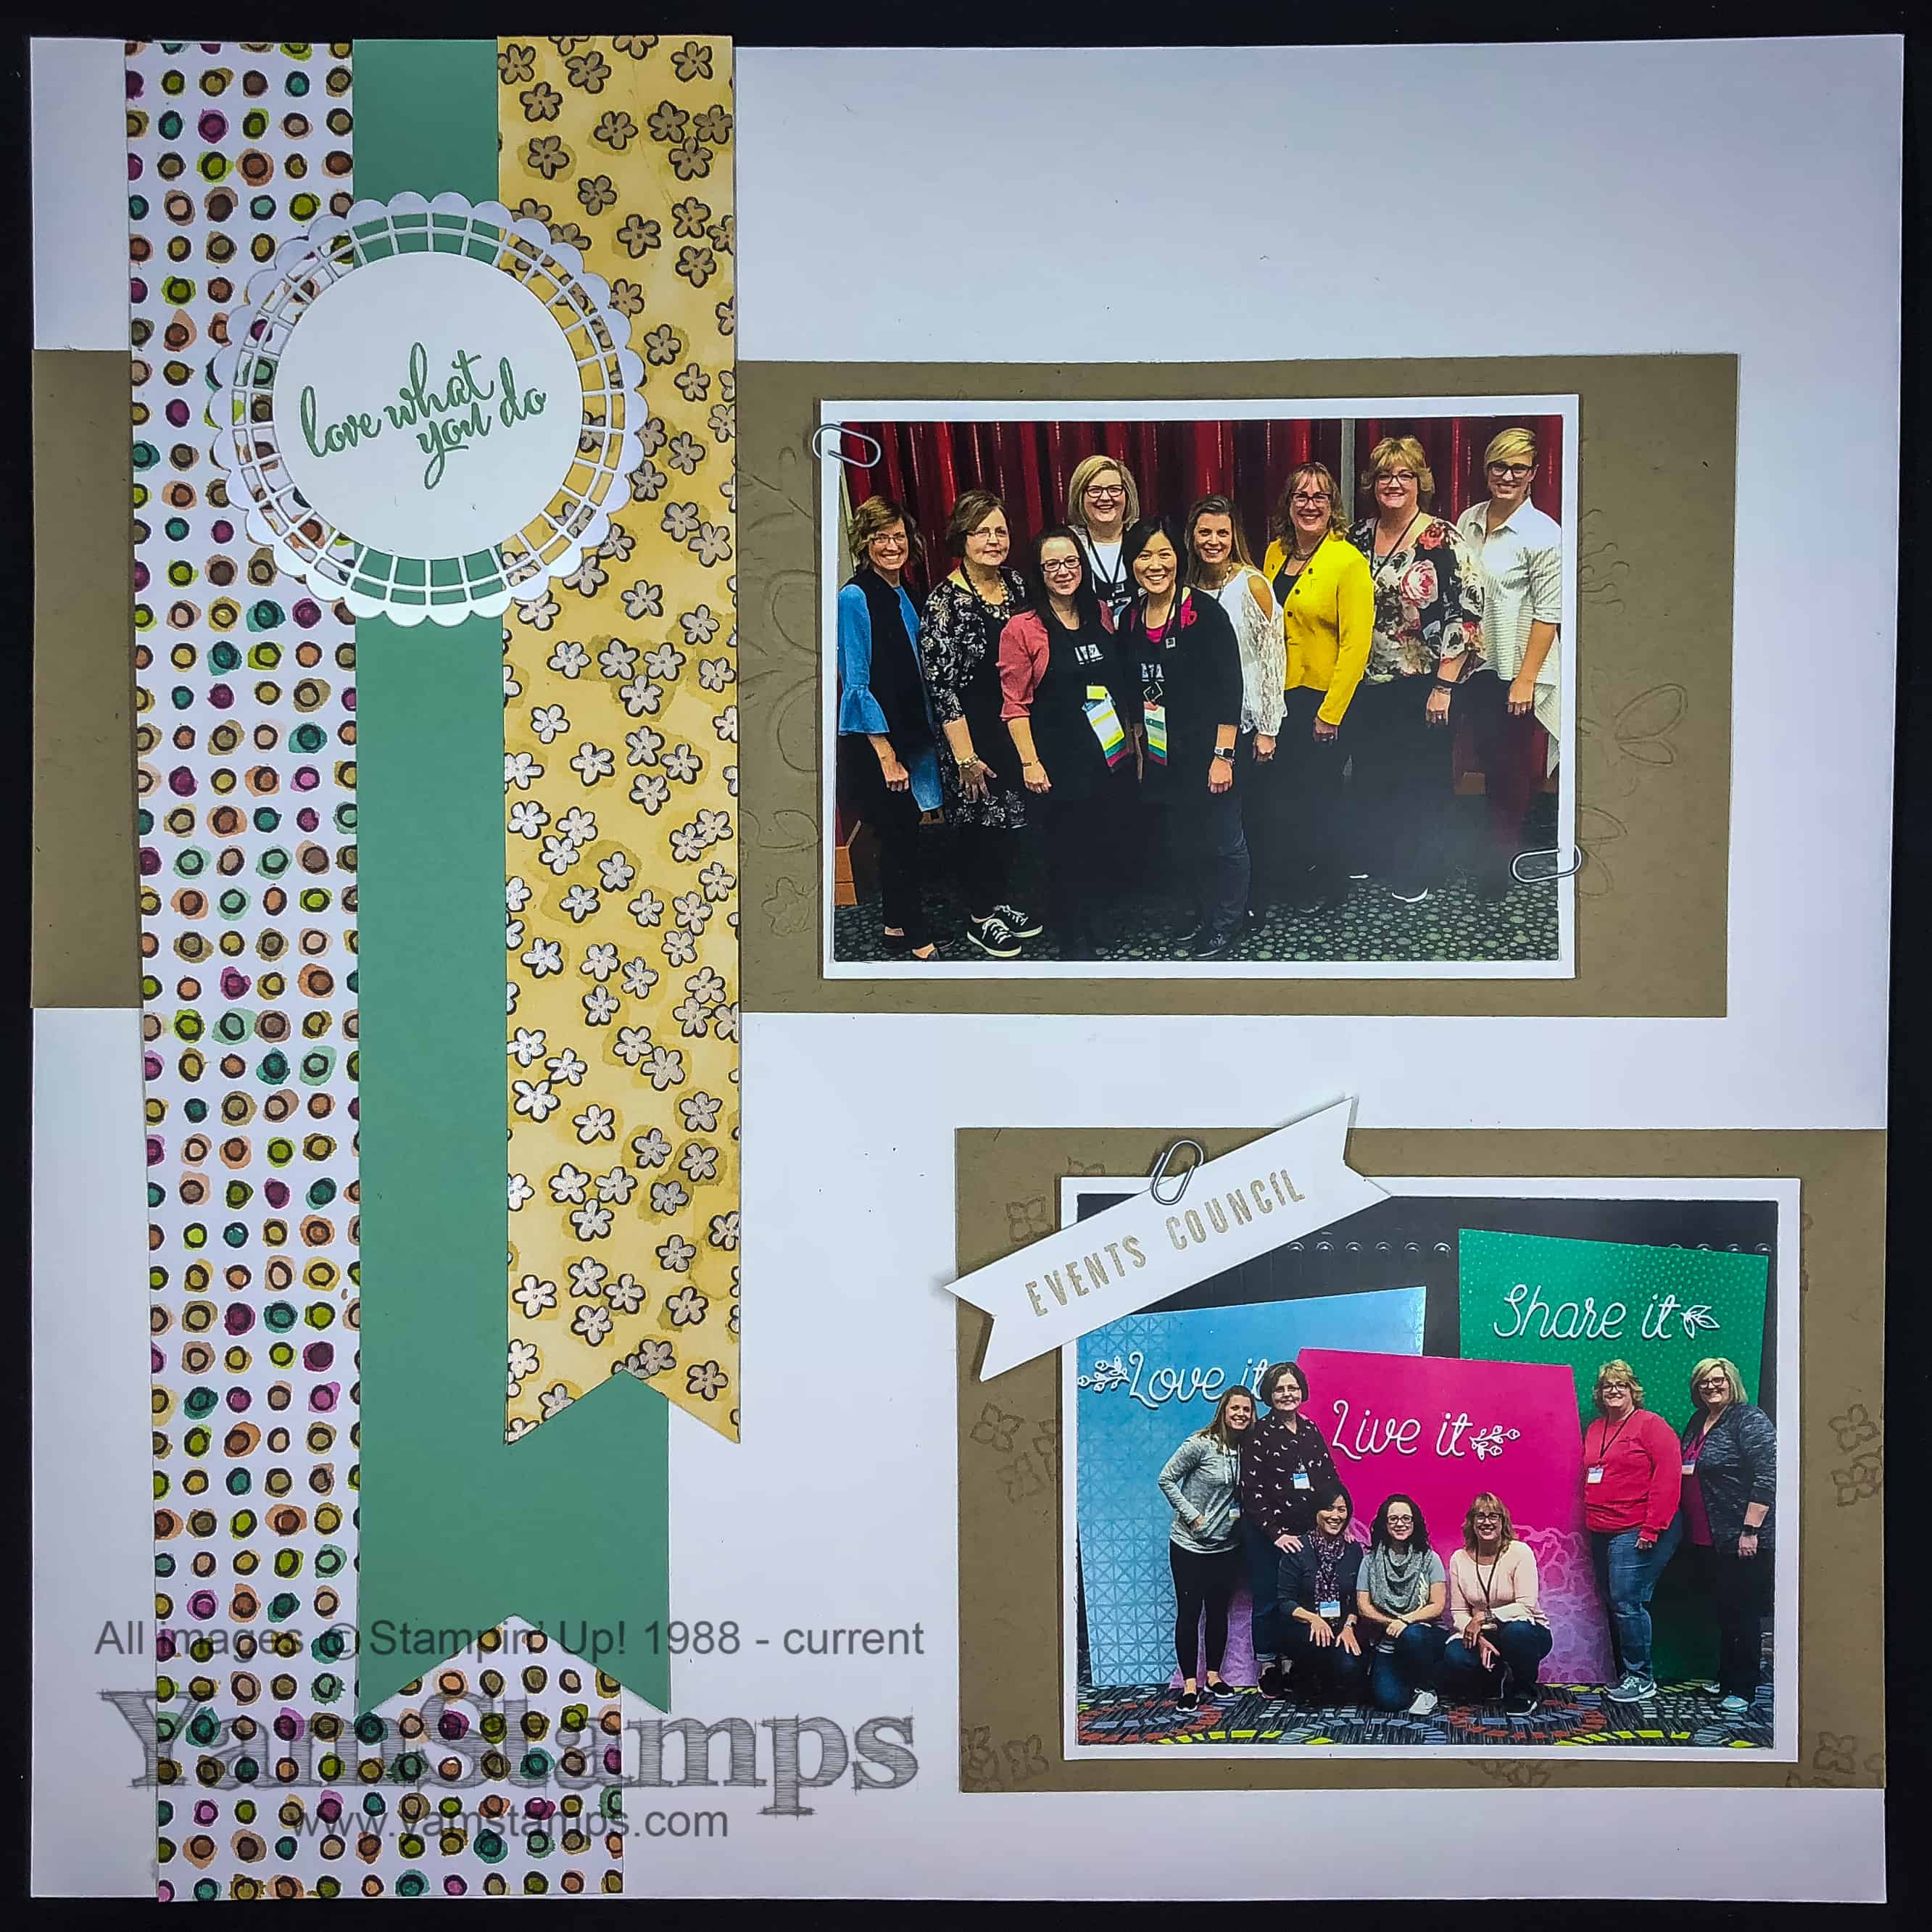
Hi! Welcome to the YamStamps blog – if you’re following the North American Events Council Blog Hop, you’ll have arrived from Sherry’s blog. Thanks for visiting! I’m Linda Yamamoto, and I’m sharing my Events Council Scrapbook Page today, using the Share What You Love Product Suite, which we each presented at an On Stage Local last weekend. I was in London, Ontario, where we awoke on Friday to snow….much like a lot of southern Ontario, actually. A bit of a rude awakening! However, we kept warm inside the Convention Centre as we worked to get the room ready for the event, and further warmed by seeing friends during the event!!

My scrapbook page is very simple – much like most of my paper crafting actually! (I’m not a huge scrapbooker, but I have my moments…) I featured some of the gorgeous Share What You Love Designer Series Paper – you can see a bit of that pearlized finish on the flower strip. The pearlized finish is also on the doily behind the sentiment “Love What You Do” from the stamp set of the same name, and it’s stamped in Mint Macaron, which is making a triumphant return to the Stampin’ Up! Colour Family as part of the Colour Revamp. I also used Crumb Cake cardstock, and embossed it with the Lovely Floral Dynamic Textured Impressions Embossing Folder – you can see some of the embossed features peeking out from behind the top picture. The bottom Crumb Cake is stamped with flowers from the Love What You Do set, and the banner is stamped with the Make a Difference Stamp set, which is an alphabet set with both script and printed letters. I added a few of the Silver Paper Clips that will be part of the Share What You Love Embellishment kit, and I figured I’d better quit while I was ahead before I messed everything up…LOL!! These items are available for demonstrator preorder now, and will be available to everyone in May, ahead of their appearance in the new Annual catalogue in June. There will be some specially priced bundles available during the preorder time, so be sure to check those out!
I have had such a great time being part of Stampin’ Up!’s North American Events Council, and am truly sad that our time as official council members is over….but even though we are not officially a council anymore, we are still a group of friends, and that’s worth everything! Amazing to think that most of us met in person for the first time at November’s On Stage event in Salt Lake City!
Go Back to see Sherry…. You’ll be visiting Bonnie next…


Apr 10, 2018 | Announcements, Retired List, Seasonal Catalogue, Stampin' Up!

I spent the past few days in London ON for the Stampin’ Up! “On Stage” event for demonstrators. It was so much fun, a fair bit of work (since I’m on the Events Committee) but so worthwhile! Demonstrators got a peek at the upcoming Annual Catalogue! So exciting…but also a little sad, when we see what products won’t be returning. The retiring list highlights all the Stampin’ Up! Last Chance items – things you will want to order or stock up on before they’re gone!
Here is the downloadable pdf list for Annual Catalogue and Occasions Catalogue products
Here is the sortable spreadsheet for Annual Catalogue and Occasions Catalogue products
Here is the easiest option – the link to the retiring products in the YamStamps Online Stampin’ Up! Store – yamstamps.com/retiring2018 The online store will be the most up to date place to check what items are still available to order.
IMPORTANT THINGS TO KNOW:
1) Retiring Stamp Sets have guaranteed availability until May 25th, after which time they are while supplies last
2) All other Retiring Product is while supplies last
3) You may notice that ALL ink pads and reinkers are on the retiring list. Stampin’ Up! is revamping the ink pad design as well as the colour offerings to keep the Stampin’ Up! palette current and up to date. This is also why the Stampin’ Write markers are on the list. All the reinkers that are listed are for colours that will NOT be in the upcoming catalogue due to the Colour Revamp.
Colours that are leaving:
- Always Artichoke
- Chocolate Chip
- Elegant Eggplant
- Island Indigo
- Marina Mist
- Perfect Plum
- Pink Pirouette
- Rose Red
- Soft Sky
- Tangerine Tango
- Tempting Turquoise
- Wild Wasabi
- Wisteria Wonder
2016-2018 In Colours
- Dapper Denim
- Emerald Envy
- Flirty Flamingo*
- Peekaboo Peach
- Sweet Sugar Plum
See that asterisk beside Flirty Flamingo? That’s because it will be coming back as part of the core Stampin’ Up! Colour Collection!
Colours being reformulated:
Basic Black
Basic Grey
These colours will return to regular dye based ink pads, rather than the Archival Ink Pads (don’t worry, there will be other Archival ink options available)
AVAILABILITY
For individual colour items – classic ink pads in current design and refills are guaranteed until May 7th, and then available as supplies last
For any colour collections (Brights, Neutrals, Regals, Subtles), all cardstocks, all Stampin’ Write markers, embellishments and the Colour Caddy (ink pad storage) – availability is while supplies last.
If your favourite colour is on the Retiring List, you may want to stock up on supplies. Again, you can head straight to the Retiring Product spot in the YamStamps Online Stampin’ Up! Canada Store by typing in http://yamstamps.com/retiring2018 or access the whole store by simply typing http://yamstamps.com/shop
As always, please feel free to contact me if you have any questions or concerns, or need assistance placing your order. I will also post more about On Stage later this week!
Apr 3, 2018 | cards, Stampin' Up!

This quick and easy floral card is great to make in bulk and have on hand “just because”. I’m going to be using this as a customer thank you card I think! It features the Stampin’ Up! set Garden in Bloom, which is one of my “go to” sets when I need to make something pretty and quick. It’s got great watercolour-ish images, coordinating line art and sentiments that can cover a variety of occasions. My fingers are crossed that this set is NOT on the retiring list which will be made public April 9th. Each year, Stampin’ Up! retires some catalogue product in order to make room for new items. While I’m often sad to see items leave, at the same time, I’m excited to see what will be coming up next!
This card is created with Marina Mist and Pear Pizzazz as the main colours. The ribbon is actually the Lemon Lime Twist 3/8″ Mini Striped Ribbon, which I first discovered when I was given the Tutti Frutti suite to present at the last Stampin’ Up! On Stage Demonstrator Event in November. It is close enough to the Pear Pizzazz (and I think there might be a hnt of it in the strips, anyway), that it can pass.
I’ve been busy behind the scenes getting ready for the next On Stage Demonstrator Event! We are lucky to have an On Stage Local Event being held in London, ON this weekend, so I’m looking forward to seeing friends there. As part of the Events Council, I’ve been privy to a look behind the scenes at all the preparation that goes into these huge company wide events. The amount of preparation and rehearsal is incredible! I also present a suite of products at the event, which means I get to play with new stuff!! I will get to share what I’ve created after the event is over, so come back to visit the YamStamps blog and you’ll see what I have been up to! The other bonus about going to this demonstrator-only event – we get a peek at the NEW catalogue!!
If you’d like to get a copy of the new catalogue when it’s released – you can complete this form to get on my mailing list. OR….if you purchase a Demonstrator Starter kit, you’ll be able to check out the new catalogue online in a week’s time!! You can get more information about the starter kit here.
One last note – the YamStamps Monthly Projects newsletter goes out today at 1pm Eastern to subscribers! The name of the winner of my Birthday Celebration will be in there, too! Subscribe here to get weekly updates, information and inspiration! See you in your inbox later today…
Mar 29, 2018 | cards, Sale-A-Bration, Stampin' Up!
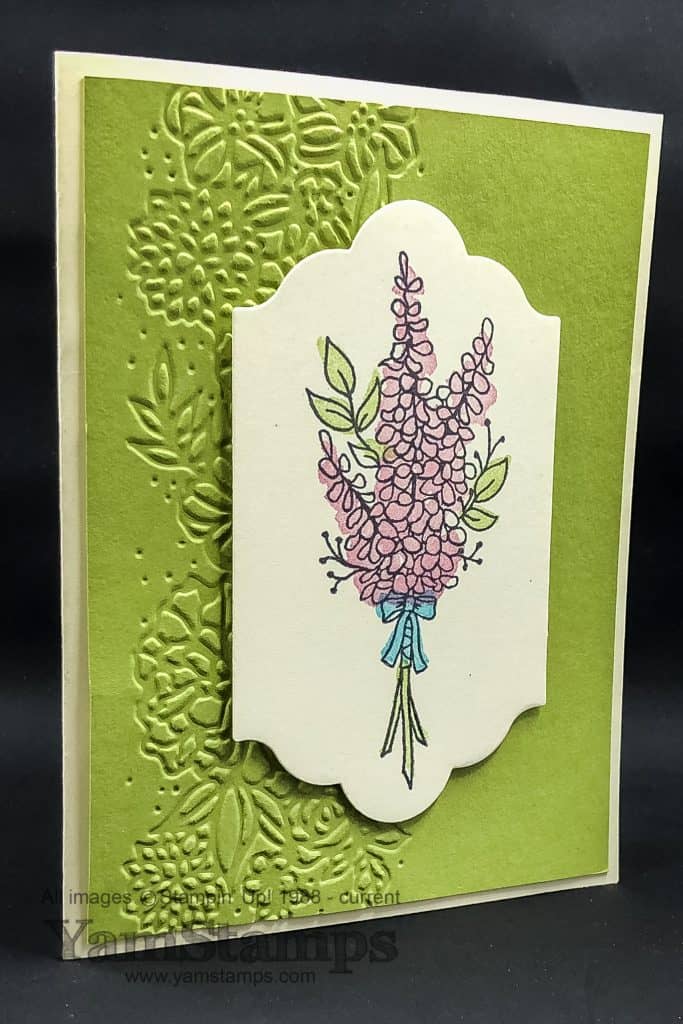
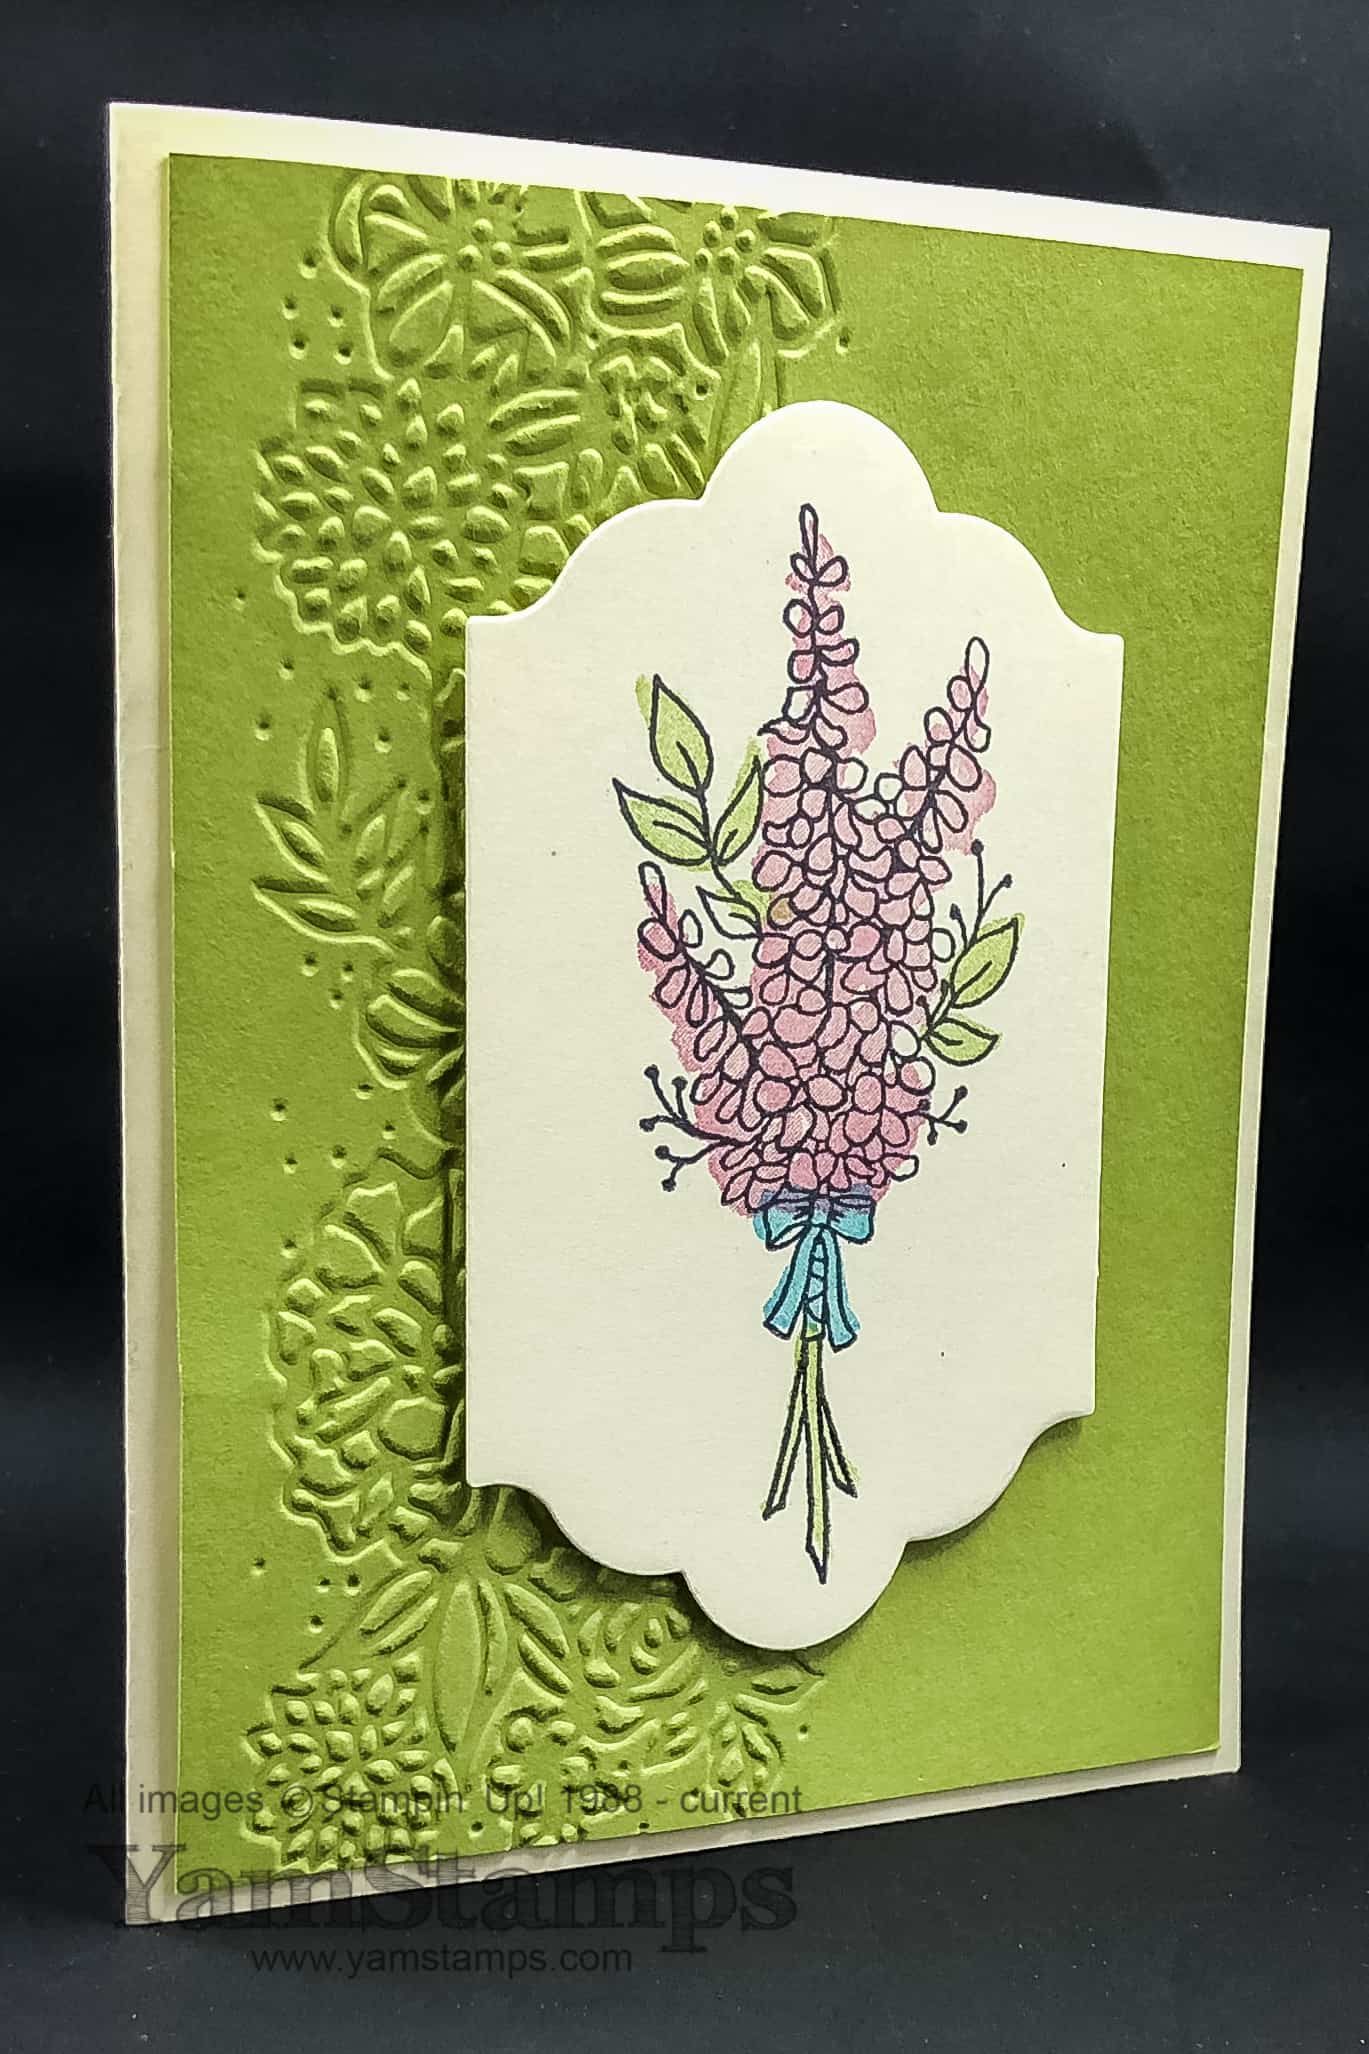
This Lots of Lavender Card is easy to recreate – but you’ll have to grab the stamp set before March 31st! Lots of Lavender is one of the Stampin’ Up! Canada Sale-a-Bration choices with each $60 in product order before the end of March. It’s two step stamping, which means that the outline is one stamp and the coloured portions are another. Technically is this 3 or 4 step stamping?? I placed the leaves on the same block, but did the flowers, ribbon and stems individually. I love how the colour isn’t perfectly lined up with the outlines – it makes it more artistic…and quite frankly, easier to stamp!!
The background is embossed with one of the Petal Pair Embossing Folders – and these two folders are now available as a Sale-a-Bration choice! When Sale-a-Bration is over, they will continue to be available for purchase, as they are featured in the “Occasions” Catalogue.
There are just 3 days left to take advantage of the great offers during Sale-a-Bration – free product with your purchase, and free stamp sets with a Demonstrator Starter Kit purchase. PLUS – become a demonstrator and get a sneak peek at the new Annual Catalogue in APRIL! Don’t forget my special offers for the end of Sale-a-Bration and my birthday week: Place an online order and use Host Code CS2YEX9S to receive a tutorial bundle via email at the end of the month. Everyone placing orders by March 31st will receive a little extra “biing” from me (under separate cover), PLUS be entered into a draw for a Big Shot or a set of Stampin’ Write Markers! If you purchase a starter kit through me, you’ll get two entries into the draw! If you want more information about becoming a demonstrator in my group, click here. If you have any questions, or need assistance placing an order, please feel free to contact me! Happy End of Sale-a-Bration!
Mar 26, 2018 | birthday, Business Opportunity, cards, contest, Sale-A-Bration, Stampin' Up!
 C
C
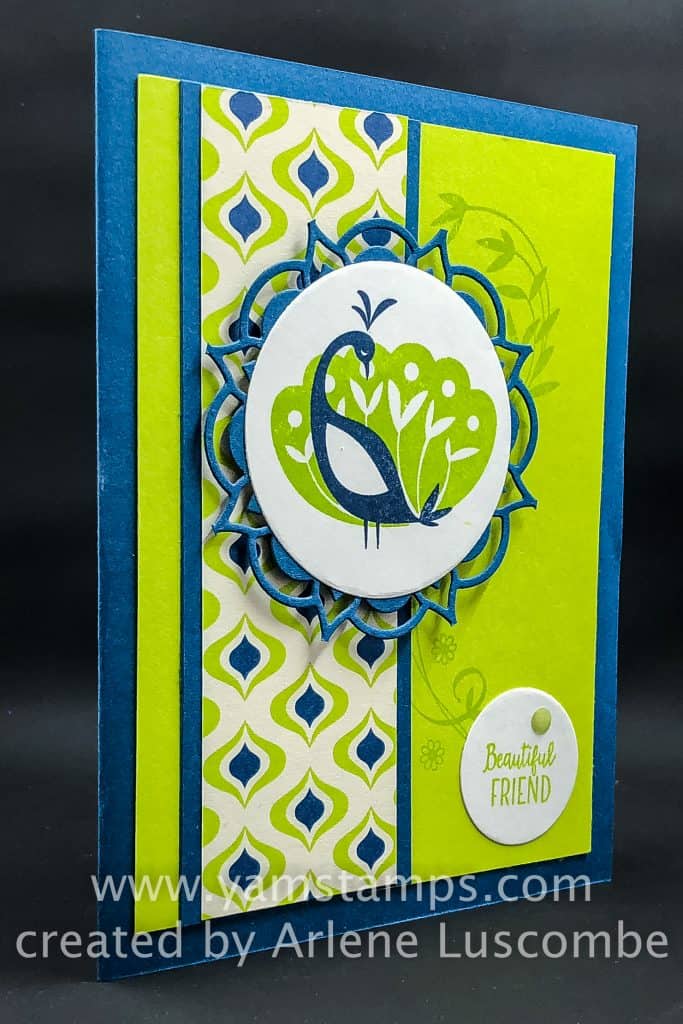
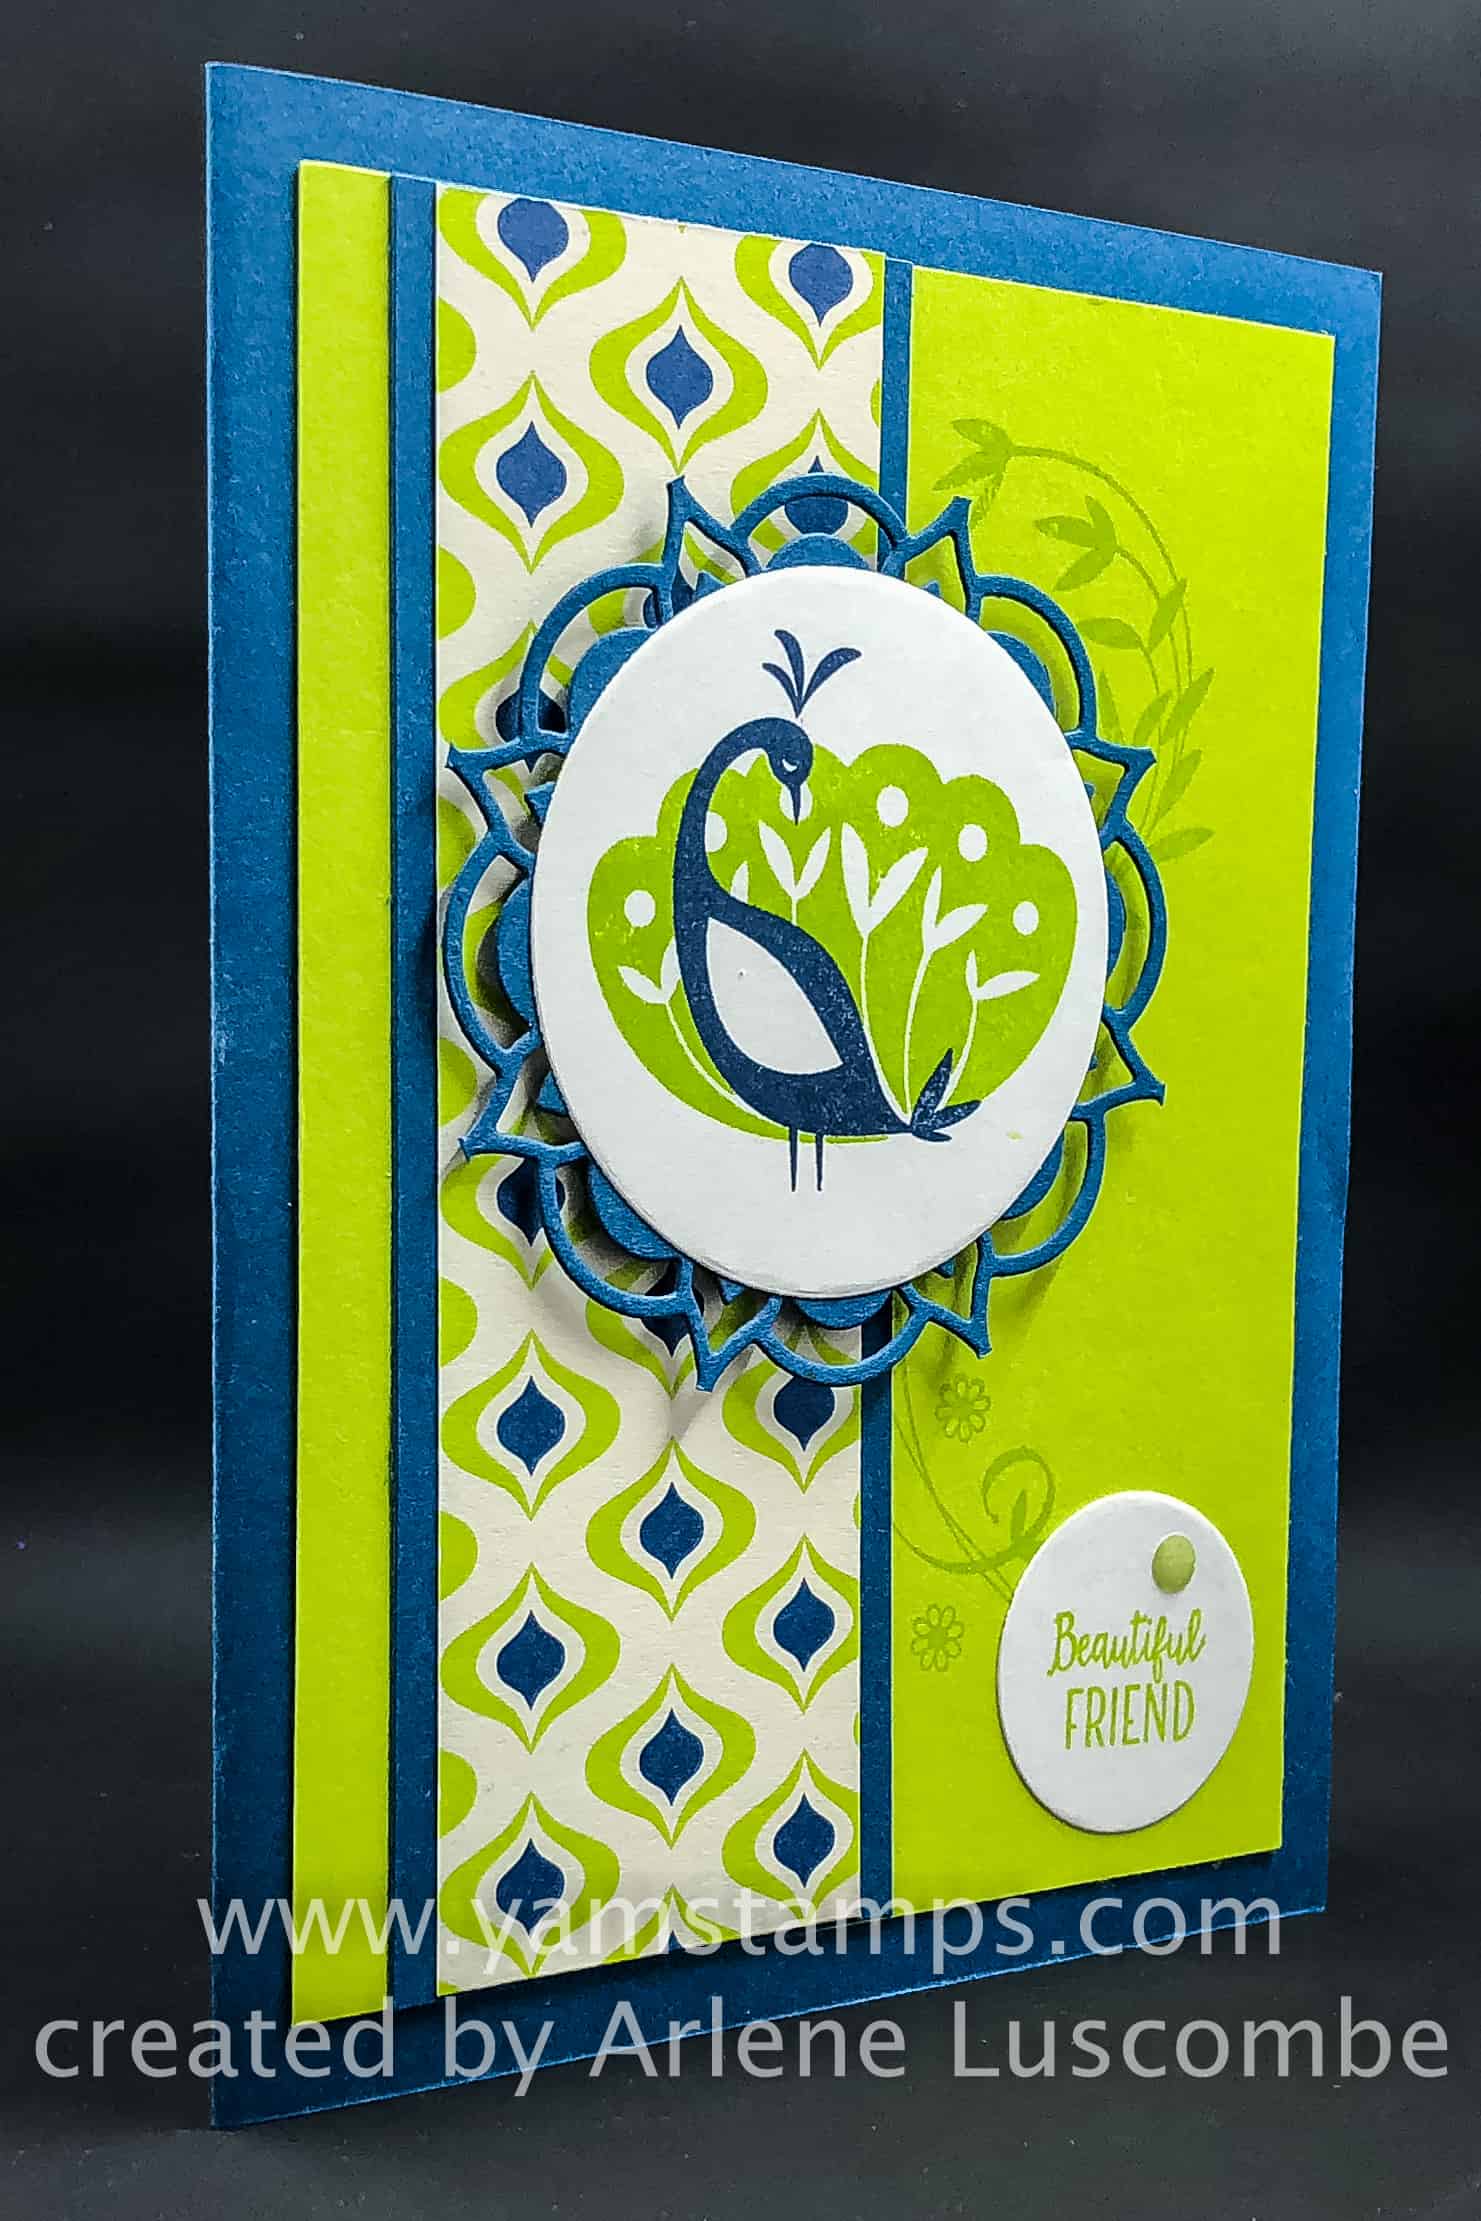
Isn’t this a great card? It was sent to me by one of my demonstrator team members, Arlene. Arlene was a longtime Stampers Club member who took the plunge just over a year ago and joined my team of demonstrators (we’re called the “Eh” Team!) – and her business is going great! Not bad for someone who was just looking to do something extra during the off season from golf…LOL. This gorgeous card features the Sale-a-Bration set Beautiful Peacock, and combined with a little Eastern Palace Designer Series Paper and Eastern Medallions Thinlits Dies for this gorgeous result. (Check the YamStamps Facebook Page a little later to see another card using these products from another friend!).
I’m looking to celebrate all this week – well, at least until the end of the month, so you get the presents! Here’s how to get in on the birthday gifting….
1) Place an order before the end of the month, and receive a little extra “bling” from me (under separate cover, in most cases…) AND an entry to a draw for either a Big Shot or set of Stampin’ Write Markers!
2) If you place your order ONLINE HERE and either use host code CS2YEX9S OR place an order of $200 or more (which qualifies for Stampin’ Rewards), I’ll also send you a tutorial bundle at the end of the month via email
3) Join my group of demonstrators by the end of the month – receive the bling and tutorials AND an extra draw entry! More information on joining my group here.
Just a word of warning – PLEASE don’t leave it to the last minute! Traditionally the Stampin’ Up! site gets bogged down on the last day of Sale-a-Bration (this year – March 31st) – because everyone is trying to get in before the deadline! (Fine print – promotion valid only through me, and offer open to Canadians only due to Stampin’ Up! regulations)
If you have any questions, or need assistance signing up or placing an order, please feel free to contact me.
Mar 20, 2018 | birthday, cards, Sale-A-Bration, Stampin' Up!
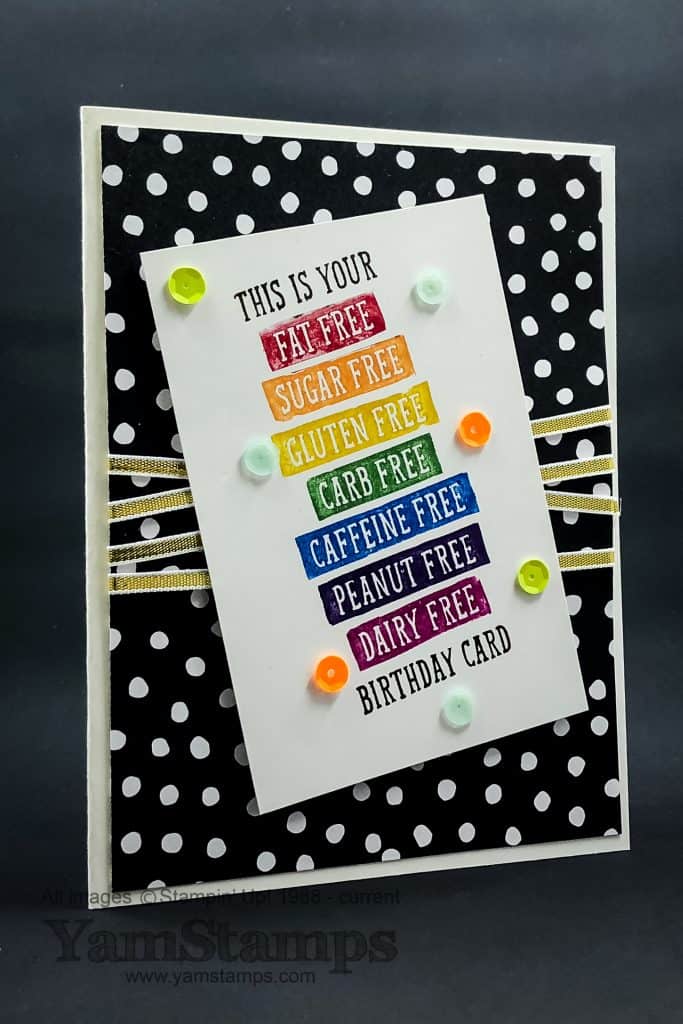
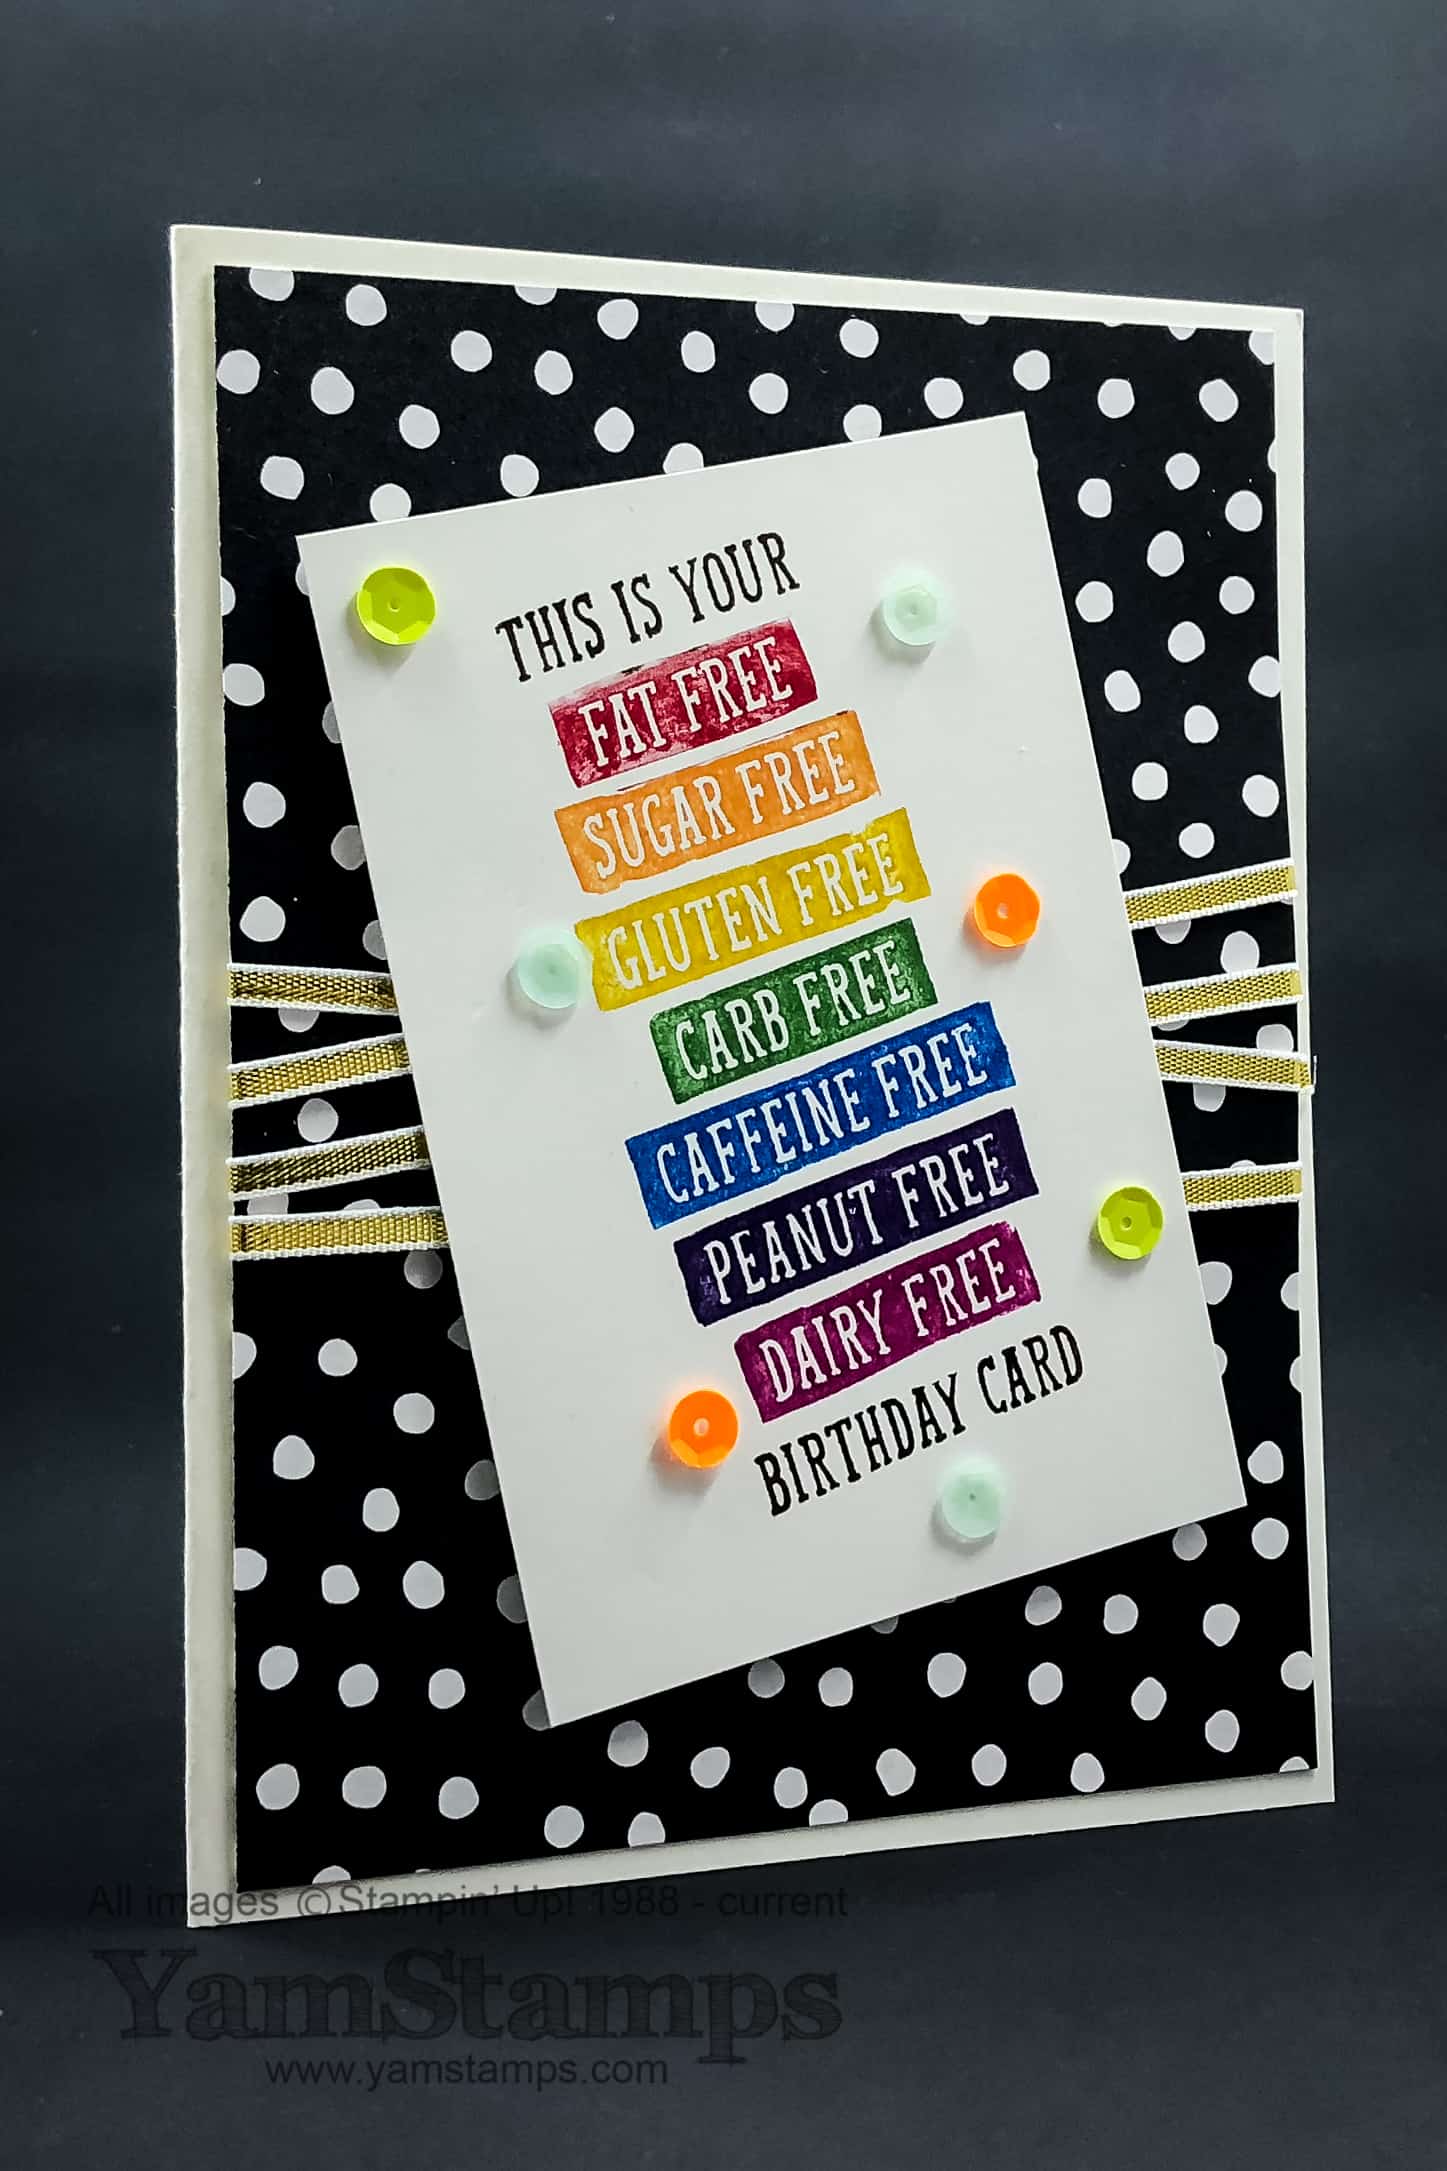
When my friends and I get together to celebrate a birthday, there’s always lots of laughter. This Birthday Wit Card – using Stampin’ Up!’s Birthday Wit set (available in wood mount or clear mount) is perfect for my birthday card needs. It’s got a number of funny sentiments perfect for birthday cards – this is just one of them. Plus, you can get one of the items on this card for FREE as part of the last batch of Sale-a-Bration choices – do you know which one?
To create the rainbow effect on the sentiment, I used the brush end of the Stampin’ Write markers to colour directly onto the ruber portion of the stamp. Top to bottom, colours are Early Espresso, Real Red, Pumpkin Pie, Crushed Curry, Garden Green, Pacific Point, Night of Navy…and I think Rich Razzleberry….and then Early Espresso again. “Huff” on the stamp (breathe like Darth Vadar) to make sure the ink is moist and then stamp onto your cardstock. Here’s a cheater tip for you – if you adhere your image on an angle, noone will be able to tell if your image isn’t perfectly aligned on the cardstock itself. (Now you are all looking at the image to figure out if it’s straight or not, aren’t you….) I did that on purpose, really. The Tutti-Frutti Adhesive Backed Sequins easily add a little bling to the card as does the Gold 1/8″ Ribbon, (regular item / Sale-a-Bration item) which is included in the latest list of options for Sale-a-Bration freebies! Please note that there are DIFFERENT item codes for the non-exclusive Sale-a-Bration items (that is, items that you can also purchase individually) so be sure to use the correct code if you are placing an online order (otherwise you will end up buying it rather than getting it for free!). The background paper is one of the patterns from the Petal Passion Designer Series Paper from the Occasions Catalogue. I think the black and white is a great background for the colourful main image.
Don’t forget that Sale-a-Bration ends at the end of March, and you don’t want to miss out on grabbing some freebies! Place an online order of $200 or more OR using the host code CS2YEX9S and you’ll receive a bundle of exclusive tutorials via email! Please contact me if you have any questions or need assistance placing your order.
Mar 13, 2018 | Announcements, Sale-A-Bration, specials, Stampin' Up!
Surprise! Stampin’ Up! Is giving you a few more options to Sale-a-Brate while you can! These are catalogue items with special item numbers so that you can get them for free with a $60 or $120 product order. Check out the image below or click here to download this flyer.
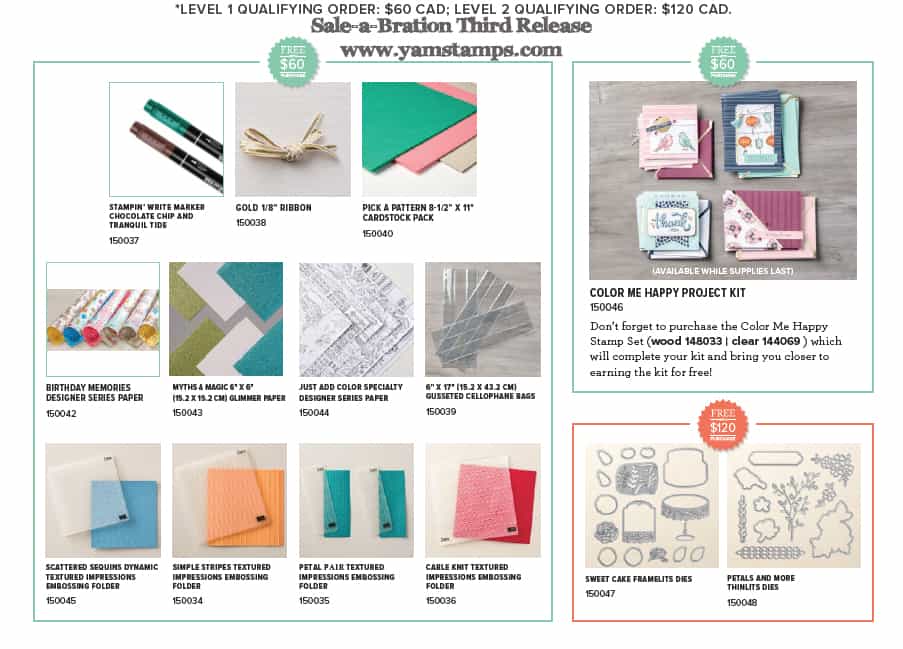
There are some GREAT options here so contact me to grab some freebies while you can – or shop online 24/7 in Canada in the YamStamps Stampin’ Up! Canada Online Store – residents of Quebec, please contact me directly to place an order. Happy last few weeks of Sale-a-Bration!
Mar 9, 2018 | cards, Frugal Friday, Occasions, Retired List, Stampin' Up!
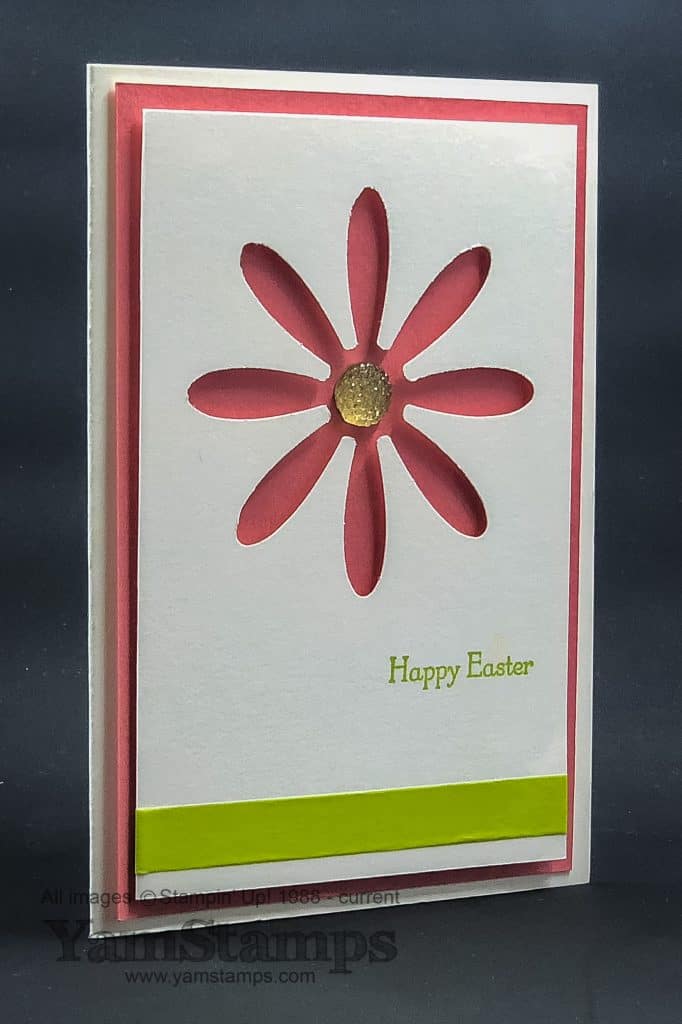
Every once in a while I like to do a “Frugal Friday” post – so today’s post features a Daisy Punch Out Card. This card is in the frugal category because the negative space is the part featured on this card – so that you can use the flower for another project – or to decorate the envelope or a package.
This card uses Flirty Flamingo cardstock as the backdrop. Flirty Flamingo is one of Stampin’ Up!’s 2016-2018 In Colours which will be retiring at the end of May. If you love one of these colours, you will want to stock up ASAP – including a reinker for that ink pad. That way, you’ll be able to use the colour for quite a while! I would recommend grabbing your supplies sooner rather than later, because retiring product like cardstock, accessories and ink pads are available while supplies last once they’re officially on the retiring list – as opposed to most of the stamp sets which usually have guaranteed availability to closer to the end date of the catalogue. The Daisy Punch is used on a piece of Thick Whisper White cardstock which is accented with a stripe of Tutti Frutti washi tape. The cardbase itself is actually one of Stampin’ Up!’s notecards. You can get a set of 20 Whisper White Notecards and Envelopes which are 5″ x 3.5″ – a little smaller than the half sheet cards that we traditionally make, but still within Canada Post mailing requirements. The centre of the flower is a large Gold Faceted Gem, which doesn’t stick out too much because the punched out cardstock is mounted with Stampin’ Dimensionals. The sentiment, stamped in Lemon Lime Twist is from Teeny Tiny Wishes (available in wood mount or clear mount) – one of the most functional stamp sets because it covers SO many different occasions! We made this card in the Monthly Card Class the other day and other options chosen included “Just For You” and “Happy Birthday”.
If you live in the Halton region, you may have been able to catch me on YourTV’s Halton News TV Program earlier in the week. I’m working on getting a copy of the short segment so I can post it to the YamStamps YouTube channel. It was a very quick card (actually using the Daisy Punch!) since it was a quick spot – mentioning the fact that it’s International Craft Month! Thanks to Jessica and everyone who works on the show for having me. It’s always a fun experience! In the meantime, I hope that you will celebrate Craft Month by spending a bit of time crafting – obviously I’m biased towards paper crafting….but anything creative is good! If you need a little help kick starting your creativity and crafting, consider joining me at one of my Monthly Card Classes, or join the Stampers Club for some regular craft time (and freebies)! See the YamStamps Events page for details. Please contact me if you have any questions or to register for an upcoming event!
Mar 5, 2018 | Paper Pumpkin, specials, Stampin' Up!
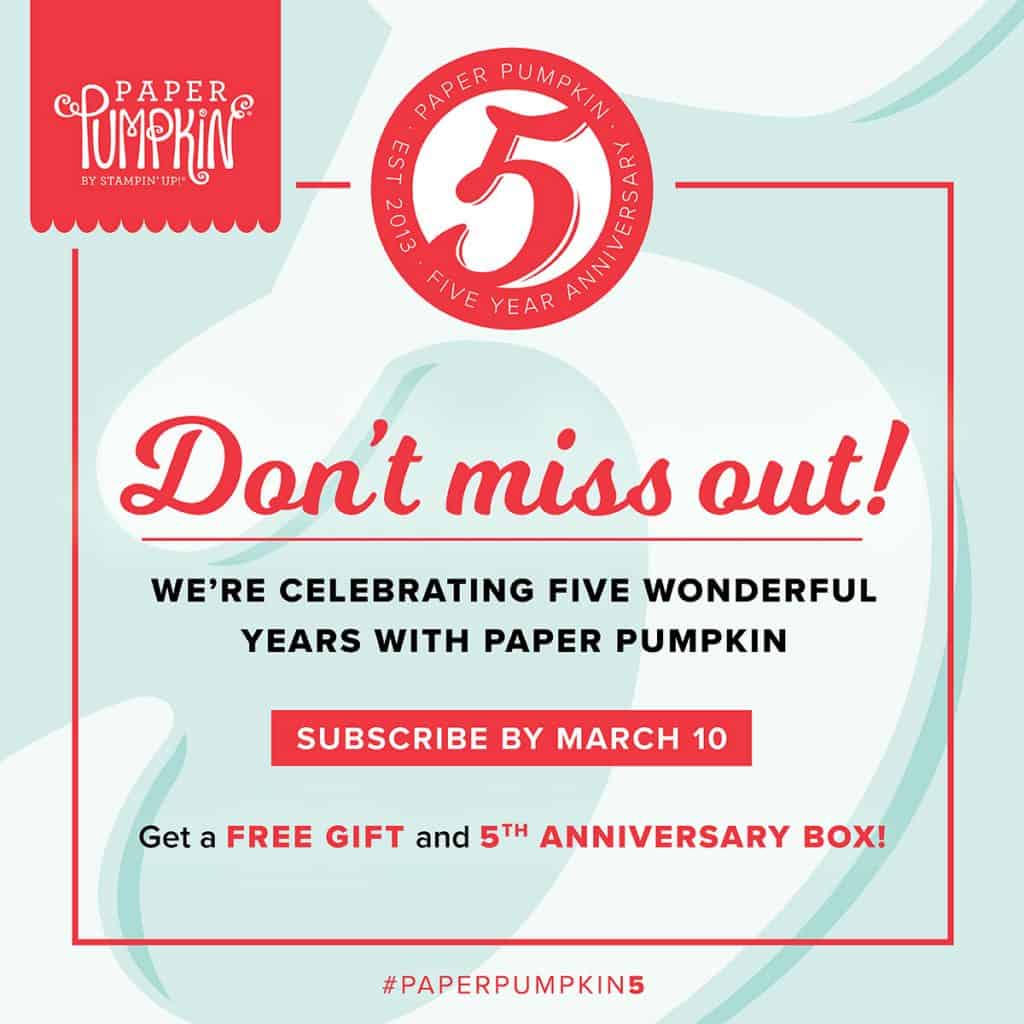
Paper Pumpkin is turning 5 – and subscribers get the free gift! In March, Stampin’ Up! is celebrating 5 years of Paper Pumpkin, the monthly subscription craft kit. If you’re subscribed by March 10th, you’ll receive a free gift in the special fifth anniversary box that will be sent out starting March 11th! If you purchase a multiple month prepaid subscription, you’ll also qualify to receive Sale-a-Bration rewards! Click on the link to purchase a subscription, or click here for more information / FAQs about Paper Pumpkin.
Paper Pumpkin subscribers also get to purchase past kits and refills when they are available – here’s a cute one from July 2017 that’s called Positively Picturesque.
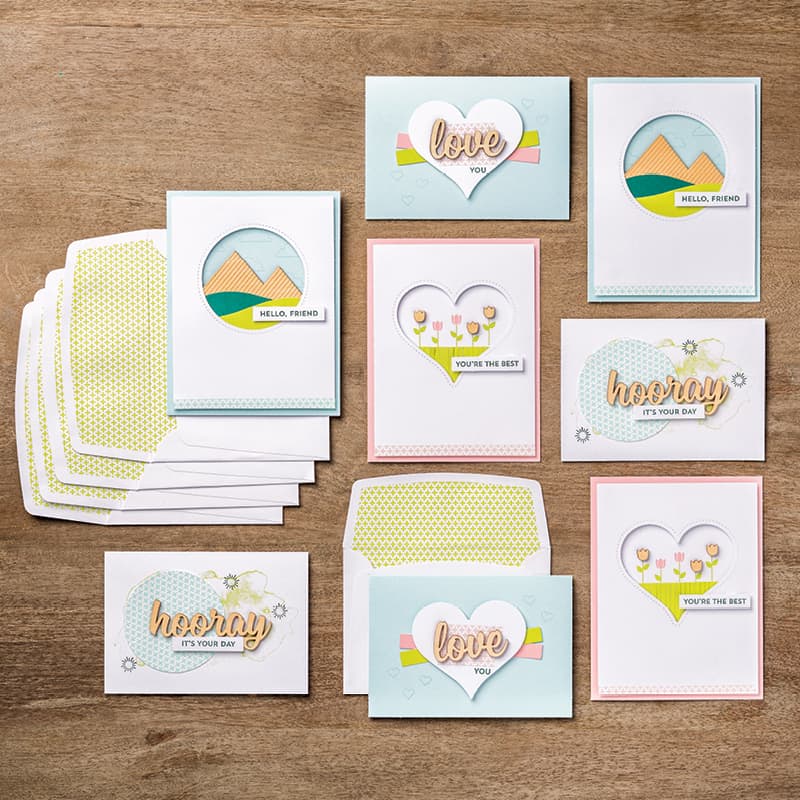
If you’re a new subscriber, you’ll receive a clear block in your first kit to use with all your upcoming Paper Pumpkin kits. From then on, each kit will be a “stand alone”. The kits include all the supplies needed to complete that month’s projects – stamp set, ink(s), accessories (such as pearls, twine, sequins etc), adhesive (glue dots and dimensionals are usually in each kit, but I like to use my own SNAIL adhesive if I can), and of course the consumable supplies – cardstock, envelopes, papers, stickers etc. It varies from month to month depending on the project. Kits can be for cards, packaging, tags, giftables/3D items… and you can choose to follow the instructions – or not! It’s up to you. I always find that there’s plenty of “extras” left over (stickers, die cuts etc) that I can use to further embellish the month’s projects, or use on my own projects.
Oh – and before you ask, demonstrators don’t know what the March free gift is, so don’t ask us. (Trust me, the lack of knowledge is not for lack of trying! haha). I will just have to wait for my March kit to arrive! I did post the “unboxing” of the February Paper Pumpkin kit in the YamStamps Facebook Group, so will likely do so for the March kit as well – so don’t watch the video if you want to be surprised!! The YamStamps Facebook Group is something new – started because people were finding even though they have “liked” the YamStamps Facebook page, they weren’t always getting to see updates from the page itself. By hosting a group as well, the hope is that the group posts will be seen more regularly. I will post to both areas, but some things will be exclusive to the group, so please come and make a request to join us.


 C
C