Nov 28, 2008 | scrapbooking
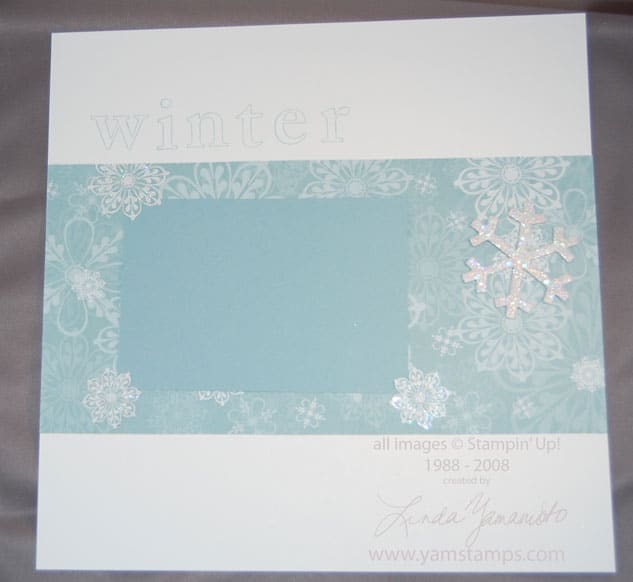
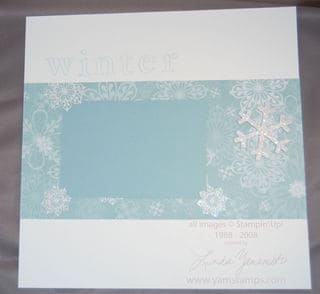 This is one of the recent scrapbooking club layouts that we did – featuring that glittery snowflake I showed you my experiment on earlier. I am still working on my photo skills, this one is skewed funny, but I couldn't seem to fix it with photoshop. (Not a photoshop issue, more like a user issue!! lol). Anyway….we used the Ski Slope Designer Series Paper – love this particular pattern in baja breeze. The letters are the outline alphabet, stamped in baja breeze.
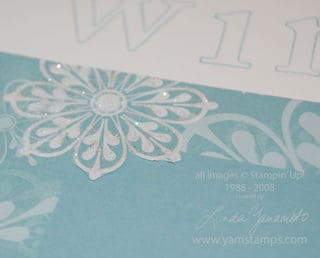 On this particular paper, we were able to use three of the snowflakes like photo corners. Using the craft knife, we trimmed around a few of the portions of the snowflake and a 4.25" x 6.25" cardstock piece fit in perfectly. We also jazzed it up a bit by adding Dazzling Diamonds glitter with some Two Way Glue. Those who have attended classes or workshops with me will know I'm not big into fussy cutting, but sometimes it's worth the effort!!
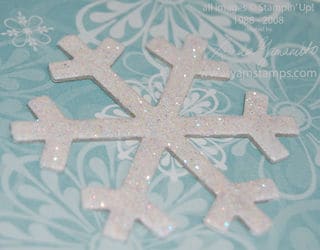 A closer shot of the chipboard snowflake – coated with whisper white craft ink, then heat embossed with heat and stick powder and coated with more Dazzling Diamonds glitter. This photo still doesn't do it justice…
It was a very glittery evening!
Sep 28, 2008 | rubber stamping, scrapbooking
 Club projects this month featured a technique called "Cracked Glass". We stamped an image, coated the cardstock with versamark and then repeatedly heat embossed with Glassy Glaze, an ultra chunky/thick embossing powder. If your image is small enough, you can melt your powder, then dump more on right away and it will "stick" until you reheat the image and melt the next layer of powder. If you can't manage working at that speed, or if your image is larger, it may be easier to simply allow the cardstock to cool slightly, then re-ink with versamark and re-coat with the Glassy Glaze. As for me, well, if I can skip that extra stage….I will!!

Once your image has a good thick layer (about 3-4 coats), stick it in the freezer where it will curl up slightly. After about 10-15 minutes (minimum), take it out and immediately bend and manipulate (not TOO rough though), and the embossed layer will crackle, giving you the cracked glass effect. If you want it to be even more pronounced, you could gently sponge ink over top to get stuck in the cracks (creamy caramel could give a nice "antiqued" look).
These projects feature the Pocket Silhouettes stamp set – on sale for 15% off but ONLY until the end of September (that would be TUESDAY)! Contact me if you'd like to place your order – or try the online ordering feature at my business website – www.yamstamps.stampinup.net !
May 25, 2008 | scrapbooking
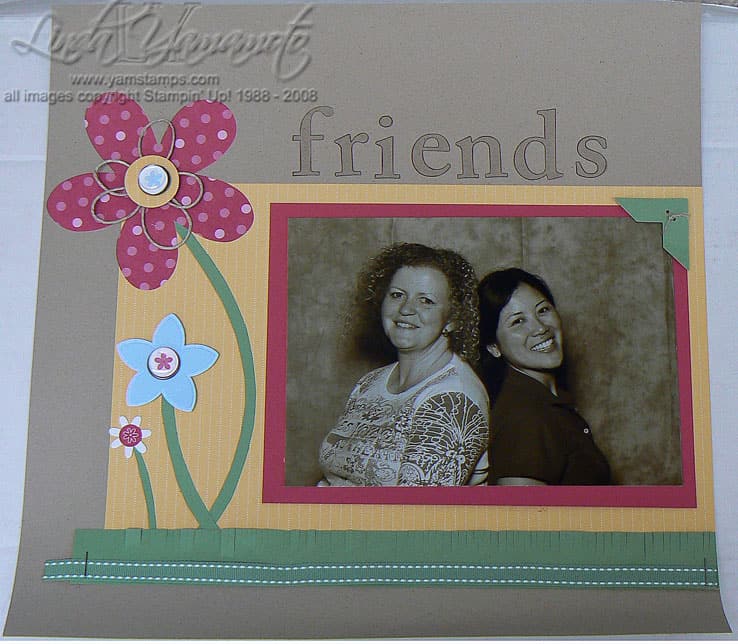
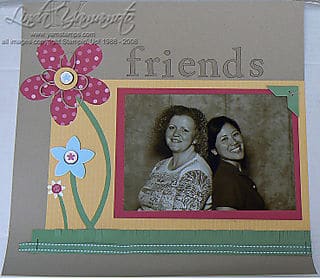 This is a scrapbook page created at last year's Stampin' Up! Convention. My friend (and "upline") Sue and I attended together – we celebrated 5 years as Stampin' Up! demonstrators. This page was a little curled at the bottom from being propped up in my stamping/scrapping room… The word friends is stamped with the jumbo outline alphabet (page 155 in the Spring – Summer Collection), and then coloured in with a versamarker! Loved this effect. The flowers are from Build A Flower Accents and Elements (p 177) – which come in those fantastic, "alterable" hinged tins. There are build-a-brads (p 189) in the centre of the 2 larger flowers. Must use those build-a-brads more, and stop hoarding them!! A fringe of wild wasabi acts as grass. I'm looking forward to seeing what we'll be doing for "make and takes" at this year's convention, celebrating 20 years of Stampin' Up!
I'm looking at starting a scrapbooking club in the next little while – are you interested?? If you're in the area of Hamilton, Burlington or Oakville, contact me for more information! It will run like my current Stampers Club. Space is limited.

 This is one of the recent scrapbooking club layouts that we did – featuring that glittery snowflake I showed you my experiment on earlier. I am still working on my photo skills, this one is skewed funny, but I couldn't seem to fix it with photoshop. (Not a photoshop issue, more like a user issue!! lol). Anyway….we used the Ski Slope Designer Series Paper – love this particular pattern in baja breeze. The letters are the outline alphabet, stamped in baja breeze.
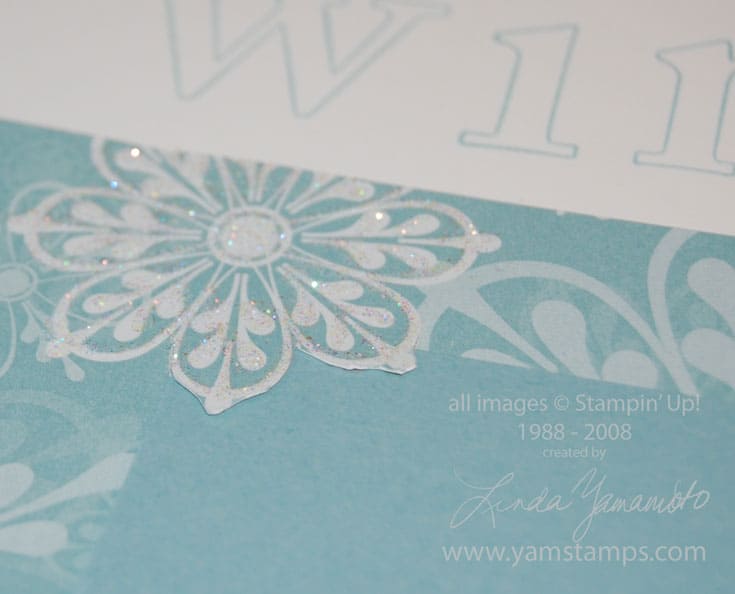 On this particular paper, we were able to use three of the snowflakes like photo corners. Using the craft knife, we trimmed around a few of the portions of the snowflake and a 4.25" x 6.25" cardstock piece fit in perfectly. We also jazzed it up a bit by adding Dazzling Diamonds glitter with some Two Way Glue. Those who have attended classes or workshops with me will know I'm not big into fussy cutting, but sometimes it's worth the effort!!
 A closer shot of the chipboard snowflake – coated with whisper white craft ink, then heat embossed with heat and stick powder and coated with more Dazzling Diamonds glitter. This photo still doesn't do it justice…


