Apr 30, 2008 | rubber stamping
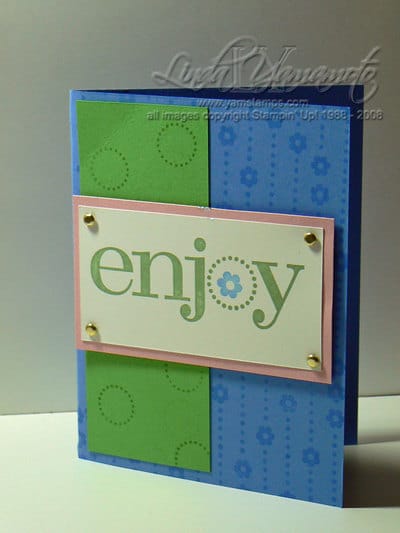 Another recent class sample (note to self: do photos BEFORE class next time! LOL – this one was loved during class, so is not in quite pristine condition from being picked up & examined a number of times…but that’s what the class samples are for!! I tried photo shopping the image but I’ve still got to work on my skills there…anyway)
This uses the the daisy dash jumbo wheel (p 51, Stampin’ Up! spring-summer collection), with ballet blue ink, in combination with the coordinating stamp set, Enjoy Every Moment (also on p 51). The card is ballet blue; green galore, pretty in pink & whisper white. I stamped the word & circles in wild wasabi, which coordinates with the green galore (in my opinion, at least! LOL) and the small flower is again in ballet blue. Gold brads finish off the card.
Stampin’ Up!’s Free Wheelin’ Promotion ends today, but have no fear, there’s some more great promotions for May!!! Stay tuned right here – www.yamstamps.com – for more information tomorrow! (Can you believe it’s going to be MAY already?!)
Apr 28, 2008 | 3D samples, Tutorial, TV/Video/Web/Tech
TADA! The promised video is here….this is as good as it gets at this point in time… I’m going to have to work on the lighting and the audio for future videos, though – because the camera is behind me, my voice didn’t pick up very well. (hard to believe, I know); I tried brightening the video and think perhaps I overdid it…ah well, it’s a learning curve. Hopefully this will inspire you to try this project – just in time for Mother’s Day!
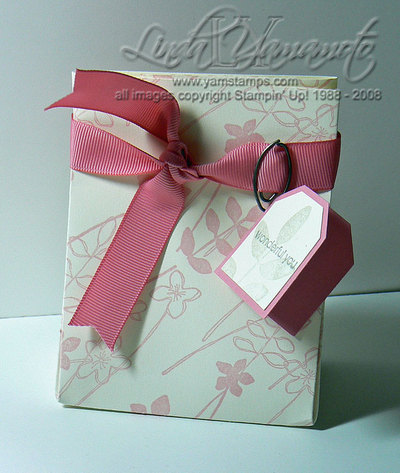
This coordinates with the Wonderful You watercolour card from my last post… Ingredients are all Stampin’ Up – Very Vanilla cardstock (8.5 x 11), Stems & Silhouettes jumbo wheel with Pretty in Pink jumbo cartridge, rose wide grosgrain ribbon, pewter hodgepodge; for tag – Wonderful You stamp set, Mellow Moss ink, Going Grey ink; small & large tag punches; vanilla & regal rose cardstock.
Here’s the photo of the project, because it doesn’t get shown off as well as it should… (click if you need to see a larger version)
And…here’s the video. Feel free to leave (gentle!) feedback here on the blog.
Apr 26, 2008 | rubber stamping
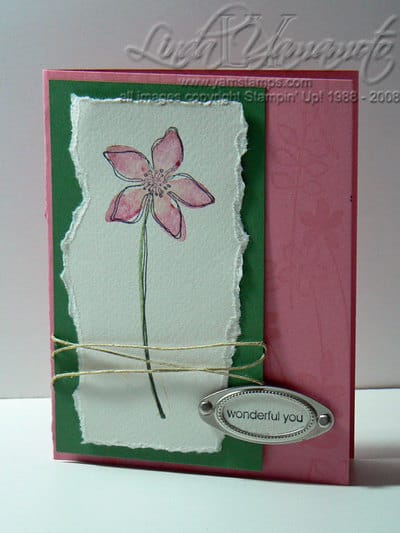 Anything using watercolours always makes me feel so "artsy" despite the lack of my visual arts educational background.
This card uses the set "Wonderful You" (p 91 of Stampin’ Up!’s current Spring-Summer Collection) and the coordinating jumbo wheel, Stems & Silhouettes (p. 91 as well). To do the watercolouring, I spritzed water across the rubber surface of the solid stamp, then coloured directly onto the rubber with my watercolour crayons (p.183) – Love these crayons. I gave another light spritz of water and then stamped onto watercolour paper. The absorbancy of the watercolour paper means I don’t have to wait _too_ long… I stamped the outline of the flower in basic grey, and used my stamp-a-ma-jig to make sure the images lined up well. Tore the edges of the paper, mounted onto some garden green cardstock & wrapped with natural hemp twine. I stamped "wonderful you" in basic grey onto a scrap of watercolour paper, punched with the small oval punch & used the small oval frame from the silver hodgepodge hardware (Occasions mini). After using the jumbo wheel on the cardstock, I assembled everything. I actually used stampin’ dimensionals to attach the silver frame to the cardfront as I didn’t want the backs of the brads to be showing through the card.
OK so here’s the reality of my lack of advanced visual arts education….the colours I used on the flower blossom in the picture are regal rose & rose red (so, essentially coordinating shades of the same base colour). My first attempt (relegated to the recycling bin) was summer sun & ballet blue. Learn from me…..I ended up with a very murky, kind of khaki green coloured flower. Not so wonderful! LOL.
Stampin’ Up! just announced that the Occasions mini will now be active until the end of JUNE! (so ignore the May date on the cover! LOL) – the new big catalogue will be out in August, so they’re shifting the dates around a little bit. More time to shop! If you do want to take advantage of the free wheelin’ promotion, though, you still only have until the end of April, so please contact me before then!!
Apr 20, 2008 | rubber stamping
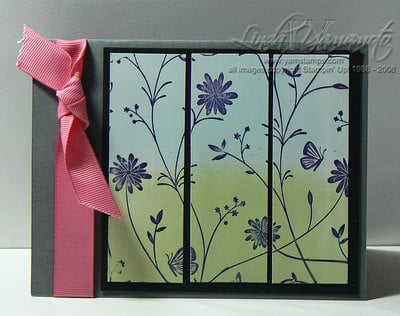 I know you’re shocked… another quick & easy card from me! LOL.
The image on this card is Stampin’ Up!’s Pretty Petals stamp – it’s a large background stamp that can be the focus of a card without too much difficulty, I think. The card was inspired by a fellow demonstrator (but I can’t give full credit since I can’t actually find the original right now….again, shocking – NOT). Anyway – glossy white cardstock is brayered with two colours – in this case, soft sky & certainly celery, and the image is stamped in Basic Black onto this, then cut into 3 pieces. In this case, I cut the pieces evenly, but they could be cut in different widths and at different angles to give the card a different look. As long as you keep the pieces in the right order! The images were mounted onto basic black and the card is made from basic grey cardstock. I made a small notch at the card fold with my 3/4" circle punch to slip the rose grosgrain ribbon through to tie in the front, just to add a little extra colour & texture.
OK back to work! I’m coming up with some more ideas for my May class & workshops! (Don’t forget to RSVP if you want to attend my May class – date of class if Weds May 7th, but cut off for registration is May 5th).
Apr 15, 2008 | Announcements
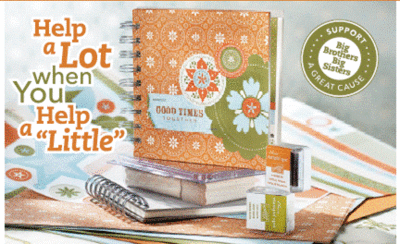 This is a GREAT promotion, to benefit a Canadian organization! For every Loonies for Littles kit sold ($32.50 adjusted price), Stampin’ Up! will donate $2 to Big Brothers Big Sisters of Canada – their in school mentoring program.
The Loonies for Littles Stampin’ Kit includes the following:
• Exclusive double-mounted Good Together stamp set
• One 5" x 5" On Board Art Journal
• Two sheets of double-sided Designer Series paper from Boho Blend
Simply Scrappin’
• Three sheets of self-adhesive die cuts from Boho Blend Simply
Scrappin’
• Four sheets of 12" x 12" textured card stock
• Two Classic Stampin’ Spots: 1 Old Olive, 1 Pumpkin Pie
• Full-color insert with photos of projects, along with step-by-step
instructions
• One Craft Keeper
I personally am especially thrilled that one stamp features the "correct" spelling for "FavoUrite" 🙂 Yay Stampin’ Up! If you’d like to get in on this special, please contact me before May 31st to help support a great cause.
 Another recent class sample (note to self: do photos BEFORE class next time! LOL – this one was loved during class, so is not in quite pristine condition from being picked up & examined a number of times…but that’s what the class samples are for!! I tried photo shopping the image but I’ve still got to work on my skills there…anyway)


