I was invited to be part of Morning Live’s Wedding Wednesdays this past week, and I had so much fun preparing for the spot! Too many ideas for the time slot, so I will have to share some here on the blog as well. In case you missed it, here’sthe video from my YamStamps youtube channel.
Thank you once again to Annette Hamm, the crafty co-host of Morning Live, to Carla, and to all the cast and crew at the show – and I promise to work on my timing – so I fit everything in!!
I’m set to show all sorts of fun items that you can make for your wedding day on CHCH TV’s Morning Live program at 9:15 today. I’m so appreciative of the opportunities that the cast & crew have given me to share papercrafting ideas and tips! When I was asked to participate in the show, I immediately started imagining all sorts of projects that I could share….but I need to keep it to a time limit and not overwhelm the viewers (to say nothing of myself!!). So I’m trying to keep it to the point, which in my case, is coordinating your stationery through colour, texture and/or images. If all goes according to plan, this post will appear just before I go onto air…
What I thought I’d do here on the blog, though, is share something else that you could use for creating wedding items (and something I’m not even planning on showing on TV….because we all know how that goes – I share it here and then don’t get to share it on TV because I run out of time!).
SO – I’m sharing some MDS products that you could use for your big day! I’m highlighting some digital downloads that you can purchase for use in MDS software or in photo editing software to create some professional looking DIY wedding stationery!
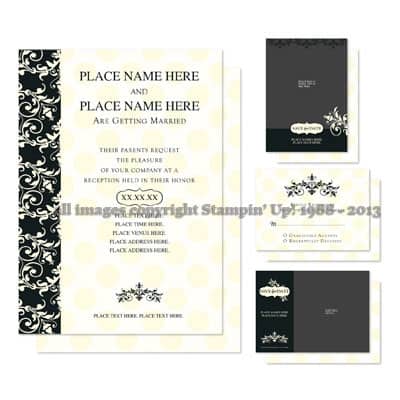
This is the Meant To Be Invitation Template. There is an invitation that you can customize to YOUR colours, and with your information of course! This template also includes a “Save the Date” card and RSVP card as well. You can edit and customize it, then send it to be professionally printed, or print it yourself! It’s a very classic style and the coordination helps present a unified theme.
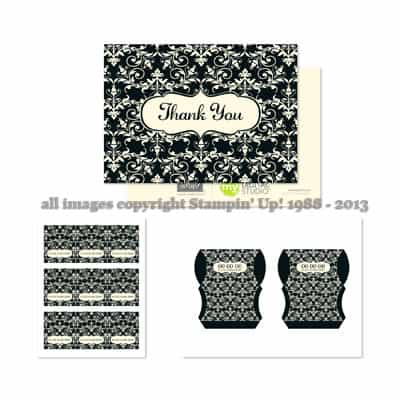
There is also a coordinating Meant To Be Ensemble that features a thank you card, place cards and a pillow box template for favours. Again, you can choose to have your items professionally printed, or print them yourself. In the case of the place cards and pillow boxes, I’d probably be tempted to do it myelf, for sure.
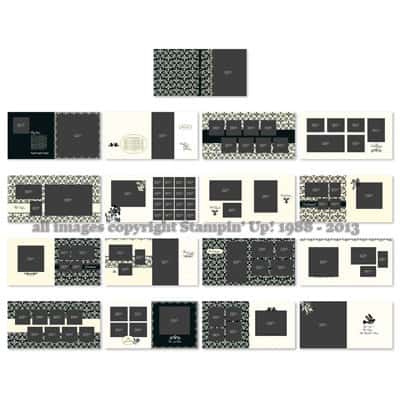
Last but not least, to preserve your memories, there’s a photobook template. Drag and drop your photos, add your text and get it printed.
All of these items can be used in MDS (the program formerly known as My Digital Studio) which only costs $24.95 (make sure you use the link and have me as your demonstrator to get that pricing, if you go through the Stampin’ Up! store, you’ll pay $27.72). The download files are also available for use in other software, such as Photoshop or other editing software that can manage .png files, so there’s flexibility in that. (You can download both types of files, too, so you aren’t locked in one way or the other!). Don’t forget that MDS has a free 30 day trial so you can play around with the program before you make a decision (but really, for the price of a few grande lattes, why wouldn’t you just buy the program?! LOL). As well, if you have questions once you’ve downloaded your items, just like an in-person customer of mine, I can follow up with you to see if you have any questions about the product, or need any tips.
As always….if you have any questions, feel free to contact me!
Just popping by to mention that I’m scheduled to be on air tomorrow around 9:15 am on CHCH TV’s Morning Live program, as part of Wedding Wednesdays. I’ve been having fun preparing mock ups of stationery that you can create for a wedding – love how papercrafting can help present a unified theme through colour, texture and images! The advantages to DIY – it’s a custom made item, and you can save some money – tune in tomorrow and I’ll share some ideas – and of course, I’ll post here as well after the show.
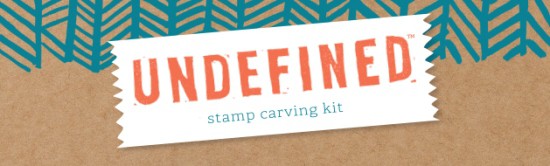
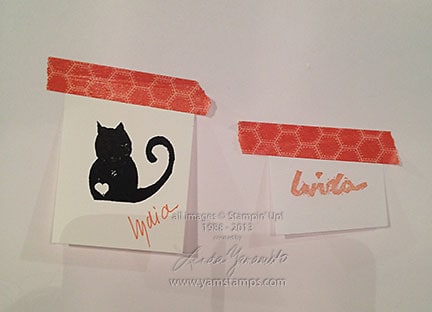
Stampin’ Up! introduced another new line while we were at Convention 2013. This is a stamp carving kit – so that you can create your own custom stamp! I remember doing linoleum block carving in grade school (do I date myself by admitting to that??!!) and this is like a smaller, easier version of that project. We were able to carve our own stamps at convention – I actually did a name stamp (which I was told afterwards was a more advanced project to tackle…might have been good to know that ahead of time!!!). I thought that writing my name was easiest, since I wasn’t feeling very artistic at the time.
So these are the results – mine is…obviously the one that says “Linda”….my friend Lydia is more artistic so drew a cat (I believe it’s a likeness of her cat named Splotchy…)
Did I mention that I actually won this kit as part of the “Prize Patrol”?! I got the complete kit, as well as some washi tape (looooove it) and some notecards and envelopes – so a complete little package ready for me to create something and send it off! The kit contains wood blocks, the carving tools, a stampin’ write marker, rubber and foam, plus a template (for ideas) and postcards.
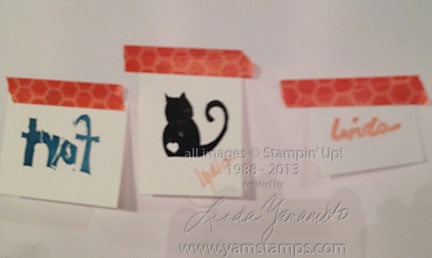
I post this next picture as a warning. The suggestion is that you draw out your idea in pencil onto a piece of paper, then you flip the paper over onto the rubber, and transfer the image by rubbing on the back of the paper and then carve. If, however, your image doesn’t transfer well, you may decide just to draw onto the rubber itself….but if you’re doing a word, you need to remember that the image you’re carving out should be in reverse….otherwise you’ll end up with….
THIS…..
LOL. My friend Dana’s artwork beside Lydia’s. The result is rather appropriate given what she was carving, don’t you think???

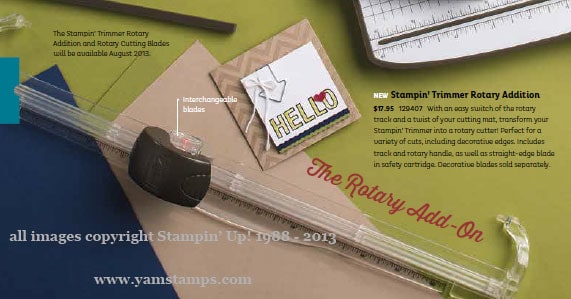 The rotary cutter attachment is now available for the Stampin’ Trimmer! Seen on page 176-177 in the Annual Catalogue, it features an arm that attaches onto the cutter base (your choice, metric or imperial measurements), and has changeable blades – a straight blade, a scallop blade, a wave blade and a perforating blade (from the Holiday Catalogue)! As well, you can get replacement cutting mats for the channel in the trimmer, to ensure you get a clean cut each time. So now this trimmer can cut, score and add a decorative edge to your cardstocks. See the whole collection HERE in my online store – shop 24/7 and have your order delivered to your door, anywhere in Canada! If you’re local to Burlington, you can also come to one of my classes or clubs and place your order in person, or by email. I’m here to enable….I mean “help”!! LOL.