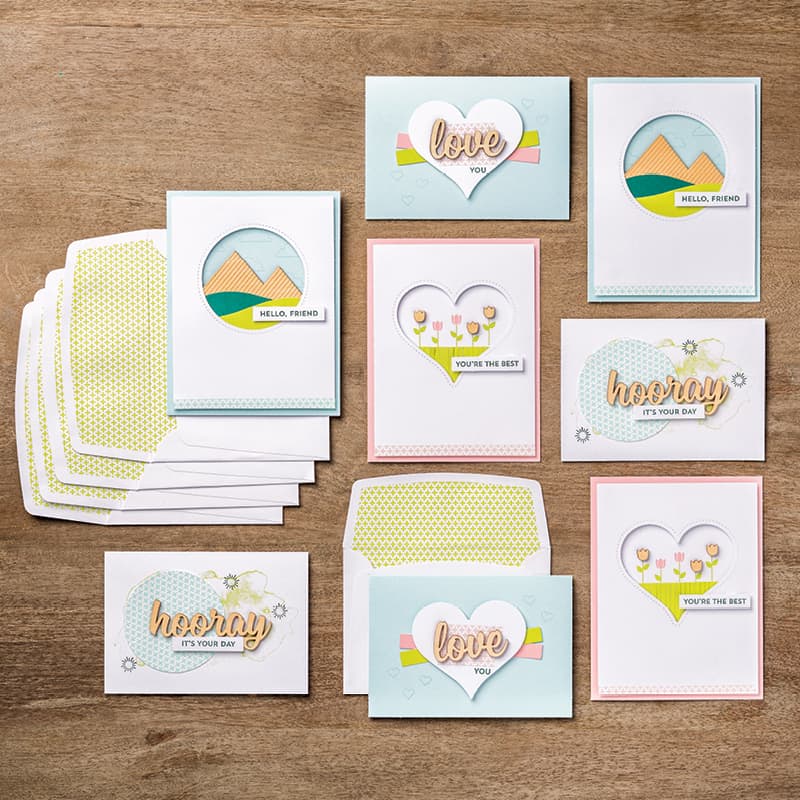
Paper Pumpkin subscribers also get to purchase past kits and refills when they are available – here’s a cute one from July 2017 that’s called Positively Picturesque.
If you’re a new subscriber, you’ll receive a clear block in your first kit to use with all your upcoming Paper Pumpkin kits. From then on, each kit will be a “stand alone”. The kits include all the supplies needed to complete that month’s projects – stamp set, ink(s), accessories (such as pearls, twine, sequins etc), adhesive (glue dots and dimensionals are usually in each kit, but I like to use my own SNAIL adhesive if I can), and of course the consumable supplies – cardstock, envelopes, papers, stickers etc. It varies from month to month depending on the project. Kits can be for cards, packaging, tags, giftables/3D items… and you can choose to follow the instructions – or not! It’s up to you. I always find that there’s plenty of “extras” left over (stickers, die cuts etc) that I can use to further embellish the month’s projects, or use on my own projects.
Oh – and before you ask, demonstrators don’t know what the March free gift is, so don’t ask us. (Trust me, the lack of knowledge is not for lack of trying! haha). I will just have to wait for my March kit to arrive! I did post the “unboxing” of the February Paper Pumpkin kit in the YamStamps Facebook Group, so will likely do so for the March kit as well – so don’t watch the video if you want to be surprised!! The YamStamps Facebook Group is something new – started because people were finding even though they have “liked” the YamStamps Facebook page, they weren’t always getting to see updates from the page itself. By hosting a group as well, the hope is that the group posts will be seen more regularly. I will post to both areas, but some things will be exclusive to the group, so please come and make a request to join us.
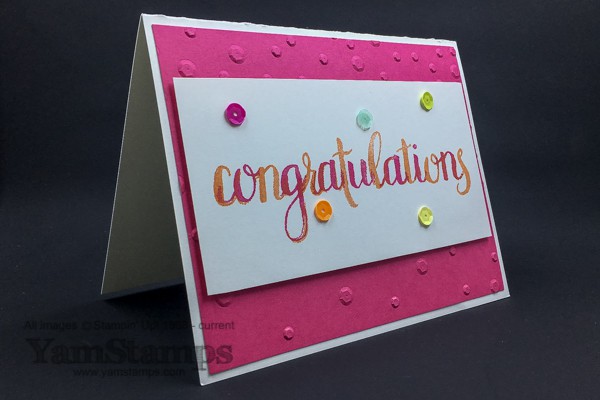
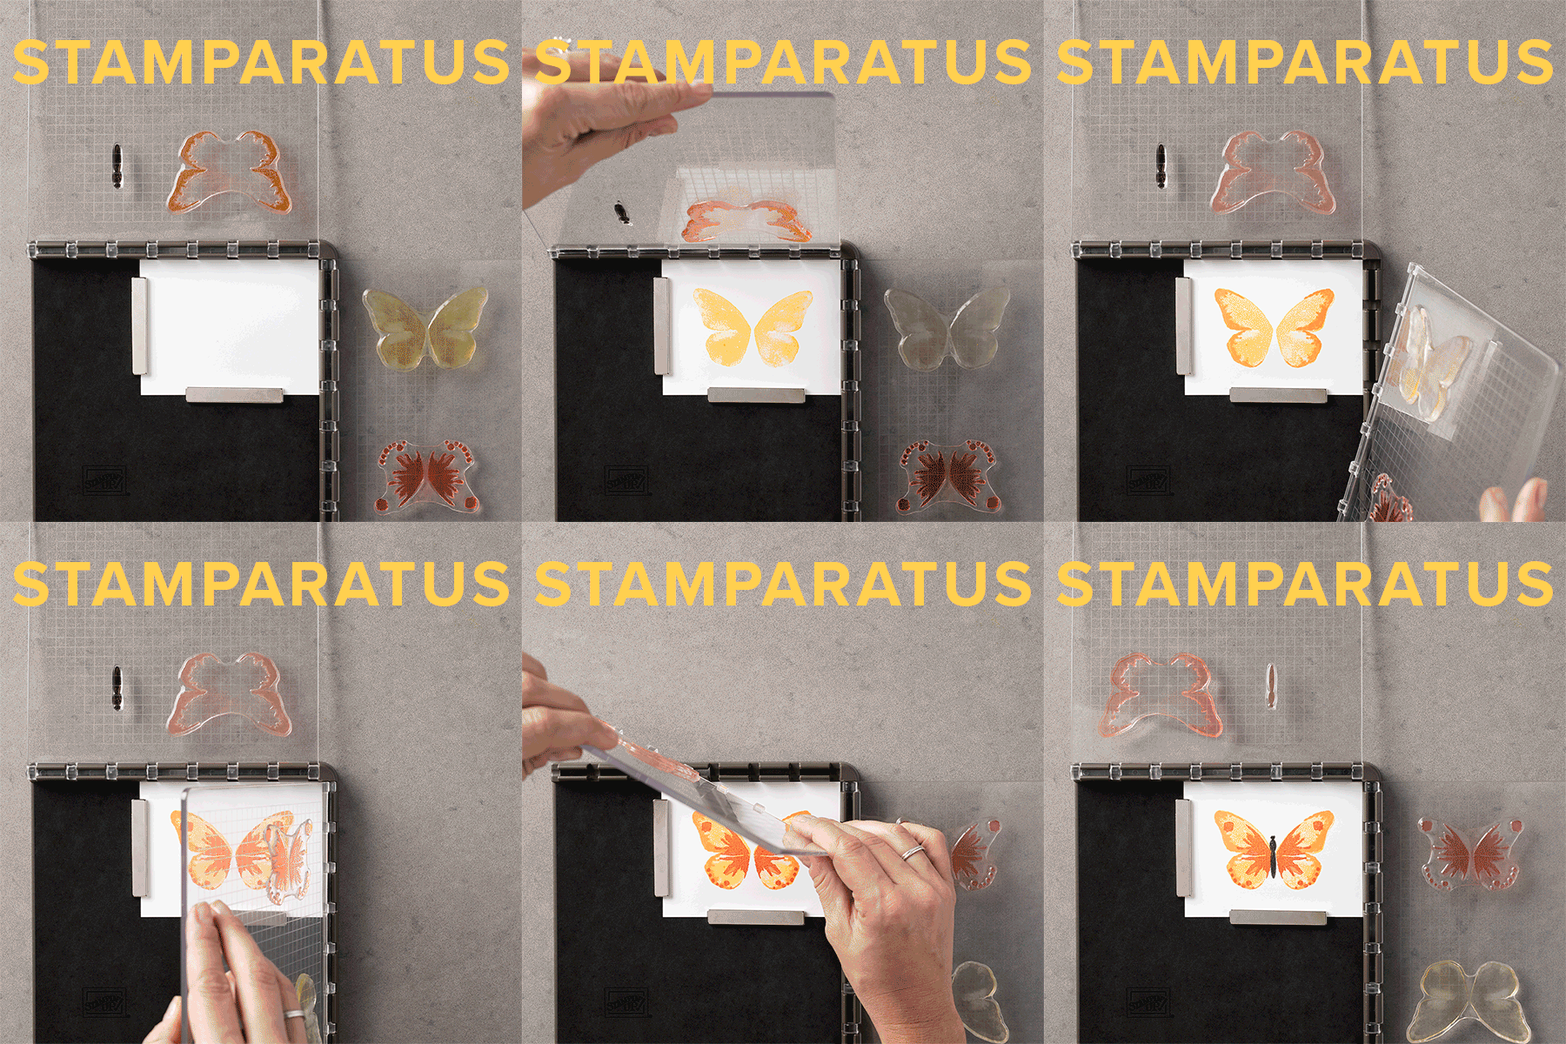
I seem to be on a bit of a congratulations / celebration card kick of late. This quick and easy congratulations card was made after I received my Stamparatus the other day! When I saw the Amazing Congratulations stamp set in the Stampin’ Up! Occasions Catalogue, I knew it would be a great one for the Stamparatus, since it was multiple step stamping. I was one of the lucky ones who got in on the first preorder window for this new stamp positioning tool from Stampin’ Up! (check out the GIF below to see it in action)
The main sentiment is stamped with two different stamps. I decided to do a multicolour version of this, because I could! I lined up the one set of letters, stamped it, then lined up the second set of letters and stamped with a different coloured ink. The two inks in this sample are Tangerine Tango and Melon Mambo, because I wanted something bright. I used the Scattered Sequins Embossing Folder in the background, and the Self Adhesive Tutti-Frutti sequins as accents. So even though the lettering looks complicated, this really was a quick and easy congratulations card! I am going to send out these cards to some members of my Stampin’ Up! demonstrator group, the “Eh” Team to congratulate them on hitting some targets and promotions!
I’ve done some work on hand lettering, and I know I have a ways to go to continue to improve my skills there, so in the meantime, this is a great way for me to get the handlettered look (and know it will look okay!! haha).Check out the YamStamps Facebook page for a slightly different colour combination on this quick and easy congratulations card. The great thing is when I used the Stamparatus, I simply cleaned the stamps off (left them attached to the plates) and just changed the ink colours as I wished. If you weren’t able to get in on the preorder for the Stamparatus, you’ll be able to place an order for one when it’s available in the next catalogue in June. Members of the Paper Crafting with YamStamps Facebook Group or the YamStamps mailing list may also have another opportunity to get their hands on a Stamparatus….just saying…. and then maybe I’ll have to make more quick and easy congratulations cards!!
In the meantime, please feel free to contact meif you have any questions, or want to come to a class or club to make one of these cards yourself!
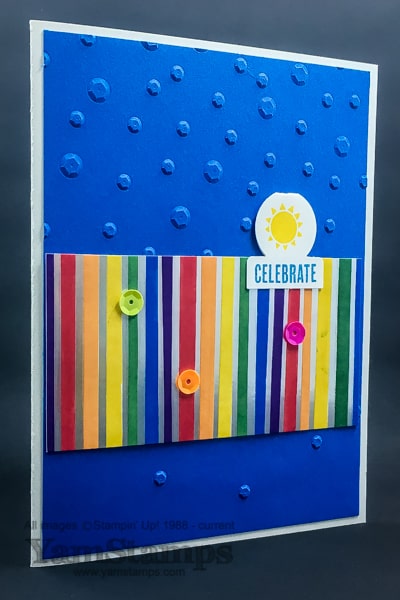
I love the new Springtime Foils Specialty Designer Series Paper! This rainbow striped card was created using one of the sheets included in this Stampin’ Up! Sale-a-Bration freebie. I shared a card the other day using one of the other patterns with a rose gold floral pattern. This sheet has silver stripes. I coloured the negative spaces between the metallic stripes with Stampin’ Write markers, in ROYGBV rainbow order. (Chanting to myself each time I switched colours to make sure I didn’t mess up haha!). I also tried using Stampin’ Blends, but found I got better results with the water based Stampin’ Write markers – in part because I could remove any excess from the silver stripes more easily with a kleenex.
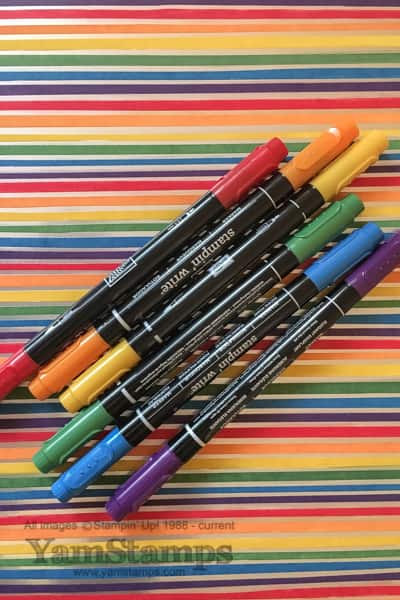
I shared this photo earlier on the YamStamps Instagram feed (plus a video to show off the metallic stripes!). I used Real Red, Pumpkin Pie, Crushed Curry, Garden Green, Pacific Point and Elegant Eggplant to colour my rainbow stripes. There’s a few options to get this combination of colours – you could purchase the Brights and RegalsStampin’ Write markers, or you could go all in and get the Many Marvelous Markers set. I coloured one or two stripes at a time, then ran a kleenex along the stripes (carefully, not to spread the colour!) to remove excess ink. It was a calming thing to do, and easy to multitask – so I watched some Olympic coverage while I did this. There are four sheets in each package, so I have more colouring I could do while watching the games so I could make a bunch more rainbow striped cards….well, depending on what sport is being shown. If it’s hockey, I wouldn’t dare try to multitask! (too busy yelling at the TV screen haha).
I created a number of cards with this technique – you can get 18 cards out of one sheet of cardstock (each strip is 4″ x 2″), so I’ll be mailing them out shortly! In the meantime, I’m off to watch the Women’s Hockey Gold Medal Game – or at least try to watch it….if I can stay awake! Go Canada Go!
Happy Saturday! Around here we are also enjoying a three day Family Day weekend…unless you are a student in this area, then you had a FOUR day weekend….(super envious). Plus Springtime Foils – gives us more to Sale-a-Brate! These are new Stampin’ Up! freebies to keep us happy.Springtime Foils Specialty Designer Series Paper features 12 sheets (3 each of 4 different single sided designs) of metallic images, and you can select it as your free choice with each $60 product purchase until the end of March. Stampin’ Up! has introduced new items for the last half of Sale-a-Bration.
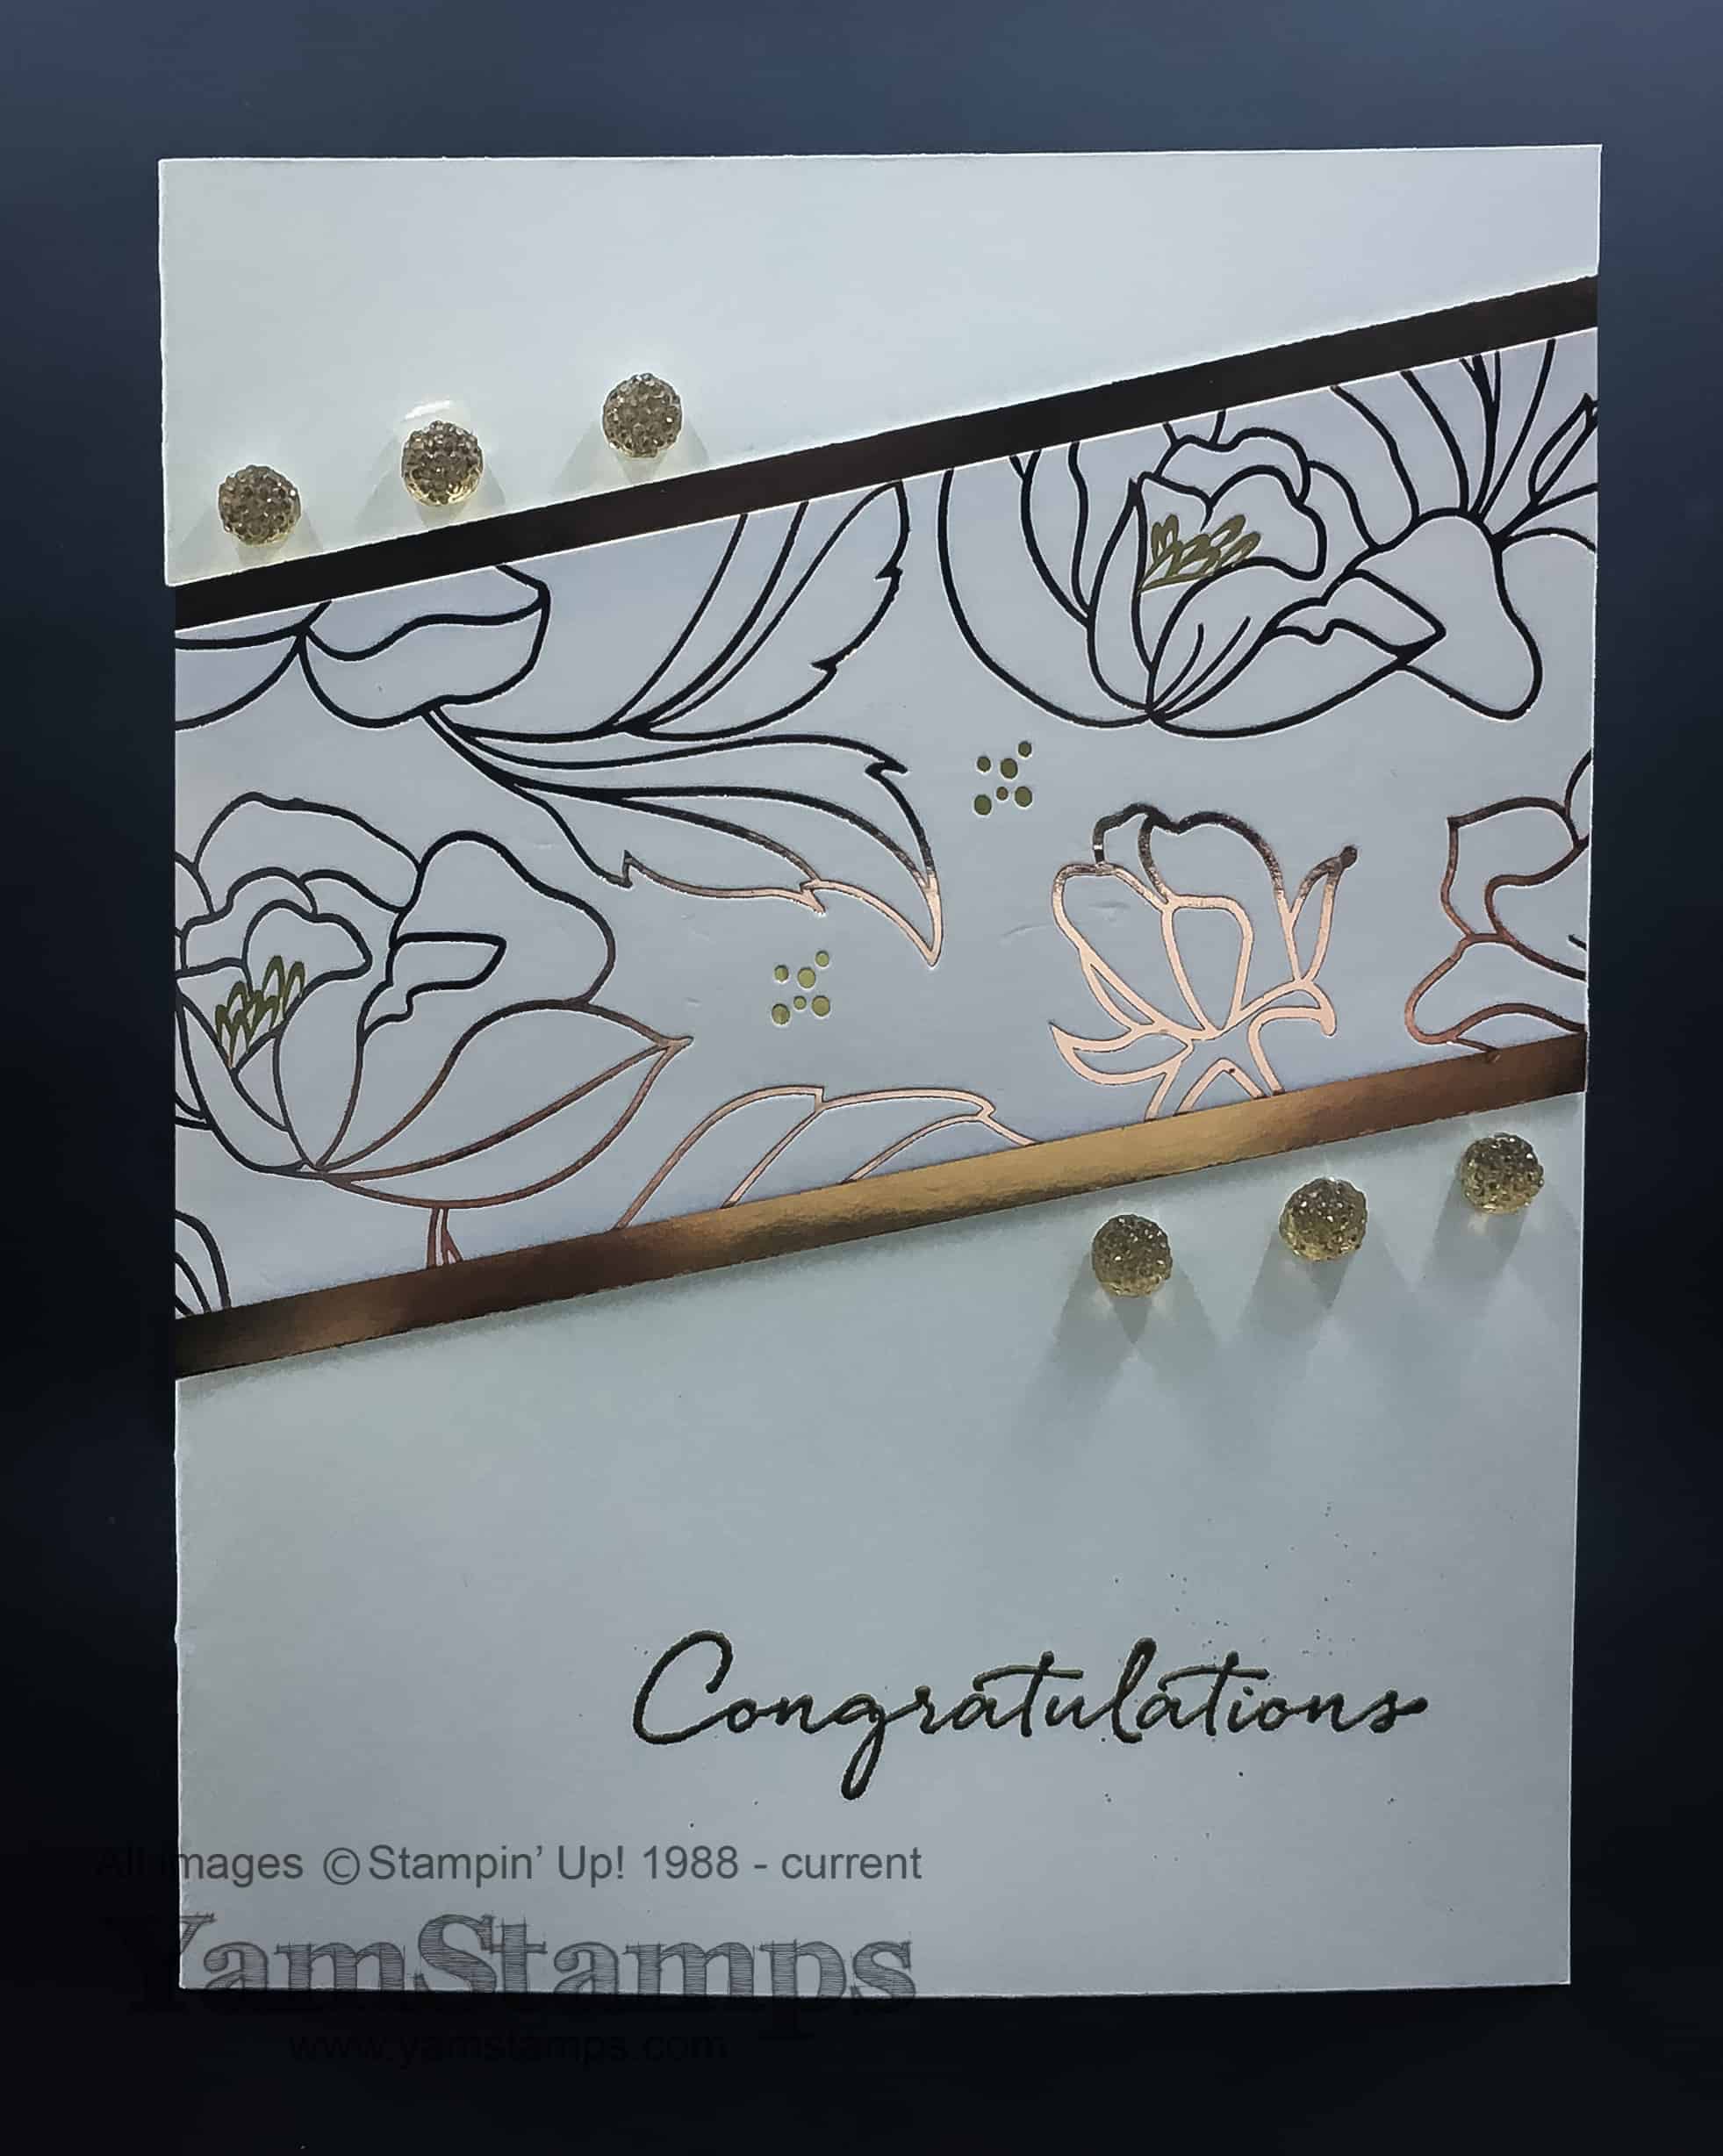
For this elegant Springtime Foils sale-a-brate card, I used strips of Copper Foil sheet along the edge of the strip of Designer Series Paper, and then added some Gold Faceted gems on either side. When making a clean and simple card, I love putting the main image strip on an angle for extra drama and interest. The sentiment is from the Floral Phrases stamp set (available in wood mountor clear mount), stamped in Versamark and heat embossed in gold.
I will be sharing the instruction sheet for this card in the new YamStamps Facebook Group. I still have the YamStamps Facebook page, but with changes in Facebook, it seems like the page posts may not always get shown to you – even if you’ve liked and followed the page – so I’m starting up a group as well. It will have similar but different stuff….LOL. Anywayclick here to join the group! We are just getting started up and established.
Happy Valentine’s Day! I get to spend the day doing things I love to do! We are having a make-up date today for the February Card Class that was supposed to happen last Wednesday, but was weather delayed. I thought I’d share this video from last year when I was on Halton Insider, showing some quick and easy Valentine’s Day decorations. If you want to see more videos, please be sure to subscribe to the YamStamps YouTube channel. I do still post videos….in fact, I should be due to upload something in the near future. (that’s not really a teaser, that’s more of a “make sure this is on my to do list” thing LOL).