Mar 6, 2017 | cards, Occasions, Seasonal Catalogue, Stampin' Up!
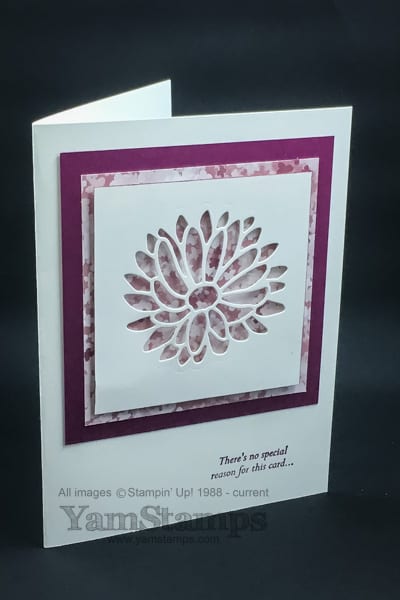
This quick negative die cut card features Stampin’ Up! Canada’s Special Reason Bundle (available with wood mount or clear mount stamps) – available in the Occasions Catalogue. When you use a negative image, you can highlight some of the patterned paper you may have in your stash! In this case, it’s the Blooms & Bliss Designer Series Paper. The tough part is picking which side of the paper to show! Keeping the paper and image as the focal points, there’s just a touch of colour on the edge of the Whisper White cardstock – you can achieve this look by running the side of the brush tip of a Stampin’ Write marker along the edge of the cardstock, or a sponge dauber with the coordinating ink. In this case, the colour is Rich Razzleberry.
One tip I can share is that as my plastic cutting pads get older, they tend to curl or bow a bit more – so sometimes running the die and cardstock through the Big Shot a few times ensures that all the little pieces are completely cut through – and the Big Shot Die Brush helps ensure they all come out easily. Another option is to use the Precision Base Plate, which has no “give” and will ensure good contact the entire time. That will ensure that your quick die cut card is truly that!
If you’re interested in learning other techniques, you can attend a card making class in person or online! We created this card during classes in the past week, but I love this quick die cut card effect, so it may make another appearance in the future, in some incarnation! Do you have a favourite set of dies that you like to use for a negative image effect? (future class attendees will appreciate if you share your faves, so they don’t keep seeing a version of this card repeatedly – haha just kidding – but just about the card – I do want to hear if you have a fave!). Feel free to leave a comment below – and don’t panic if it doesn’t show up right away – comments are moderated to avoid spam! In the meantime – be positive about negative die cuts (sorry, couldn’t resist), and contact me if you have any questions.
Mar 2, 2017 | cards, Occasions, Seasonal Catalogue, Stampin' Up!
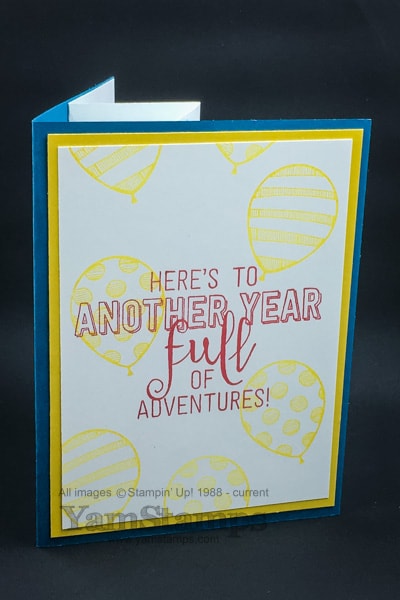
Sometimes you need an extra special or “WOW” card, and you don’t feel like making it from scratch. (If you do feel like making it from scratch, may I suggest the Clever Cards Online Class ?! You’ll get five different WOW card designs!) Here’s an easy pop up birthday card made using Stampin’ Up!’s Balloon Adventures set and Balloon Pop-Up Thinlits Dies. They’re available together in a discounted bundle…which I recommend because I love easy coordination (and who doesn’t like saving a bit of money?!). Real Red, Island Indigo and Crushed Curry combine to make a bright, fun card that’s sure to impress.
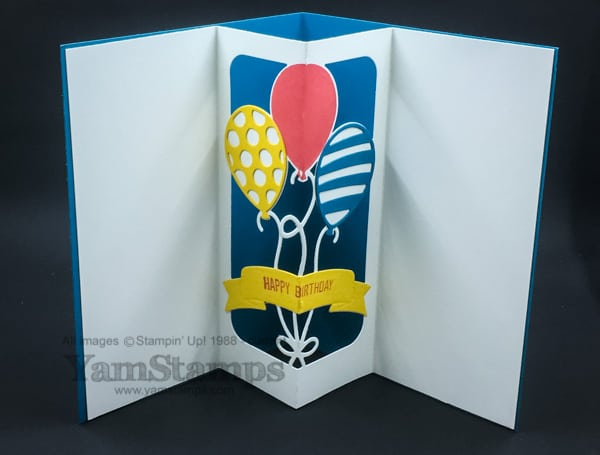
The interior pop up portion is made using a die! You score your cardstock, align the die along the score line and run it through your Big Shot. Fold along the score lines and you’re ready to complete your card! (I told you it was an easy pop up birthday card!) I like to use Tear & Tape to adhere the pop up insert securely in place (just don’t adhere the middle, otherwise the pop up won’t work!). Originally, I had stamped “Happy Birthday” directly onto the banner, but truth be told, I messed it up….so I cut another banner from a scrap of Crushed Curry Cardstock, restamped the sentiment and adhered it over top of the messed up one. It looks good either way. Well, maybe not with a messed up sentiment, but with a white banner rather than a yellow one. I added two additional die cut balloons that were adhered in place on the pop up portion, and the middle balloon is simply stamped in Real Red. The set is photopolymer, so you can re-stamp the balloon image on top again if you need more ink coverage – sometimes the score line doesn’t take the ink very well. (ask me how I know this…).
This card does take a little longer than a non-3D or non-moving part card might take to construct, but it’s just more steps, not that much more difficulty, really! A bit more time to construct a still quite easy pop up birthday card, thanks to coordinating stamps and dies, but the smile on the recipient’s face is sure to be worth it in the end! This is the kind of card that can be a gift in itself. We actually tackled this card in Stampers Club and the March Card Class! I liked this card so much I included it in both classes! If you’re needing an outing during the day or evening, consider joining us next time! See the YamStamps Events Page for upcoming events, or contact me to register for the April Card Class or to find out more about Stampers Club. Hope to see you in class soon!
Feb 26, 2017 | cards, Sale-A-Bration, Seasonal Catalogue, Stampin' Up!
Do you prefer Glimmer Paper or Glitter? While I love glitter, I don’t always love the mess it leaves – which is why I really love Stampin’ Up!’s Glimmer Paper. It’s an easy way to add all the glitter and shine with less fuss and mess.
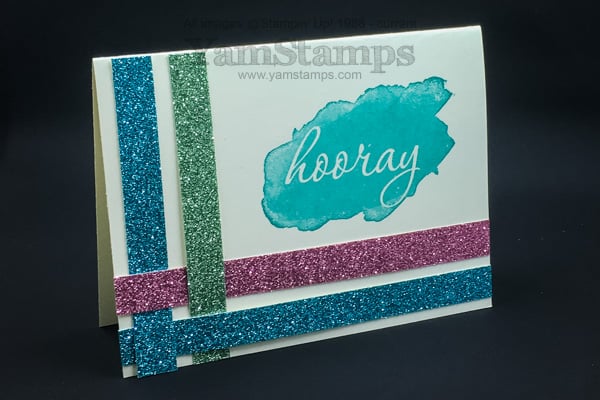
This project showcases an easy way to use Glimmer Paper. Glimmer Paper is perfect for adding shine to your paper crafting with less mess than loose glitter. While you will still likely find some stray glitter here & there after you use it, it’s not nearly as invasive! The paper is a little heavier than regular cardstock and has a slightly waxy backing on it, so I like to use Tear & Tape to adhere it in place. If you’re more patient than me, you may choose to use the Multipurpose Liquid Glue. I’m more of a get it done and get going type of crafter, not to mention somewhat messy, so dry adhesives tend to work better in my crafting corner.
This fun card features two of the second release Sale-a-Bration products. Reverse Words has two negative image words, and the 12 pack of 6″ x 6″ Glimmer Paper is perfect for cardmaking or scrapbook page accents. Some other samples were seen in this post. I used the sample from the Second Release Sale-a-Bration flyer as a jumping off point for this card. If you’re attending one of my events this week, you’ll get a chance to make this card as well! The image is stamped in Bermuda Bay, and then strips of the Glimmer Paper are woven at the edge of the card as an accent. Not only is this an easy way to use glimmer paper, it’s an easy way to build up your card stash! You could make a stack of these cards with different main images for a variety of occasions.
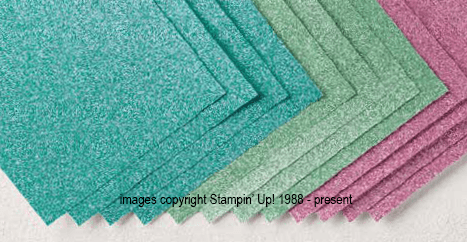
The Sale-a-Bration Glimmer Paper comes in a package of 12 sheets of 6″ x 6″ in 3 colours – Bermuda Bay, Mint Macaron and Sweet Sugarplum, and is available as a free choice with each $60 product order until March 31. Stampin’ Up! also offers packages of two 12″ x 12″ sheets in Dazzling Diamonds, Real Red, Blushing Bride, Gold, and Silver. With so many options, and so many easy ways to use Glimmer Paper, there’s no excuse not to add a little glitter to your projects! If you need to build up your supply of shiny objects, head to the YamStamps Online Stampin’ Up! Canada store to stock up!
So what’s your preference – glimmer paper or glitter? (HINT – I’m going to be randomly rewarding people for “class participation”….aka commenting on the YamStamps Blog Posts….).
Feb 21, 2017 | cards, Sale-A-Bration, specials, Stampin' Up!
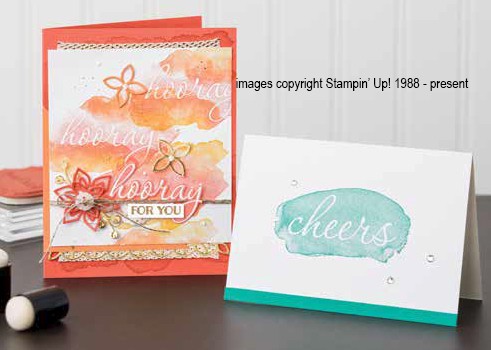
Happy Sale-a-Bration Second Release Day! Stampin’ Up! has some new freebies for you until the end of March with each $60 merchandise order! You can download the flyer here. My personal favourites are seen in the samples above from the flyer. I love the Reverse Words stamp set (item 143316 wood or 143319 clear), and of course, the Glimmer Paper (item 143831)! You get 12 sheets – 4 of 3 different colours, in 6″ x 6″ sheets. Bermuda Bay, Mint Macaron and Sweet Sugarplum – they coordinate with a number of suites (coordinating products) from the Occasions Catalogue (Cupcakes & Carousels, Falling in Love and Succulent Garden) – but for me, they also scream “SPRING” and “EASTER”.
Don’t you agree? I need to build up my stash of these…and I’m sure they’re going to be very popular! Don’t forget that Sale-a-Bration only runs until March 31st, so now is the time to grab your freebies while you can. Purchase the starter kit (more info here), and on top of everything ($165 product of your choice for $135, business supplies and a Paper Pumpkin kit) – you get an additional TWO stamp sets of your choice for free! Just FYI…when you go to the YamStamps Online Stampin’ Up! Canada store, did you know that you can select “Stamps” and the format of your choice (wood mount, clear mount or photopolymer), and then sort by “> price” ? That way….you can get the most bang for your buck!!
So far, the most popular item during Sale-a-Bration has been the “Hey Chick” set (item 143328 wood or 143331 clear). I used that for my Year of The Rooster card…I kind of cheated I think, and turned a chicken into a rooster by adding the little red “beard”. (Can you tell I don’t own chickens? Unlike some of my friends who proudly show off their egg hauls!). The original Sale-a-Bration catalogue is here.
There is still some space in the March Monthly Card Class if you want to get out to do some crafting and grab a free Sale-a-Bration item with your $60 product order (that’s multi-tasking that I can handle!). Please contact me to register, or if you have any questions. Otherwise – see you in class soon!
Feb 20, 2017 | Business Opportunity, non stamping related

If you’re in Ontario – Happy Family Day! If you’re not – Happy Monday! On this Family Day, I find myself reflecting on family….and trying to keep a work – life balance (if there is such a thing!).

That’s me and my son in 2002 – when we were living in British Columbia. This is about the time when I started with Stampin’ Up! Canada as a demonstrator. The company was expanding into Canada from the US and I jumped on board. Crafting gave me a creative outlet and helped me carve out some me time to get some life balance. At the time, I lived in an area where I had to take a ferry to get to Vancouver (and area), and we had no craft store locally. It wasn’t unusual for me to spend a day to travel into the city, drive to a stamp store or craft store (plus hit the big box stores and maybe a mall LOL), then turn around and head home again (usually with toddler in tow, so it wasn’t always the most efficient trip either haha). This would happen maybe once a month at the most? (My memory grows foggy). Anyway. I realized that signing up to be a demonstrator would be the easy way to get my own paper crafting supplies delivered right to my door! The other bonus was that it gave me an opportunity to socialize with other adults. While I did enjoy being the parent of a young child, there’s only so much conversation you can have with a toddler…so this definitely came at the right point in my life! I often do card classes with moms who are enjoying a chance to get together with their friends and have some “me” time, so I know I was not an anomaly!
Fast forward a few years….LOL. I continued with my Stampin’ Up! business, which survived a cross country move (back to Ontario to be closer to my extended family), and managed to grow my business while keeping a “regular day job” in health care as well. Around 2014 I was getting burned out with my day job, though. My job was flexible, but I was finding that the flexible component often had to be me! Demands were growing higher, as was my caseload, despite my efforts to set limits. This, on top of parenting was a lot to manage, and life balance was definitely out of whack! So I made the decision to reduce my day job hours – officially becoming a part time employee. This allowed me to continue with client care, but gave me the opportunity to enforce some boundaries so that I would not get so burned out again. My Stampin’ Up! business was able to fill some of the income gap, while continuing to give me a much needed creative outlet and socialization (at this time, I was the parent of a young teenager, and once again, conversation with a teen boy can be limited…)!
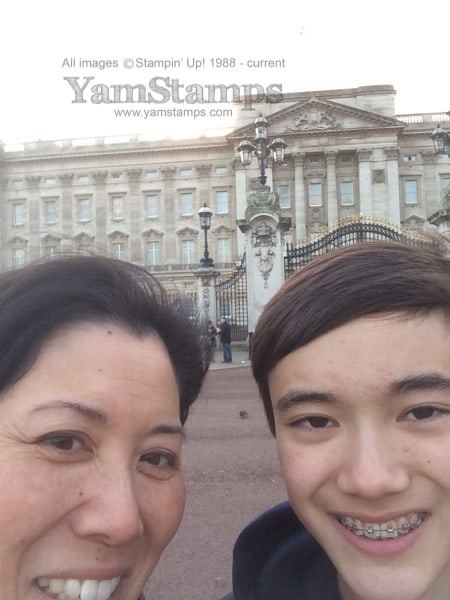
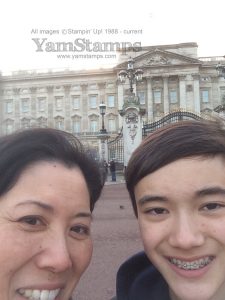
These days, I enjoy that I can change my schedule to choose to spend time with my teen, as I am realizing that he’s not going to be in the family home for much longer! (selfie photo is from a family trip to England a few years ago). My Stampin’ Up! job is flexible, but I’m the boss, so I’m in control of the schedule and workload!
I am going to spend this Family Day enjoying a little down time and hanging out with my teen (well, as much as he’ll let me haha!). Maybe I’ll also get a little crafting in there as well….we’ll see what the boss says….!