Thursday, September 18 ONLY – save 15% on Stampin’ Up! Canada stamps and stamp tools!
Time to shop and SAVE! Grab stamps and stamp tools at 15% off for 24 hours Thursday September 18 while supplies last! Offer excludes Last Chance items and bundles (already discounted),
Sale starts at midnight Mountain Time (which is 2am Eastern) Sept 18th and runs until 1159 pm Mountain time (which is 159AM September 19 Eastern). Shop online at yamstamps.com/shop or message me if you need assistance placing your order!
First of all, it’s the sense of loss and grief that’s felt – you, as well as the person who has suffered the loss. I often feel more anxious and pressured to “get it just right” – wanting to make a sympathy card that is beautiful, thoughtful and appropriate, which is particularly difficult at a time when I’m not feeling very creative or crafty.
It’s often said that cards are a hug with a fold in the middle, and I think that sympathy cards are definitely an example of this. Those who receive handmade cards feel cared for and seen. Your time, your creativity, your words—especially when shared during difficult times—can carry deep comfort and meaning. If I can, I often like to include a favourite memory of the loved one – because that was one of the things that would bring a smile to my face in the past when I’ve received sympathy cards.
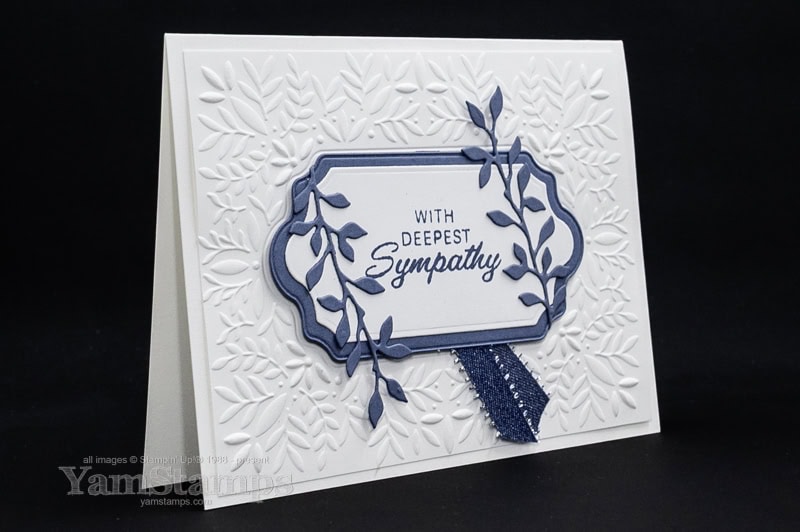
I’ve found it helpful to create sympathy cards to have in my stash – because I often don’t feel like making a sympathy card when I actually need one to send. This sympathy card was the second design that I created for the recent Stampin’ Up! Canada September-December 2025 Mini Catalogue card swap. For a linked supply list for this card, please see the YamStamps.com Sunday Swaps Page – where I share linked supply lists for swap cards that I receive (and make)!
Sympathy Card Making Tips
I love monochromatic colour schemes, and I think they are particularly good for sympathy cards – very calming and peaceful, especially if you choose more muted tones. To keep one colour cards from being too boring, texture from Embossing Folders or simple die cuts add interest without being too distracting. Nature themes, not necessarily florals – leaves/greenery, nature scenes (lakes/trees), birds are all good options (as well as florals). I also prefer simple embellishments if any, and nothing too “blingy” – but that’s me, and the person that you are making the card for may like bling and appreciate that more! That’s the joy of making your own cards – you can customize it for the person receiving it.
Sympathy cards can be difficult ones to make, but they are always appreciated.
Ready to Stay Inspired?
If the thought of beautiful, easy card projects lights you up, I’d love to share more with you! Sign up for my weekly newsletter to get exclusive tutorials, time-saving Stampin’ Up! tips, and creative inspiration delivered right to your inbox—just for amazing people like you who deserve a little crafting me time.
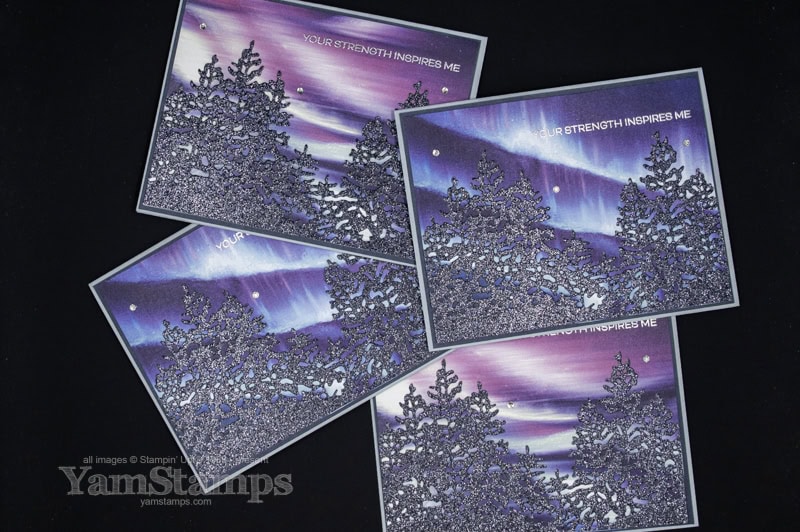
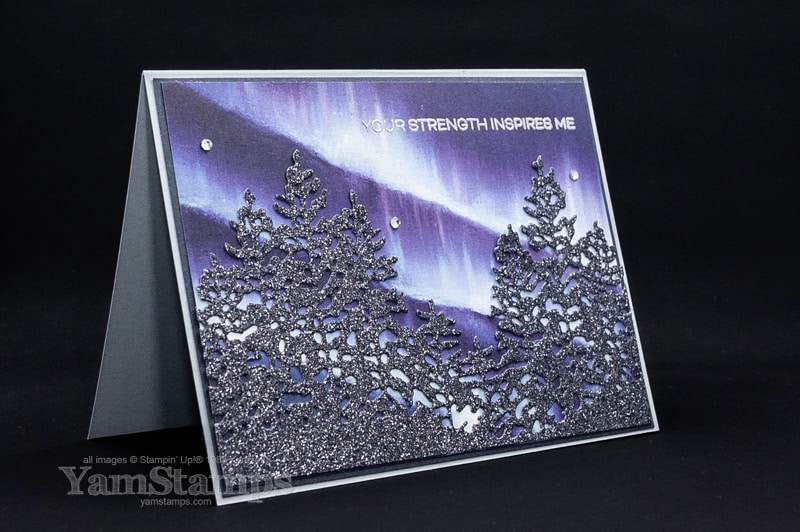
One guaranteed way to see the Northern Lights? Make a Northern Lights Card using Stampin’ Up! Canada products!
I have been fortunate to see the Northern Lights, but they weren’t extremely strong where I was, so it’s still on my bucket list….Stampin’ Up! Canada’s September-December 2025 Mini Catalogue features the Lights of Aurora Suite, and I used that to create a Northern Lights card for a recent Demonstrator card swap! Make your own and be guaranteed to have a great view of this beautiful phenomenon!
I’ve always enjoyed participating in card swaps, because they’re a great way to get ideas for products that I own – or have yet to purchase! They’re inspiration as well for my future card designs – by taking the basic design and then using what supplies I have on hand, I can come up with a new look without too much effort (or frustration!). My nothern lights card design had two different versions, as I used two different sheets of Designer Series Paper. The Lights of Aurora Designer Series Paper is a 6×6 package, with 8 sheets of 6 different double sided designs. By using two different papers, I had enough for 16 cards which was enough for what I needed for the swap. I can’t decide which was my favourite version!
I used a fairly simple layout for this card because I really wanted the paper to be shown off – it is a northern lights card, after all! Honestly, the most finicky thing about this card was making sure I got all the little bits out of the die cut trees! Thankfully, I had my Take Your Pick tool with the die brush tip, so I just ran that over the die cuts a few times, an easy task to do while binge watching shows. The streaming shows of choice during the card swap making sessions – Wednesday, and Only Murders in the Building. I typically watch foreign language shows, but I can’t do that when I’m multitasking because I can’t read subtitles at the same time! I do have subtitles on all the time, but at least with English language shows I can listen and follow along for the most part…
Anyway! If you want to get the full supply list (with links) for this northern lights card, I shared this card as part of the YamStamps Sunday Swap Series Page – yamstamps.com/sunday-swaps. If you’re a Stampin’ Up! Canada Demonstrator and are interested in participating in our next Demonstrator only swap, message me! If you’re not yet a Stampin’ Up! Canada Demonstrator and want to find out more about being one (and maybe participating in a card swap, too), message me! Happy Sunday! Hope the upcoming week treats you kindly.
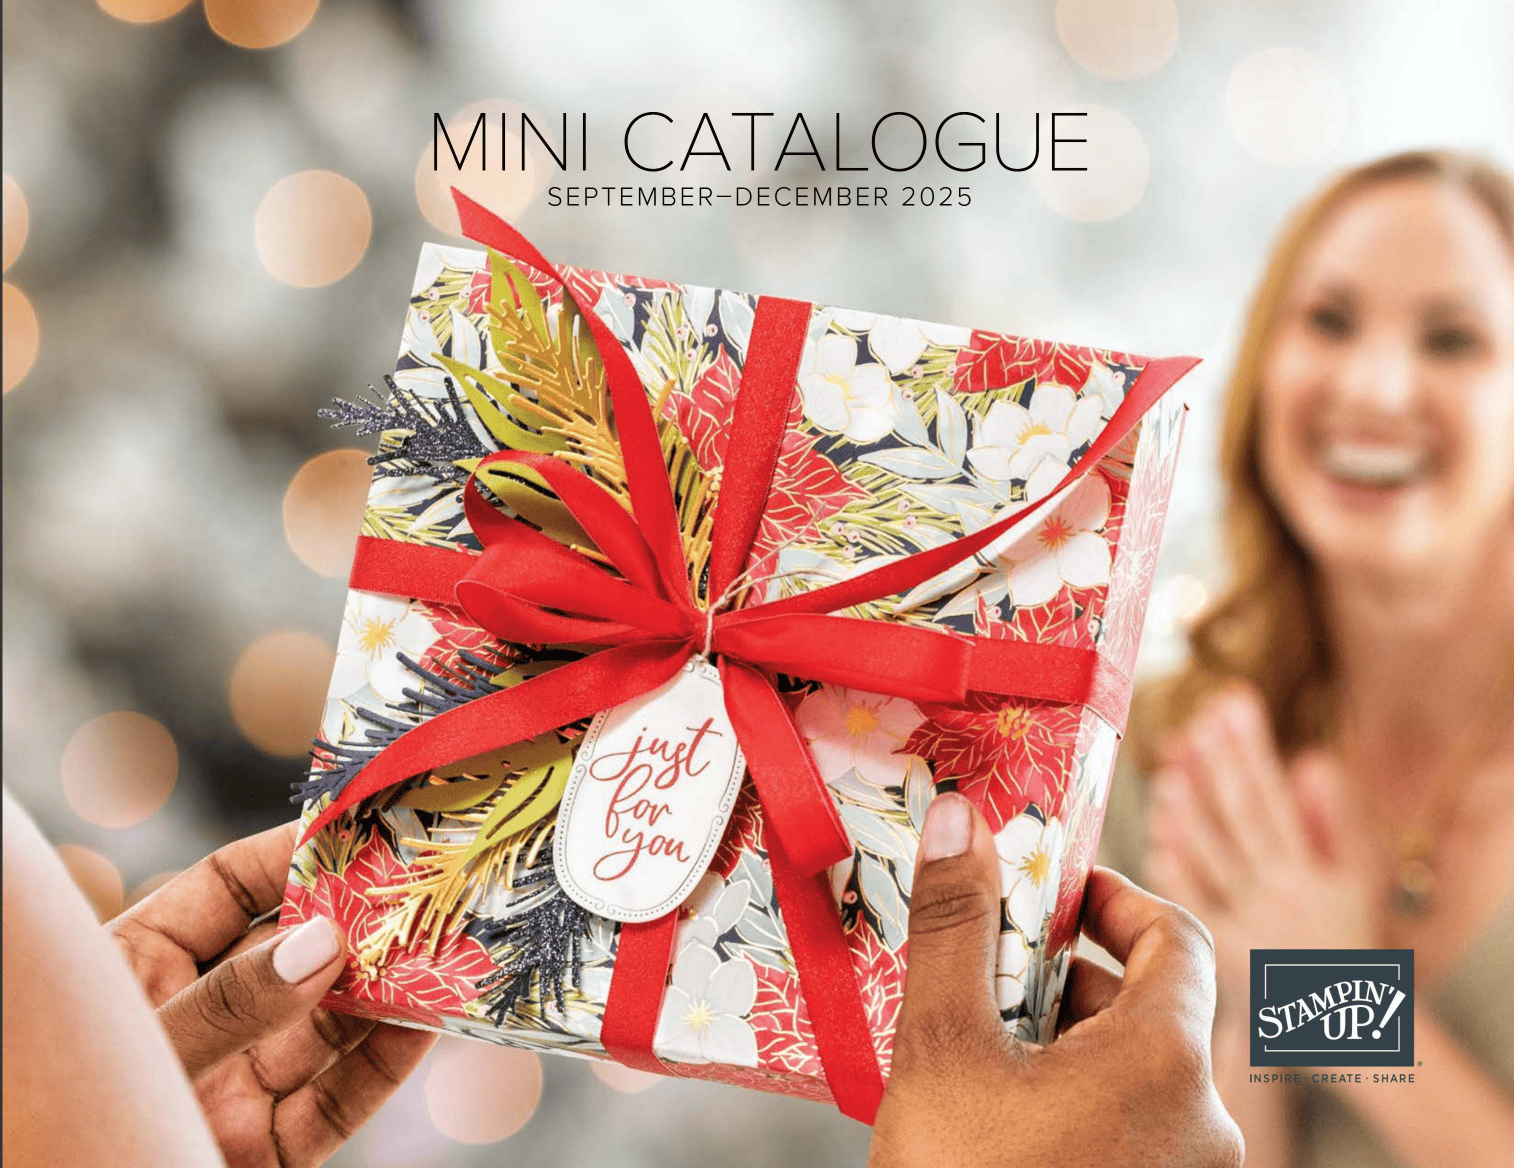
It’s the Most Wonderful Time of the Year…..for many of us, it reminds us of the hilarious Back to School shopping commercials, but it also means Christmas!
There are lots of seasonal paper crafting products plus lots of products that can be used at any time of year! I participated in a Canadian Demonstrator card swap so Sunday Swap Shares on the YamStamps Facebook Page and on the YamStamps.com Sunday Swaps Page will feature September – December Mini Catalogue products!
On top of the new catalogue, there’s also new Online Exclusive Products (that aren’t featured in a print catalogue) and two new kits. So many options! I’ll tell you about a funny story with the online exclusives in a later post…
Other news: Water Painters are BACK! They were unavailable to order for quite a while, but Stampin’ Up! has found a new manufacturer so they are available once again. One of my favourite “hacks” with water painters – use them to seal your mailing envelopes closed! No licking envelope flaps and risking paper cuts!
Also…
Stampin’ Up! is going to stop selling red rubber stamps?!!
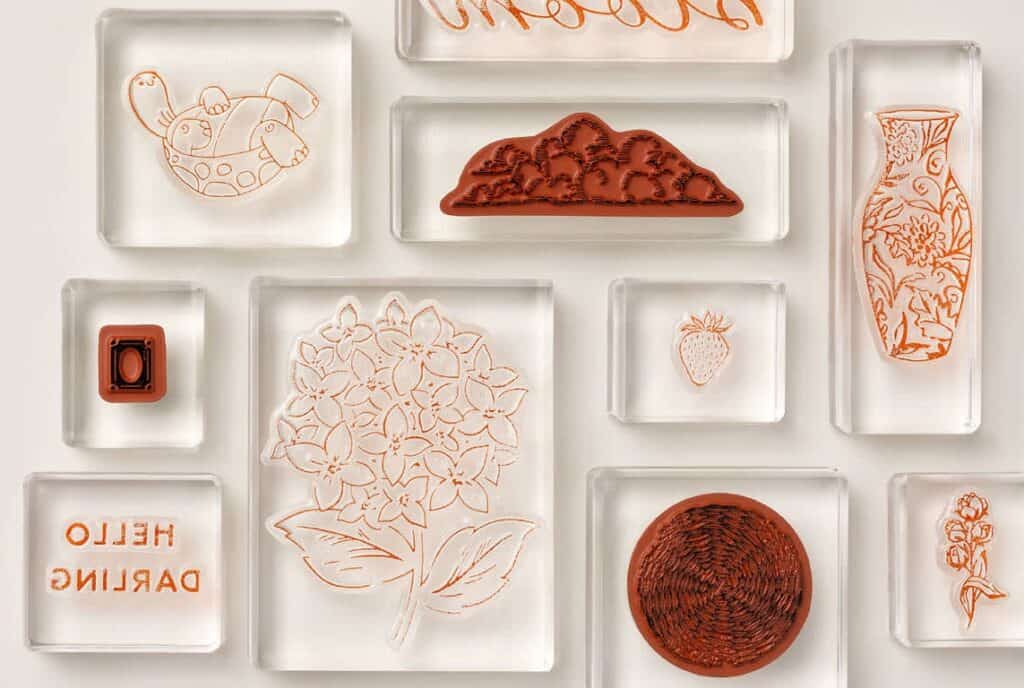
Now before you go running for the hills, I will clarify!! Stampin’ Up! will stop selling red rubber cling mount stamps – but WILL continue to offer photopolymer (clear) stamps. Have no fear! We will live to stamp another day! In all seriousness, the company was having increasing difficulties sourcing quality raw materials to make the red rubber cling stamps, so made the decision to switch production to only photopolymer stamps. The September-December Mini Catalogue will be the last Mini to feature red rubber stamps, and those sets from the 2025-2026 Annual Catalogue that are in red rubber cling mount will be available while supplies last, but will definitely retire at the end of the sales period.
WHAT DOES THIS MEAN FOR YOU?
Well, if you see a stamp set that is cling mount, you’ll probably want to be sure to purchase it – because it will NOT carry over.
New streamlined packaging is being introduced. The DVD type containers will be phased out, and replaced with new photopolymer envelopes (similar to the ones that the dies currently come in). Both the stamps and the dies will transition to the new size photopolymer envelopes – and they will all be the same size! I’m looking forward to being able to store more product in a smaller space!!!
ALSO RETIRING…
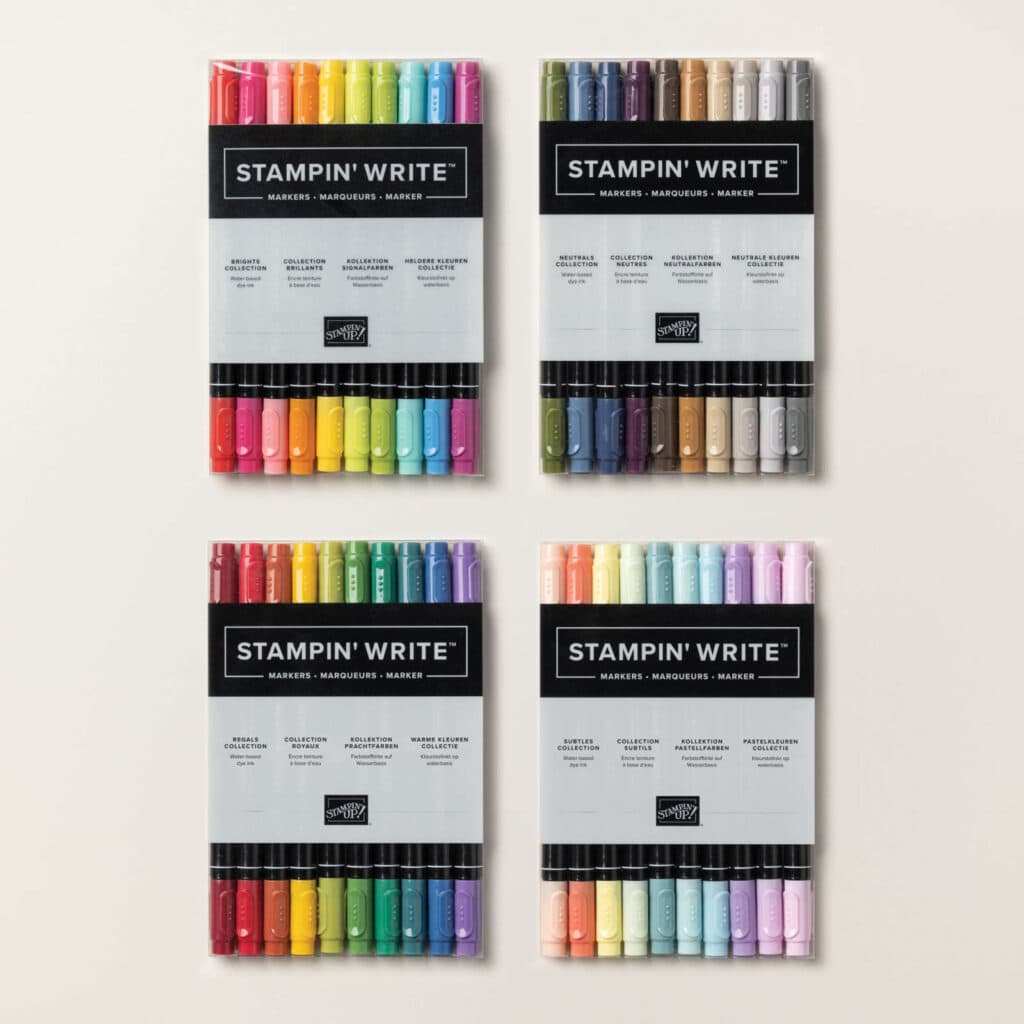
Stampin’ Write Markers. With the switch to all photopolymer stamps, and with the success of the alcohol based Stampin’ Blends markers, Stampin’ Up! has decided to stop production of the water/dye-ink based markers. You’ll find them in the Last Chance category in the online store, and available while supplies last. I am sad to see them go! I love using them for direct to (rubber) stamp techniques, and I like writing with them, and love the colour coordination with SU colours. I will be hanging on to my collection to continue to use with the red rubber stamps in my collection – plus I like to use them in my journal!
So September is being true to itself – introducing some changes but bringing excitement for all that is to come! If you want to keep up to date with the latest Stampin’ Up! news and get tutorials right to your inbox, plus get access to an exclusive tutorial when you sign up, be sure to subscribe to the YamStamps Newsletter! Next edition is out on Tuesday!
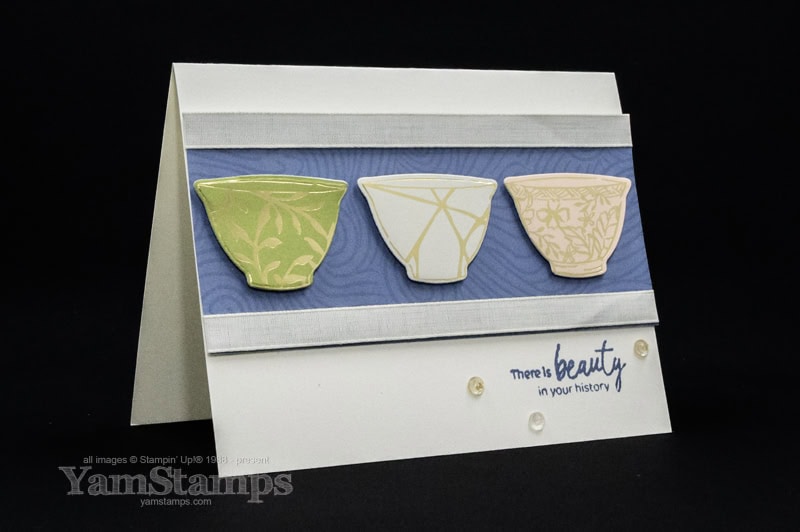
I love that Stampin’ Up! Canada has a Kintsugi Inspirations Suite!
Kintsugi is a Japanese art/craft where broken pottery is repaired with laquer that is dusted with gold or another precious metal. It celebrates imperfection and that there is still beauty in things that may not be “perfect”. Kintsugi Inspirations is a suite of products from Stampin’ Up! that brings that elegant beauty to your craft room!
I love the whole concept of celebrating the history of an item and imperfections, and I love that there is an easy way to craft with this suite! For this Kintsugi Inspirations card, I used the Kintsugi Inspirations Specialty Designer Series Paper, and the coordinating Inspiring Imperfections Dies. The Dies coordinate with the Inspiring Imperfections stamp set (and you can get them together in a discounted bundle), but they also coordinate with the Designer Series Paper!! I roughly trimmed around the images I wanted to use (because the paper is 12″ x 12″ and won’t fit through the Stampin’ Cut & Emboss Machine!), and then I die cut the images with the tea cup shaped die. I made sure to pick one of the images that had the kintsugi-look to it – the centre one, with the gold lines. If you prefer, there’s also a couple of stamps that have those “crack lines” – so you could use that on any image!
The concept behind Kintsugi also suits my paper crafting…because my crafting is often not totally perfect, and I’m learning to roll with that (though it’s a difficult concept sometimes!!). So I’m going to look to Kintsugi and how imperfection can be inspiring and still beautiful in its own right!
Don’t forget that free shipping offer is only available July 23-25, so don’t miss out!! You can message me if you would like to pay by etransfer, or need assistance setting up your account or order!