A card that looks polished and impressive… but secretly comes together without too much fuss.
I created this card for a recent Demonstrator-Only card swap featuring products from the May-August Catalogue (which goes live to customers on Tuesday May 5!).
If you’ve ever wanted to create something that feels finished, but still works on a lower-energy crafting day, this design is one to keep in your back pocket.
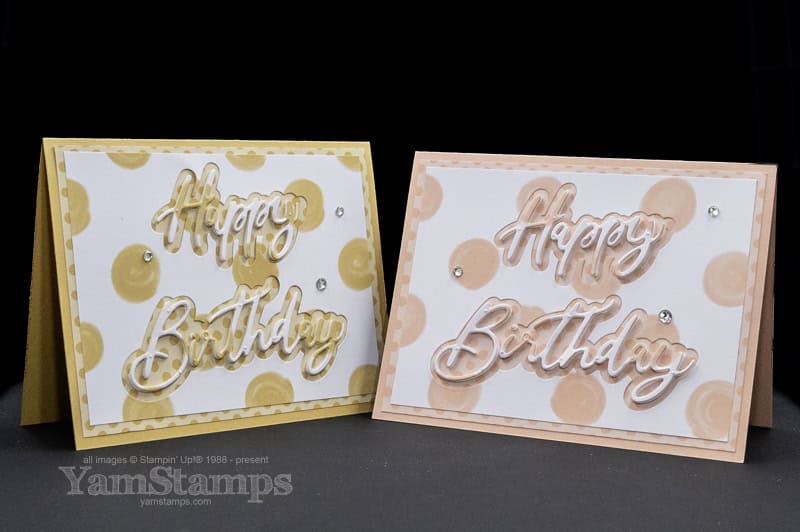
Today’s project uses Golden Glow, Crisp Cantaloupe, and the 2026–2028 In Color Painted Patterns DSP to create a coordinated layered birthday card. There’s a fully linked supply list on the YamStamps Sunday Swaps Page, but please note that the links to the items in the May-August catalogue won’t work until May 5th! Also – while it goes against everything I learned in grade school, I use “Color” because that’s how the product is labelled….
The background is created using a single sheet of Designer Series Paper! The small dot pattern is one side of the sheet, and the large dots are on the other. One 4″ x 12″ strip will create one cardfront so it’s easy to create a few of these cards at the same time.
Let the Thrifty Sentiment Be in the Spotlight
The Words & Wishes Dies really shine in this design, particularly because they are popped up on a Foam Sheet. Thrify crafting for the win – and super coordinated flow. After I die cut the background from the large dot DSP, I stuck the cut outs onto a foam sheet and then die cut the sentiment from that. When you adhere the sentiment into the negative spaces, you’ll see how the pattern flows across the words and creates cohesion! The trickiest part of this project was making sure I didn’t lose the dot to the “i”…
HINT: In my experience, the large random dot pattern is a bit more forgiving than a smaller, more solid pattern, and circles are always more forgiving than hard edges like rectangles or stripes.
Add Just Enough Sparkle
Rhinestones are one of my most favourite all around accessory to add to a project. They catch the light, draw the eye in and give that finishing touch.
Application Hints:
Space them out
Create a loose visual triangle
My preference: odd numbers
One Design, Endless Variations
You may know this about me – but I don’t want to use up all my brain cells for crafting (typically I craft at the end of a work day so I don’t have many left over!!). With this one design, you can create so many looks – swap out the paper you use, swap out the colours for a whole new take. The Words & Wishes Dies have a number of coordinating sentiments and backdrops so you can swap out the sentiments as well!! That’s why I love card designs like this – paper crafting doesn’t have to be difficult to be impressive.
Your Turn
If you’ve been wanting a go-to birthday card that you can recreate without overthinking every step—this is a beautiful one to try.
Pull out your supplies, pick your colour, and give it a go.
And when you do:
Are you leaning Golden Glow or Crisp Cantaloupe?
Did you keep the background soft or go a little bolder?
Comment below, save this layout for later, or share your version—I’d love to see what you create.
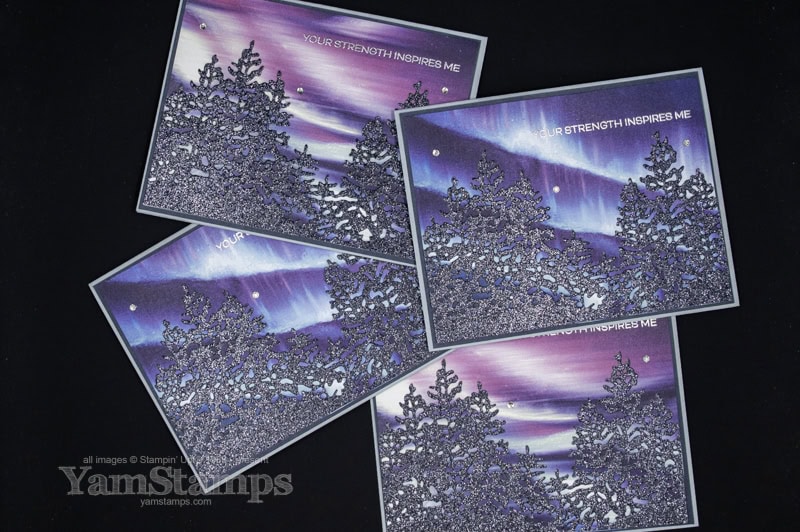
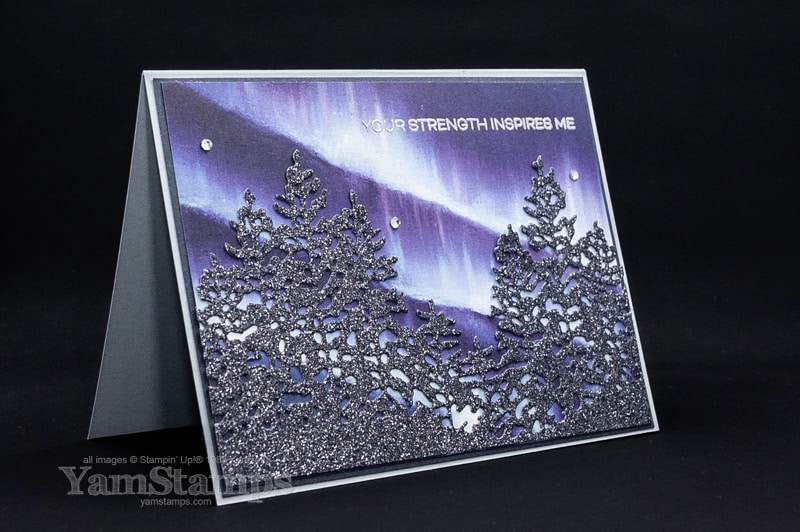
One guaranteed way to see the Northern Lights? Make a Northern Lights Card using Stampin’ Up! Canada products!
I have been fortunate to see the Northern Lights, but they weren’t extremely strong where I was, so it’s still on my bucket list….Stampin’ Up! Canada’s September-December 2025 Mini Catalogue features the Lights of Aurora Suite, and I used that to create a Northern Lights card for a recent Demonstrator card swap! Make your own and be guaranteed to have a great view of this beautiful phenomenon!
I’ve always enjoyed participating in card swaps, because they’re a great way to get ideas for products that I own – or have yet to purchase! They’re inspiration as well for my future card designs – by taking the basic design and then using what supplies I have on hand, I can come up with a new look without too much effort (or frustration!). My nothern lights card design had two different versions, as I used two different sheets of Designer Series Paper. The Lights of Aurora Designer Series Paper is a 6×6 package, with 8 sheets of 6 different double sided designs. By using two different papers, I had enough for 16 cards which was enough for what I needed for the swap. I can’t decide which was my favourite version!
I used a fairly simple layout for this card because I really wanted the paper to be shown off – it is a northern lights card, after all! Honestly, the most finicky thing about this card was making sure I got all the little bits out of the die cut trees! Thankfully, I had my Take Your Pick tool with the die brush tip, so I just ran that over the die cuts a few times, an easy task to do while binge watching shows. The streaming shows of choice during the card swap making sessions – Wednesday, and Only Murders in the Building. I typically watch foreign language shows, but I can’t do that when I’m multitasking because I can’t read subtitles at the same time! I do have subtitles on all the time, but at least with English language shows I can listen and follow along for the most part…
Anyway! If you want to get the full supply list (with links) for this northern lights card, I shared this card as part of the YamStamps Sunday Swap Series Page – yamstamps.com/sunday-swaps. If you’re a Stampin’ Up! Canada Demonstrator and are interested in participating in our next Demonstrator only swap, message me! If you’re not yet a Stampin’ Up! Canada Demonstrator and want to find out more about being one (and maybe participating in a card swap, too), message me! Happy Sunday! Hope the upcoming week treats you kindly.
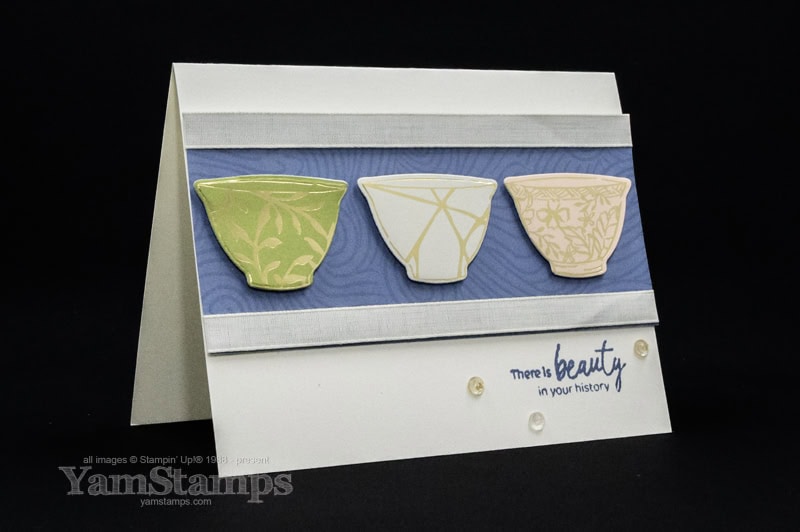
I love that Stampin’ Up! Canada has a Kintsugi Inspirations Suite!
Kintsugi is a Japanese art/craft where broken pottery is repaired with laquer that is dusted with gold or another precious metal. It celebrates imperfection and that there is still beauty in things that may not be “perfect”. Kintsugi Inspirations is a suite of products from Stampin’ Up! that brings that elegant beauty to your craft room!
I love the whole concept of celebrating the history of an item and imperfections, and I love that there is an easy way to craft with this suite! For this Kintsugi Inspirations card, I used the Kintsugi Inspirations Specialty Designer Series Paper, and the coordinating Inspiring Imperfections Dies. The Dies coordinate with the Inspiring Imperfections stamp set (and you can get them together in a discounted bundle), but they also coordinate with the Designer Series Paper!! I roughly trimmed around the images I wanted to use (because the paper is 12″ x 12″ and won’t fit through the Stampin’ Cut & Emboss Machine!), and then I die cut the images with the tea cup shaped die. I made sure to pick one of the images that had the kintsugi-look to it – the centre one, with the gold lines. If you prefer, there’s also a couple of stamps that have those “crack lines” – so you could use that on any image!
The concept behind Kintsugi also suits my paper crafting…because my crafting is often not totally perfect, and I’m learning to roll with that (though it’s a difficult concept sometimes!!). So I’m going to look to Kintsugi and how imperfection can be inspiring and still beautiful in its own right!
Don’t forget that free shipping offer is only available July 23-25, so don’t miss out!! You can message me if you would like to pay by etransfer, or need assistance setting up your account or order!
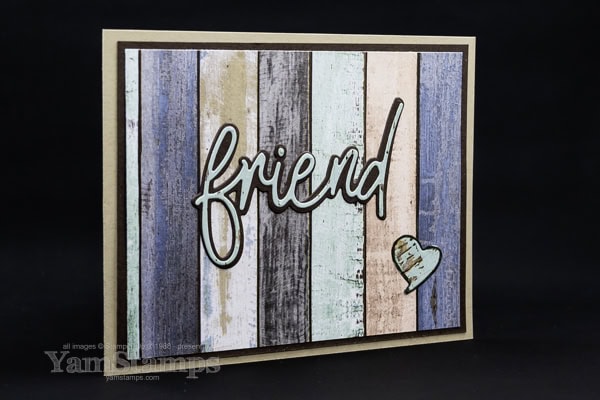
I think Stampin’ Up! Canada’s Friends for Life bundle is one of my favourites right now. I used it along with the Country Woods Designer Series Paper to create this Friends For Life Card – and it’s easy to re-create! I’ll share a couple of tips that might make this card a bit easier as well.
First off, the Country Woods Paper has some gorgeous wood grain / painted wood grain images including this multicoloured/striped one. That makes for an easy background for my Friends For Life Card! I used Early Espresso Cardstock for the backdrop, but before I stuck everything down, I cut the backing die for the word “friend” from the centre of that cardstock. I love that thrifty trick. The hole was then covered by the patterned paper and noone’s the wiser. I chose to die cut the detailed text and the heart from another sheet of the paper that had the lighter blue toned “paint”.
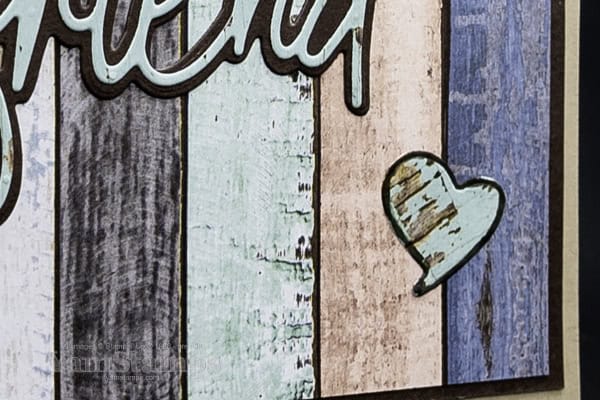
The trickiest part about this Friends for Life card is not losing the dot for the “i” when you pop everything out of the die!! If I am sending out die cut pieces like this to my Card Club Members, I fold some Press ‘n Seal in half around the pieces to encase everything safely. The other thing that the Press ‘n Seal can do is to hold the die cut in the original shape. Sometimes when I pull a thinner die cut word out of the die, it will stretch/spread, so I have to smush it back into the original orientation to fit onto the background. I hold the die horizontally, close to my work surface (covered in a bit of Press n’ Seal), use the brush tip for my Take Your Pick tool, and run it over the die to push out the die cut shape and drop it directly onto the Press ‘n Seal (or with as little handling as possible) to keep it in the original ratio/shape.
One other thing to make it easier with thinner or more detailed die cuts – I often will use an Adhesive Sheet on the backside of the paper – so that I just have to peel off the liner and it’s ready to attach. The other option is to use Multipurpose Liquid Glue – small dots, and it’s good to let it dry just a bit so that it doesn’t “smoosh” out everywhere.
To tie everything together and add a finishing touch to my Friends for Life Card, I took the brush end of my Early Espresso Stampin’ Write Marker (part of the Neutrals Stampin’ Write Markers set) and ran it around the edge of the heart so that it matched the word “friend” and the general design of the card. Put everything onto a Crumb Cake Card and it’s done!
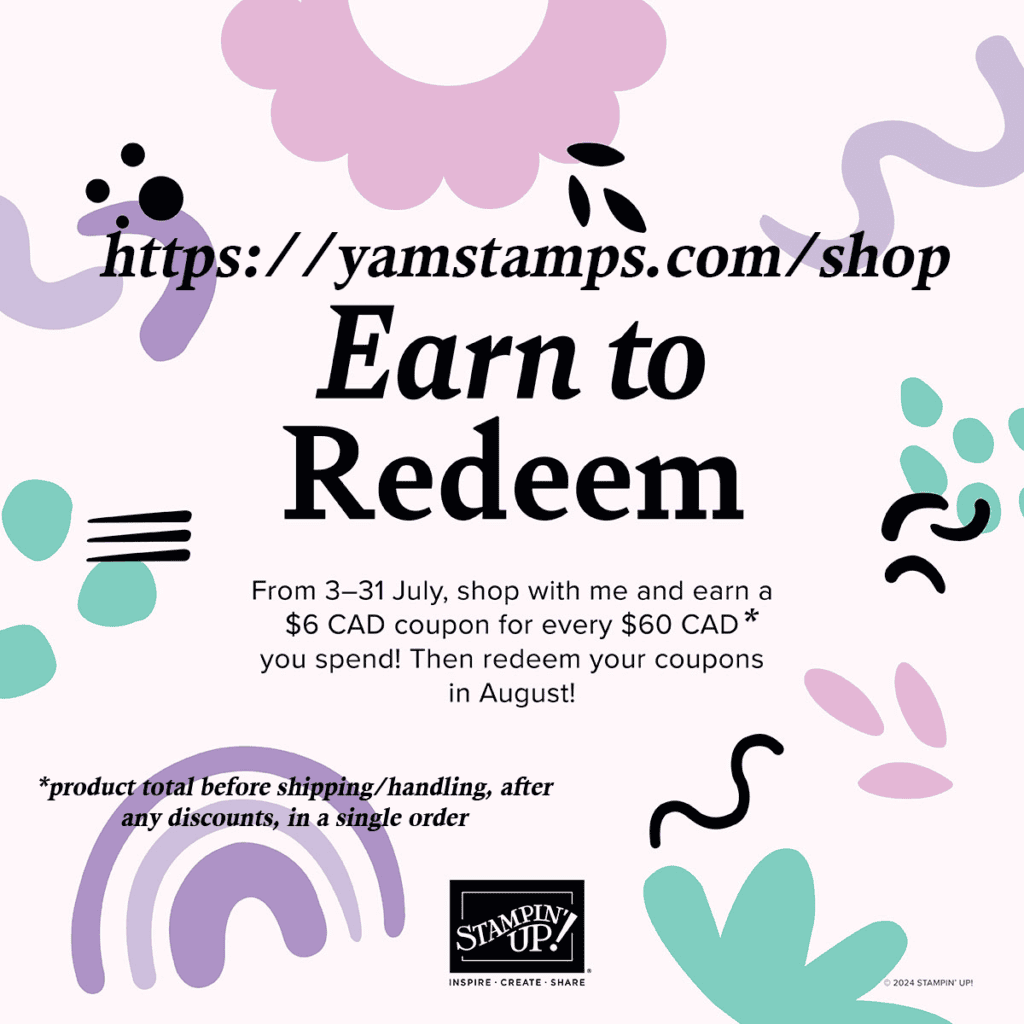
Starting today and running until the end of July, it’s Stampin’ Up!’s BONUS DAYS! For each $60CAD in product that you order, you’ll earn a $6CAD coupon that you can spend in August! Product total must be before shipping/taxes and after any discounts or codes are applied. It’s a great way to get an extra reward for making sure you’ve got crafty supplies on hand! Shortcut to shop in Canada is YamStamps.com/shop or you can message me with your order if you’d like to pay by etransfer or if you need assistance placing your order. Happy Shopping, and Happy Bonus Days!!
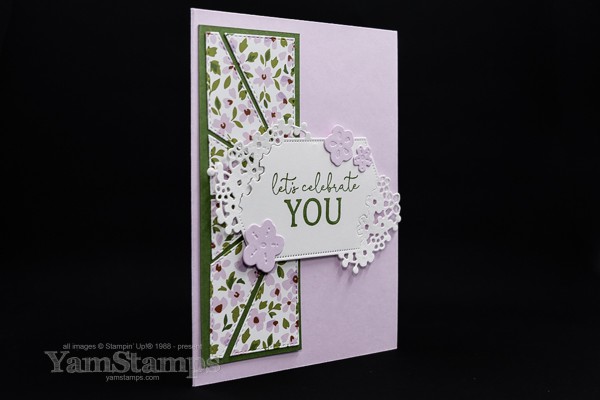
An eye catching element for this celebrate you card!
A “celebrate you card” is a perfect one to have in your card stash – because it can cover so many occasions – or non-occasions! This one has an eye catching design element that is easy – and an efficient way to use your patterned papers!
It’s apparently spring here (*cough*)….so I thought this was a good floral-spring themed celebrate you card to share! The patterned paper is from the Delightfully Eclectic Designer Series Paper which has four times the sheets that are in the typical DSP packages. I die cut the paper with one of the Patchwork Pieces Dies, and then used half of the die cut on this card – meaning I can use the other half on another card! The sentiment is from the Sentimental Park Stamp Set and the label and flowers from the coordinating Sentimental Park Dies.
This is the time of year when we start getting ready to say goodbye to products from the 2023-2024 Annual Catalogue and the January-April 2024 Mini Catalogue. Happily, the Sentimental Park stamp set and dies will be around for another year….but the Patchwork Pieces Dies and Delightfully Eclectic Designer Series Paper will be retiring at the end of the month, so are available only while supplies last/end of April – whichever comes first. Starting 9 April (next Tuesday), the Last Chance Sale starts – and the Delightfully Eclectic Designer Series Paper will be half price! So you may want to take your chances and wait until 9 April to get all that paper for less…. HOWEVER…
Here’s a little peek at some of the new product that will be available Wednesday!
The September-December 2023 Mini Catalogue will be in effect as of Wednesday, 6 September – here’s a peek at new product that you’ll find in it!
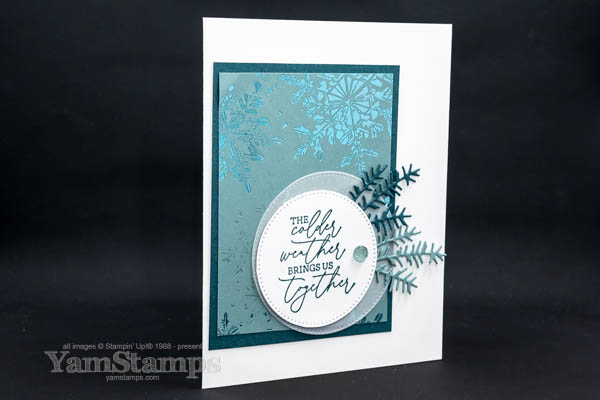
Stampin’ Up! Demonstrators get advance ordering privileges for new catalogue product – one of the very fun perks of being a Demonstrator. It’s so we can prepare samples and classes ahead of time, theoretically, but really, half the time we are just ooohing and aaahing over the product. (Or maybe that’s just me?! ha!). One of the other things I enjoy about being a Demonstrator is being part of Demonstrator only card swaps – where we make multiples of a single design and share with others who have done the same thing – so we end up with a variety of cards in terms of designs and products used. It’s a great way to kick start my own creativity plus get samples of products that I might not (yet) own!
I love the colours used in the Snowflake Magic Specialty Designer Series Paper. I always love things that are shiny or sparkly….and blues/greens are some of my favourite tones, so this paper was part of my first preorder from the catalogue. I combined it with the Magical Meadow stamps and coordinating dies (available in a discounted bundle) and stamped the sentiment in Pretty Peacock, which partners so well with Lost Lagoon. A little bit of bling from the Faceted Gems Trio pack completes the card. All of these links will work properly after 6 September, so you can come back then to follow the trail down the rabbit hole… (plus I’ll post a link to the actual catalogue as well, so there’s that).
Here’s a speedy video of my mass production process (less the part where I cut out the vellum circles because apparently I sometimes get the start/stop process messed up and just record me getting ready to record….not the actual part that I wanted to show!!). It’s from the YamStamps TikTok (speaking of rabbit holes…)
When I mass produce, I tend to do all (or most) of the same task at the same time before moving on to the next. Less switching of tasks means less brain work for me….and when you get into a rhythm it’s easier – plus it’s the only time I can usually craft and watch/listen to something at the same time without getting too distracted!
Did you enjoy this peek at new product?! I’ll be sure to post more – especially after the catalogue is live on Wednesday, so be sure to come back to the YamStamps blog to check it out!