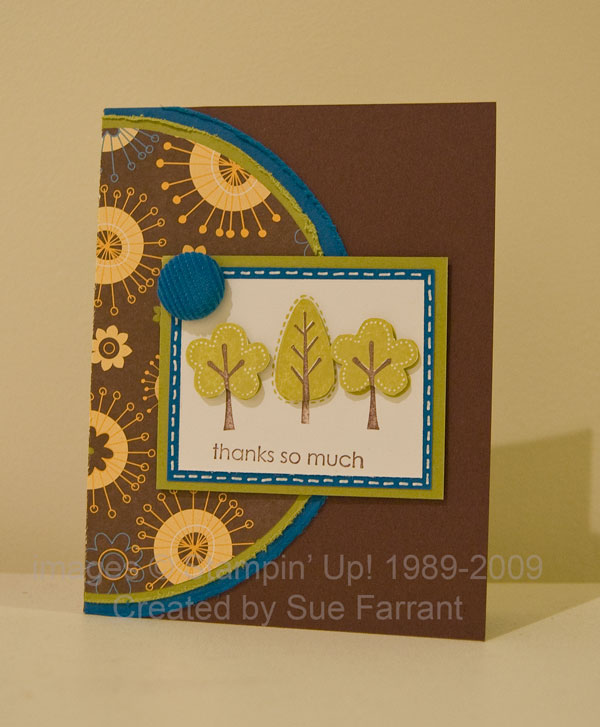
Thought I'd share this swap card created by my friend Sue. She uses the Stampin' Up! set Trendy Trees (on my wish list…) and the Good Morning Sunshine Designer Series Paper. I love the combination of Kiwi Kiss and Pacific Point with the Chocolate Chip!!! Lots of details on the card – the distressing on the circles (cut with the lovely new Circle Scissor Plus), the popped up trees, the faux stitching around the image and the Pacific Point corduroy button. All adds up to a "wow" card! It was great to get this in the card swap as I don't have this set…yet…lol
Happy Earth Day and Happy Professional Administrator's Day…
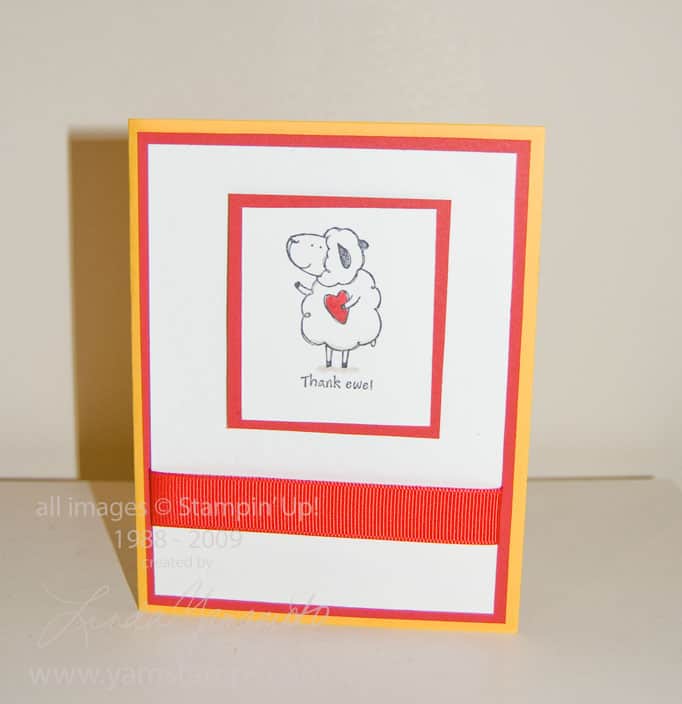
Another quick card from the mini Stamp a Stack from Stampin' Saturday. We used the image from Pun Fun (attendees got to choose which one worked for them) and then coloured in with stampin' write markers. I just used a bit of real red on the heart and some sahara sand for shadow. It's hard to see in the photo, but the larger white cardstock was run through the Big Shot with a Texturz plate. This example uses the mini dots but we also found that the larger dots were fun and tended to be even more noticeable. A length of real red ribbon around the bottom and then onto a Summer Sun card for contrast! Thanks for looking. I'll be updating my classes and events page in the next bit so be sure to check back and see what's on!
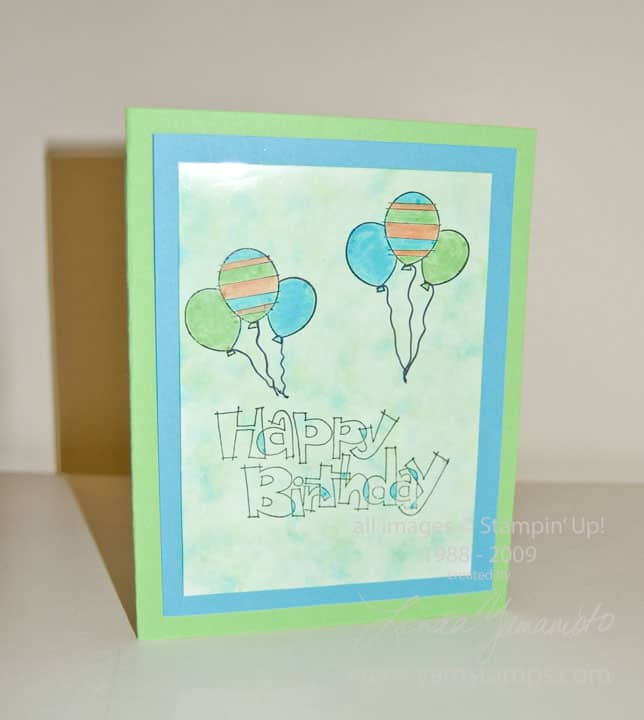
Another Stampin' Saturday card – from the "mini stamp a stack". We used the polished stone technique to create the pattern on the glossy cardstock. Stamps are from the Bitty Birthday and Outlined for Fun sets. We used stampin' write markers to colour the images as well.
Polished stone requires glossy cardstock and rubbing alcohol (isopropyl alcohol), cotton pads (makeup removal pads), ink pad reinkers and a well ventilated room. I also like to use rubber gloves to keep my hand from getting too inky. Wet a cotton pad with rubbing alcohol, and add drops of reinker to the pad, placed fairly close together. Dab the cotton pad repeatedly over the glossy cardstock to get the effect. If you rework an area while it's still wet, you tend to get a more muted effect, if you let an area dry before going over it again, you get more distinct "spots". Once it's dry you can stamp on top of it!
So I was doing really well on trying to post on the blog everyday….and then yesterday happened. The technogork that I am…I thought I had the post scheduled and I obviously messed up because nothing happened!!!!
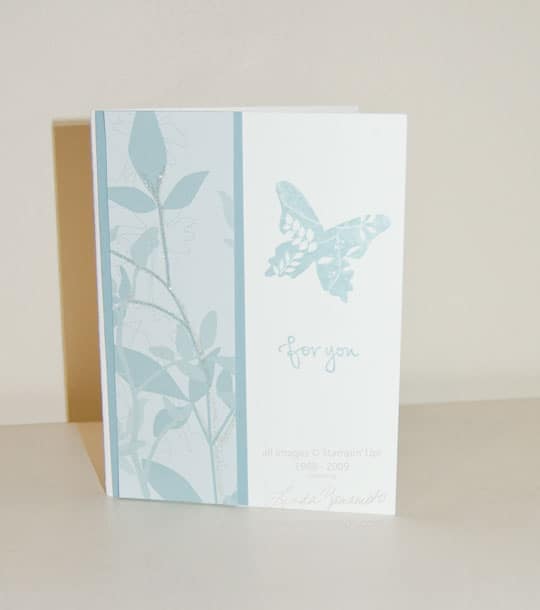
So here it is anyway… A quick and simple card that still wows! This is the Urban Garden designer series paper. We backed it with baja breeze cardstock and stamped the images from Great Friend (in the Occasions mini) in baja breeze. I liked it as it was…but then we added a little dazzling diamonds glitter with 2 way glue just to add a bit of bling. (Can't go wrong with glitter, I think…)
Easy to create, and a nice "break" for the brain after creating 3D projects!!
A reminder that I have a "For the Girls" all occasions class occuring on the first Wednesday of May, 7pm here in Burlington. Cards for females….and then in June…"For the Boys" all occasions class featuring cards for males! Contact me to register! Class fee is $15 and includes all supplies required for the projects, plus envelopes!
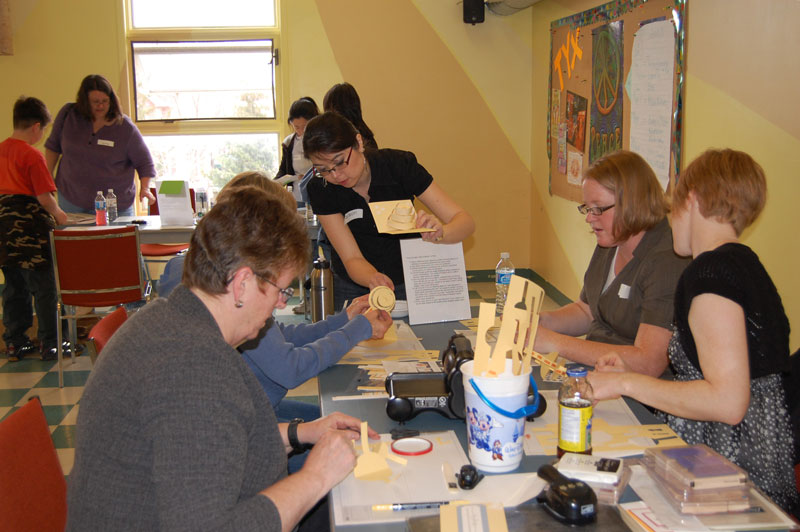
THANK YOU to all who made it to Stampin' Saturday!! I hope you had as much fun as I did… A HUGE thanks to Alison, a member of my demonstrator team who graciously helped out (and brought her Big Shot too!). She's guiding people through the 3D pop up cake card here. Two Big Shots definitely made all the projects go a bit more quickly.
I did remember my camera, though remembering to stop and take photos is still something I need to work on (can you tell I started as a card maker vs a scrapbooker?! lol). This is a candid shot of some of the attendees hard at work. I think the rest were at other stations, shopping the garage sale table or eating….
Oh – and for those attendees who might have heard me muttering "I thought I had more stuff for the garage sale table"….I found the other box of stamp sets when I arrived home. DOH. Oh well, more for the next rubber garage sale.
So thank you again. I am putting my feet up and will take/edit/post photos of the projects tomorrow.
Can't wait – been doing final prep this evening. We'll be doing a polished stone card, a card using the Sizzix texture plate, a quick and elegant card using designer series paper, plus two 3D projects – the Sizzix pop up cake card and a Top Note box. If you can't tell, I like my Big Shot….lol.
My camera is on my list of things to remember so I'll be able to post pictures from the event (as long as I remember to take the pictures….). Looking forward to seeing stamping friends (old and new) tomorrow!!
Today is the last day to register for Stampin' Saturday! This Saturday at Tansley United Church, 2111 Walkers Line, Burlington ON (in the loft – accessible by stairs or elevator) we'll be stampin' up a storm from 12 to 3 pm – a mini stamp a stack (6 cards total) plus 2 different 3D items, snacks, door prizes and the rubber garage sale!
$35 covers all supplies and fun – Contact me or click on the paypal link below to register before it's too late. See you Saturday!
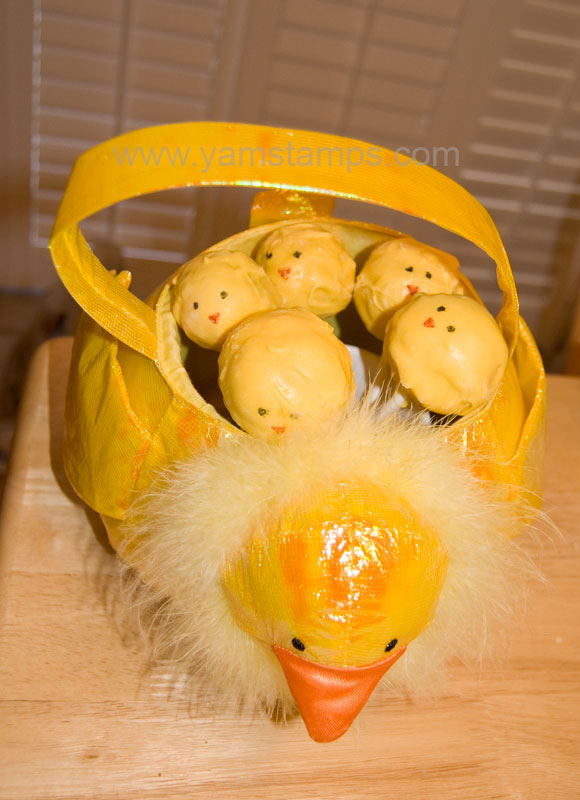
Pretty impressive, eh? I was inspired, but couldnt find the candy coated chips (used for the beak & wings).
Don't laugh too hard…these are mine
Presentation is everything, right? (that's my son's Easter basket)
My son loved my version and thought they were great, so that's all that really matters. I figure if I keep practising I may be able to produce half decent ones by next Easter…. Have to work on my "dipping" technique. Oh, and I have a year to find those candy coated chocolate chips for the wings & beaks.
Then again, perhaps I should stick to papercrafting.
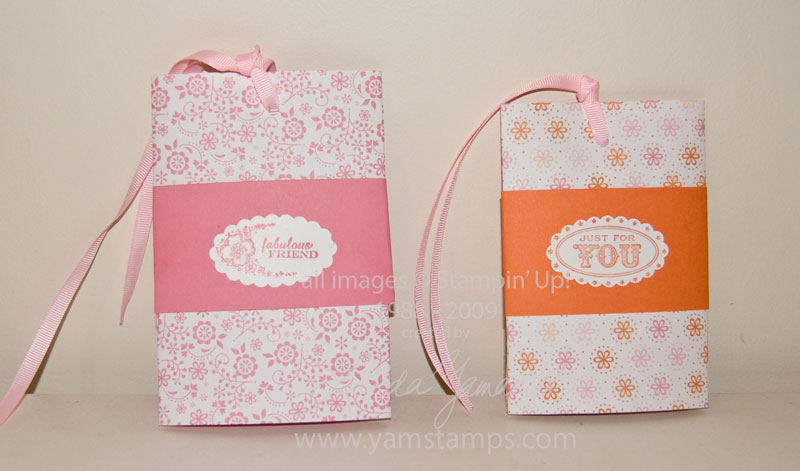
These are the seed packet holders I demonstrated on CH Morning Live last week. Essentially, it's a flattened tube of paper around the seed packet – just fold the paper around the packet like you would fold a letter, and secure with adhesive. Punch a hold in the top (the Crop-a-dile goes through multiple layers with ease!) Thread ribbon through the hole, then slide the packet into the tube, pushing the ribbon down. Once it's in the tube, tie a knot in the ribbon, and the recipient just pulls up on the ribbon to reveal the seed packet. We made it a bit fancier with a "belly band" of cardstock and stamped images from the Occasions Mini set Oval All, and punched out with the yummy new scalloped oval punch, also featured in the Occasions Mini.
Don't forget that if you order $50 worth of product from the Occasions Mini, you get a free "Under $12" item from the Idea Book & Catalogue! (page 208)
ALSO – Today is the last chance for the special pricing for Stampin' Saturday! Saturday April 18th will be a fun afternoon of stamping and creating (oh, and shopping….). Contact me to reserve your spot!

 Thought I'd share this swap card created by my friend Sue. She uses the Stampin' Up! set Trendy Trees (on my wish list…) and the Good Morning Sunshine Designer Series Paper. I love the combination of Kiwi Kiss and Pacific Point with the Chocolate Chip!!! Lots of details on the card – the distressing on the circles (cut with the lovely new Circle Scissor Plus), the popped up trees, the faux stitching around the image and the Pacific Point corduroy button. All adds up to a "wow" card! It was great to get this in the card swap as I don't have this set…yet…lol