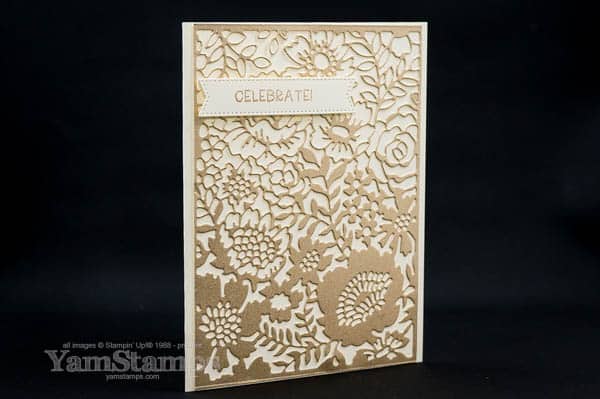
Stampin’ Up! has a number of larger dies that can be used to create backgrounds or main elements for your paper crafting projects. I used the large die from the Two Tone Flora Dies to create this shimmery die cut card. The dies include the large die, as well as smaller dies that coordinate with the large die and with the Two Tone Flora stamp set. Right now, they’re available in a discounted bundle, but that option will disappear after 1 May 2023. The individual products will still be available for purchase, though!
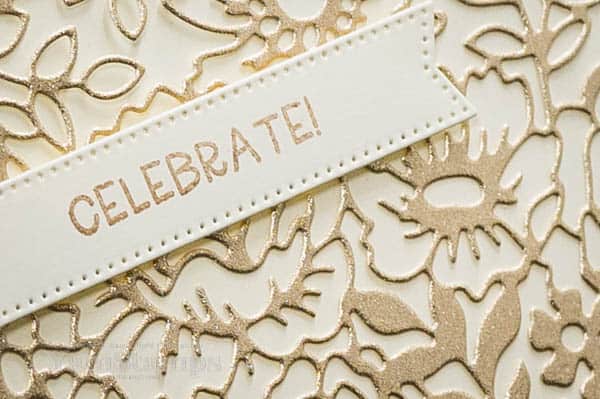
For this quick and elegant shimmery die cut card, I used the large die with the Fine Shimmer Paper Pack (also retiring – available until 1 May 2023/while supplies last). I love the shimmer paper for adding some bling but not being over the top (and also not leaving glitter/shimmer everywhere). To make this even easier, I applied strips of the adhesive sheet to the back of the Fine Shimmer Paper before die cutting.
Tips for die cutting thicker layers/detailed dies: I make the “sandwich” according to the instructions on the cutting plate, and run it through the Stampin’ Cut & Emboss Machine a couple of times. I also have found that if I have the die/paper on a slight angle (rather than lining it up straight on the cutting plates), it tends to cut more efficiently (plus it’s easier to feed through the machine). I definitely use both of these approaches if I have adhesive sheet on the back. I usually find that it may not cut all the way through the liner, but when I pull the adhesive liner off my die cuts, the little bits also tend to pull away at the same time.
I added a Stylish Shape die cut label and stamped “Celebrate” in Crumb Cake ink, which I thought complemented the tone of the Shimmer Paper. The sentiment is from the retiring Framed Florets stamp set (see previous disclaimer about retiring product…).
You could make a whole bunch of these shimmery die cut cards ahead of time, but just add whatever label was appropriate for the occasion!!
If you’re looking for more card making inspiration, information and tutorials, be sure to be signed up for the YamStamps Newsletter! New subscribers get a free video tutorial as well. Sign up using the box at the top of the website, or click here.
A quick and fun stripes and spots card that’s easily customized!
I love how it’s easy to get a custom card by swapping out colours or sentiments. That’s the case with this stripes and spots card! It’s a fun celebratory card that could be used for any number of occasions.
For this card, I used the NEW Core Colour Fresh Freesia. Yes, the same Fresh Freesia that is a 2021-2023 In Color – it’s sticking around and becoming part of the regular Stampin’ Up! colour offerings! I combined it with Pale Papaya and Polished Pink, also 2021-2023 In Colors, but those ones are retiring 1 May 23.
You could easily take this stripes and spots card design, and use it with any cardstocks and embossing folder you have on hand. In this case, I used the spots folder from the Basics 3D Embossing Folders package – which includes 3 different Embossing Folders which are great for all occasions. They are one of the Online Exclusives – so they don’t actually appear in any catalogue, just in the online store.
The sentiment is from the Eden’s Garden stamp set (available until 1 May/while supplies last) and is stamped in Fresh Freesia ink – because you know I like to coordinate my colours! I used a die that had angled edges because it made it easy to angle my sentiment across the cardfront. It’s actually from the retired Frosted Flurry dies….but apparently I couldn’t keep track of that and used it anyway LOL! I don’t feel it’s fair to use retired products here because they aren’t always available (though obviously this one will show up at my retired product garage sale if you’re able to attend!). There are other angled dies that would do a similar job – like the Something Fancy Dies or even the Sentimental Park Dies. Or you could go old school, cut a long rectangle and then once you’ve adhered it in place at an angle you like, just trim off the overhang!
If you’re looking for other card design ideas to help you get creating more quickly and easily, subscribe to the YamStamps Sketch System! Subscribers have been loving how quickly they can create cards based on the sketches! You get the “blueprint” or sketch of the card, including measurements, the first week, and then in the following weeks you’ll get samples (and a supply list) using the same sketch, showing different takes on it! For only $9.99 CAD a month that’s a lot of inspiration – and it’s exclusive to the program. Find out more and start your subscription here!
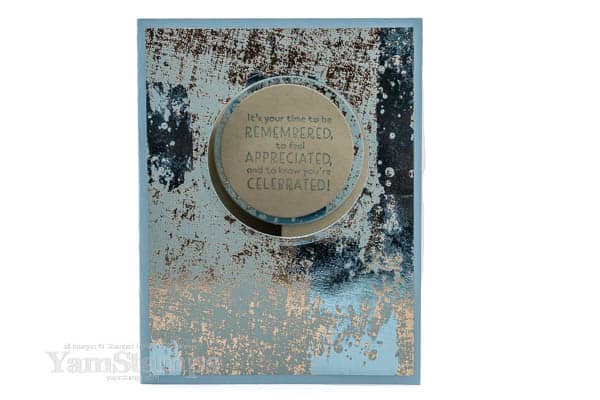
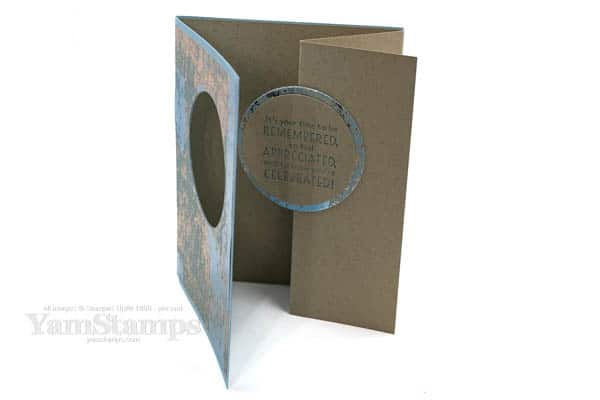
So for the super easy fancy fold card part…the Crumb Cake a “Z fold” card. Take your cardstock (8.5″ x 5.5″), fold it in half, and then fold one side in half again. Arrange it so it opens to the right, and then adhere it inside a 8.5″ x 5.5″ piece of Balmy Blue Cardstock that’s folded in half.
The impressive part comes from cutting a circle in the front of your Balmy Blue/DSP card. Take that circle, and with the entire card structure closed, adhere the circle on the fold of your Crumb Cake cardstock. It looks a lot trickier than it actually is!! Don’t you think it lives up to the Super Easy Fancy Fold Card title?!
For this card I did use the Layering Circles Dies with my Stampin’ Cut & Emboss Machine. The layering circles dies are retiring – so they’re only available until 1 May or while supplies last (whichever comes first). I am having a retiring product garage sale here in Burlington on Saturday, 6 May 23, but these dies will NOT be part of that – because I’m hanging on to them!!! If you don’t have these in your stash, you may want to grab them before they’re gone, or if you are recreating this card, you could easily use a circle punch, or another shaped die you have in your craft area.
(otherwise, garage sale in my garage Saturday 6 May 23 (EDIT) SATURDAY 13 MAY from 9am til noon, and yes I’m aware it’s Coronation Day, but you can still watch and then come by….or PVR it and come early). (also – it will probably be re-broadcast multiple times that day!!) Message me for more details and exact location!
If you’re interested in more easy and impressive card ideas, be sure to be on the YamStamps list – I send out weekly ideas, information and tutorials! Use the sign up box at the top of the YamStamps site, or click here. If you’re new to my list, you’ll get a free video tutorial when you sign up!
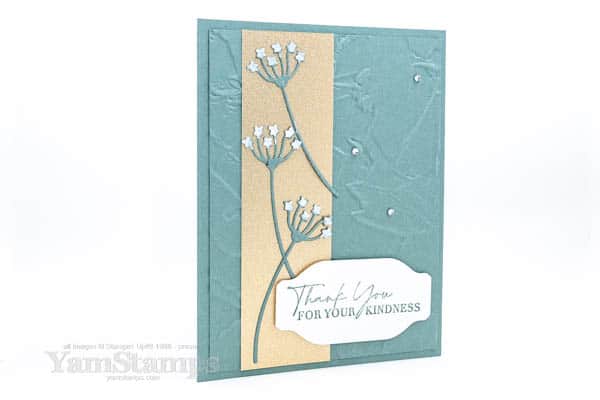
A bit of ink gives these die cuts a cool effect for this floral card!
I’m all about flowers right now….because I’m ready to stop shovelling snow! This is a floral card that I made for a recent Demonstrator only card swap. We used products from the January-April Mini Catalogue, so I chose to use the Dainty Delight stamp set and dies – which you can purchase separately or purchase together in a discounted bundle. A quick reminder that discounted bundles are often available only for the sales period of initial catalogue in which they appear – something to keep in mind, especially as we draw closer to the end of the Mini Catalogue sales period!
I may have mentioned it before, but I am not a gardener. Inside plants, outside plants – doesn’t matter – they are lucky to survive a few months at my home. That’s why I really like paper flowers and plants!! I decided that these die cuts reminded me of Queen Anne’s Lace, though they may actually be based on a different flower, but the beauty of paper flowers is that you can customize them however you’d like.
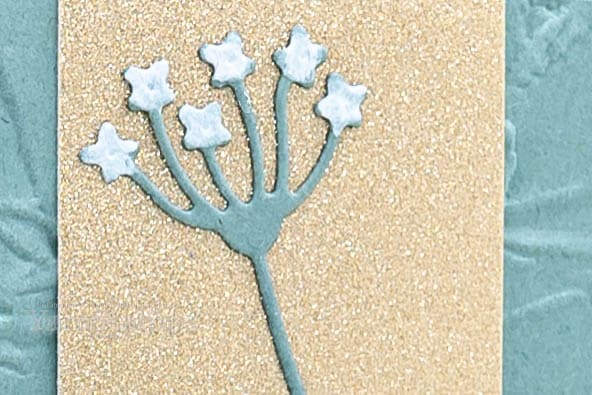
To make them more like the flowers (okay, I believe they’re actually considered weeds around here, but they’re pretty weeds), I made the blossom portion white. This was actually the most time consuming part of this floral card, and even at that, it didn’t take long. I placed the die cut onto a silicone sheet, and then squeezed some White Craft Ink refill onto a spare Clear Block. I used a dry Water Brush to apply the reinker onto the blossoms, did a couple of coats to be sure it was opaque enough for my liking, and then left them to dry. Once they were dry, I added them to the card. Easy peasy! I have to try it, but I think you could probably add some coloured reinker on top of the white blossom to make coloured blossoms if you want!
floral card closeup (you don’t have to be an expert painter!)
Die Cut Your Patterned Paper to make this beautiful and EASY card!
Stampin’ Up! Canada has a number of coordinating dies and stamp sets – which I love. What I have grown to love even more, though, is the coordinating dies and Designer Series Papers! When you die cut your patterned paper, you’ll be amazed at how professional your results will look – check it out:
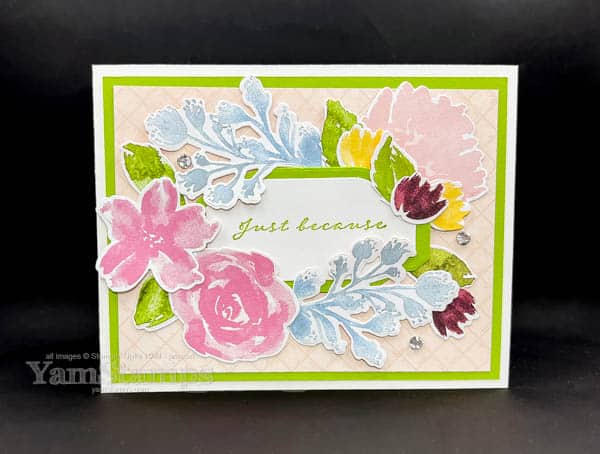
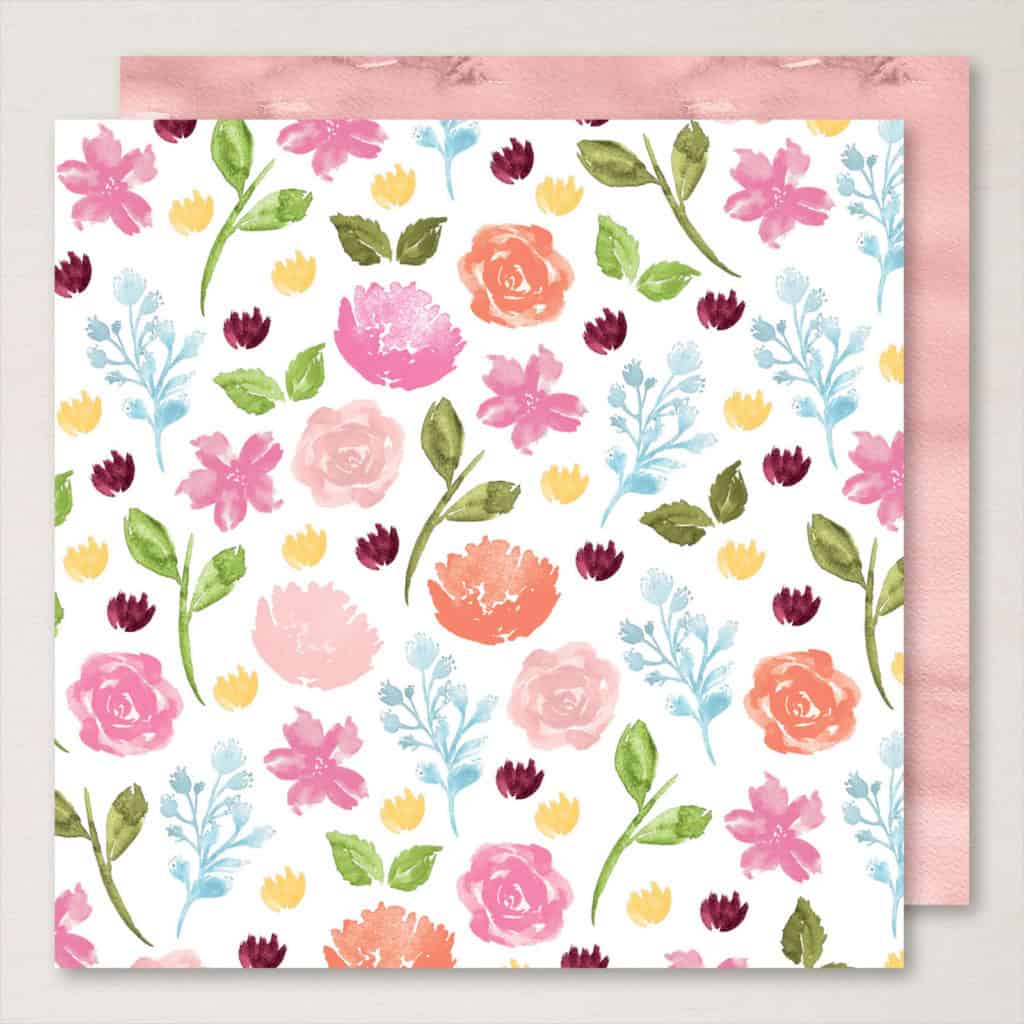
For this card, I stamped the sentiment in Granny Apple Green, and used the Something Fancy Dies to cut the labels. (Using my thrifty trick of cutting the backing label layer from the centre of the backing cardstock). I then die cut a bunch of images from the sheet of DSP that has images just waiting to be die cut…
…and took those die cut pieces and arranged them around the border of the frame! I adhered a different piece of the DSP to the backing cardstock to cover up the hole, and the create a background for the sentiment and die cut flowers. Added some Rhinestone Basic Jewels for a bit of bling and patted myself on the back! Die cut your patterned paper for an easy, professional looking card.
I also used this paper and dies to decorate one of the cards in my Fantastic Florals Online Class – and I made a few prototypes, so you know that there’s plenty of cards to be made with all the die cuts you can get from one package of paper!
The YamStamps Sketch System is perfect for quick and easy cardmaking!
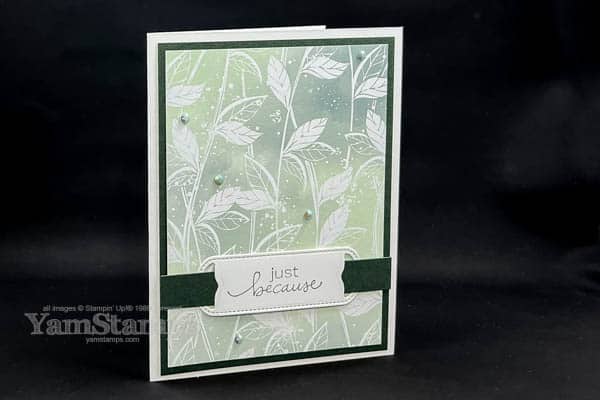
The YamStamps Sketch System for quick and easy cardmaking – I’ll show you the concept while I share this card that features some gorgeous new Designer Series Paper! The patterned paper in question is the highlight of this card – it’s the Hello, Irresistible 6″ x 6″ Designer Series Paper. It is, literally, irresistible – I had to buy it during the Demonstrator PreOrder period last month!!
Here’s the card:
The Hello, Irresistible DSP patterns are based on resist techniques, with gorgeous washes and bold images – and you want to make sure it’s seen! The paper is not in any catalogue, so if you’d like to take another look at it – check out the YamStamps Online Stampin’ Up! Canada store for this and other Online Exclusive Products! I added a bit of bling to the cardfront with the Iridescent Pastel Gems.
I realize that I often have “go to” designs for my quick and easy cardmaking – it makes it fast for me to come up with variations on a theme by switching out the paper and products used. I started the YamStamps Sketch System Subscription program a couple of months ago to help subscribers kick start their creativity, and they are loving how it truly does make for quick and easy cardmaking! (I also love how it helps me while I’m coming up with the sketches and samples!) It definitely helps overcome “Crafter’s Block” when you can’t come up with an eye catching card design, no matter how hard you try. (Sometimes the harder you try, the worse it gets…).
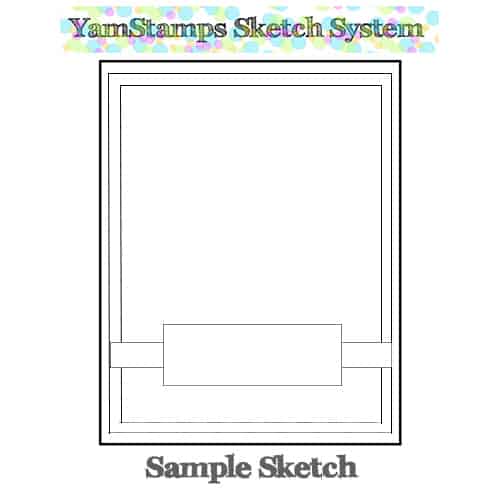
For example…the Hello, Irresistible card could have been one of the weekly samples to go along with a Sketch System sketch – though in truth, I came up with the sketch after making this card! LOL. This design is a little straightforward – the designs in the Sketch System are a little more involved.
Dimensions: Cardbase: 5-1/2″ x 8-1/2″ scored and folded at 4-1/4″ Large Rectangle: 5-1/4″ x 4″ Medium Rectangle: 5″ x 3-3/4″ Strip: 1/2″ x 4″ Small Rectangle: 1″ x 3″
This is similar to the Week One Email for each sketch in the subscription series. You get the sketch, the measurements, and the first sample. For the next three weeks, you get a different sample showing a variation on that month’s sketch. The last week also brings a summary email – showing the sketch and all four samples. One sample is always a winter holiday themed one – so you’ll have plenty of holiday card ideas when you need them! Quick and easy cardmaking – all year round!
After four weeks, you’ll get a new sketch and a new series of samples – and so on, and so on!
Supply lists for each sample are also provided for your reference, though not all items may be available for purchase at the time you receive the email. The beauty of the Sketch System is that it’s a blueprint for the card, and you substitute in whatever supplies you have on hand, and customize it for your card giving needs!!
Try it out – make a card using this sketch! When you post it online, use the hashtag #yamstampssketchsystem so I can find it – I’ll make it worth your while 😉
What subscribers have to say:
Kathy says “I really enjoy receiving the weekly ideas for a monthly pattern. Great idea. Thanks.”
Merle says “I was able to create a whole bunch of birthday cards really quickly – it made it so easy!”
Visit go.yamstampsmore.com/sketchsystem for more information – and get started! You get your first sketch emailed to you as soon as you sign up!