Dec 4, 2017 | cards, Christmas, Retired List, Stampin' Up!
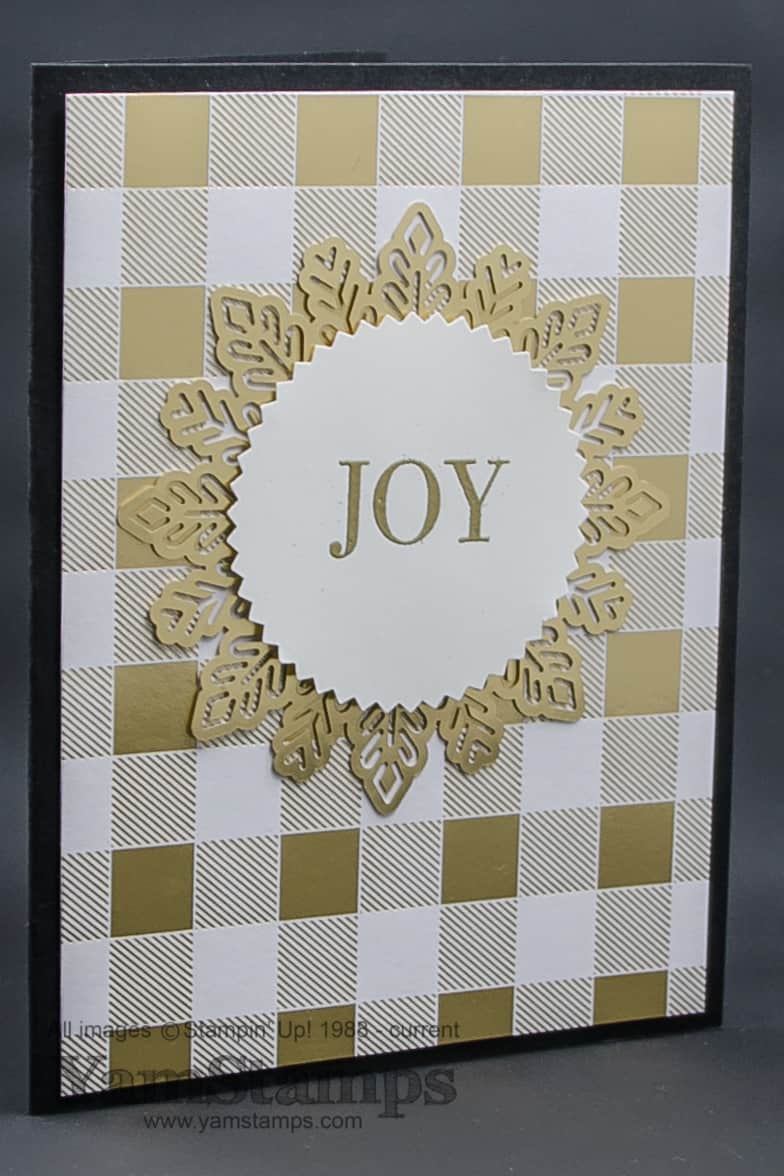
This time of year can certainly be hectic, so I thought it was a good time for a Manic Monday – Christmas Card Edition! Some of the items featured on this card are going to be retiring – so you’ll want to grab them while you can. Read more about the Year End Sale Event here – including links to the lists.
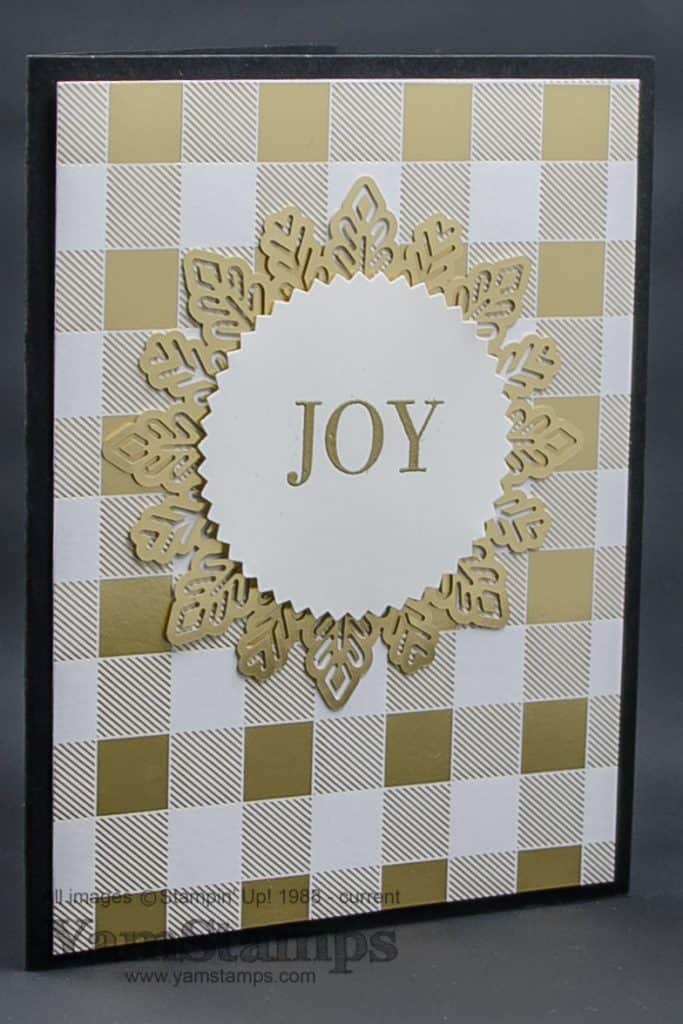
You may notice that this is a black card. I liked the way the black made the gold and white “pop” more – but black is a hard colour to write on….so what you can’t see is that there is an additional piece of Whisper White cardstock on the inside of the card so that the personal greeting is readable.
The gold plaid background is one of the sheets from the Year of Cheer Specialty Designer Series Paper. This has been my FAVOURITE paper from the Holiday Catalogue. I love the weight of it, and I love the “wow” of the metallic. It adds glamour to the project without effort! The gold foil snowflake is another way to add “bling” without too much effort. Both the DSP & the foil snowflake will be unavailable after the end of the Holiday Catalogue – and current supplies are available while they last (so if you really like these items, you’ll want to order them ASAP!). The JOY sentiment is from Cheers to the Year, which is available in wood mount or clear mount until the end of the Holiday Catalogue sales period. It’s heat embossed with Gold Stampin’ Emboss Powder, and punched out with the Starburst Punch. Good news…LOL…both of those are from the Annual Catalogue, so will be around for a while still!
This card can be easily created en masse so great for those that are still finishing their holiday cards (guilty party here….LOL). Have you finished your cards yet? Once again, like the cobbler’s children who have no shoes, I am the cardmaker who is scrambling to get Christmas Cards together to send out for herself!! On the YamStamps Facebook page, I shared a great article about the importance of still mailing a Christmas Card. I truly believe that a handmade card increases the value and significance even more! So on that note…I’m off to see what I can do about my Christmas Card list!
Nov 30, 2017 | cards, Christmas, Seasonal Catalogue, Stampin' Up!
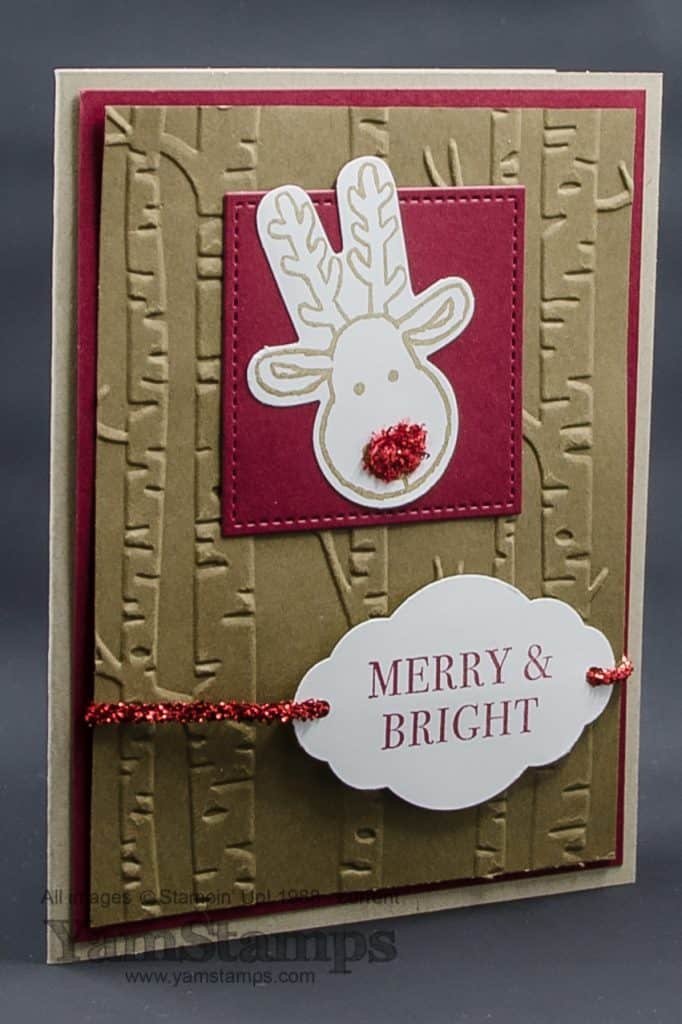
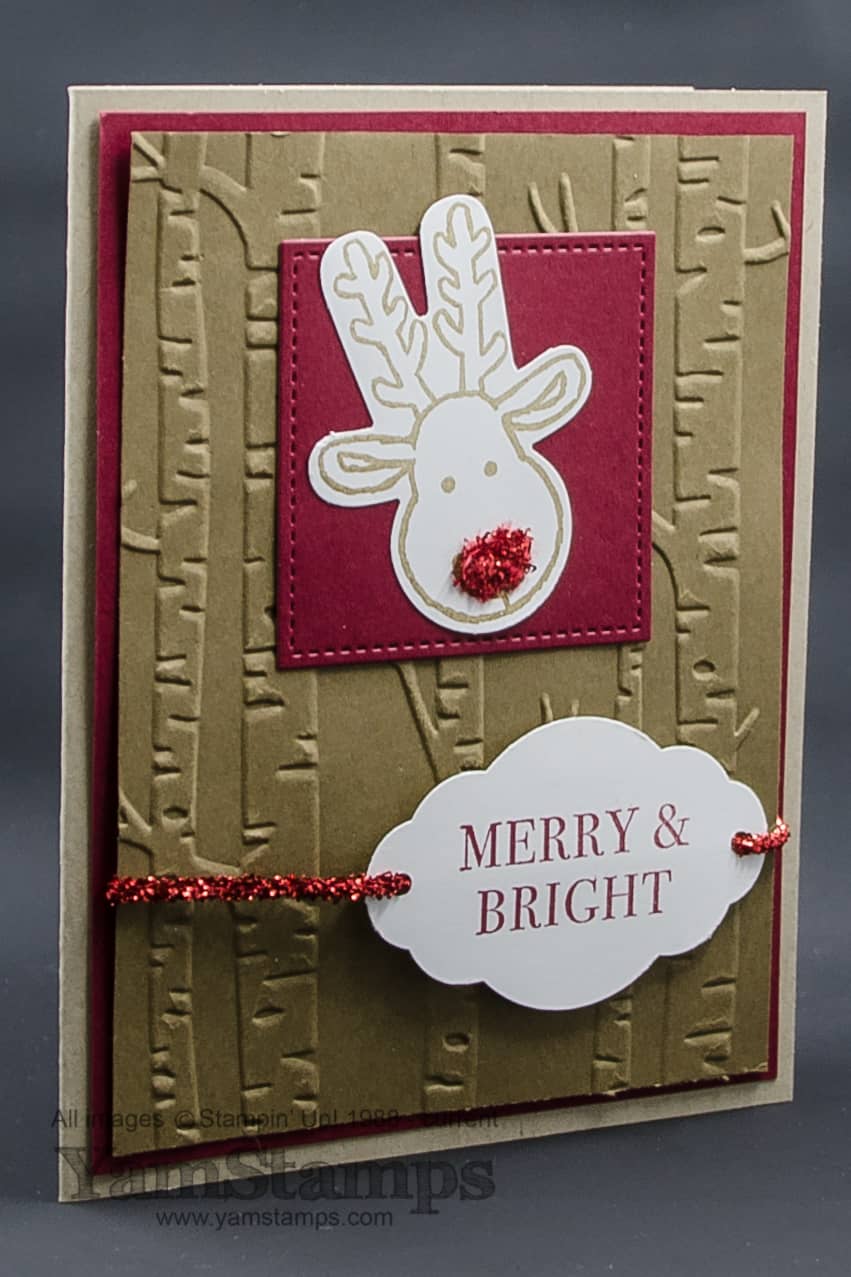
Isn’t this fun? This is a Mini Tinsel Trim Reindeer Card – one of the projects from the last Christmas Card Class. There’s a lot of components to this card, even though it’s not overly complicated, and it all adds up to fun, The reindeer is from Stampin’ Up!’s Cookie Cutter Christmas and punched out with the coordinating Cookie Cutter Builder Punch. He’s stamped in Soft Suede and then mounted onto a Cherry Cobbler Stitched Shape Framelits square, which, if you know me, you’ll know that the square was cut from the backing layer of Cherry Cobbler Cardstock – because it never hurts to be a little thrifty! The Soft Suede cardstock is embossed with the Woodlands Embossing Folder, and the Pretty Label features a sentiment from the Hearts Come Home stamp set (available in wood mount, clear mount or bundled with coordinating Framelits – wood bundle / clear mount bundle). I normally try not to mix & match too many stamp sets, but couldn’t resist how the Merry & Bright sentiment tied in so well with the Rudolph theme. The red Mini Tinsel Trim is featured on this card – holding the label in place, and on the reindeer’s nose! For the nose, I applied some Multipurpose Liquid Glue to the nose and then worked over top of the area and snipped bits of the red tinsel trim – to create red, sparkly shavings that stuck in place.
I love the versatility of the Cookie Cutter set – and this was the most popular make & take that we did at the YamStamps booth at the recent Scrapfest / CreativFest. Attendees who stopped by got to choose either a reindeer or a gingerbread man tag – both from the same set and using the same punch! We did different make & takes each day of the event, so those who were attending the crop could stop by each day to make a different mini project. If you are still looking for inspiration, I hope that you are on my mailing list! We are in the final stretch of the Twelve Weeks of Christmas – each week featuring a different holiday project. We are focusing the last few weeks on tags, bags and wrapping ideas. You won’t see this Mini Tinsel Trim Reindeer Card in there, since we’re already past the card section, and since the ideas shared in the Twelve Weeks emails are ONLY in the emails – not on the YamStamps blog nor any of the social media feeds.
December means we are getting into the busier time of the season! I don’t know about you, but I’m looking at a calendar full of Christmas concerts, gatherings and events. If you need a little creative “time out”, the Monthly Card Class is still happening – December’s class is this upcoming Wednesday, December 6th, at 1pm or 7pm. If you’d like to join us, please contact me to register. Please note, that looking ahead, January’s Card Class will be the SECOND Wednesday of the month, not the first.
I hope that you’ll come back tomorrow – because there’s going to be more details about a SALE happening during the month of December! Plus I’ll update in the next few days about the next Stamparatus Reservation window. In the meantime, if you have any questions, please feel free to contact me!
Nov 28, 2017 | cards, Stampin' Up!, TV/Video/Web/Tech
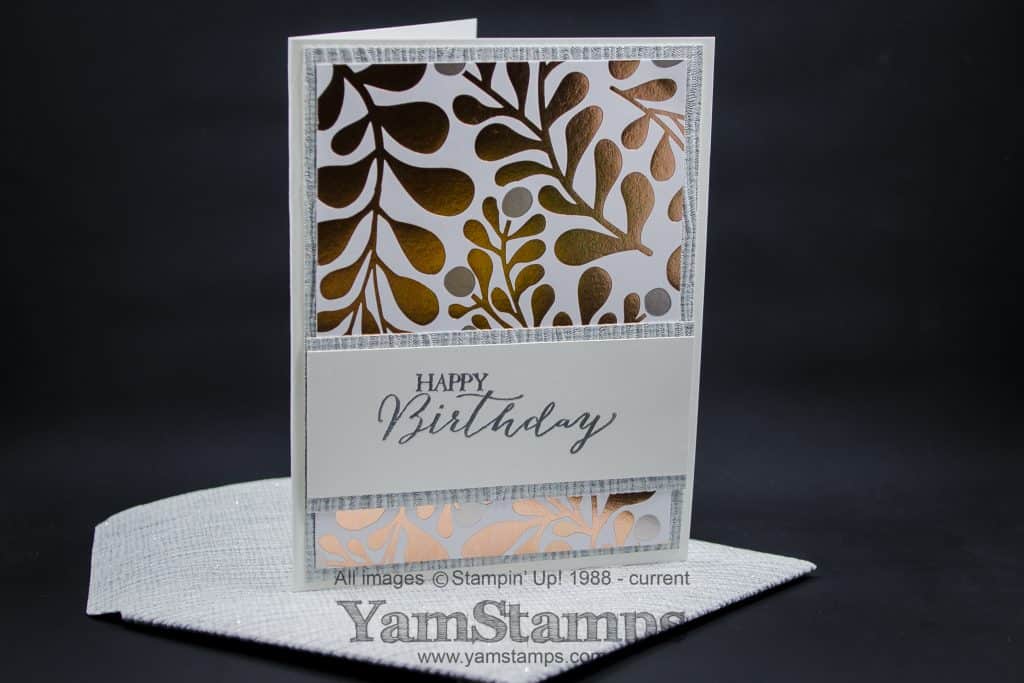
I was recently asked to participate in a fun project for the Wayfair blog – making a wallpaper craft! The idea was to showcase how to use leftover remnants of wallpaper. I got to pick whatever wallpaper I liked from the online store (that was a chore in itself, narrowing it down!) and then use it to create or re-create a craft project.
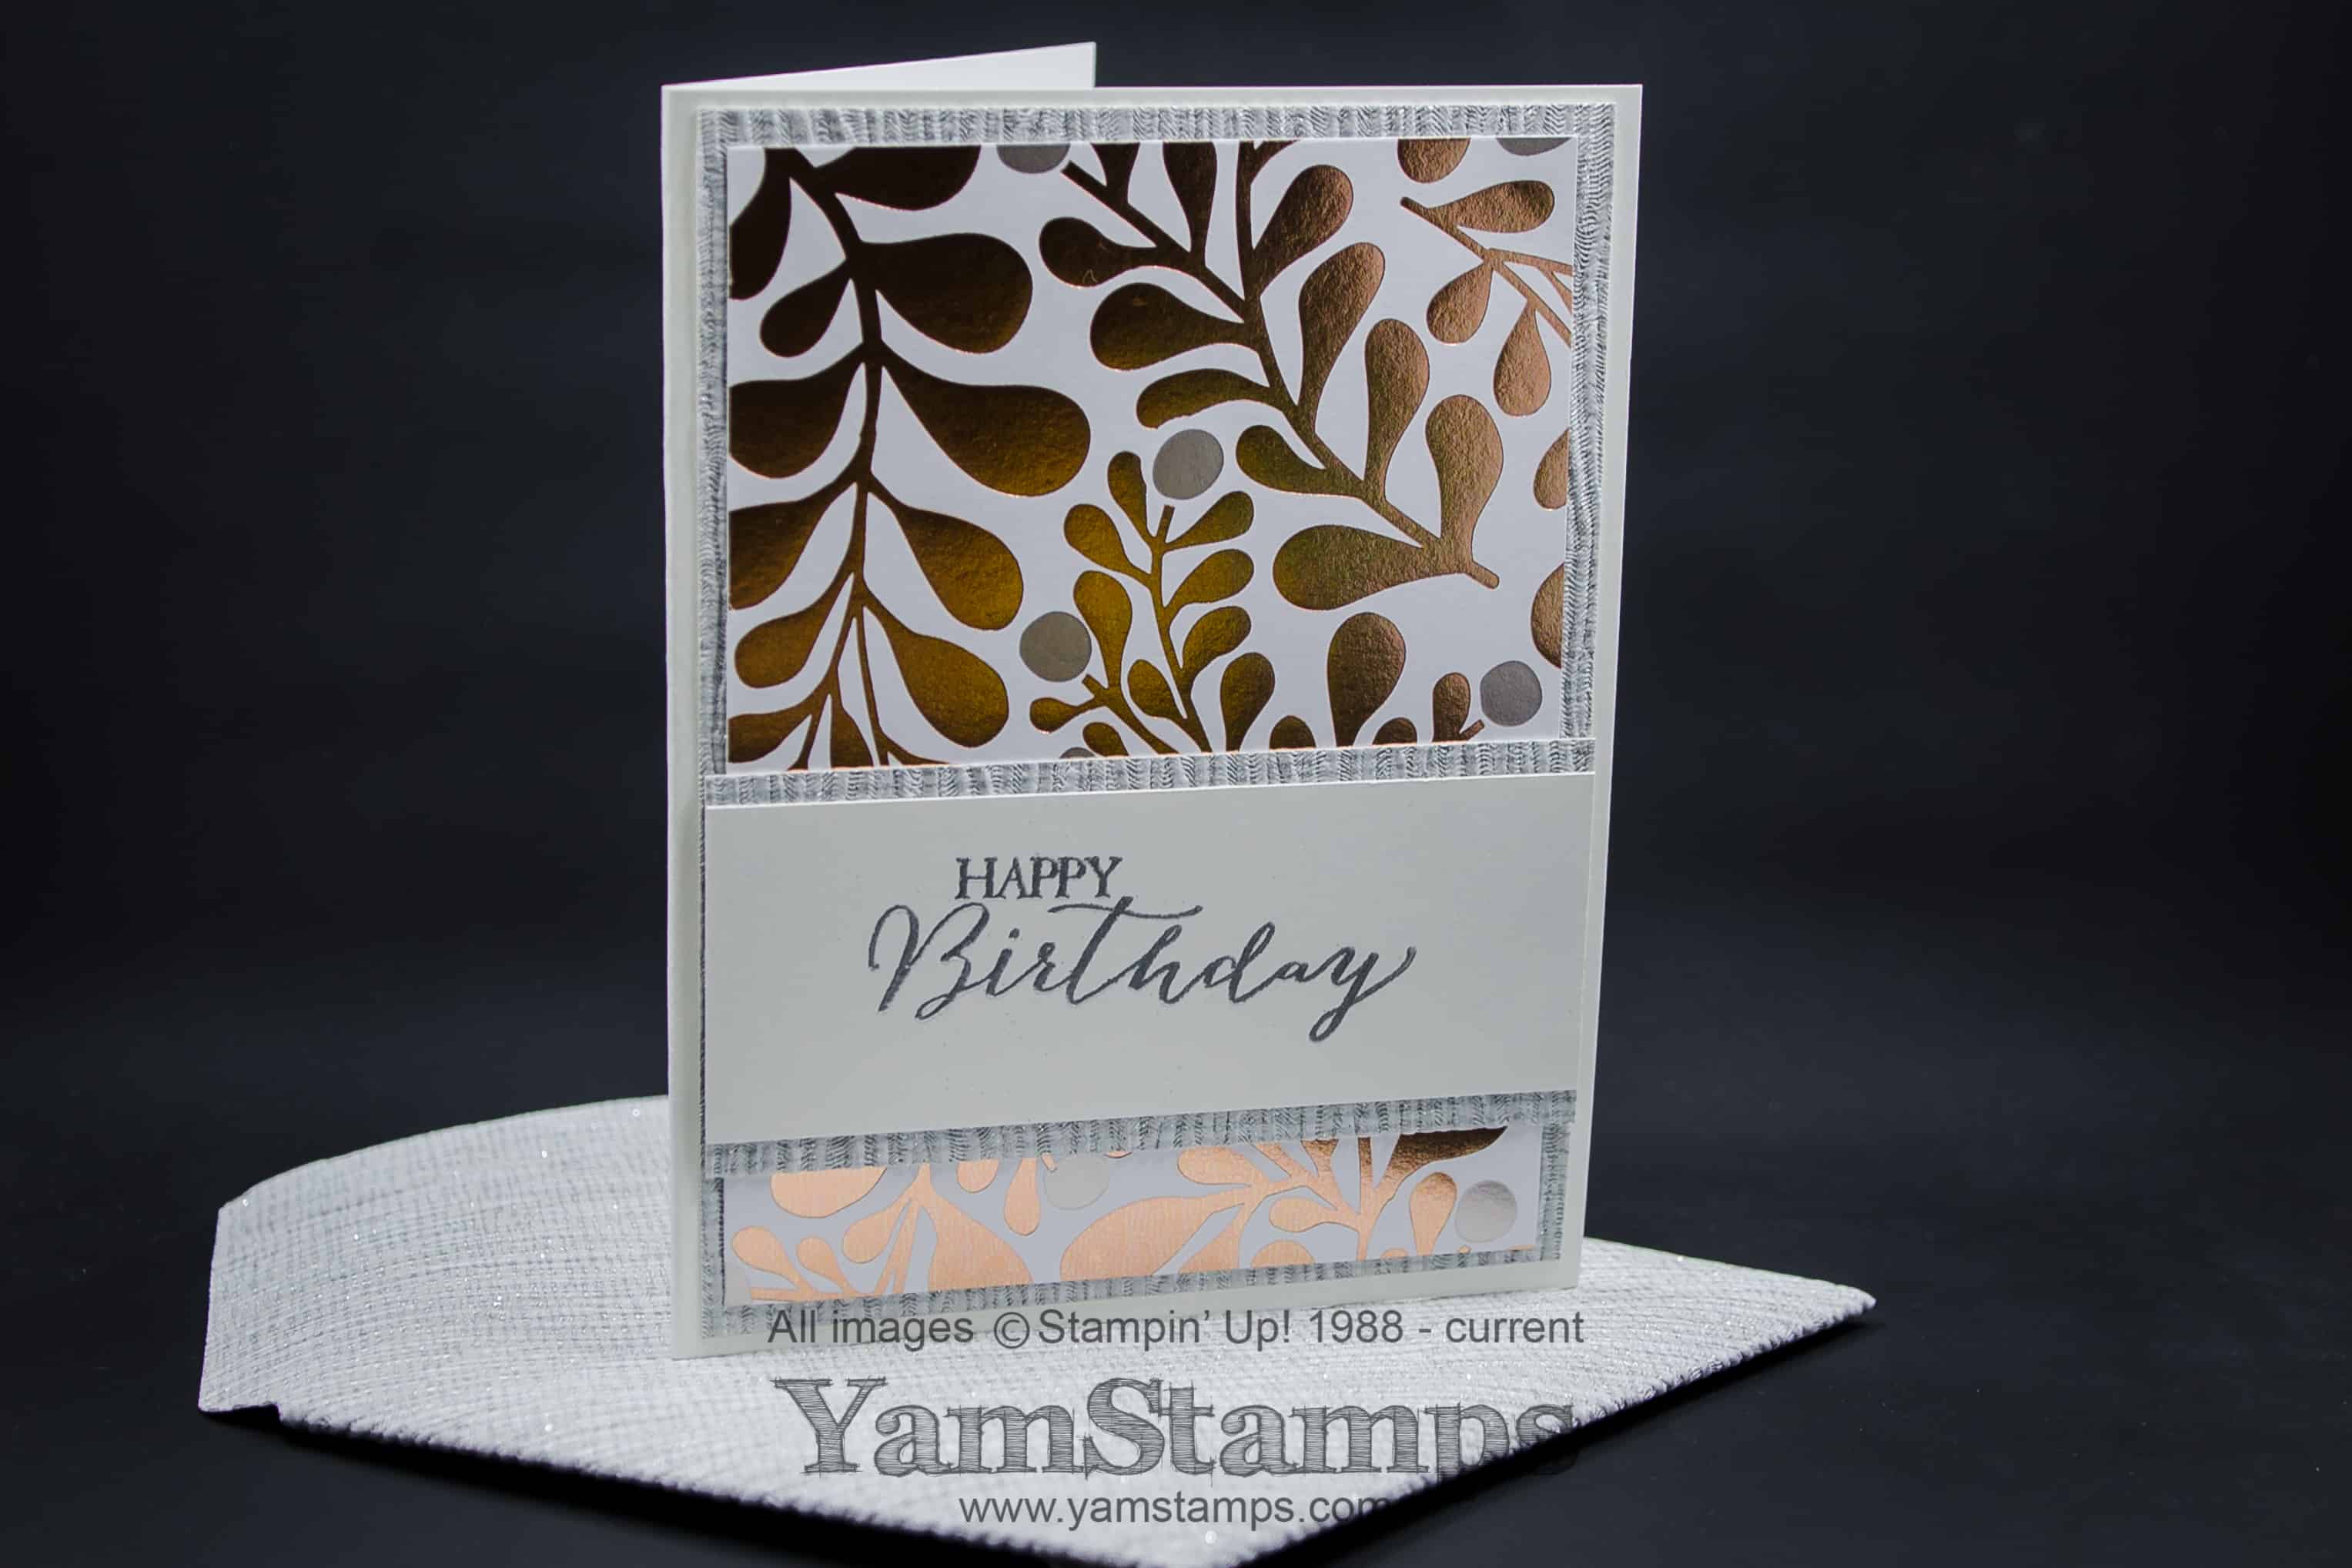
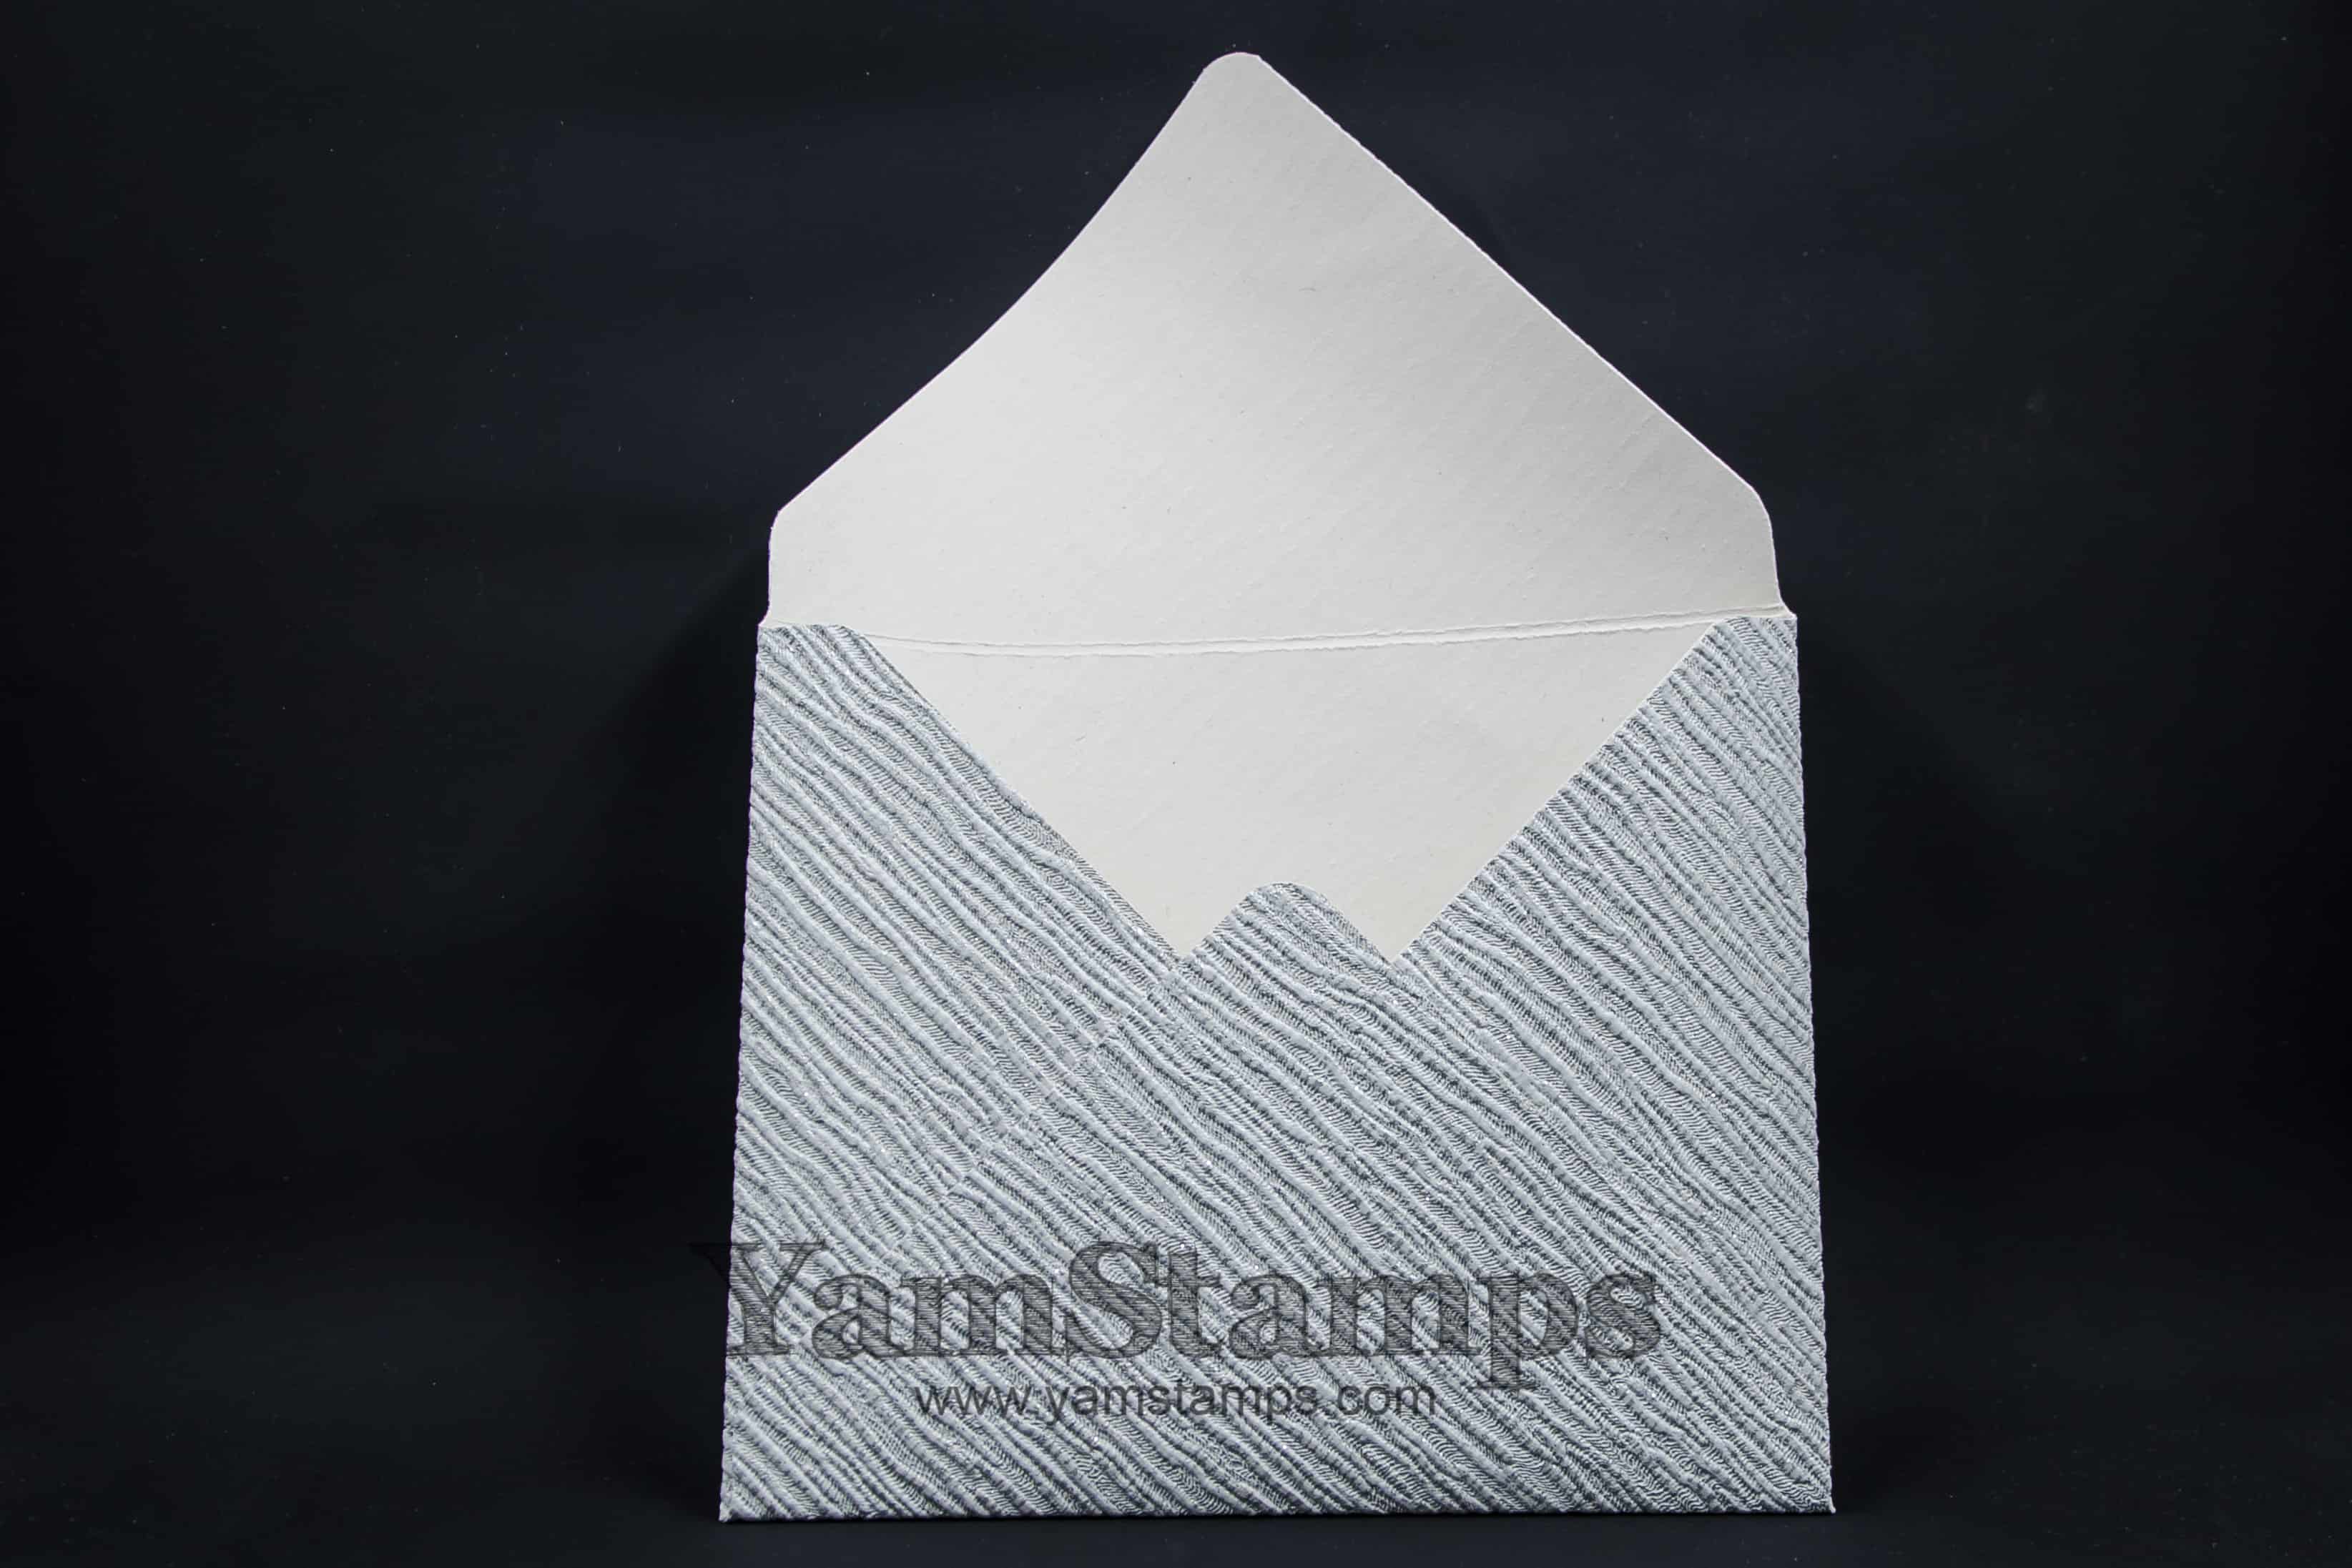
This is the project that was shared on the Wayfair blog. – I did a version of the metallic birthday card with remnants of the wallpaper, plus made an envelope. I was pleased at how easy the wallpaper was to work with – I was worried it either wouldn’t cooperate or would crack or not fold as I wanted, but it is wallPAPER after all…. The wallpaper featured in this is Silver Shimmer – it’s a heavier, almost fabric-like feel. Okay, maybe not fabric. Lightweight pleather?? Anyway – it cut and scored easily enough for me to use the Envelope Punch Board to create the envelope. I added portions of it behind the Year of Cheer Specialty Designer Series Paper rather than the Silver Foil I used on the original card. The one caution – it will add some heft to your project, so you may end up paying a bit more postage to send it – depending on how much wallpaper you use. The Silver Shimmer wallpaper is as advertised – it has silver tones and it does shimmer, so the whole package together is WOW. This is a wallpaper craft project that will have you wanting to have surplus wallpaper so you can make multiples!
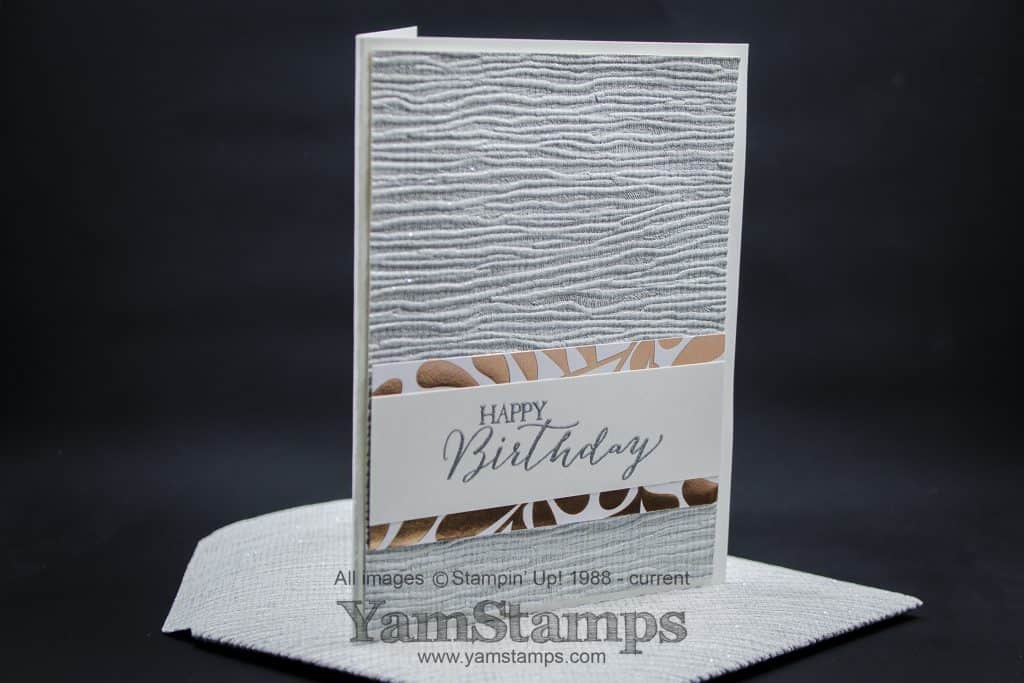
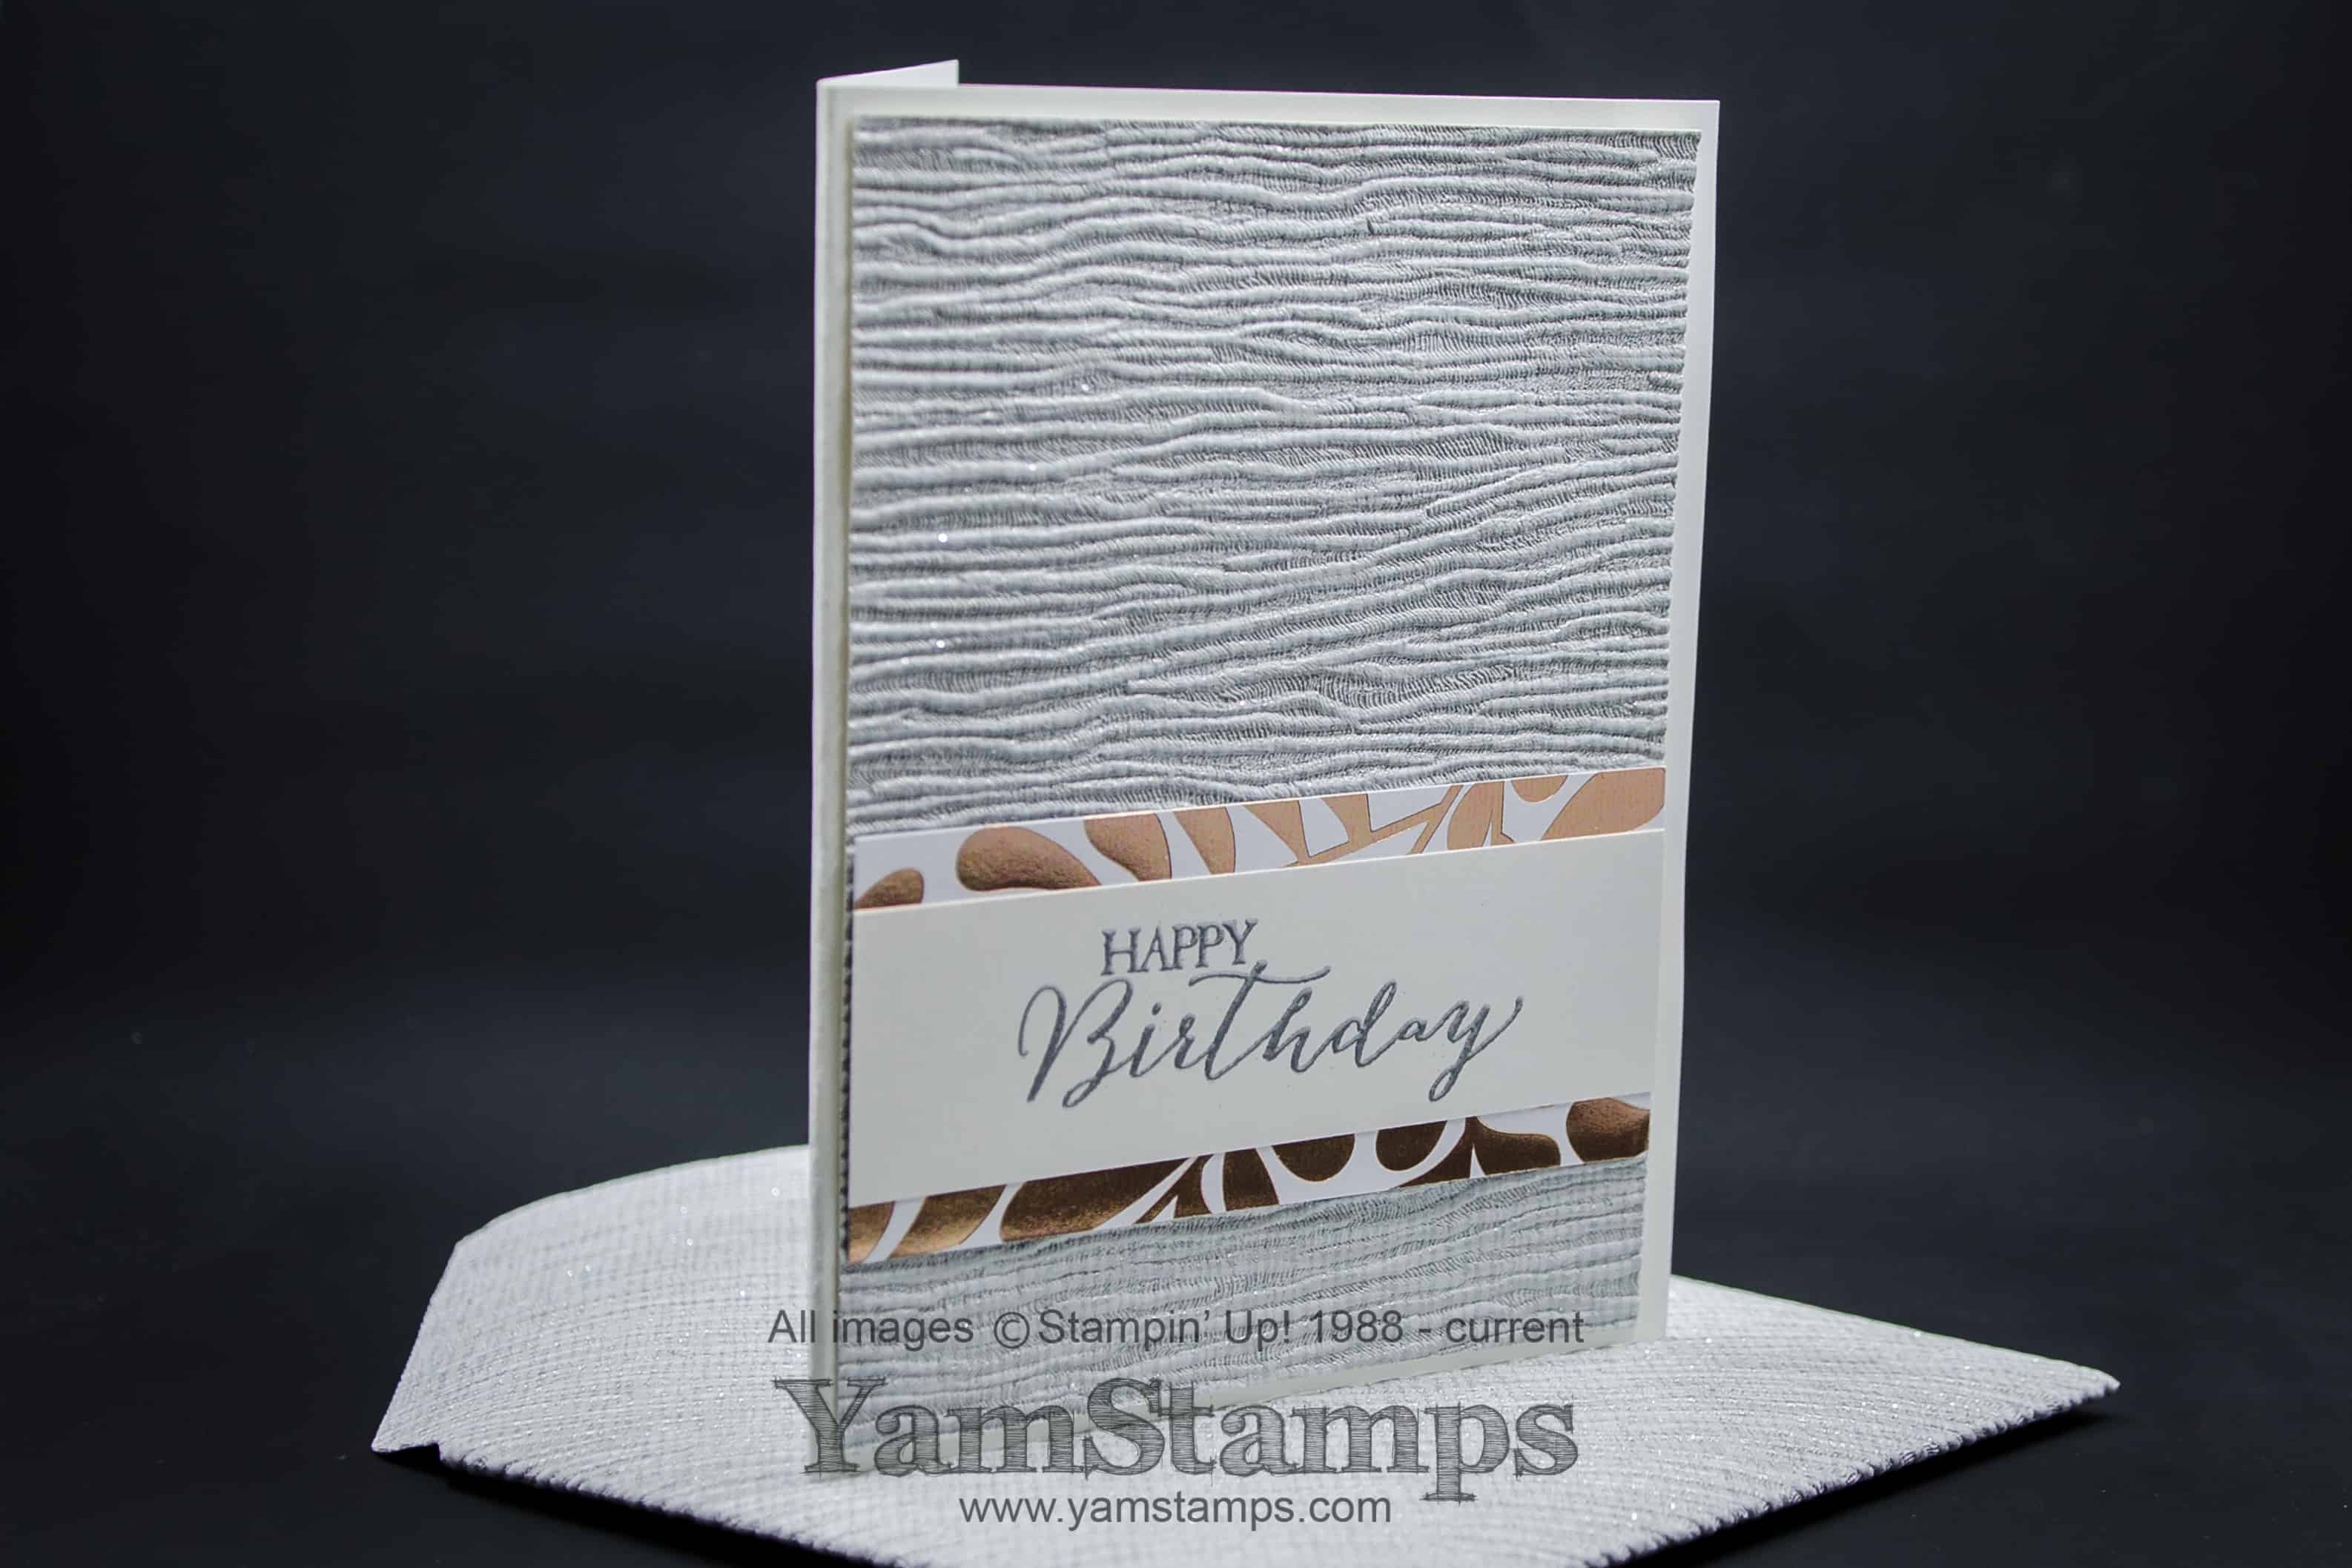
This is a variation on the theme – showing off the wallpaper a bit more. Love the texture it gives. I used Tear & Tape to adhere the wallpaper to the project (and to adhere the other layers to the wallpaper) – just to ensure it was really “stuck”. I find the Tear & Tape very good for 3D projects or things with a bit more texture or heft. The Multipurpose Liquid Glue would likely work well for a wallpaper craft….but I don’t always work well with liquid adhesives, being the slightly messy crafter that I am….
Here’s a better look at the wallpaper envelope.
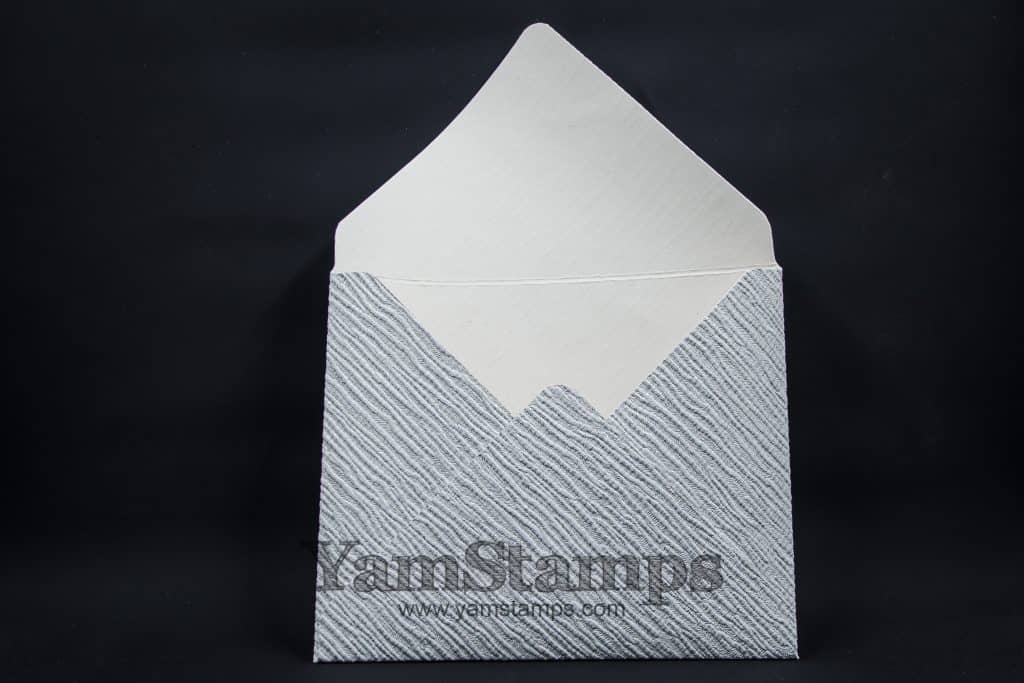
You can see the score line, and the corner rounder on the Envelope Punch Board worked with the wallpaper as well!
So thank you to Sarah at Wayfair for inviting me to participate in this really fun project. I still have some wallpaper here….so you may very well see it pop up again in future projects. Or maybe I’ll actually use some on a wall…..(who am I kidding….wallpaper crafting for the win!). What’s the most recent non-crafting item that you’ve used in your crafts lately?? My enquiring mind wants to know…
Nov 11, 2017 | birthday, cards, Stampin' Up!
,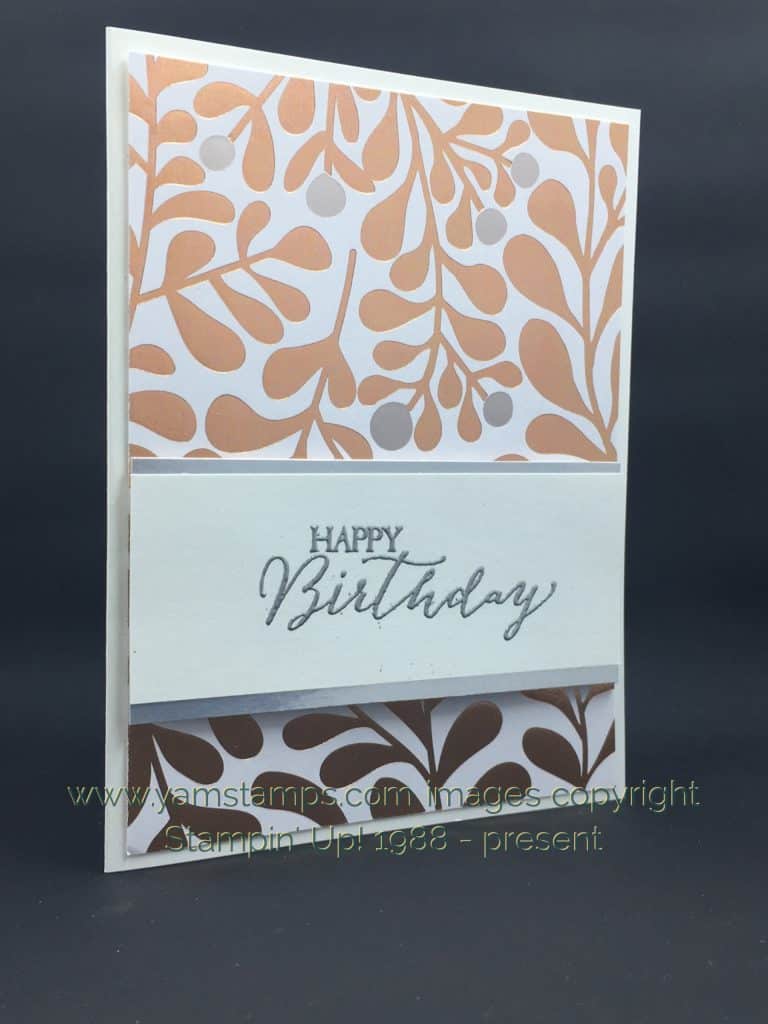
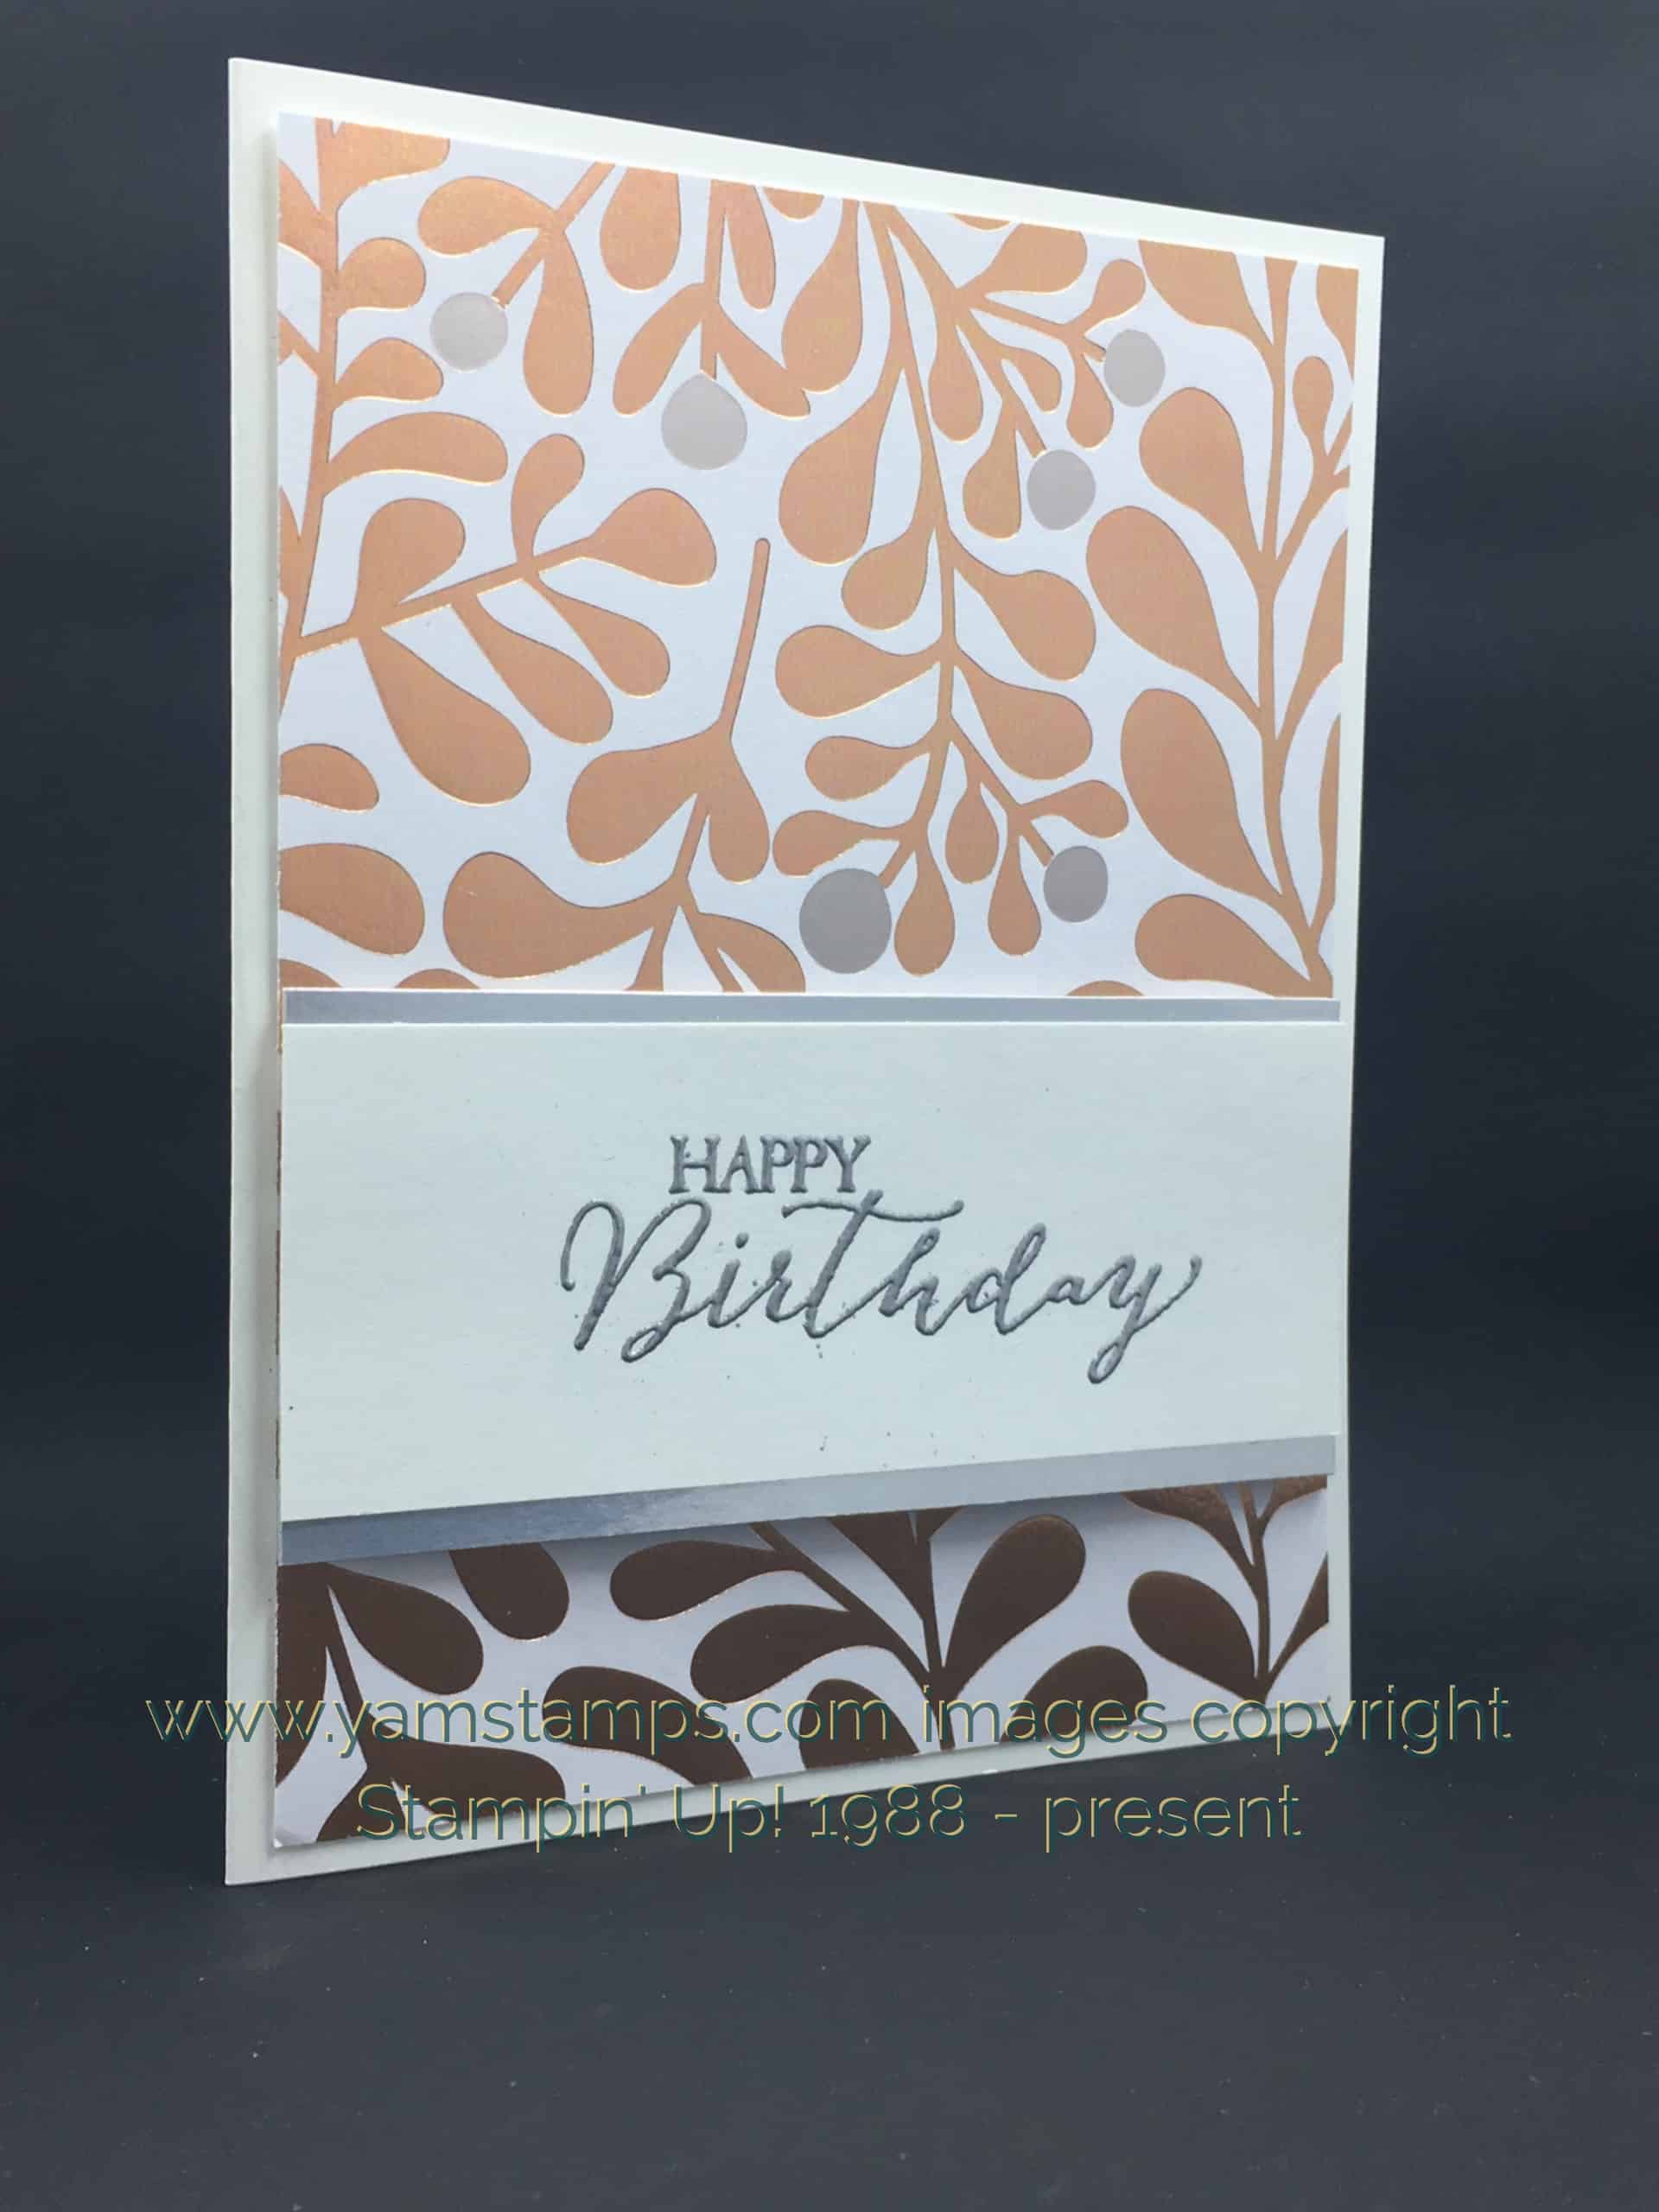
This metallic birthday card showcases Stampin’ Up!’s Year of Cheer Designer Series Paper – one of my current favourite papers. I love the elegance of the metallic designs and how they can be used for almost any occasion! I think that the pattern on this paper is like a stylized mistletoe….but because of the metallic colours I felt okay using it on a non-Christmas card.
For this elegant, easy birthday card, the greeting from Butterfly Basics (available in wood mount, clear mount or photopolymer) (one of the few sets available in all three stamp options) was embossed in Silver onto Whisper White cardstock. To keep the metallic theme going, the sentiment was then backed with Silver Foil and then placed on top the the Designer Series Paper. Clean and simple, and easy. Just my kind of crafting! I think that the clean lines and graphics also make for a great masculine card.
I apologize for the bit of radio silence over the last little while. I am currently attending the Stampin’ Up! On Stage Live event in Salt Lake City as part of their Events Council. I promise to write more later about this experience (once I’m allowed….and once I’ve recovered LOL). The last while has been crazy busy with preparation for the event itself. I did a presentation on Friday (well, technically 3 of them, since I had to repeat it at 3, 4 and 5pm) sharing an upcoming product suite and some ideas for how to use it in a class. It was a lot of fun once I was over the initial stress and nerves!
Oct 31, 2017 | cards, Christmas, Occasions, specials, Stampin' Up!
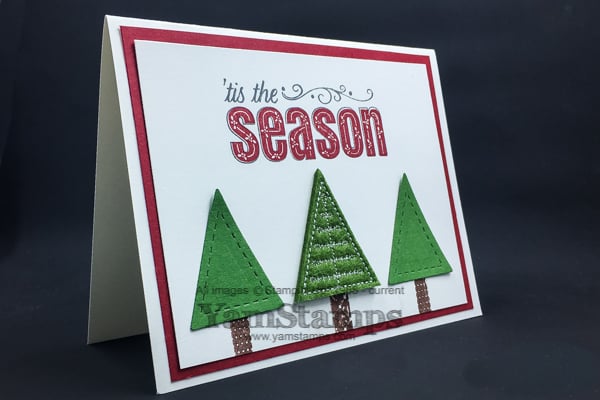
Boo! Scary thing is – it’s the last day that you could get the Merry Patterns stamp set for free! This is the stamp set that Stampin’ Up! is offering free with a $375 product order (and NO, it doesn’t have to be just one person ordering – most people have earned it by having a group of friends place orders together, or having a card making party). This card is from October’s Christmas Card Class – each participant received a package of Stitched Felt Embellishments that we then used on the cards. The sentiment is from the Merry Patterns set – as are the tree trunks (those are the patterned candle portions). The “stitched” cardstock trees are created using the Quilt Builder Framelit Dies – which you can also get in a discounted bundle along with the Christmas Quilt Stamp Set. I thought this combination was fun and coordinated well!
More scary news – it’s also the last day for the Buy 3 Get 1 Free Designer Series Paper Sale! Selected papers have been part of this special, and if you still need to stock up, you have until end of day to take advantage of this deal! I put together a huge binder featuring all the different designer series papers that were part of the special and had it on hand at the Scrapfest / CreativFest booth this past weekend. I’ll still be able to share this way of seeing the papers, but the deal will be gone….*sigh*
So here’s some good scariness…..how about a Halloween card?!
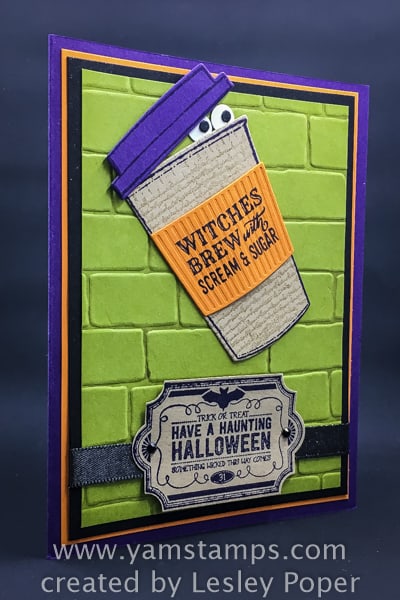
I received this fun card as part of a demonstrator swap a little while back! We each created a number of copies of our card design, and received a card from everyone participating in the swap! I love this card from Lesley Poper. The eyeballs peeking out of the cup make me laugh….and of course the cup reminds me of my oh so favourite “Grande, Coconut Milk Chai Latte…with cinnamon powder please”. Not sure how happy I’d be to see those eyeballs looking at me though… I am sharing a number of the Halloween themed cards on my various media platforms today at various times – so besides here at the YamStamps blog, you can also check out YamStamps on Facebook, Twitter and Instagram to see different fun holiday projects!
I hope that you and your goblins have a fun and safe Happy Halloween!!
Oct 23, 2017 | cards, Manic Monday, Stampin' Up!
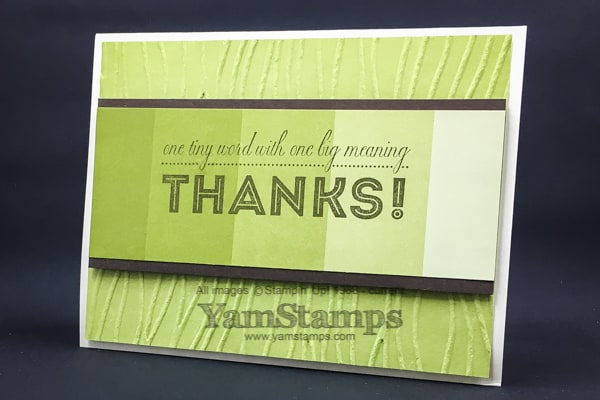
A quick and easy thank you card to share on a Manic Monday. One of the things I have been known to struggle with is sending cards. Not necessarily creating them, or writing them, or even mailing them, but actually keeping the flow going from step one to three! So I have to try to keep it as easy as possible for myself – hence this quick and easy thank you card! The less I have to do to get the card created, the less chance there is for me to get sidetracked along the way…..that’s the theory at least!!
The Colo(u)r Theory Designer Series Paper Stack makes this card stand out – without too much work. There’s a great choice of ombré patterned papers in different colours. You get four sheets of each of the double printed designs – and all the sheets are 6″ x 6″ so good for cardfronts! There are 48 sheets in all, so imagine how many of these quick and easy thank you cards you could make! This background cardstock is Old Olive, same colour as this particular sheet of Designer Series Paper, (no brain work involved in colour picking!), and embossed with the Seaside Embossing Folder. I aligned the ridges vertically so that they echoed the vertical lines of the ombré progression. The sentiment is from the One Big Meaning stamp set, available in wood mount or clear mount. It’s stamped in Early Espresso, which is also the cardstock behind the strip of Designer Series Paper.
A reminder that the Colo(u)r Theory Designer Series Paper is one of the papers included in the current Buy 3 Get 1 Free promotion! Until the end of the month on selected styles of Stampin’ Up! Designer Series Papers, you can buy three packages and get the fourth one for free! If you are entering the order yourself at the YamStamps Online Stampin’ Up! Canada store, you’ll want to enter the 3 most inexpensive papers FIRST (hint: Stacks), and have the most expensive paper (hint: Specialty Designer Series Paper) as the fourth one you enter, because that’s the one that will be free. And YES – you get to pick which one you get for free! So if you’ve had your eye on the Just Add Colo(u)r 12 x 12 Specialty Designer Series Paper, now is the time to grab it…because you could get it for free. Stampin’ Up! has new alcohol based markers coming soon (I’ll write more about them before you are able to purchase them on November 1st, don’t worry), so you can stock up on this colouring paper and be set to play with the new Stampin’ Blends!
If you’re attending the CreativFest / Scrapfest October 26 – 28, be sure to stop by my booth – I’ll have samples of all the selected Designer Series Papers that are part of the sale, so you can see them in person! (oh, and there may be a show special on orders….just saying…). See you soon!