May 19, 2017 | cards, specials, Stampin' Up!
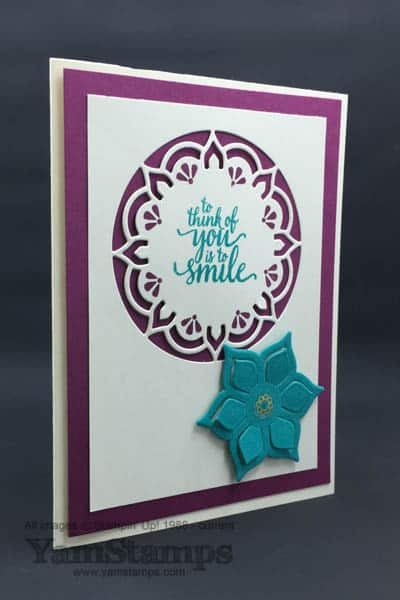
During the month of May, you can order Eastern Palace Suite products in a bundle before they are released in the new Stampin’ Up! Annual Catalogue! I used the products to create this easy die cut card. I love how detailed and intricate it is….and how easy it was to create! The circular die cut shape is one die, and the flower and petal cut outs are two nesting dies that you can run through the Big Shot at one time. The little petal flourishes around the border of the die cut are created using stamps – but because they coordinate with the backing cardstock, a lot of people think it’s a part of the die cut detail! Thank you, Stampin’ Up! coordinating inks and cardstock!
These products are available in two options – the Eastern Palace Starter Bundle and the Eastern Palace Premier Bundle. To recreate this card, you’ll need the Premier Bundle, which contains the Eastern Medallions Framelits Dies. I chose to use Rich Razzleberry and Bermuda Bay cardstocks & inks – which are similar to the new In Colours included in the kits – Fresh Fig and Tranquil Tide – only because of the numbers I had to prep (and didn’t have enough cardstock at the time to cover all I needed for classes!). So – 2 passes of the Big Shot with 3 dies, a bit of stamping and you have an easy die cut card!
I did a fancier variation of this design for a swap I participated in, so will share that version a little later as well. Just FYI – if you’re interested in the bundles, you can order them as part of your Starter Kit…plus still have room for a little more product! The Eastern Palace Flyer is here. If you want to create your own easy die cut card, just be aware that the bundles are available during May, but are NOT featured in the new catalogue – there is a bundle of the stamps and dies, and then all the individual products….so to make the easy die cut card….easier….consider grabbing a bundle! You can check out the Eastern Palace products in the YamStamps Online Stampin’ Up! Canada store here. As always – please contact me if you have any questions.
May 17, 2017 | cards
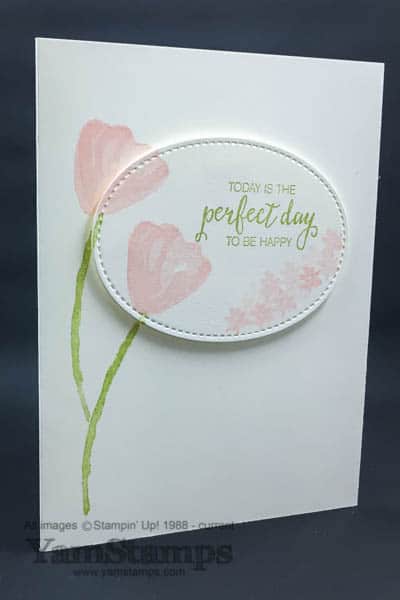
This clean and simple floral card features the Stampin’ Up! Bunch of Blossoms stamp set and the Stitched Shape Framelits. I love this design – for me, it creates extra interest that is not too distracting. By having the design flow over both layers, and elevating one of them, it makes the card a little more eye catching – and it’s so easy to do! By the way – this stamp set has a coordinating punch, and the discounted bundle is being discontinued – however the individual items will still be available in the next catalogue. If you’d like the coordinated bundle (really, why wouldn’t you?!), be sure to grab it at a discount before May 31st!
I stamped the left flower first – I placed my die cut on my cardfront (I just held it in place), then stamped the base flower image so it overlapped both layers. It’s a two step image – so I stamped the larger/fuller flower shape first. I then removed the die cut and stamped the second layer of the flower on the cardfront. Even though you might get a bit of a gap in the first image where the layers meet, when you stamp the second image it fills everything in. I stamped the other images on the die cut next (it doesn’t have to be held in place on the front of the card), including multiple small flowers. By stamping first generation (ink the stamp, then stamp on the paper) and second generation flowers (after you stamp the image, stamp another one without reinking the stamp first), it adds a bit more dimension as well. I stamped the stem image twice, connecting it so it looks like one plant. You can either hold the die cut in place when you stamp the stems or just stamp them on the card front and then stamp them separately onto the portion of the die cut where they’d line up. In the end, it’s a simple way to make a clean and simple floral card a little less….simple!
I made this card on Whisper White Thick Cardstock. It’s my favourite cardstock for a clean and simple floral card – or any clean and simple design. When you don’t have to worry about a lot of layers or embellishments weighing down your card, your card can have a little more body all by itself by using a heftier cardstock. You can get a sneak peek at the new Very Vanilla Thick Cardstock if you order the Eastern Palace Premier Bundle this month. I’ll be sharing a project using some of the Eastern Palace products later this week. Attendees at the May Monthly Card Class and May Stampers Club got to play with some of the product already – and picked up the flyer (download it here). You can see the Eastern Palace special May bundles in the YamStamps Online Stampin’ Up! Canada store here. If you have any questions, please feel free to contact me. Otherwise, happy shopping!
May 8, 2017 | cards, Stampin' Up!
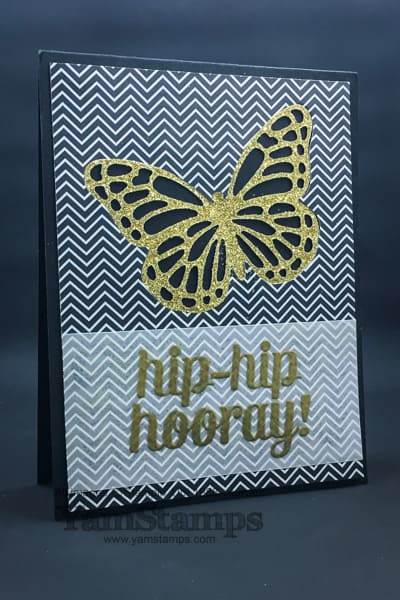
Isn’t this a gorgeous card? It was sent to me by one of my friends who is a Stampin’ Up! demonstrator in the states. Bev (aka Texas Grammy) sent me this lovely card to congratulate me on my promotion to “Gold” level as a demonstrator. The sentiment is from the previously retired stamp set, Bravo, and the background paper is from the specialty Designer Series Paper, Pop of Pink, still available while supplies last (and at a discounted price!). She used the Butterfly Thinlits die and inlaid it into the paper. I love the gold and black design – it’s so striking! Thank you Bev!
I am behind on sharing and behind on mailing my own cards as well….I hang my head in shame. (but not for too long, because I have things to do to catch up, obviously….). Lots of things to do, including finishing editing videos for my next Online Class, Watercolouring 101. I previously asked for feedback from customers & subscribers about what they wanted to learn more about – and watercolouring was a frequent response! So look for that class to be launching in the next week or so. I will have a launch special, with reduced pricing for the first 24 hours…so stay tuned!
In the meantime, I will get back to work! Funny how things look so controllable when I write them down on my lists and agenda….but then something happens and the plans go awry. Well, now that I think about it, perhaps it’s not the plans that go awry….but my attention and focus. (please tell me I’m not the only one?!) No wonder I liked Bev’s card so much – it’s shiny!! LOL.
Apr 26, 2017 | Big Shot, cards, Stampin' Up!
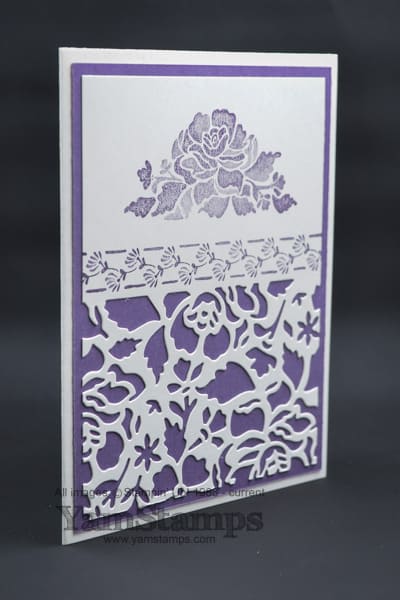
I love beautiful cards that are easy to make…and believe it or not, this card actually falls into that category!! Promise! This lovely detailed floral die cut card uses the Floral Phrases stamps set (available in wood mount or clear mount) and the coordinating Detailed Floral Thinlit Dies – the stamps and dies are available together in a discounted bundle (wood mount bundle or clear mount bundle) BUT ONLY UNTIL THE END OF MAY. Sorry for shouting, just don’t want you to miss out! The individual items WILL be in the new catalogue, but the bundles WILL NOT.
Anyway. The main image gives a kind of watercolour-y feel with the variations in degrees of intensity of colour. I love that I don’t have to do the work to get that effect! On this card, it’s stamped in Perfect Plum. The detailed floral die cut at the bottom of the cardstock is made by placing the flat edge of the larger thinlit along the border stamp image. Then it’s adhered onto Perfect Plum cardstock and onto the cardfront.
The new catalogue will be bringing back one of my favourite adhesives – adhesive in the form of a sheet – which will make adhering detailed die cuts even easier! If you need to make a detailed floral die cut card in the meantime….use the pointy end of the Multipurpose Liquid Adhesive, or the Fine-Tip Glue pen. We’ll be making this card in May’s Monthly Clard Class. Have you registered yet? Space is limited….so please don’t delay. Class will be Wednesday, May 3rd at 1pm or 7pm. See other upcoming events on the YamStamps Events Page.
Oh – and before I forget – if you’re in the Burlington ON area – mark Saturday, June 3 on your calendar! It will be the annual YamStamps New Catalogue Open House and Retired Rubber Garage Sale! More details to follow – look for info here on the YamStamps blog and in the May Paper Crafting Projects Newsletter – going to subscribers May 2!
Apr 21, 2017 | cards, contest, Retired List, Stampin' Up!
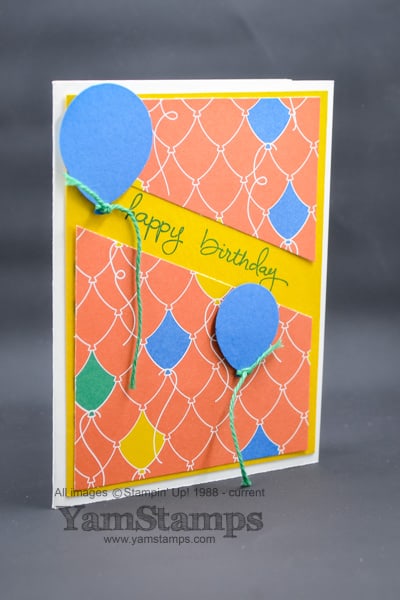
One type of card that is great to have on hand is a birthday card – there’s nothing worse than realizing you need a birthday card RIGHT NOW – which for me, usually happens just before I’m due to leave home to meet that person. It’s great to have a “go to” design that you can use for those quick and easy cards! This fun birthday balloons card was made using the retiring Party Animal Designer Series Paper, and the retiring photopolymer stamp set Endless Birthday Wishes. I love the font in this set! All the words are separate so you can combine them in whichever way works for your project, and can use them on a non-birthday project as well. The balloons are punched from Pacific Point cardstock using the Balloon Bouquet Punch (this is NOT retiring….but it is low inventory right now, so you might want to order it sooner rather than later if you “need” this soon). I think the most difficult thing on this card was tying the knots in the Emerald Envy Solid Baker’s Twine….hahaha! It’s great to use Designer Series Paper as a jumping off point for your colour theme – I simply pulled the colours from the paper I was using – Pacific Point, Emerals Envy and Crushed Curry. Quick and easy!
I did use Stampin’ Dimensionals to pop up the birthday balloons to make them stand out even more, and left the twine hanging loose for fun. This layout is not just perfect for quick and easy birthday cards, it’s great for any handmade card! I used it for one of my cards that I shared at the Stampin’ Up! On Stage Event. Here’s another sneak peek at that Crafting Forever set!
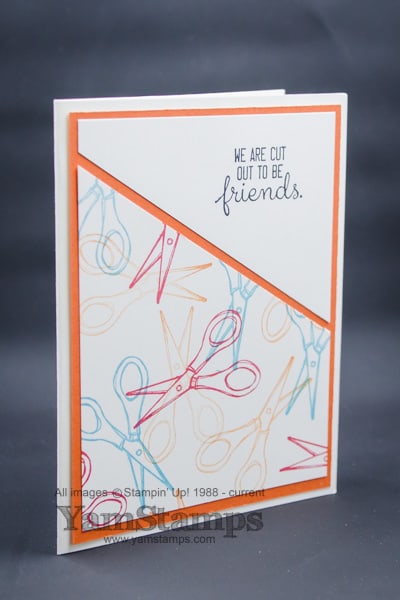
Similar but different to the birthday balloons card! A fun multicoloured take on the same layout. Colours used here are Pumpkin Pie, Real Red and Tempting Turquoise. You can see that the gap is a little smaller on this card, because I didn’t need to put any words in the space – I put them on the top portion of the angle cut piece instead. Quick and easy cards for the win! Use this layout and simply switch the sentiments as you need!
A reminder that the Crafting Forever stamp set used on this card will be available in the new catalogue (coming in June). If you want a copy of the upcoming Stampin’ Up! catalogue, please complete this form and I will follow up with you to get a copy to you. If you complete the form before April 29th, you’ll be part of the first mailing from Stampin’ Up!
ONE LAST REMINDER – don’t forget that you have NINE days left to be eligible to win a Big Shot from me…..see all the details on this blog post….and good luck!
Apr 19, 2017 | cards, Retired List, Stampin' Up!
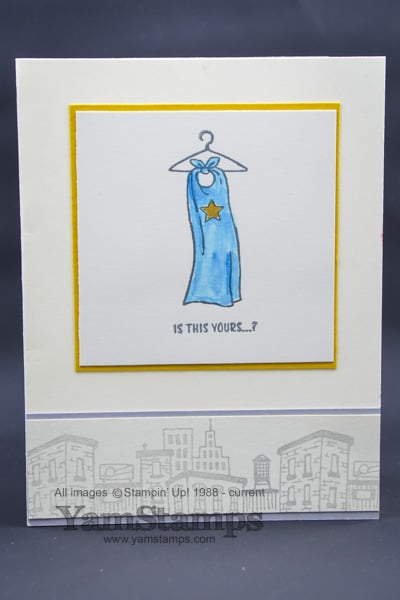
Do you know an Everyday Hero? You know, the person who is always helping out, coming to the rescue but not always in a big, flashy way, and often in a quiet, in the background kind of way. This is the card for them! It uses the retiring Stampin’ Up! set, Everyday Hero. I love the cartoon images! This card uses the cityscape on the bottom of the card, and the cape image on the top. Watercoloured the cape by scribbling with the brush end of the Pacific Point Stampin’ Write marker onto a Silicone Craft Sheet or spare Clear Block – pick up the colour with an Aquapainter, and then colour the image. Since the cardstock is Very Vanilla, you can’t overwork the image too much, otherwise the cardstock will pill. I actually like working on regular cardstock every once in a while with watercolouring, so that it forces me to colour the image and then leave it alone….good for quick card making and resisting the urge to rework an image to death. The image is stamped in Basic Gray, which is an Archival ink, and won’t run when it gets wet. A tip, though – if you quickly set the ink with a Heat Tool, you can move on to the colouring stage more quickly.
The star is coloured in with another retiring product, the Gold Wink of Stella Glitter Brush. Don’t panic, the Clear Wink of Stella will still be around, but the gold one is going away. I love how easily these brushes add some shimmer to a product. Talk about an Everyday (crafting) Hero to rescue an otherwise ordinary project?!
I used the Everyday Hero set for a card that I shared on International Women’s Day on the YamStamps blog here. Lots of fun options for this set, but it’s only available until the end of May. The retiring list is here. You can shop online here – or if you need assistance placing your order, please contact me. If you live in Quebec, I can place the order for you and have it shipped to you, but the online ordering system doesn’t work in la belle province, sorry. Retiring stamp sets have guaranteed availability until May 21st, after which date it’s while supplies last. Tools and accessories are while supplies last only, and some are already sold out! So please don’t hesitate. Happy shopping.
What everyday hero could you send this card to? Leave a comment and I will send my project to one commenter to share!









