Apr 14, 2016 | Big Shot, cards, Stampin' Up!
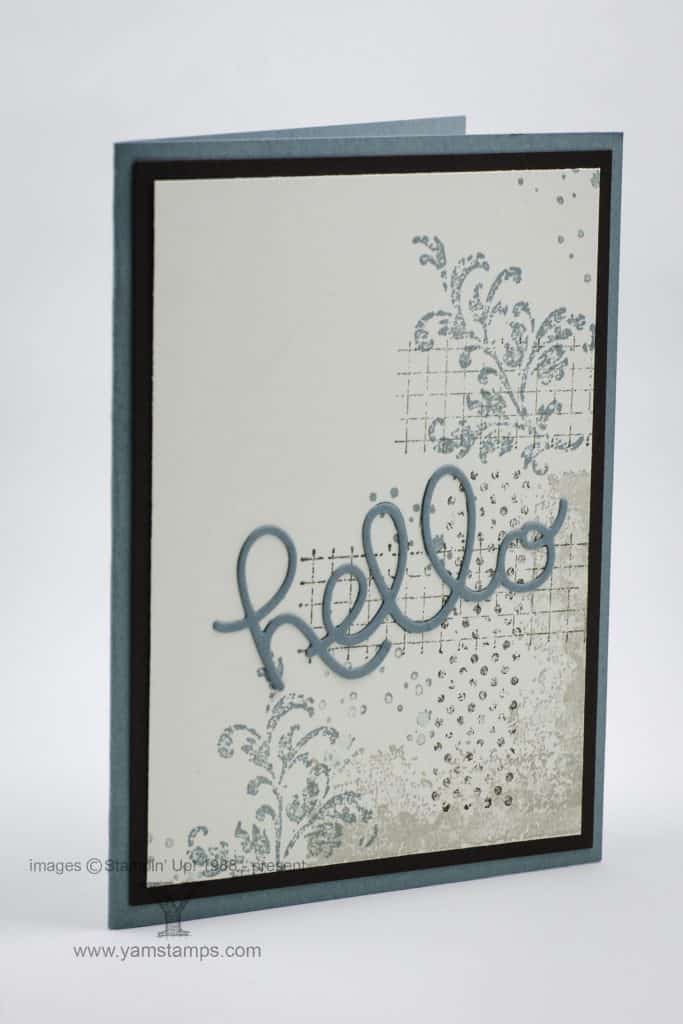
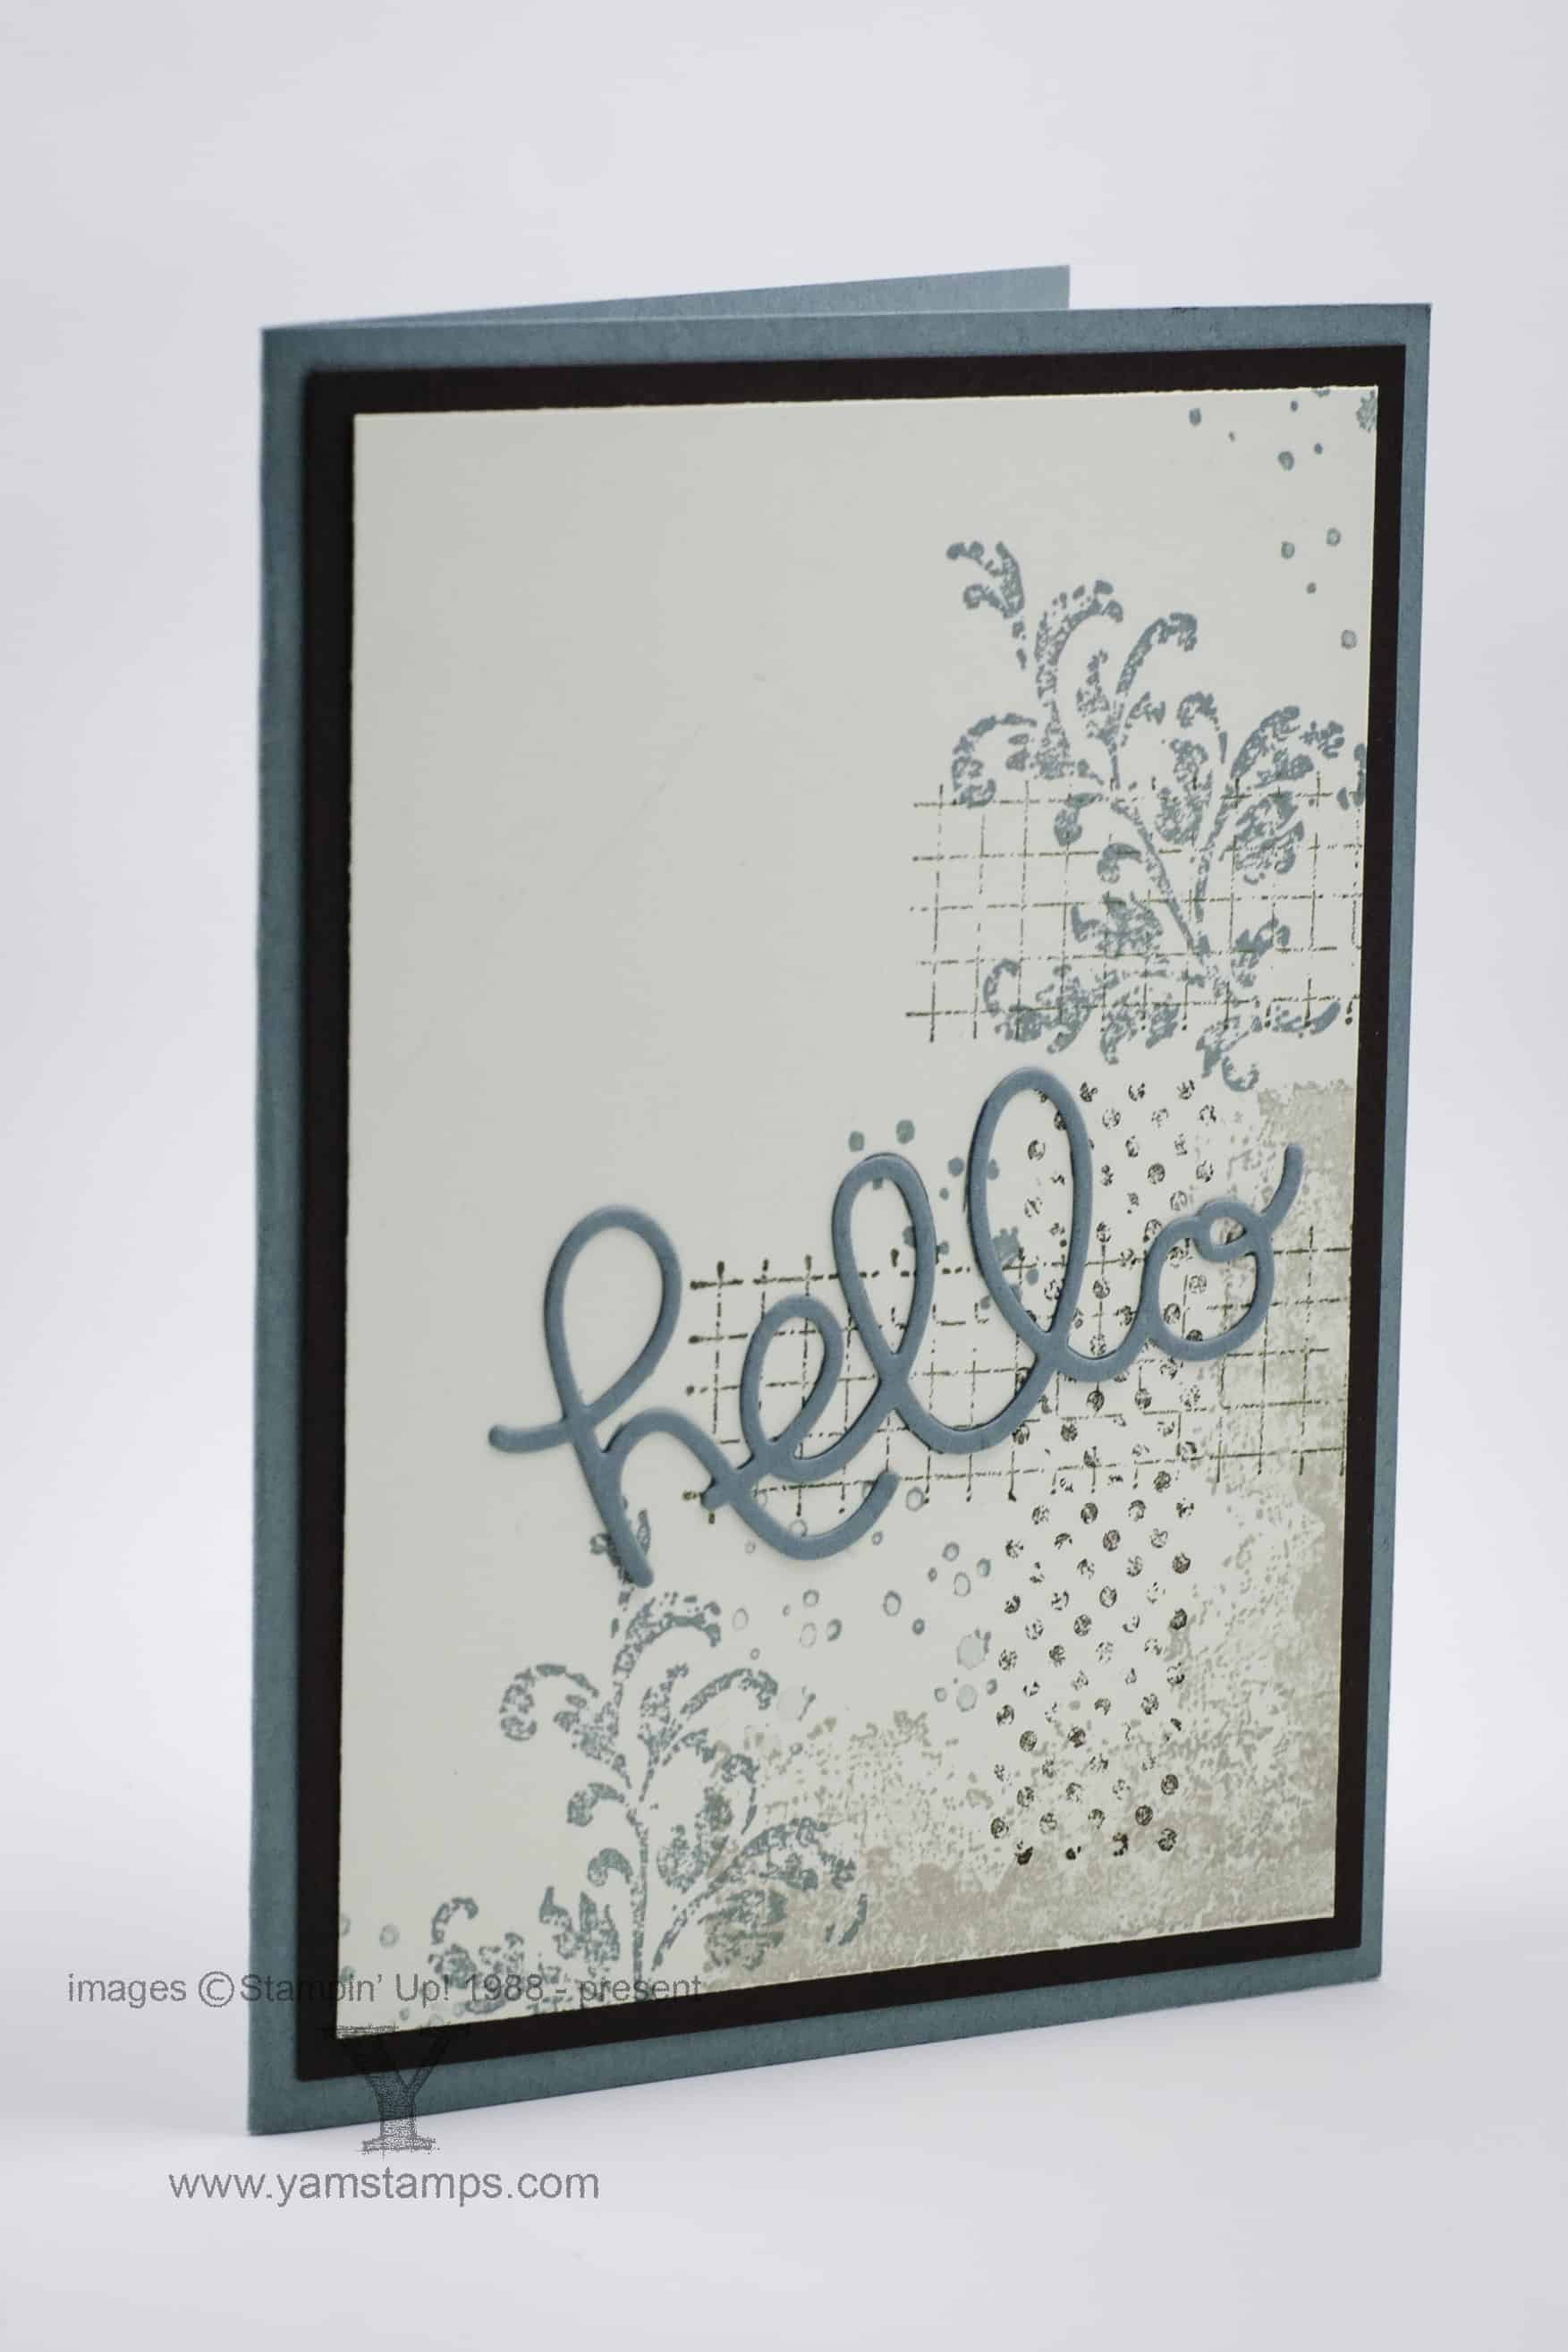
It’s me….with a card….that I SWORE I had shared already but now for the life of me can’t find it…. Anyway….this uses the gorgeous Timeless Textures stamp set, available in clear mount or wood mount. Combined with the Hello You thinlits, it makes for a lovely artistic card, good for males or females. The card base is Lost Lagoon, one of the 2014-2016 In Colours, which means it will be leaving us soon *sniff*. Early Espresso and Crumb Cake are the other colours featured on the card. We found that the Die Brush was useful in popping out the die cut, and one layer of wax paper between the cardstock and die also made it quick to remove.
If you like Lost Lagoon, NOW is the time to grab more of it – before it’s gone! Don’t wait until the official retirement announcement. The retiring In Colours go quickly, and often are the first items to go. You can shop online and place your order, or contact me if you have questions, or need assistance.
Don’t forget to enter my retiring list contest – everyone who enters gets a $5 gift certificate to use in May!
Mar 24, 2016 | cards, Occasions, Seasonal Catalogue, Stampin' Up!
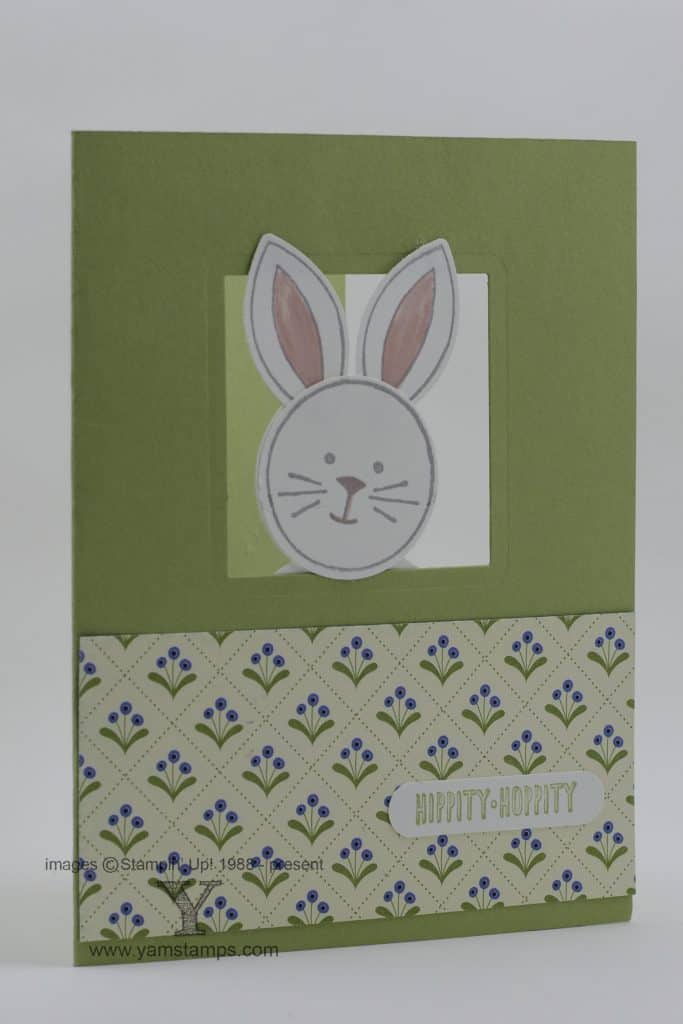
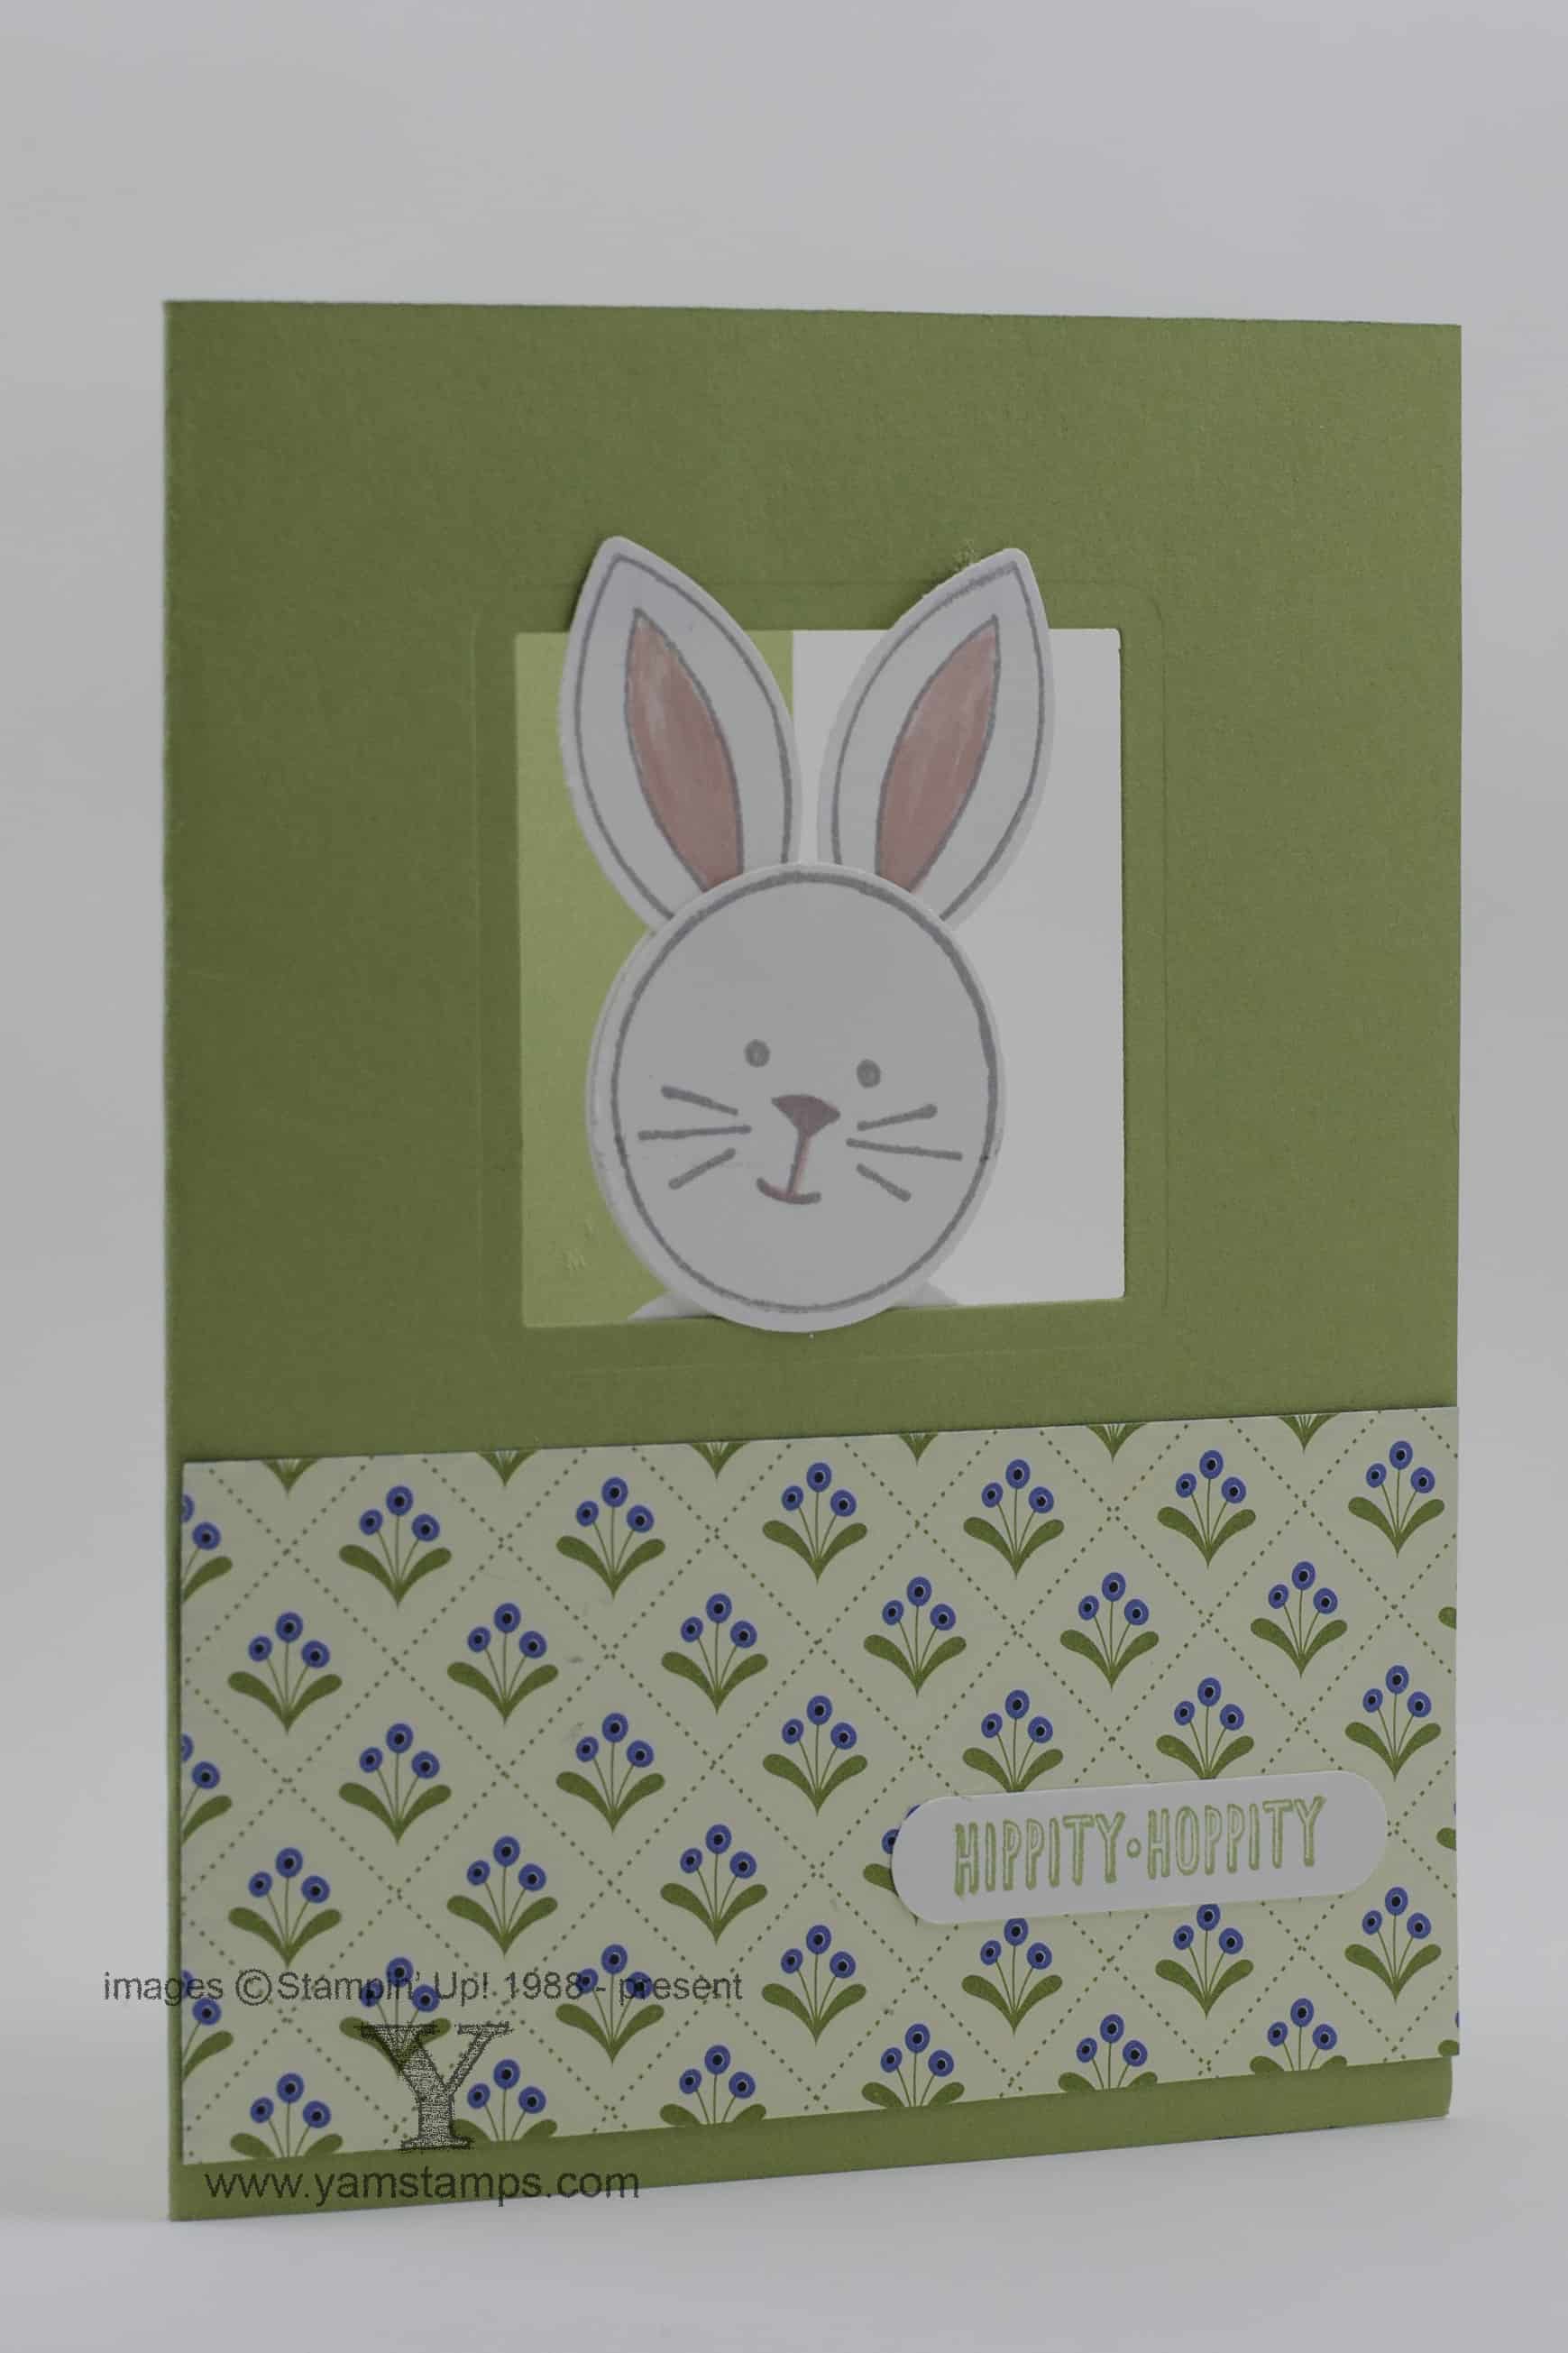
Apparently it’s spring, and Easter is this weekend, though it’s snow/freezing rain around here and schools have been cancelled! So – if you need something to keep the kids occupied….consider some punch art! This fun card was created using the Friends and Flowers set (available in clear mount or wood mount), the Festive Flower Builder Punch and some circle punches! We used a couple of different sentiment sets – Hippity Hoppity is from And Many More (clear mount or wood mount) and the inside Happy Easter sentiment is from Teeny Tiny Wishes (clear mount or wood mount) – one of my most used sentiment sets for sure. The Designer Series Paper is from the Pretty Petals stack. The bunny is peeking through a window cut with one of the square framelits from the Pear Pizzazz card.
My favourite part about this card is the inside…
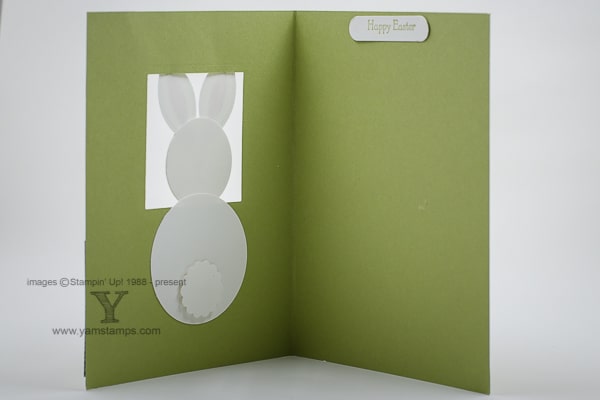
heehee!
Enjoy your “Snow Day” if you’re in the affected areas. Otherwise…happy Thursday! If you are looking for some more fun – try one of my online classes – if you like punch art, there’s a holiday punch art class that you could use to get a jump on your Christmas cards?!
I hope that you stay warm today, and if you’re going out, have a safe journey, and a wonderful Easter weekend with your family & friends.
Mar 19, 2016 | cards, Occasions, Seasonal Catalogue, Stampin' Up!
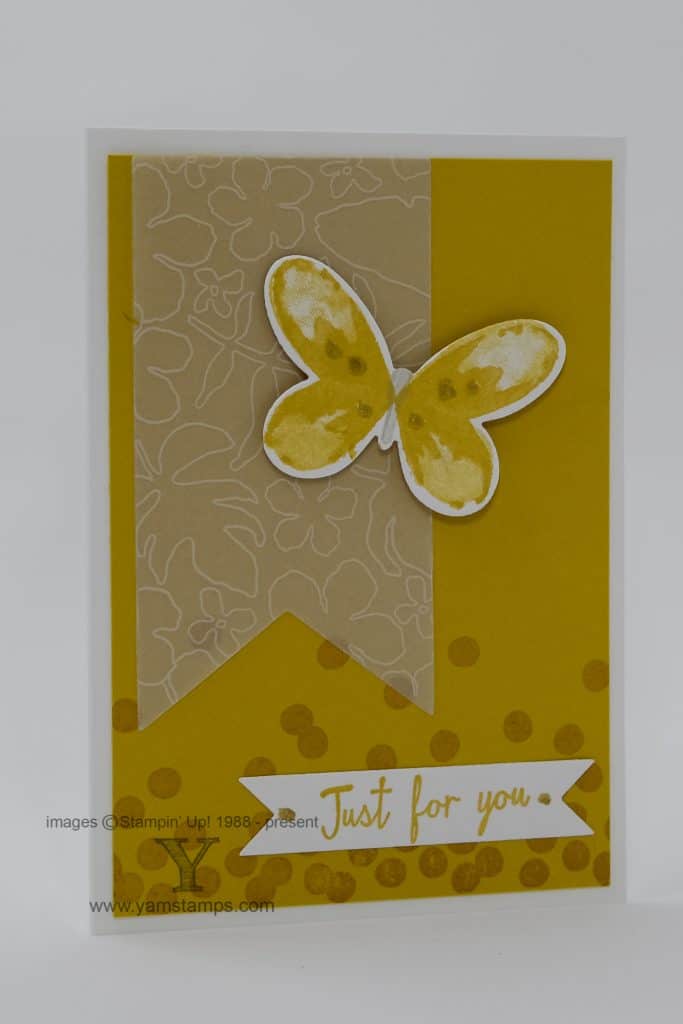
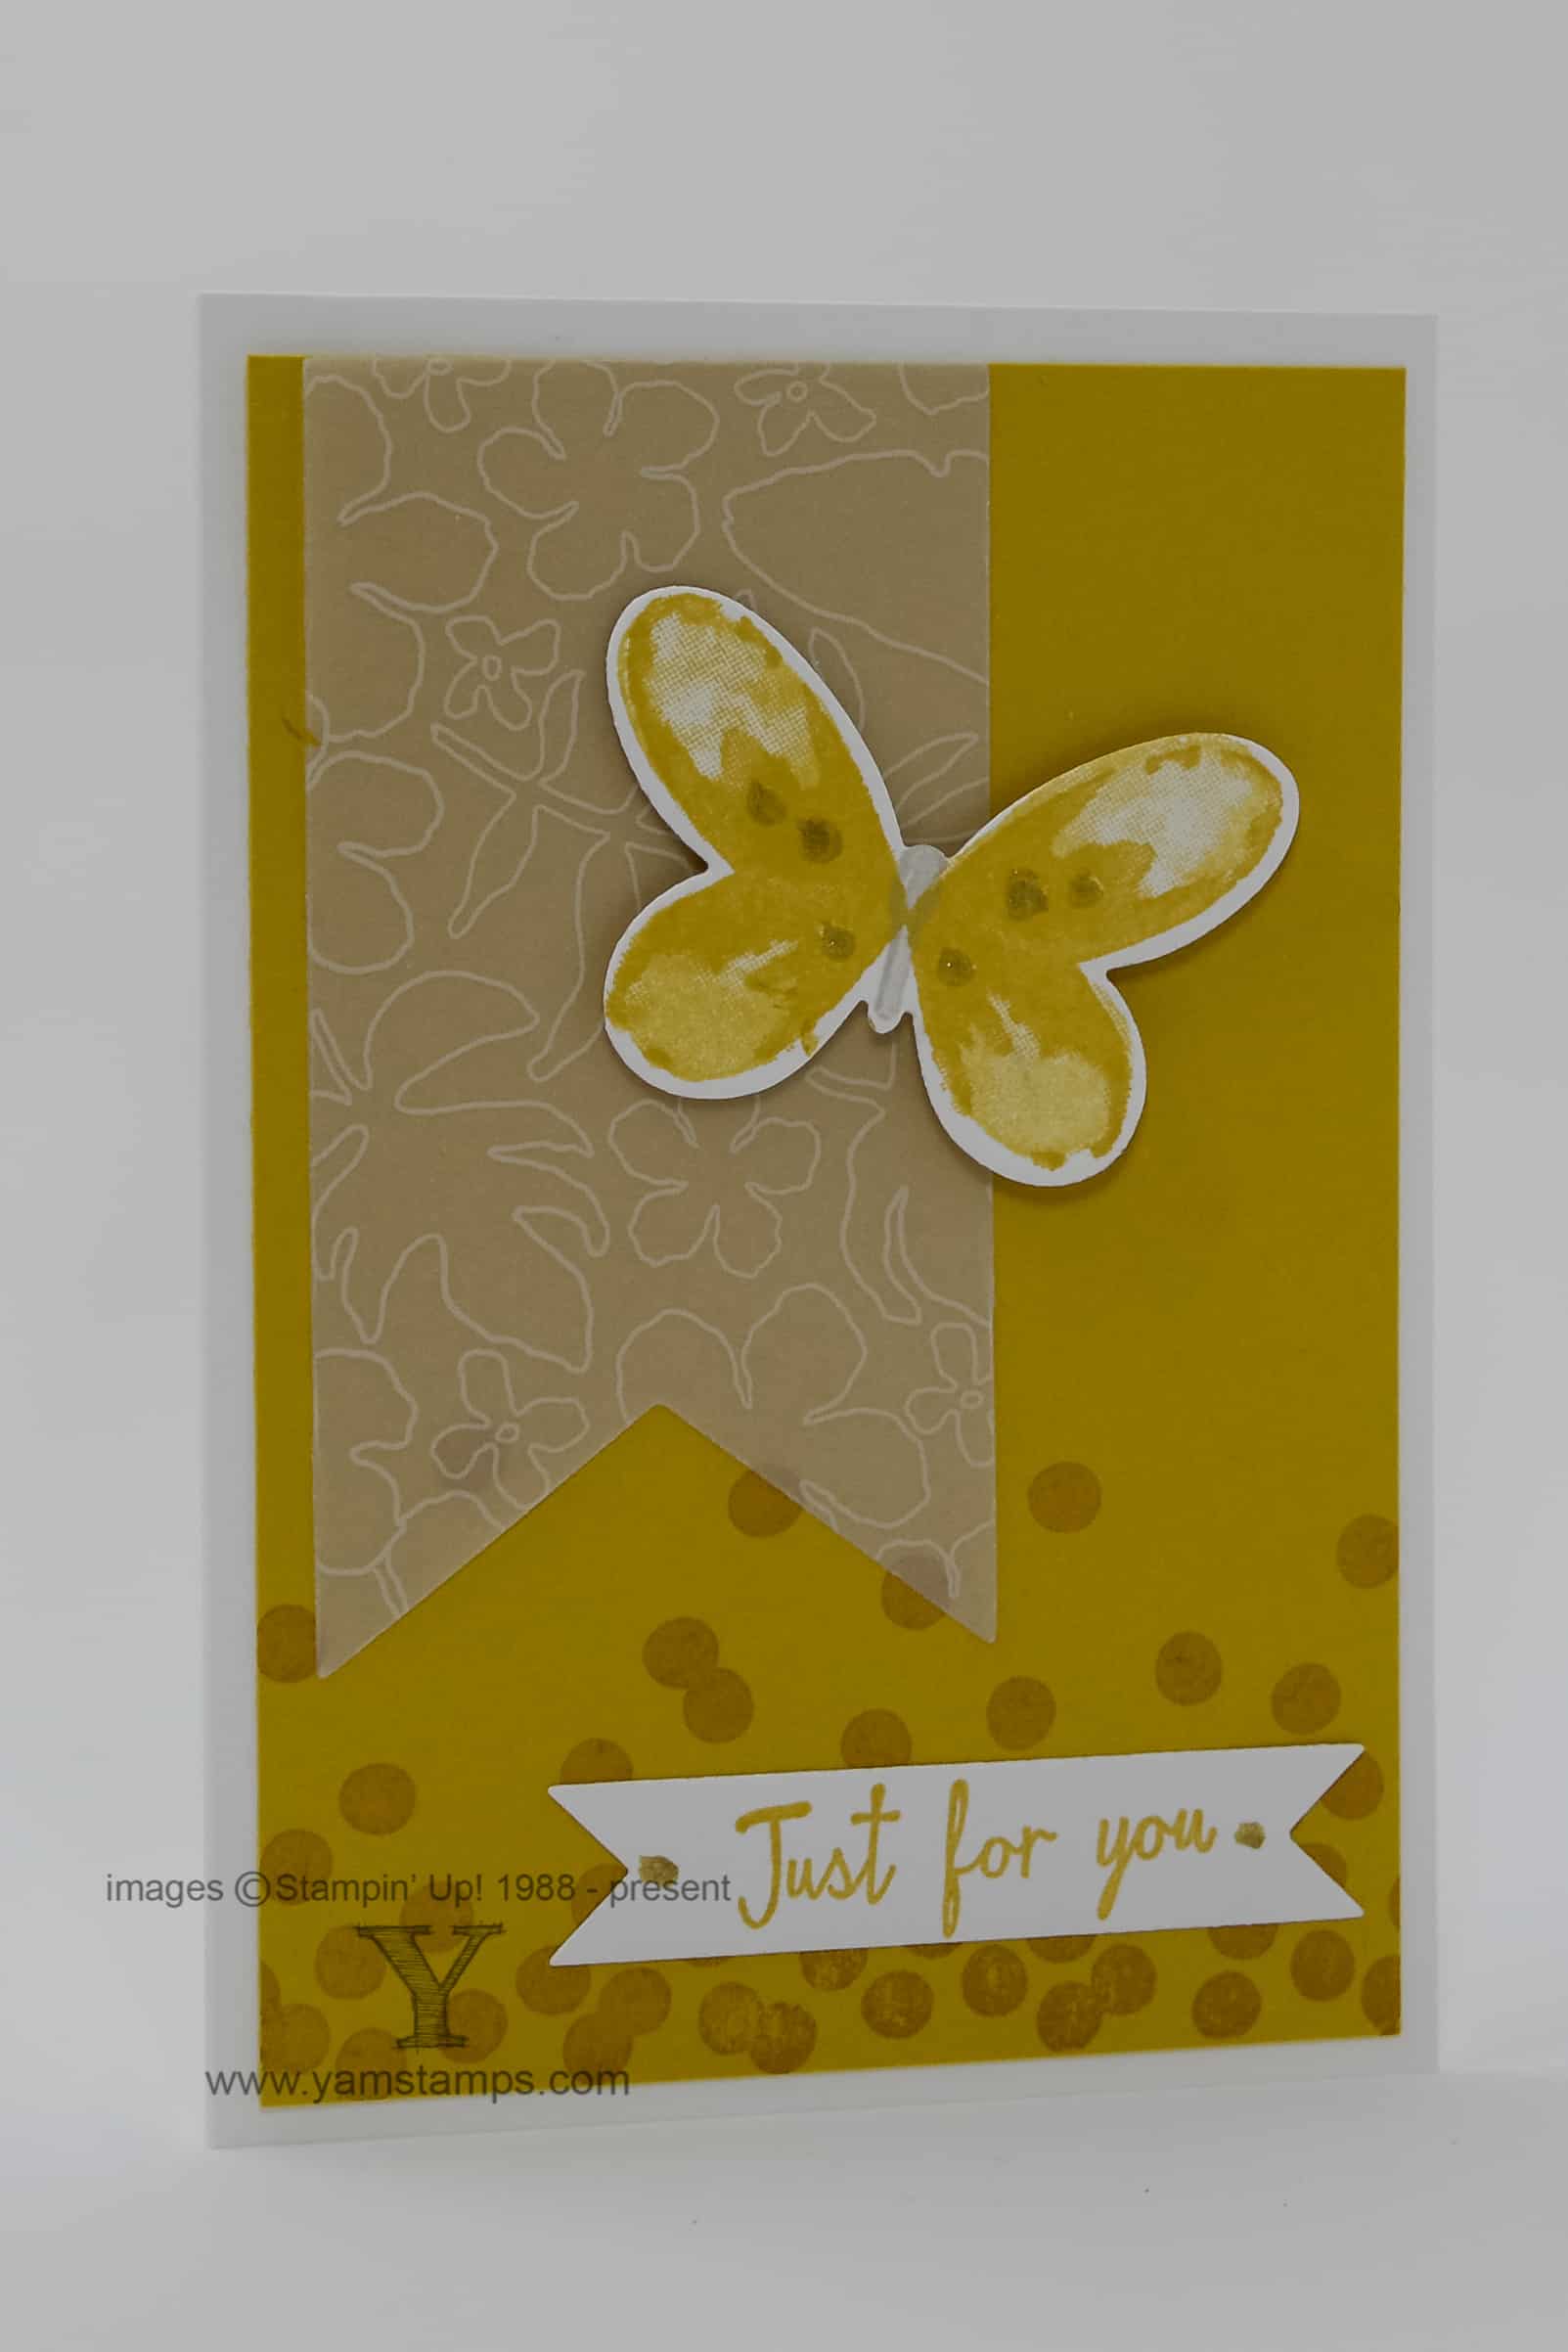
Do you remember this card that I shared with you previously? I shared a Thrifty Vellum Trick Video (you can see it at the YamStamps YouTube Channel) at the same time. Here’s the card that I made with the cut out piece from that – since it’s not thrifty to cut something out and then throw it away! It’s made with Stampin’ Up!’s Whisper White Note Cards & Envelopes. Besides the vellum banner, we added a piece of Hello Honey cardstock, stamped with one of the Dotty Angles stamps, and a butterfly from the Watercolour Wings set die cut with the Butterflies Thinlits Dies. Added a touch of Gold Wink of Stella to the butterfly and to either end of the sentiment tag. Here, we just used a touch of SNAIL adhesive on the vellum behind where the butterfly was going to be attached to hold the banner in place but not be visible.
This is an example of a more feminine card, and we’ll be making four feminine cards for different occasions at the April Occasions Feminine Card Class. Your $25 class fee will include a package of Botanical Garden Jewels. We’ll use some in class, and you’ll take the remainder home for your other projects. Class Date is Thursday, April 21 at 7pm, and registration deadline is April 7th. Payment is due at time of registration – you can click on the PayPal button below, or contact me if you have any questions.
Mar 3, 2016 | cards, Stampin' Up!
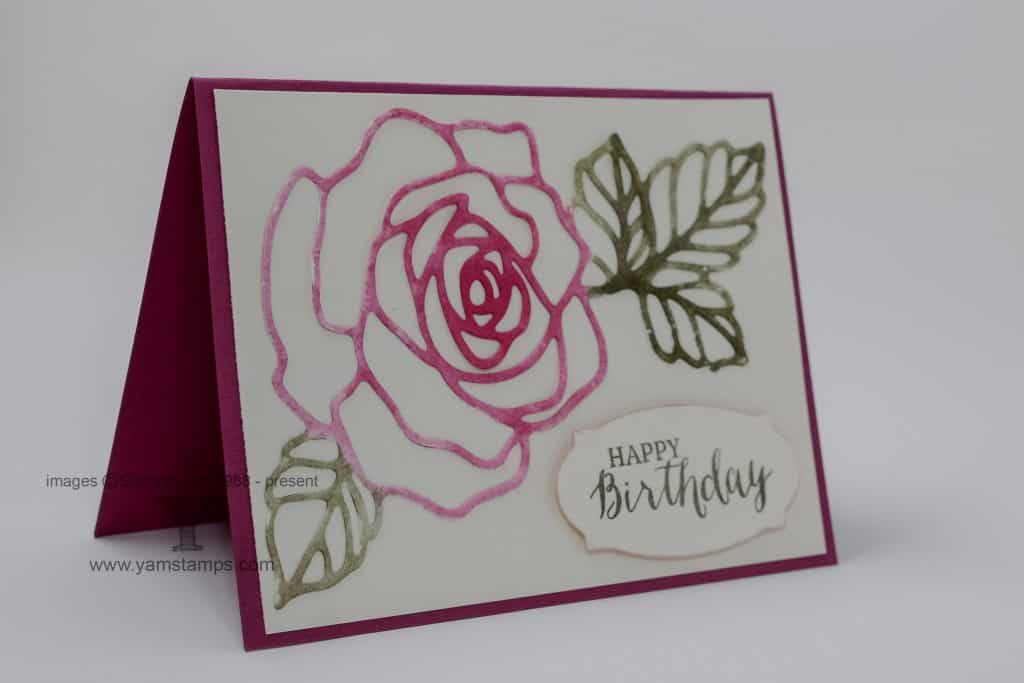
I thought we could use a little floral feel on the blog today…after having a big snow dump around here, I need a little reminder that spring will eventually arrive! I love the Rose Garden Thinlits Dies, and the coordinating Rose Wonder Stamp Set – and love the bundle that’s discounted by 15% even more! For this card, rose/leaves were die cut from watercolour paper, then we used the aquapainter with some Rose Red and Always Artichoke reinker to colour the die cut image. The Fine-Tip Glue Pen came in very handy to adhere this die cut onto the card front. The other tool that was useful was the Big Shot Die Brush to remove all the little bits and pieces, and help ease the die cut out of the thinlit. This bundle and the Brush tool have been popular choices from the Occasions Catalogue!
I sent out my monthly paper crafting newsletter yesterday (if you sign up for the newsletter now, you’ll get a copy of the last one that went out as well!). In that newsletter was a link to a quick survey about paper crafting – to help me tailor my online and in person classes to what your needs are! Please complete the survey, and if you include your information (it’s optional), I will make a draw from everyone who completed the survey to win a $20 gift certificate from me! Thank you in advance for your help.
Don’t forget about the upcoming Birthday Card Class for March – you get a Wink of Stella pen included in your $25 class fee! Click on the button to register – deadline is Thursday, March 10th so that the supplies can arrive in time for the class!
See the YamStamps Events Page for other upcoming classes and events. I look forward to seeing you in class soon!
Feb 25, 2016 | cards, Paper Pumpkin, Sale-A-Bration, Stampin' Up!

So I have committed myself to sending forty cards over forty days….because I realize that I have limitations! LOL. Some in the Stampin’ Up! world are mailing out birthday cards to any and all takers…and I know that’s just beyond me. So forty cards and forty days….ish….it is! Thankfully, I have a Paper Pumpkin subscription to help me out! Each month, I get a fun kit full items to help me create a project quickly and easily (and who doesn’t want that?!). Even better – it’s ON SALE right now! You can get a three month subscription for $69, plus you’ll qualify for one free Sale-a-Bration item! This month’s kit includes a birthday stamp (among others), so I decided to use it to help me get a few bithday cards out and in the mail. I did choose to modify this design slightly – by adding some of the glitter tape that you can select as your free Sale-a-Bration item! This is one of the new limited time offerings for the last part of Sale-a-Bration – there’s gold, white and silver. LOVE the bling without the mess or fuss. On the card above, I snipped the ends of the gold washi tape to match the banner that is pre-cut in the kit. I stamped “happy birthday” with the Blackberry Bliss Stampin’ Spot (mini travel ink pad), added the adhesive die cuts and now it’s ready to send! It _may_ even get to the recipient on the intended day!! (This is shocking, in my world….sad but true).
Speaking of washi tape, did you see the photo I shared on Instagram and Facebook? This idea was shared by one of the artists at Stampin’ Up! and I LOVED it – so had to copy it.
I think I like this even better than my previous washi tape storage (which was to tie them on a ribbon).
If you would like to join the handmade card revolution, come to March’s Monthly Card Making Class! It’s a great way to get some new ideas and have some creative time. See the YamStamps Events page for other classes and events, or contact me if you have any questions!
Feb 11, 2016 | cards, Sale-A-Bration, Seasonal Catalogue, Stampin' Up!
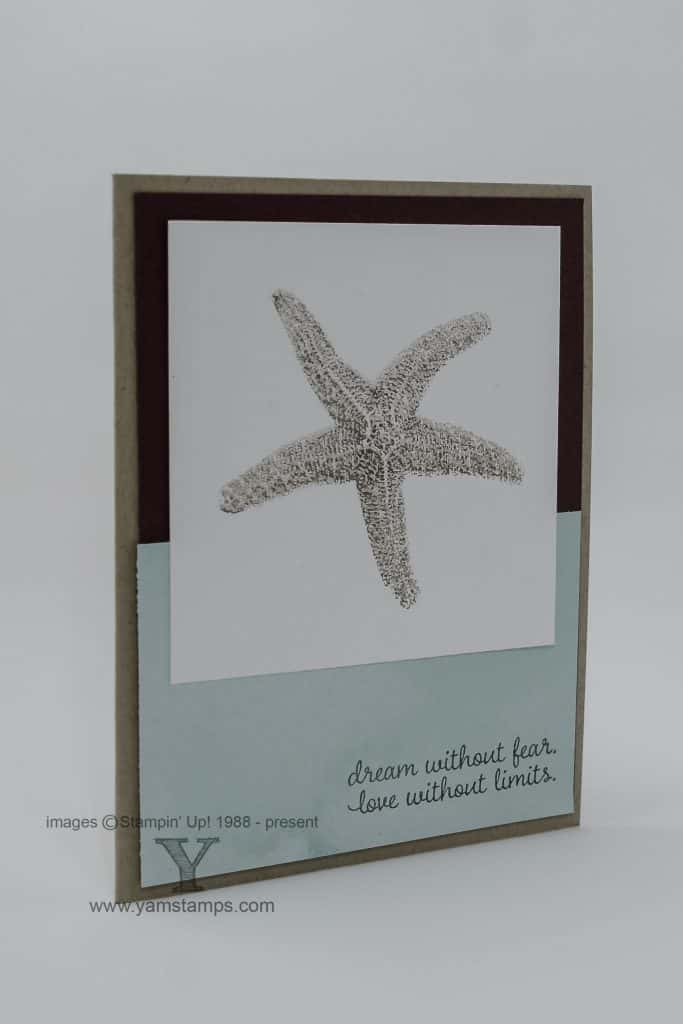
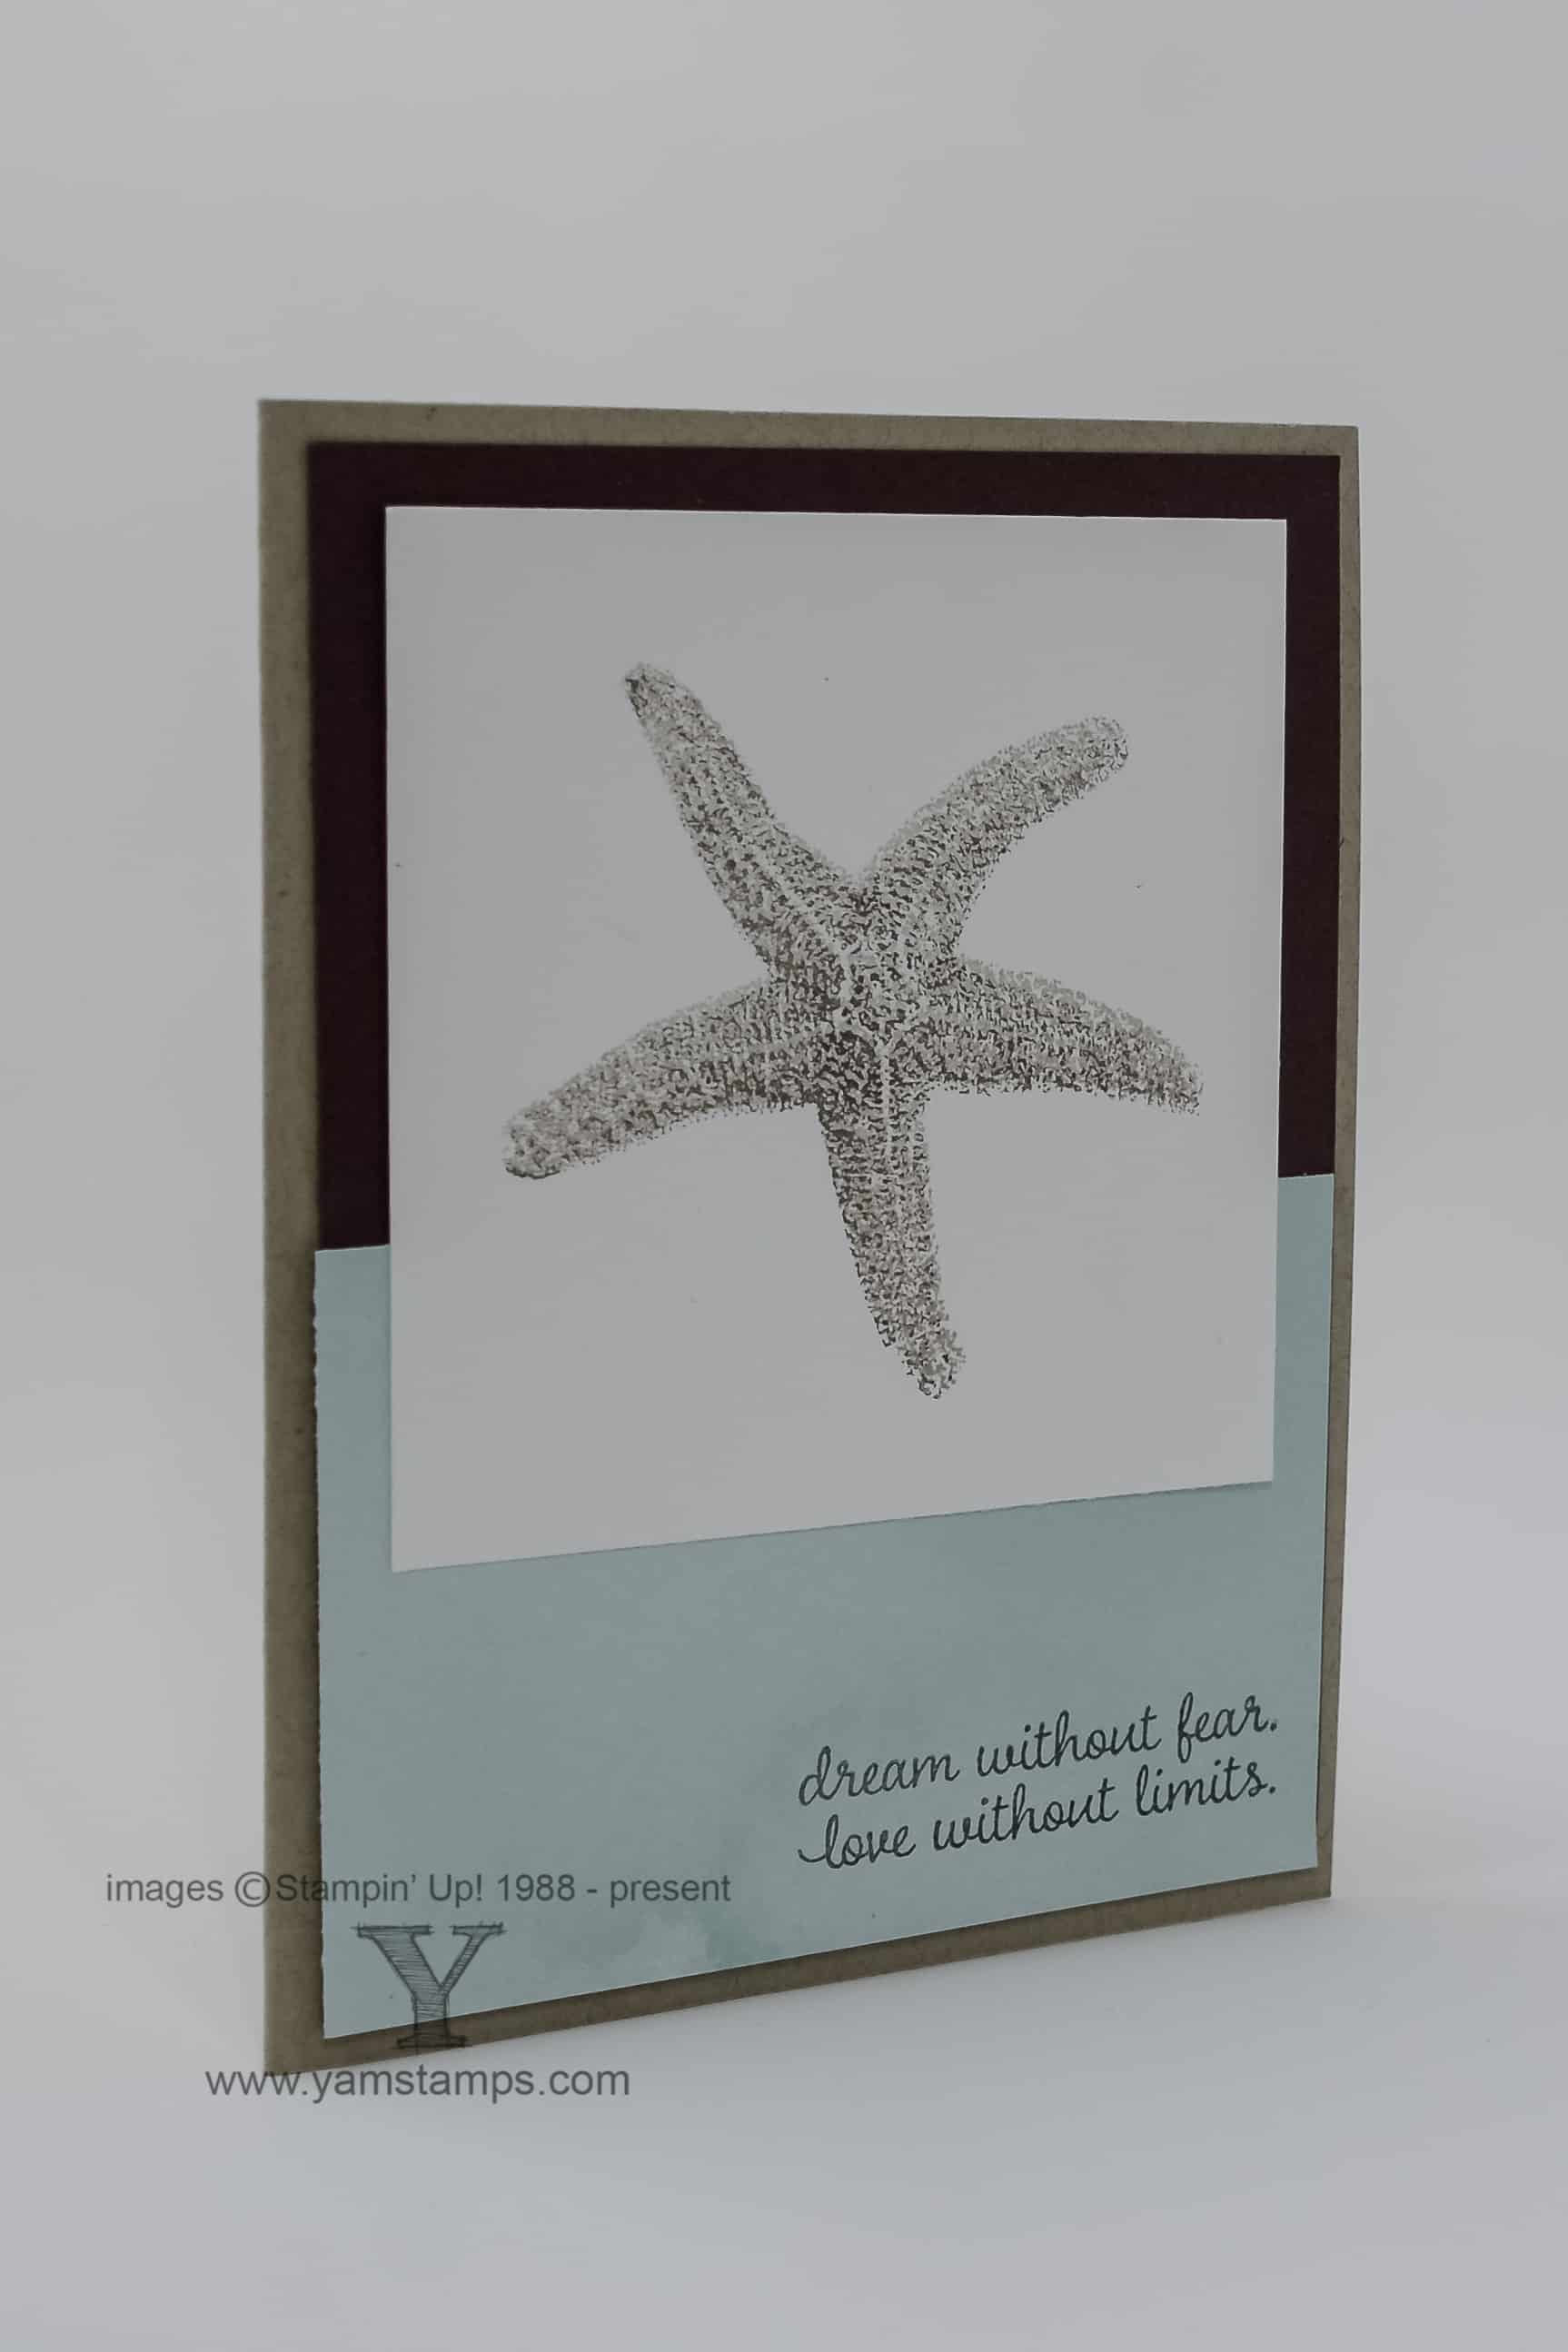
Doesn’t this have a lovely, serene, beachy feel? This is made with Stampin’ Up!’s Picture Perfect set, and the watercolour wash effect paper on the bottom is the limited edition Sale-a-Bration Perfectly Artistic Designer Series Paper. The flip side of this paper is a marbled look – it’s truly gorgeous and difficult to pick which side to use!! The paper will be available for free with a $60 product order until February 15th. There _may_ be an opportunity to get it after that date, depending on inventory, but it’s not guaranteed – so grab it now before you miss it. The other colours on this card are Crumb Cake and Chocolate Chip.
I’ve decided that I’m going to make an effort to send out more cards by mail. During the next 40 days, I’m going to mail out 40 cards – a card a day. I’m not going to count my “Thank You” customer cards in that total, because I want to challenge myself! This ties in nicely with a movement happening in the Stampin’ Up! world. One of the corporate team members is starting a trend to send out birthday cards – celebrating the handmade, mailed card as opposed to electronic messages (even though those are nice, too!). Shannon bravely put out a facebook post welcoming all to indicate their birthdays to receive a card. I think she has over 1000 birthdays to keep on top of, at last count?! I am being a little more realistic in my abilities and time allotment, so I’m going to do 1 random card per day over 40 days. I posted my first card for this challenge on the YamStamps facebook page yesterday.
If you’d like to bring back the art of the handmade, mailed greeting card, you can register for the Birthday Card Class!! February’s class will be Thursday, February 25th at 7pm in Burlington. The registration deadline is TOMORROW so don’t miss it. You receive a package of the Birthday Bouquet Designer Series Paper included in your class fee, so you’ll have plenty to take home after completing four different birthday cards in class. Please contact me if you have any questions, or use the registration link below.