Mar 30, 2015 | cards, Occasions, Stampin' Up!
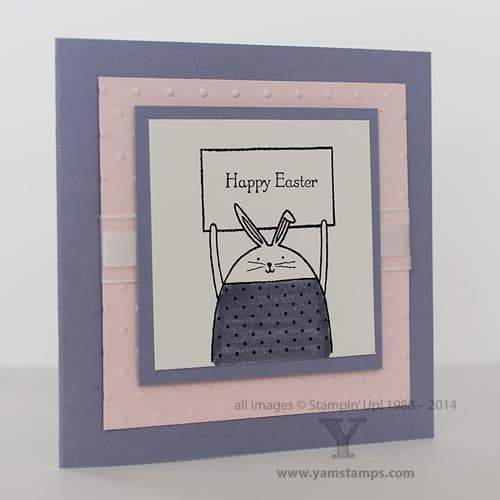
This is a fun card to whip up for Easter. Using Stampin’ Up!’s Cheerful Critters set and Teeny Tiny Wishes, which is the most useful stamp set on the face of the planet… The Cheerful Critters is a photopolymer set, which means it’s see through (well, more or less, mine has been used and loved and is slightly stained LOL). I found it easiest to eyeball where the critter’s sign would land, and then stamp the greeting first. I was then able to position the critter accurately since I could see through to where my greeting was. This was a quick colouring job with my Stampin’ Write markers on Shimmery White cardstock. (See? There is life after Blendabilities!!). I also used the Perfect Polka Dots Embossing Folder to coordinate with the bunny’s shirt and added a touch of ribbon to complete it. This square card is 4.25″ x 4.25″ completed so still fits in Stampin’ Up!’s medium envelopes.
One of my commitments this year is to send more “Happy Mail” – cards in the mail. If you’d like to add to your stash of cards to give and send, don’t forget the Monthly Card Classes – there’s one on April 1st (no fooling!) but you must register at least 2 days in advance (that would be TODAY, Monday, for April’s class) Hope to see you soon!!
Mar 28, 2015 | cards, Sale-A-Bration, Stampin' Up!
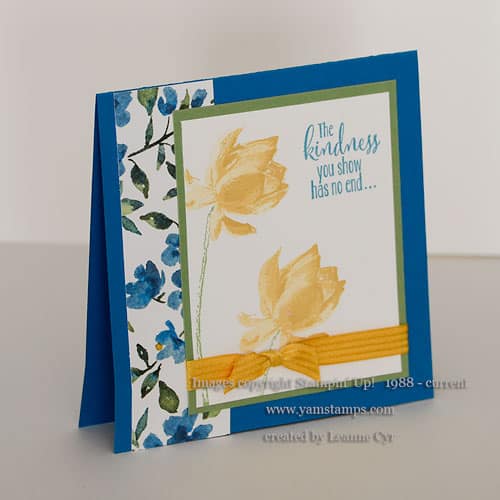 This beautiful card is one that I received from a member of my “Eh” Team of Stampin’ Up! Demonstrators, Leanne Cyr. Isn’t it lovely? Featuring the Sale-a-Bration favourite set, Lotus Blossom. Love the colours and spring feeling. She’s also used the Painted Blooms Designer Series Paper from the Occasions Catalogue. Did you know that the original designs for this paper set were all hand painted?
It’s coming down to the crunch to get your hands on Sale-a-Bration items with each $60 merchandise order, and extra items in your Stampin’ Up! Demonstrator starter kit – March 31st is the last day to take advantage of these deals. Please contact me if you need assistance, have any questions, or are ready to pick out your starter kit items (I can walk you through the sign up process). You can shop online 24/7 at the YamStamps Online Stampin’ Up! Canada store. PLEASE don’t leave it til the last minute, in part because Sale-a-Bration items are while supplies last, and in part because any good site can be overwhelmed by high amounts of traffic, and of course, that tends to happen the closer that we get to deadlines!
Mar 26, 2015 | cards, Sale-A-Bration, Stampin' Up!
 Time is ticking…you have 5 days left to take advantage of Stampin’ Up!’s Sale-a-Bration – it ends March 31st, but PLEASE don’t wait until then as most Sale-a-Bration items are while supplies last. If you’re looking to join my “Eh” Team of Stampin’ Up! demonstrators, sign up before March 31st to get a free kit from the Occasions catalogue, but again, don’t wait! Having lived through Stampin’ Up! deadlines before, I’m pretty sure that the system will be overloaded with last minute shoppers and new demonstrators – and it’s not pretty. Please contact me if you have questions or need assistance!
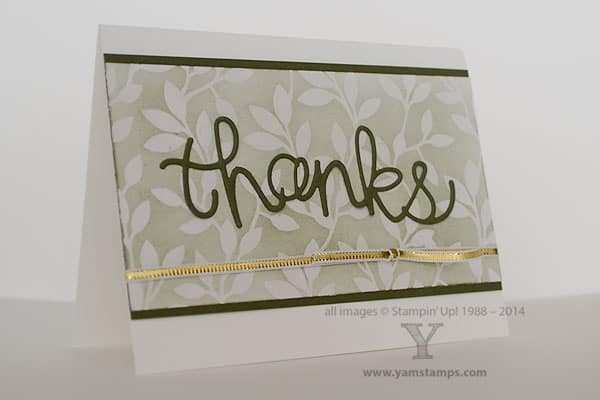
This is a card we did in Stampers Club this month – using the Irresistibly Yours Specialty Designer Series Paper, which is a Sale-a-Bration free item with each $60 merchandise order. This paper is already embossed, so just add ink! We sponged Always Artichoke ink onto the cardstock – I like the look of the sponging because it’s not solid – it gives a gradation to the colour. If you like the more solid colour effect, you can brayer the ink onto the paper, but I figure we need to highlight the fact that it’s not just a solid printed paper! Added the “thanks” from the Hello You Thinlits and a bit of gold ribbon and it’s done.
Check out the latest video on the YamStamps YouTube channel showing how to make cutting with Thinlits an easy experience. Thrifty Tip Reminder – get double duty from your backing cardstock – cut the word from the cardstock before adhering the remainder underneath your Designer Series paper! Happy Crafting.
Mar 9, 2015 | cards, Stampin' Up!
 If you’ve checked out my blog and projects, you’ll know that in general, I like quick, easy and clean cards and projects, or things that maybe look difficult but aren’t! This isn’t to say that I don’t make more complicated items or over the top stuff, but because of my nature, it’s better for me to get it “done and dusted” rather than messing around with it for ages (which usually translates to never finished, or wrecked because I did just a little too much tweaking…) So I’ve decided that I’ll try to share on a semi-regular basis “Manic Mondays” (child of the ’80s, can you tell?) – cards that are really fast to copy and create and get out the door.
This quick and easy card features one of Stampin’ Up!’s photopolymer sets – Snuggles and Smooches. I love the scribbly image! Stamp the scribbles, stamp the word and punch out, then add it onto a die cut. A bit of washi tape and a background add finishing touches. You’ll be able to stamp this card in minutes and get it into the mail to brighten someone’s day.
Another new feature I’m trying – please let me know what you think! Below is a clickable visual supply list. Happy Stamping!
Mar 6, 2015 | cards, Sale-A-Bration, Stampin' Up!
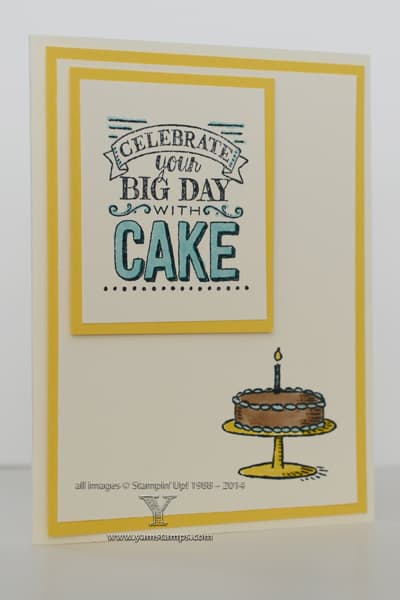 This fun birthday card uses the Stampin’ Up! Sale-a-Bration set Big Day, which you can get for free with each $60 in merchandise order until the end of March. Added some colour with Blendabilities, popped onto a card front and done! I added the images on a layer rather than the card base as Blendabilities will bleed through, and I didn’t like to have that show on the inside of the card. Right now, Stampin’ Up! has stopped the availability of Blendabilities as they work out some issues with the product – so they’re unavailable to order 🙁 however this doesn’t mean that you have to stop colouring! There are many ways that you can colour images – your Stampin’ Write markers, aqua painter or blender pen used with ink refills (or picking up ink from the inside lid of the stamp pad).
If you’d like to squeeze in a party before the end of Sale-a-Bration, contact me ASAP as availability is limited. I’m looking forward to my upcoming classes in the meantime, and off to prep!
Feb 22, 2015 | cards, Occasions, Seasonal Catalogue, Stampin' Up!
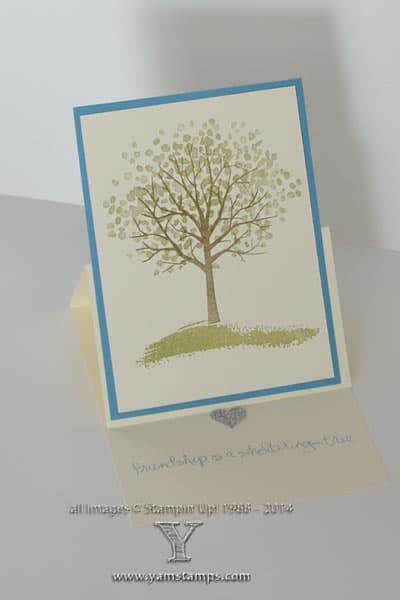 This is a super quick and easy card to make! The stand up card is made the same way as the Valentine’s Card I did on Morning Live, and is based on the basics of card cutting and folding in the video I shared here. Using Stampin’ Up!’s Sheltering Tree set from the Occasions catalogue, it’s easy to create this card that reminds us that spring is on its way….sometime… This is 2 step stamping at it’s best – stamp the trunk in a brown tone of your choice, stamp the leaves in the colour of your choice, add a bit of ground and you’re done. The gradation of colour in the leaves is done by the stamp itself so it’s easy to look totally artistic!
If you’d like other ways to look totally artistic, don’t forget that TODAY is the last day to register for the upcoming Blendabilities class on March 12th. Space is limited, and payment due at time of registration. Don’t miss out! These are fun tools to use in your paper crafting and I’ll show you some tips and tricks to make your colouring look totally professional. And you know me – it’s going to be easy, because I’m a bit of a lazy crafter that way!!


