Oct 11, 2010 | Christmas, Events, rubber stamping
 This is one of the design choices for this year's Christmas Card Clinic. It's a Whisper White card base with Marina Mist ink and cardstock, plus a bit of dazzling diamonds glitter (optional!) for added "bling".
The stamps are from a retired Stampin' Up! set…and I think it might have been a hostess set as well…but I'm not even sure of the name…sorry… but know that I have it here and it's ready for you to come and use to create your cards!! LOL.
Card clinics are being held in the first few weeks of November, cost is $25 for 10 cards and envelopes, with $2 per additional card of same design thereafter. Please contact me if you have any questions. All clinics will be held here in Burlington ON. On that note, today's reflection is that I'm grateful to have the opportunity to have a home based business that allows me to earn some extra income, have fun and keep my family as a priority 🙂
Dec 19, 2009 | Christmas, rubber stamping
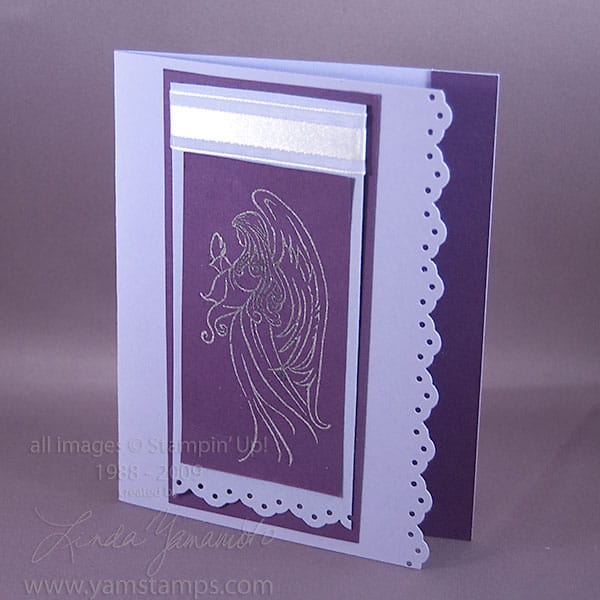
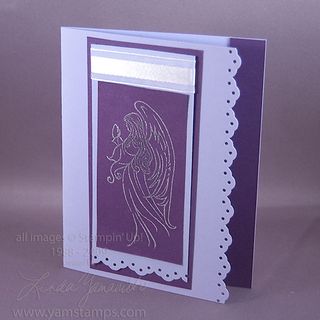 I like using some "non-traditional" Christmas colours for holiday cards. Here's a card that uses Almost Amethyst and Elegant Eggplant together. The angel from Holy Tryptich is stamped in Encore Silver Metallic Ink, and heat embossed with Iridescent Ice. The eyelet border punch is used on the Almost Amethyst layers and is highlighted by placing Elegant Eggplant behind them.
I've been trying to finish getting my cards in the mail! For me, it's one thing to get the cards made, it seems to be another thing entirely to write them out and get them into the mailbox!!
I hope that the countdown to Christmas is going smoothly for you. Don't forget that Stampin' Up!'s Twelve Days special is still running – a good chance to get some great Big Shot supplies at a sale price! Contact me to place your order before the 22nd – don't miss out!
Nov 18, 2009 | Christmas
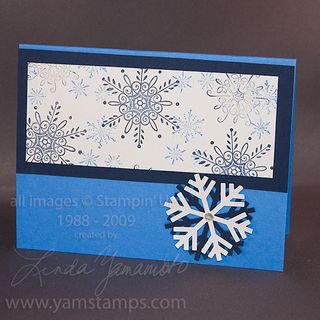
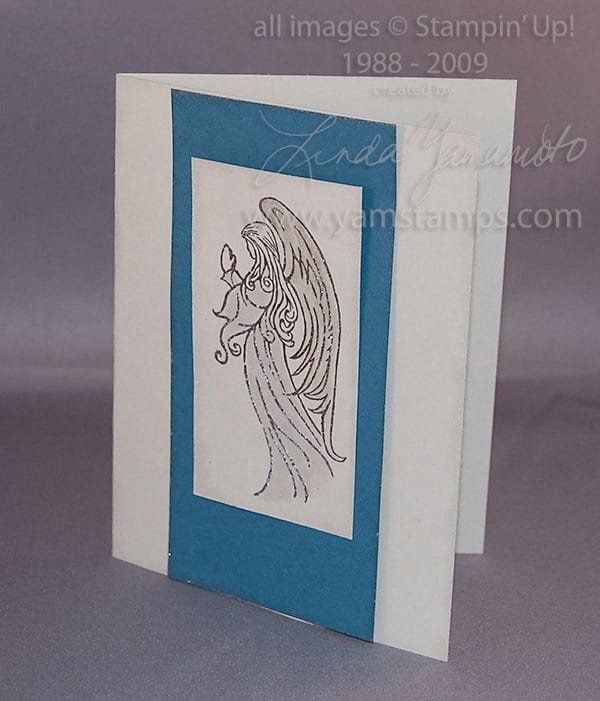
 I love using blue for holiday cards. This is Stampin' Up!'s Ballet Blue combined with Night of Navy and Shimmery White Cardstock. I tried a close up of the white so maybe you can pick up the shimmer a bit?! It's subtle…but it's there.
Serene Snowflakes stamped in Night of Navy & Ballet Blue (why think too hard, just coordinate the ink with the cardstock…LOL)
I punched snowflakes out of Night of Navy & Shimmery White. The rhinestone gem in the centre of the snowflakes is the gem from a clear rhinestone brad. To get the gem out, open the arms of the brad, then pry back one of the retaining arms. I will often search through the brads to find one that the little arm is sticking out ever so slightly – much easier to pry open. Pop out the gem & then adhere it with a little Tombow Mono Adhesive. I love the clear rhinestone brads, but this just gives another look, and a little less bulk.
Email newsletter subscribers should be receiving week 8 of the 12 Weeks of Christmas today. How did we get here already??!! Please sign up for my newsletters at the top left of the blog. Non-Canadians are welcome to sign up for ideas and inspiration, but please be aware that I am prohibited from selling to those outside of Canada.
Nov 14, 2009 | Christmas
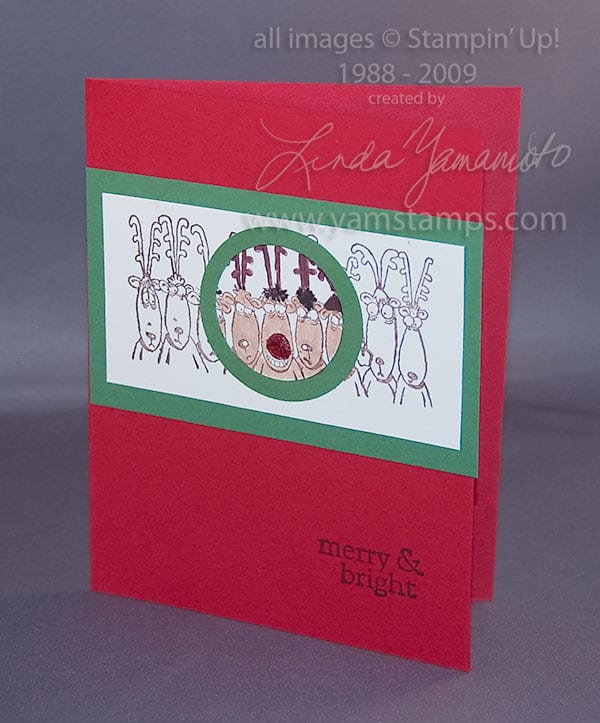
 The spotlight technique is a fun way to add a quick shot of colour to your line images. These reindeer are my favouries from Stampin' Up!'s Holiday Line Up stamp set. This is the "thrifty" version of spotlight… The reindeer are stamped in Basic Brown onto the Very Vanilla Cardstock. To spotlight an area you have a couple of options – you could stamp a second image and punch a circle out of it…or you could punch a ring and place it on your original image. To create a punched ring, punch the inner portion first. In this case, I used the 1-3/8" circle punch on Garden Green Cardstock. I then used the 1-3/4" circle punch upside down so I could centre the original punch out when I punched again to create a ring. Clear as mud?!
Anyway, once I adhered the green ring in place on my image, I used my Stampin' Write markers to colour in the portion contained by the ring, and added the Red Cosmo fine glitter to the nose of the centre reindeer. The Merry & Bright sentiment is from a retired Stampin' Up! set but I thought it suited the card.
If you'd like to use this card for your holiday greetings this year, it's being offered at my Christmas Card Clinic. Contact me to reserve your spot & your design…and I'll prep everything for you!
Nov 10, 2009 | Christmas
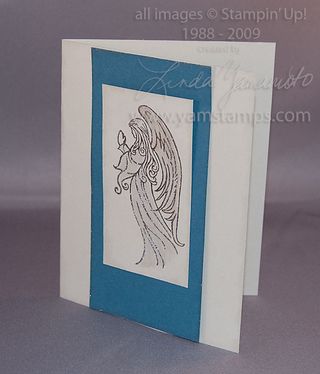 Here's another Christmas Card Clinic sample. The angel from Stampin' Up!'s Holy Triptych stamp set gets a shimmer from the shimmer paints plus iridescent ice embossing powder. The shimmer paint is a great way to get a subtle wow factor (is that an oxymoron?!)
A reminder that there's still room in the Card Clinic for Thursday, November 19th if you would like to make your Christmas Cards! Check out the sample album here, then email me to let me know which one you'd like to recreate! Cost is $25 for 10 cards – includes all cardstock – precut for you, and all supplies required to make the cards themselves; plus envelopes! Need more than 10 cards? Each additional card is $2.50.
Other card making options include the Holiday Stamp a Stack in Mississauga, Saturday Nov 21, or hosting your own card making party with your friends! Contact me if you'd like more information.
Nov 9, 2009 | Christmas
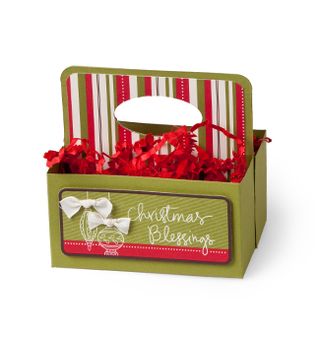 This idea was shared with us on the Stampin' Up! Demonstrator website. It uses the Christmas Jingle Simply Scrappin' kit, and the box is the Box #2 Bigz Die for the Big Shot! This is the same box die that we are using for our Christmas tags at the Holiday Stamp a stacks (You can see that here). Here, Diana has used two of the boxes back to back, and adhered the lids together, then punched out a handle with the large oval punch – how clever!!
To make your own paper filler (the red crinkly stuff) – use your paper crimper on red cardstock, then run it through a strip cut paper shredder. (If you use a cross cut paper shredder I guess you'd get confetti instead?!)

 This is one of the design choices for this year's Christmas Card Clinic. It's a Whisper White card base with Marina Mist ink and cardstock, plus a bit of dazzling diamonds glitter (optional!) for added "bling".