Oct 24, 2009 | Christmas
and check it twice…. (click on image to open the file).
My mailing list received this earlier in the week, but I'm also posting it here in case you missed it or (*gasp*) aren't signed up for my email newsletters LOL. (If you want to be signed up, go to the top left of the yamstamps blog).
This is a wish list for Canadian Stampin' Up! customers (sorry, I can only sell to those in Canada, if you need a demonstrator in another country, check out www.stampinup.com for availability in your area). Enter your desired items, indicate an amount for a gift certificate you'd like, and then email it to me. I will get in touch with your contact person to help fulfill your wishes! Return it by November 25th to ensure plenty of shopping time before the winter holidays for your loved ones.
If you have trouble accessing the wishlist (it's a Word document) please contact me. Happy shopping!!
Dec 25, 2008 | Christmas, rubber stamping
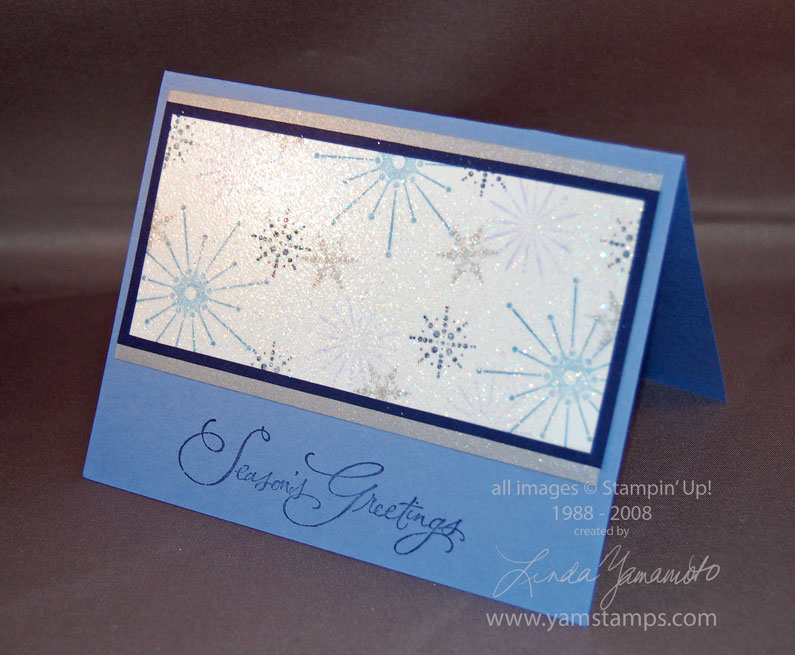
 This was my Christmas card design this year. Oh, and hey, it's another blue holiday card!! (Can you tell what colour I like?!) It may be hard to see in the picture, but the Snow Burst images are stamped onto whisper white cardstock in brocade blue, night of navy, almost amethyst and metallic silver. Once that dried, I pressed my Versamark pad over the strip of cardstock, then heat embossed with iridescent ice embossing powder to give it the all over sparkly look. It's mounted onto night of navy cardstock and brushed silver cardstock. The greeting is from Many Merry Messages (my most used holiday set – all greetings!)
Frugal Friday tip on a non-Friday – I cheated on the silver layer – rather than hiding so much cardstock behind the other layers, I cut thin strips and adhered them to the navy cardstock. Same effect but much more economical! You could also punch out the middle of the night of navy strip with various punches to stretch your dollar further. I however, was a bit time strapped so skipped that frugal step in favour of a bit more speed in my card making!
I want to take the opportunity to thank all of you for your readership and time! Happy Holidays to all and wishing everyone a happy, healthy and creative new year.
Dec 24, 2008 | 3D samples, Christmas
This is from week 11 of my 12 weeks of Christmas emails this year – I thought I'd share it here if you still have some packaging needs for tomorrow!!


I know I can't be the only one that hangs on to the "nice" bags that I sometimes get from stores. This is a heavy duty paper bag with cord handles. I simply covered up the logo with this 3D tree I made, and also covered up the inside logos with a thin strip of designer series paper (hard to see in the picture). The tree is made from 4 squares of the Ski Slope Designer Series Paper, topped with 3 stars punched from metallic gold cardstock. I replaced the cord with the felt ribbon from the Alpine Ribbon Originals.
HOW TO:
1) Cut 4 squares from your designer series paper – 3"x3", 2.5"x2.5", 2"x2", 1.5"x1.5"
2) Each is folded the same way, and then adhered together to form the tree shape; I used a the flip side of the designer series paper for the trunk.
Step by step shots below for the basic fold…the first steps are basically scoring the paper.
start with your square fold in half, then unfold again
fold in half the other way, unfold fold diagonally, unfold, then fold on
the other diagonal & unfold


fold in half with crease at top poke in the side along crease lines
* if you are using patterned paper, (bring the top fold down so it's vertical)
to make design symmetrical, have the
design run horizontally*
previous step finished repeat on other side
bring the front right fold to the repeat with the other side – DONE!
centre line & crease
Dec 19, 2008 | 3D samples, Christmas
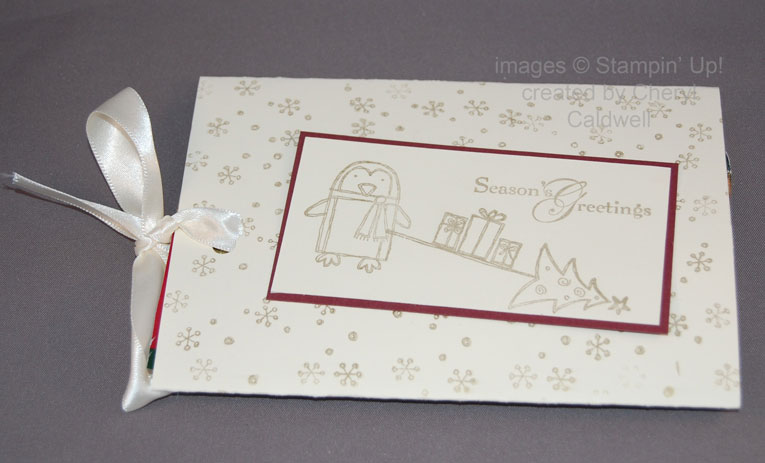
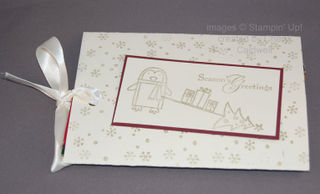 Cheryl gifted my son & I recently – I got to have this portion of the treat! She created a packet holder using the Punch Pals set, with the packages on the tree like a sled – so cute.
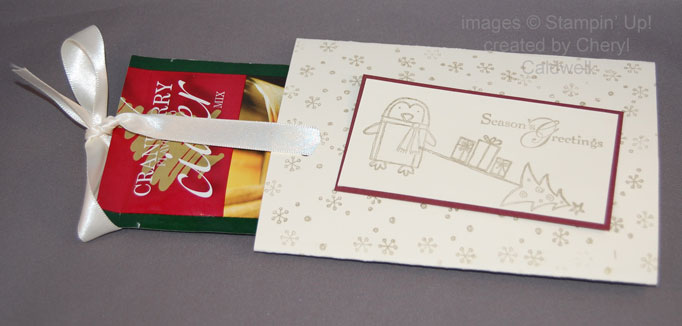
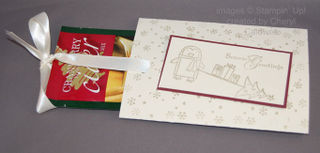 This is the slider portion open – with the treat! Essentially you create a flat tube, then punch a hole through both layers at the top; thread a length of ribbon through. You place the treat into the centre of the tube, on top of the ribbon. Slide it into place, then tie the ribbon. The recipient simply pulls up on the tied ribbon to slide out the treat (no untying necessary – so a great gift packaging idea for little ones to open!).
Thanks Cheryl, for the treat! I had the cider immediately after taking these pics!
Dec 16, 2008 | Christmas, rubber stamping
 Things are a little busy around here right now….what with the last week of school before Christmas, and me still trying to get my own Christmas cards done & mailed out…. My last "Twitter" update reads "Still working on finishing Christmas cards…still hoping to have them mailed before Christmas…" I think it's going to be like that for a while…lol
Anyway – here's another swap sample from the talented Kim – featuring the Deer Friends Hostess set, Ski Slope designer series paper and those great scallop punches! I love how she's cut out around the snowman's head & mounted it to give some dimension.
OK I'm off to work on those cards some more. I'll try to post a shot of my card here later. If you're on my mailing list – it's the TWELFTH week of the TWELVE weeks of Christmas!!! Watch for it in your inbox later this week.
Dec 3, 2008 | Christmas, rubber stamping
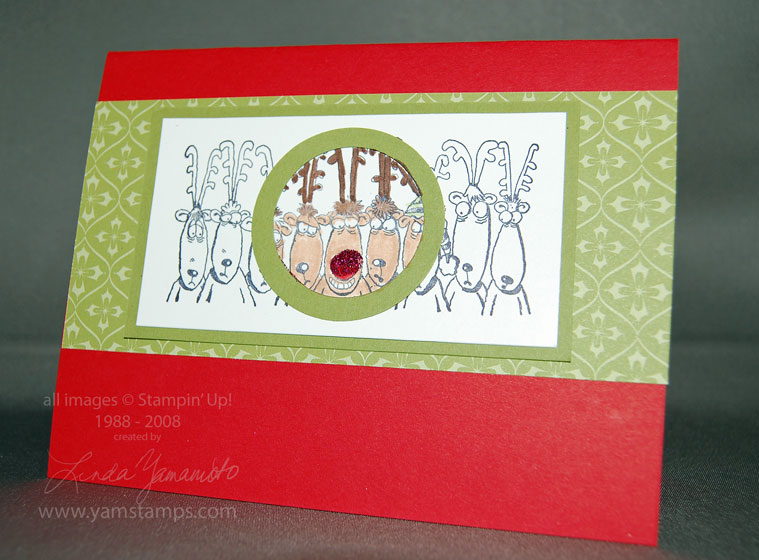
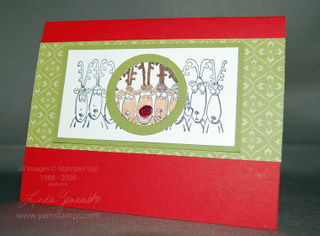 This is such a fun stamp set! Stampin' Up!'s Holiday Line Up features reindeer, elves and snowmen. I am thinking that this might end up being my holiday card this year…or one of them. (NO, I'm still not done them).
This is a cheater verision of spotlighting that we did at my friend Linda's recent workshop. The image is stamped in basic black onto whisper white cardstock. We punched the 1-3/8" circle punch on some old olive cardstock, then (using the punch upside down so we could see what we were doing) used the 1-3/4" circle punch around that hole to create the green ring. Adhering this to the image, we then just coloured inside the circle with stampin' write markers. A bit of 2 way glue on Rudolph's nose and some fine cosmo glitter to jazz it up; mount the image onto a strip of ski slope designer series paper and a real red card – tada! The nice thing about this card is that it's extremely flat, despite the layers, so no worries about mailing issues…(unless of course you have a 3 page Christmas letter plus photos to include…)