Jul 21, 2010 | rubber stamping

I love two-step stamping – it's what brought me to Stampin' Up! products in the first place. Simply put, two step stamping is stamping an image in two (or more) steps. In this case, it's one stamp for the outline, and one (or more) stamp(s) for the coloured image. WIth the stamp set Awash with Flowers, the stem is separate from the large flowers and the flower head is a separate stamp, as is the solid leaf image for the stem. These solid images don't always line up perfectly to entirely fill the outline (even if you use the stamp-a-ma-jig – they're made that way!!) and I love the artistic look of this effect. It's also very freeing for me, not having to worry about getting everything "perfect". The sentiment is from the set Perfect Punches, which coordinates with various Stampin' Up! punches.
This card features Baja Breeze and Pink Pirouette, two colours that are now part of Stampin' Up!'s core colour offering. Daffodil Delight and Certainly Celery round out this palette. (Eh Team stampers, check the team newsletter for dimensions & more details so you can recreate this at one of your workshops!).
We created this card at the recent July card class. In September, my monthly card classes will re-start (taking a little break in August). Hope that you can join me at a class soon!!
Jul 19, 2010 | rubber stamping
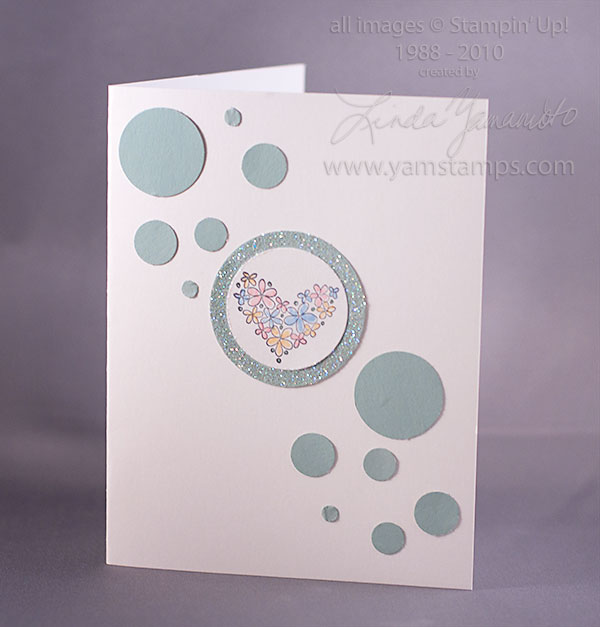
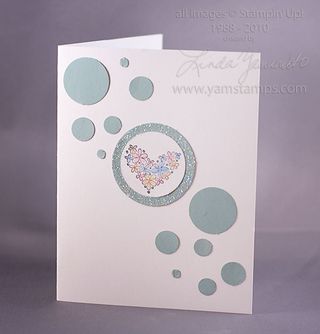 is that you can create a unique and personal card each time! This is the card I made for my friends who were married this weekend. I used Stampin' Up!'s Shimmery White cardstock (which unfortunately doesn't look that shimmery here…) and the retired colour Sage Shadow, since I had some still lying around. The Sage was similar to the colour theme of the wedding, and the punched out circles also went with the theme. Their invitations had featured shimmery white paper with green circles printed on it…so I went with that as my foundation for the card. (See, you don't need to think up these things on your own!!). I used my various circle punches to create different sized circles, and then adhered them to the card. I used Staz On ink to stamp the floral heart (from the set Simply Said) and then coloured it in with Stampin' Write markers (Bashful Blue, Apricot Appeal and Pretty in Pink…I think). I added 2 Way Glue to the rim of the Sage circle and then coated it with Dazzling Diamonds glitter to make the focal point stand out. Voila! A unique, custom-made card! If you want to learn more about card making, please consider coming to one of my card-making classes. Contact me if you have any questions!
Jul 17, 2010 | rubber stamping
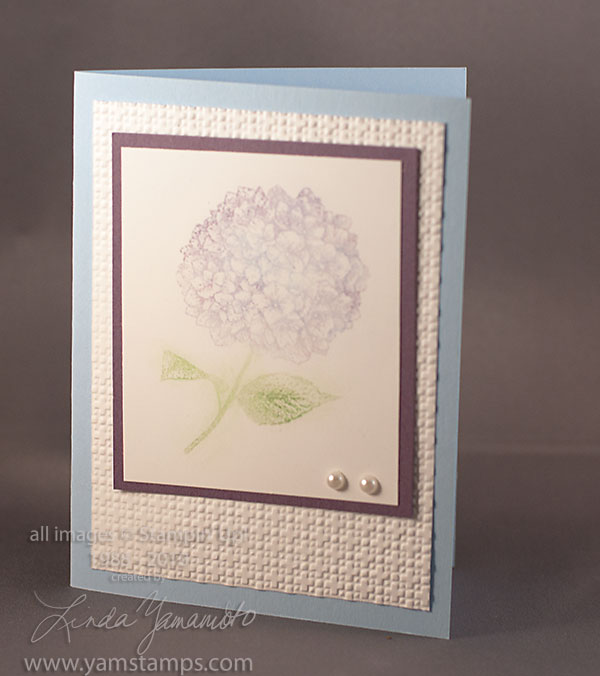
 I love hydrangeas…and this card features a hydrangea bloom in my favourite colours using the Poppin' Pastels technique. The stamp is from Stampin' Up!'s Level 1 Hostess Set "Because I Care". (Workshop hosts can earn this for free – contact me for details).
The bloom was stamped in Versamark and then I dabbed Stampin' Pastels over the image. I initially used Bashful Blue in spots over the flower, then went over it again with Perfect Plum to get the varigated colours. The Square Lattice Embossing Folder for the Big Shot gave beautiful texture to the background piece of Whisper White, and I added a couple of Basic Pearls to complete the card. We did this at my recent Card Class (if you're interested in attending future classes, check out my class page or contact me for more information).
Thanks for looking!
Jun 14, 2010 | 3D samples, Events, rubber stamping
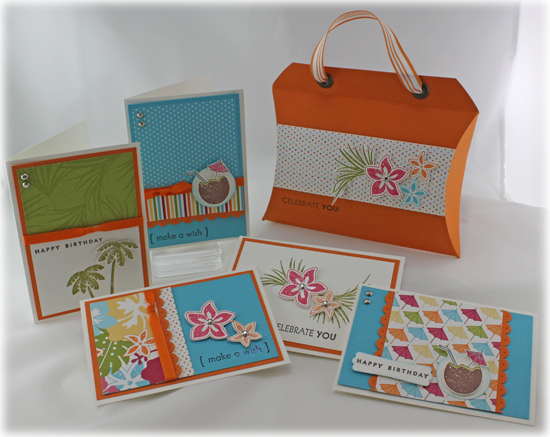
 The next themed class offering is Island Oasis – you'll get the chance to make these five cards and the purse to hold them! Cost is $25 and includes all supplies required. Class will be held in Burlington, Tuesday, July 27th at 7pm. Click on the link to pay by credit card, or contact me if paying by cheque or cash.
If you're interested in getting started on some scrapbooking, on the MONDAY, July 26th at 7pm, we'll be doing a two page layout featuring the same set and paper. Cost is $15. Click on the link to pay by credit card, or contact me if paying by cheque or cash.
Jun 8, 2010 | rubber stamping
when your 9 year old son says "Cool card!"
 Well, I kind of hoped he'd like this one…(I was actually thinking of using it as his bday card! LOL).
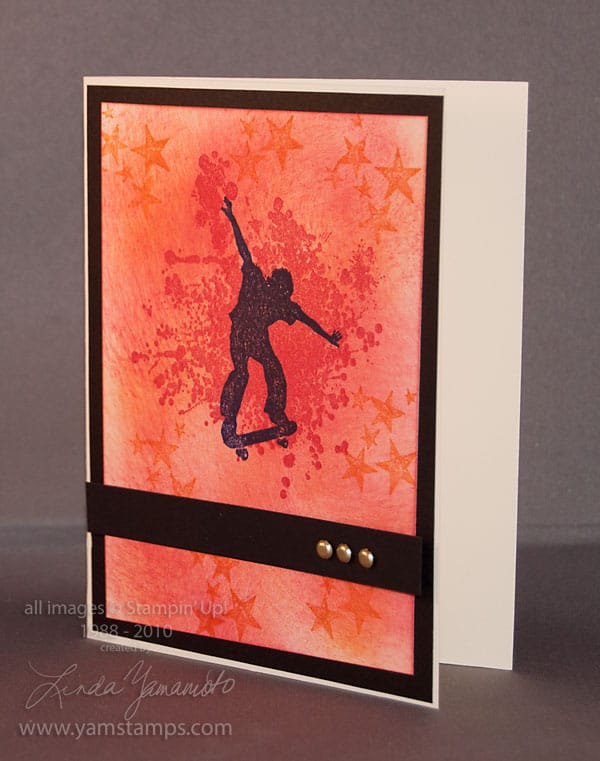
This card uses Extreme Elements and Extreme Skateboarder. I sponged Pumpkin Pie and Ruby Red inks onto Very Vanilla cardstock, then stamped the Elements in the same inks. I stamped the skateboarder in Basic Black on top. If I were to redo this card, I may consider doing the skateboarder in craft ink so that I could emboss him.
This card was inspired by a "swap" I received a few years ago… unfortunately I can't find the original right now, so can't give credit. When demonstrators get together, we tend to swap cardfronts to share ideas and inspiration. I've said it before – you don't need to be creative to be a cardmaker (or a demonstrator, for that fact!!) – you just have to be able to copy and tweak!! (Need more proof? Come to my Info Night! LOL)
Jun 7, 2010 | rubber stamping
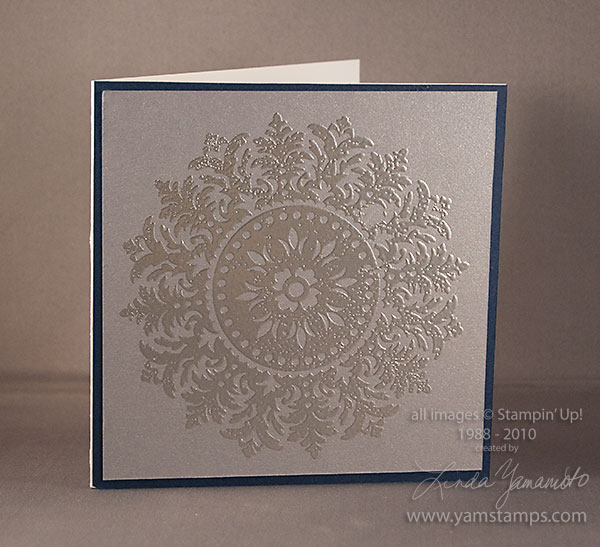
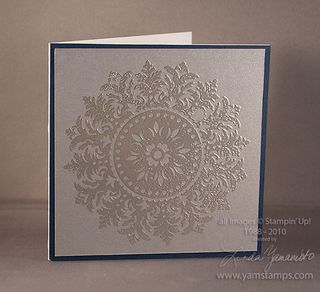 I love the effect of tone on tone heat embossing. This square card (fits in a Stampin' Up! medium square envelope) features the Medallion stamp. It's stamped onto Brushed Silver Metallic Cardstock and backed with Night of Navy cardstock. When we did this card in class, I opted to do a Night of Navy card with a smaller white insert on the inside of the card, which gives a much cleaner look to the finished product. I think this is a great "any occasion" card!
My upcoming events include the Information Evening, Monday June 14th at 7pm here in Burlington and the Birthday Bliss class, Weds, June 16th at 7pm also here in Burlington. If you're interested in attending either, please contact me! The Info Evening will provide you with…information…on having your own rubber stamping & scrapbooking business (or supporting your hobby!!). It's a great time to consider this right now – especially because there is a Mini Starter Kit special!
Hope to see you soon!