Aug 1, 2017 | cards, Christmas, Seasonal Catalogue, specials, Stampin' Up!
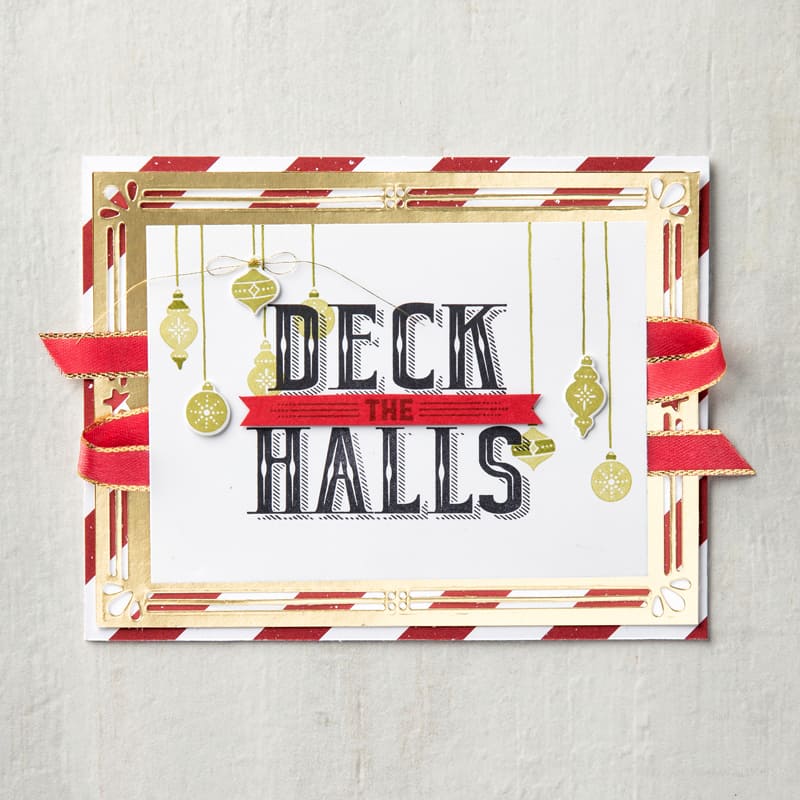
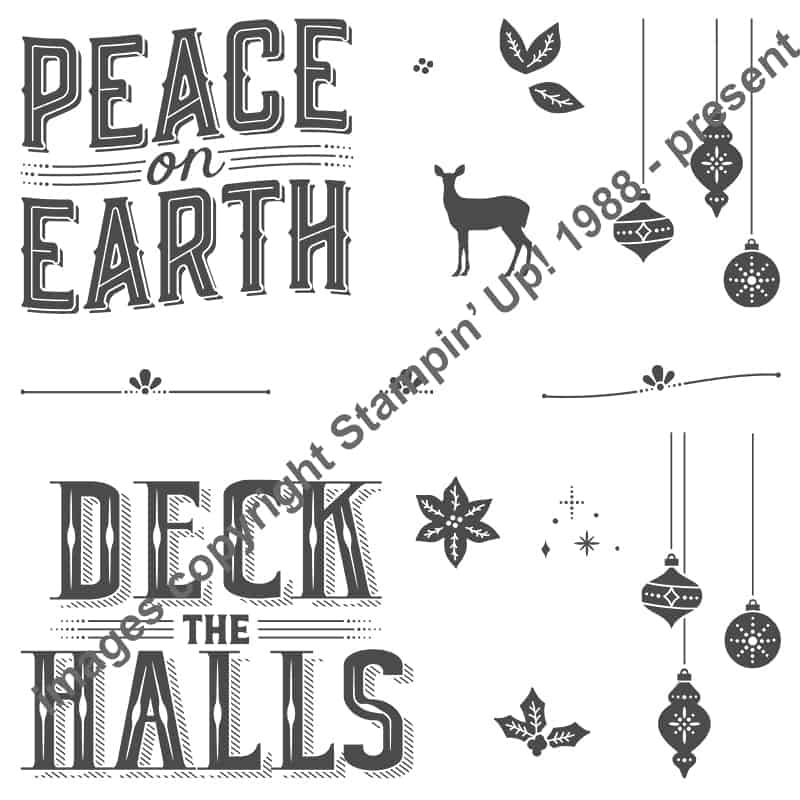
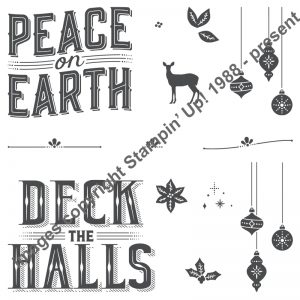
Last month, you could get the Carols of Christmas set (clear or wood) for free as part of a bonus kit of product with your starter kit. Now available for purchase, you can also get it as part of the Carols of Christmas Bundle with a great set of dies called Card Front Builders. Bundle is available with clear or wood options. There’s also a clear mount french version of the set, available as part of a bundle as well. The cardfront builders framelits will be useful year round – not just for holiday cards!
I think you can count on seeing this bundle being used for one of the cards in this month’s Christmas card class, which happens on Thursday, August 17th at 7pm. The featured product for the August class is ribbon – specificially the gold and silver edged ribbons. If you register for the Basic+ option, you’ll receive 1/2 roll of each of these ribbons at class. See the YamStamps Events page for other upcoming classes and more information.
The YamStamps August Paper Crafting Project Newsletter goes out later today to subscribers, and features a couple of projects using the Daisy Delight Bundle. The Daisy Punch has been SO popular that it’s ended up on backorder a couple of times already – but it’s available for purchase today – so grab it while you can! Don’t forget to use your coupon code from July’s Bonus Days to get $6 off! Please contact me if you have any questions or need assistance placing your order.
Jul 26, 2017 | cards, Christmas, specials, Stampin' Up!
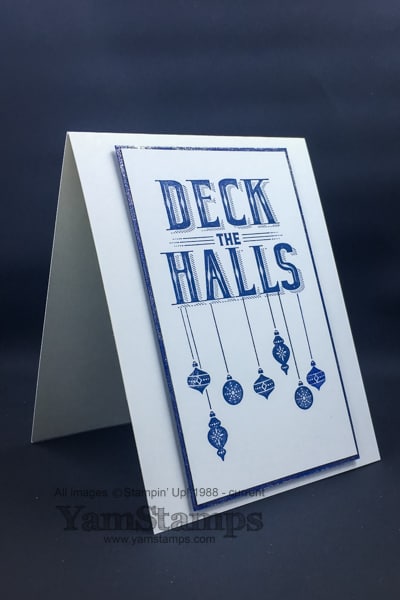
Believe it or not, I’ve already held two Handmade Christmas Card classes already this summer – this is a card we made at the last class. Clean and simple design, blinged up with the Wink of Stella Glitter Brush (which apparently is hard for me to photograph…). Navy and white is a classic colour combination, and goes well with a clean layout, I think. Stampin’ Up!’s Carols of Christmas is the featured stamp set, and if you purchase a starter kit in July you will receive this set for FREE in the bonus Essentials Kit that includes some great tools for papercrafting (all in all a $94 value). This is on top of the value already packed into your choice of $165 worth of product for $135 and necessary business supplies to get you started! More information here. Start selecting your product here.
Your other option is to wait until August, and this set will be available for purchase in either wood mount or clear mount, or in a bundle with the coordinating Card Front Builder Dies. I’ll be posting a link to those items in my online store in August. If you purchased $60 in product in July, you’ll also have that coupon code to use in August – so it’s a great time to get your supplies for YOUR handmade Christmas card!
A hint on this card – when I made this prototype, I ended up lining up the first set of ornaments a little too far to the left, so when I stamped the second set, I ended up with a gap at the right side of the words (under the S…) – so everyone in the class was advised to start their ornaments a bit further towards the centre. I saved this handmade Christmas card by cleaning the stamp, then colouring in just one of the ornaments with the brush end of a Night of Navy Stampin’ Write marker. This way, I was able to stamp a single ornament at the right side so I didn’t have a funny gap.
Some class attendees already have EIGHT handmade Christmas cards in their stash….no pressure or anything….haha! If you’re not quite ready for Christmas cards, consider attending the Monthly Card Class instead. We do 4 different cards, for various occasions, and all required supplies are included in your $20 class fee. First Wednesday of each month – check the YamStamps Events page for upcoming dates. If you DO want to make a handmade Christmas card….or 4….the next Christmas card class is August 17th, a Thursday evening at 7pm. You have the option of the Basic Class Fee – $20 for all supplies to create that evening’s cards, or the Basic+ Class Fee, which includes all the supplies PLUS the featured product for that class. The July class featured the Wink of Stella Glitter Brush on all the projects. The August class will feature the new Silver and Gold Edged Ribbon – participants who choose the Basic+ option will receive half a roll of each product that evening, in addition to the class supplies required. You can contact me to register.
In other news….not sure if you saw it on my Instagram feed or the YamStamps Facebook page, but I road tripped to St Thomas this past weekend! I did a class for Jenny and her friends, which was a lot of fun, and Jenny decided to take advantage of the July special and purchase the starter kit as well – so she’s now part of my demonstrator group known as the “Eh” Team! So fun! More fun on the way home – I drove across town to check out the Jumbo statue, as advised by everyone at the class! St Thomas is the city of trains – in fact, the last time I was in the area was for the Day Out with Thomas (as in Thomas the Tank Engine) a number of years ago with my son (who is now 17….so you can imagine it’s been a while). Anyway. The life sized Jumbo statue is in place to memorialize the real life Jumbo the elephant from the P.T. Barnum circus, who was sadly struck & killled by a train while in St Thomas. He really was a huge elephant! It was a little detour before I headed safely home again. I realize I need to work on my selfie skills a little more….but here’s the proof, as I squinted into the sun to get the shot…

I was also hurrying to get the photo before the other visitors were in my shot! I don’t often travel this far to do a class, but I do enjoy getting out to meet new people at events like this if time and schedule permit. That is definitely one of the best perks of this “job”. I’m looking forward to more travel – to Stampin’ Up!’s On Stage event in Salt Lake City for one, where I’ll be joined by quite a few of my “Eh” Team members this fall! If I play my (greeting?!) cards right, I will be able to earn a gift card for travel as well! In the meantime, I’m off to come up with some creations for August’s class. Hope to see you there!
Jul 24, 2017 | cards, Information, Stampin' Up!
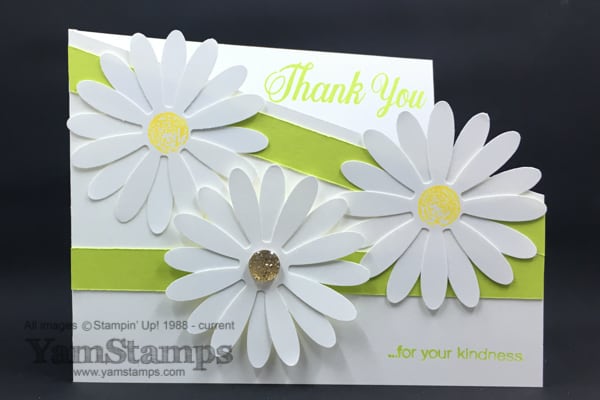
This is a swap card I created using the Daisy Bundle – Stampin’ Up!’s Daisy Delight stamp set and Daisy Punch. Angled lines on a card helpto give a bit of interest, as well as the added bling of a Gold Faceted Gem. I love the images and coordinating punch, and the good news is that it’s also available as a discounted bundle. The bad news? YOU CAN’T ORDER THE BUNDLE RIGHT NOW! Waaaaah! The punch has been SO popular that it’s sold out a couple of times already! Punch sales are way beyond projected, so for the time being, Stampin’ Up! has turned off the ability to order the punch and the bundle. It’s estimated that the next shipment will be in around August 1st. The stamp set is currently available to order, but the punch (and therefore the discounted bundle) are not.
HERE’S WHAT TO DO. You have a couple of options
- Order the stamp set now, along with other craft supplies, and be sure that the total product adds up to $60. All July orders that have $60 in product earn you a $6 coupon code that you can use in August to purchase the punch once it’s available again.
- Wait for the bundle to be order-able once again in August and place an order once it’s available.
HOW I CAN HELP
1. If you would like, I can contact you to let you know when the punch is available once again. Please enter your information here and I can put you on my notification list. This list will only be used to let you know when the punch is available. You can then go online to my online store and place your order.
2. I can place an order for you once the punch is available – PLEASE CONTACT ME. I will get your information (including payment choice) and then place the order for you. Payment will be processed when the order is placed. It can be shipped directly to your door, or if you’re close to Burlington ON, I can have it shipped to my place and we can make arrangements to make a hand off!
If you have any questions, please contact me. In the meantime, stay tuned for other cards and creative ideas that will keep you occupied while we await the return of the punch….
Jul 18, 2017 | Announcements, cards, online class, Stampin' Up!
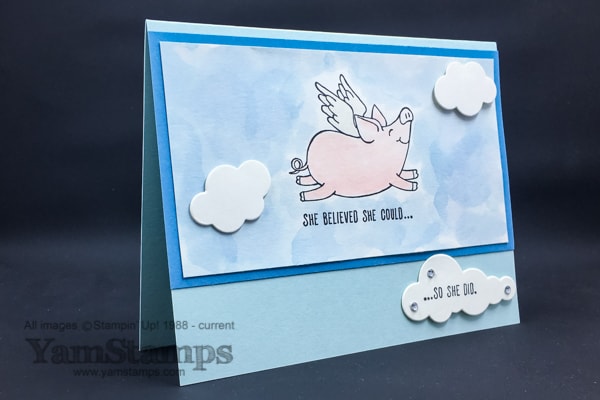
Stampin’ Up!’s set This Little Piggy (available in wood mount or clear mount) is such a fun set. I used it to create some fun swap cards a while back. When Pigs Fly….we should celebrate! I love this sentiment in particular. The image itself is watercoloured, using the aquapainter and refills. Marina Mist is the sky, and Blushing Bride (if I recall correctly….) was used for the pig. I watercoloured on Shimmery White cardstock, and the clouds are cut from the same cardstock. It has a beautiful, subtle shimmery sparkle to it. To boost the shimmer a bit more, I used the Clear Wink of Stella Glitter Brush on the wings.
I love that watercolouring doesn’t have to be all smooth and washed out if you don’t want it to be! I filmed a tutorial on how to get the variegated wash background, and I’ll be sharing it in the Online Watercolouring Class (yes, I know, it’s still in final stages of production…life keeps getting in the way! LOL). (I know, sometimes it feels like this online class will be live when pigs fly….if you want to be notified when the class is available for registration, click here to join the list)
The clouds are die cut using the Up & Away Thinlit dies. A cheater trick of mine is to put the sentiment on a die cut or punch out, so if you mess it up, you only have to redo one portion, not the entire card….or if you happen to mess up stamping on the card itself, a die cut or punch out can cover that up! Trust me, after decades of paper crafting, I know how to cover up mistakes….LOL. What’s that sentiment? A mistake is just an opportunity for an embellishment?! When pigs fly…I will design a card without making a “forced creative detour”….hahaha!
I’ll be pulling out the Wink of Stella Brush Pens next week for the Christmas Card Class. Nothing like a little shimmer and shine to make your Christmas cards more special! You can still register to come to class and make 4 different Christmas cards. You’ll get to use the Wink of Stella Brush to try it out…and if you like it, you can always order one for yourself! Don’t forget that if you place a $60 order you’ll receive a coupon code for $6 to spend in August! Plus….if you made a purchase at my Open House / Retired Product Sale in June, you’ll have received the email with a coupon amount to use exclusively with me this summer!
Please feel free to contact me if you have any questions or need to register for an upcoming class.
Jul 1, 2017 | cards, Stampin' Up!
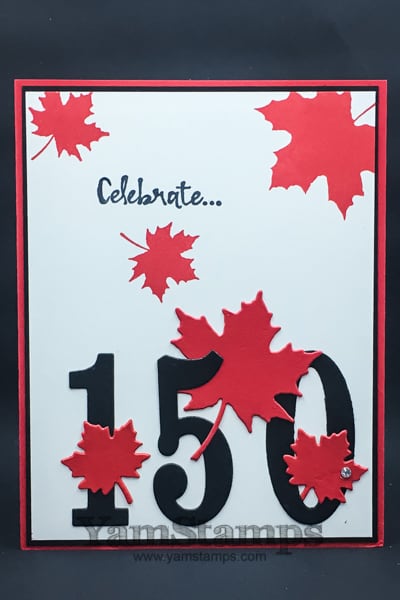
Happy Sesquicentennial, Canada! We are celebrating 150 years of Canada today, and I’m hoping the weather clears up a bit so we can do so properly!! I received this fun card in a recent swap in which I participated. This swap had a set of rules and deadlines, and each demonstrator created multiples of their one design and sent it in. They then received the same number of cards back, but they were all different! It’s a great way to get ideas for sets you have and sets you (cough) don’t yet own… and more proof that you don’t need to come up with all the ideas yourself if you’re a demonstrator!
This card uses a number of Stampin’ Up! sets and dies – Colourful Seasons (I cannot bring myself to spell it Colorful as it is in the catalogue, sorry) and Seasonal Layers thinlits which are available as a discounted bundle , and the Large Numbers Framelits. Thank you Cynthia Millan for this fun card! I love that it showcases how you can customize handmade cards for whatever occasion you choose.
Don’t forget that it’s BONUS DAYS – for each $60 of product you order during July you’ll get a code for $6 towards a purchase in August! This is a non-cumulative amount – so the $60/$120/$180 etc has to be at one time – you can’t add up a bunch of $20 orders during July and get a coupon. You can shop online here. OR there’s the starter kit bonus in July – get a free “basics” kit that includes blocks, adhesive, snips, grid paper AND a not yet released Christmas stamp set! You can get more information about becoming part of my demonstrator group here, or start picking your $165 worth of merchandise for your starter kit here. As always, please contact me if you have any questions or concerns.
HAPPY CANADA DAY! Celebrate safely 🙂
Jun 30, 2017 | Announcements, specials, Stampin' Up!
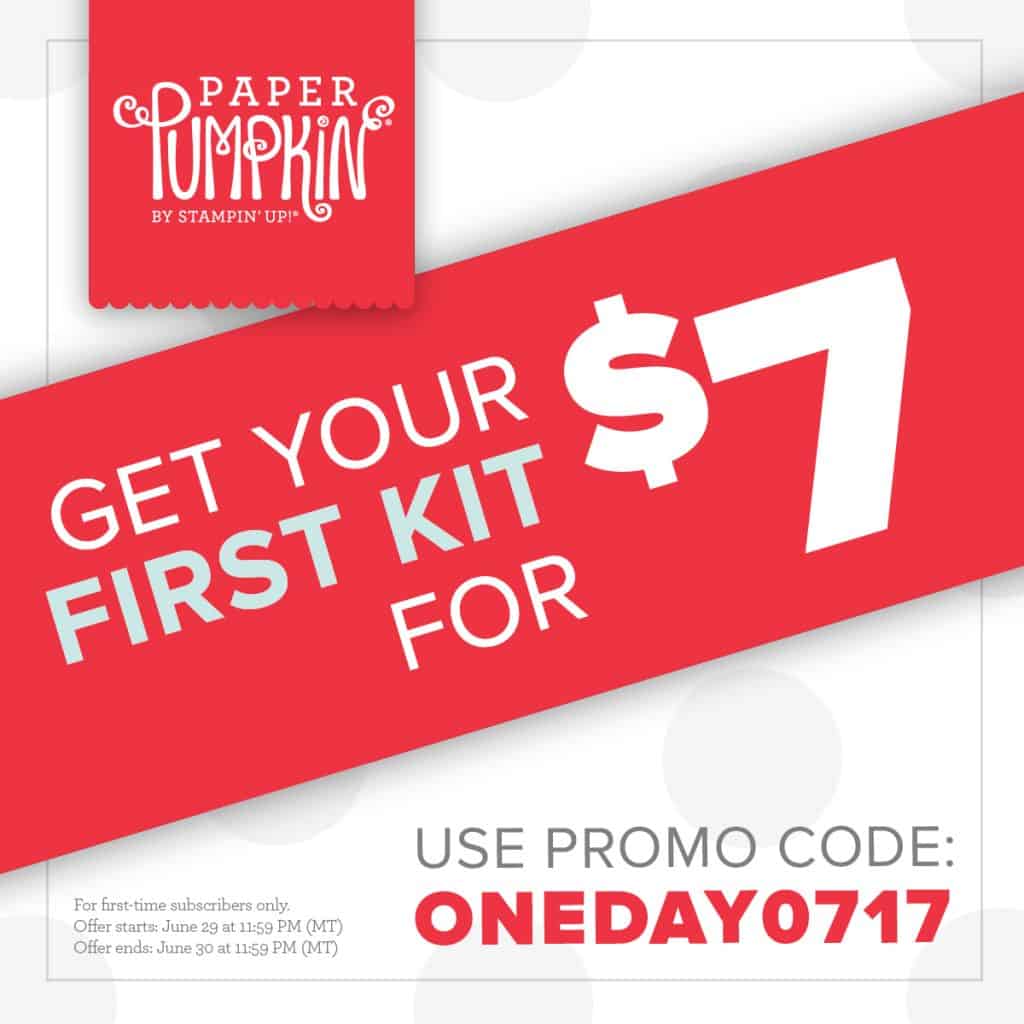
Stampin’ Up! Canada is offering some specials to kick off summer! First things first – this special is ONLY GOOD TODAY, June 30th – new subscribers can get 75% off their first Paper Pumpkin kit! Paper Pumpkin is a monthly paper crafting kit that comes to your door! Each month brings the orange box with complete supplies and instructions to make a project. They’re perfect for taking to the cottage, on trips, or for the budding crafter in your life – and it’s a great time to try it out! Click on the image or HERE to start your month to month subscription and get your first kit for $7! Get more information on Paper Pumpkin here.
Next up….
Starting tomorrow – after celebrating Canada Day, you can celebrate Christmas?! Stampin’ Up! is offering a FREE essentials kit with your Starter Kit purchase! You’ll get 2 clear blocks (size D), Grid Paper, Paper Snips, SNAIL adhesive and a Bone Folder – PLUS a brand new Christmas stamp set called Carols of Christmas!
This is on top of the $165 in product that you get to choose, plus the basic business supplies (catalogues, order forms etc) that will let you run your business as you wish. The starter kit costs only $135 – no shipping, and if you’re in a province that has a blended tax rate, no taxes! Join my group of demonstrators and grab your starter kit here – or check out more information about being part of my demonstrator group here.
LAST but not least – you’ll get a bonus just for placing a qualifying order!
Shop in July, get a bonus to shop in August! For each $60 in product (before shipping/taxes), you’ll get a $6 coupon to spend in August! Pretty self explanatory I think….you can click on the image or here to shop 24/7 in the YamStamps Online Stampin’ Up! Canada store and have it shipped to your home! If you are in Quebec or would like more assistance in placing your order, you can pick out your items and then contact me with your order – I will place it for you and have it shipped to you.
REMEMBER – THE PAPER PUMPKIN SPECIAL IS ON TODAY – FRIDAY, JUNE 30TH. THE BONUS DAYS AND CHRISTMAS IN JULY START TOMORROW!
As always, please feel free to contact me if you have any questions.