Nov 22, 2008 | TV/Video/Web/Tech
 Here's another video on my demonstrator business website (www.yamstamps.stampinup.net) – you can click on the picture to go to the page with the video. It features Stampin' Up!'s co-founder and CEO, Shelli Gardner demonstrating some ideas using the kit. The kit itself is a great value, and includes everything you need to create some great ornaments, tags or a garland…or whatever you choose to try! Contact me if you need more information, or while at my demonstrator business website, click on "shop here" to place your online order!
Nov 21, 2008 | rubber stamping
 This is Melanie's swap card. I tried to adjust the colours but it's still not quite right…still working on my photoshop skills…
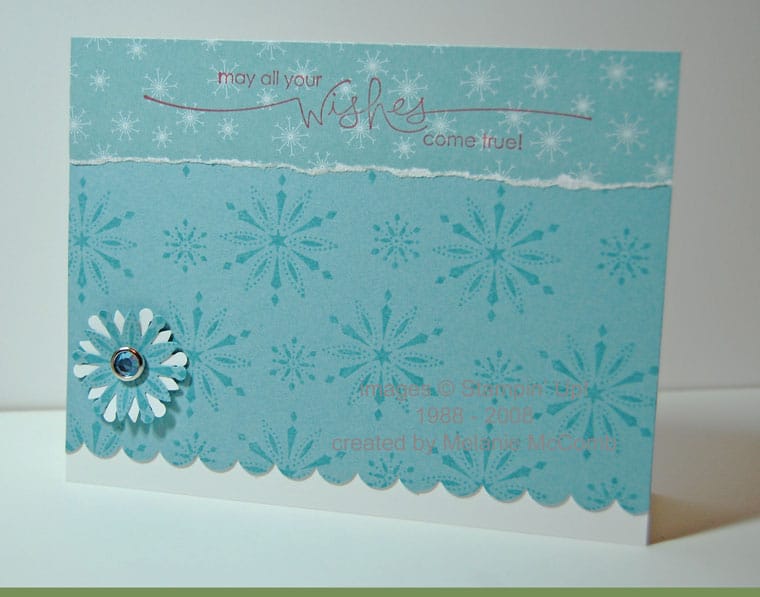
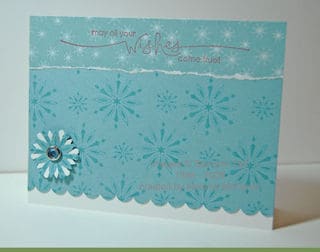
This is actually done in baja breeze… with the sentiment in riding hood red. The card is whisper white. The snowflake from Snow Swirled was punched with the coordinating snow blossom punch, and mounted on the same punch out in whisper white, anchored in place with a blue rhinestone circle brad – from the Ice collection. This would be an easy card to "mass produce" as the main body of the card could be stamped on a single sheet of cardstock, then cut into 4 sections, scallop edged and mounted onto a white card. I'm partial to blue cards….so this one caught my eye! Hope these ongoing swap samples have inspired you in your own card creations – there's still time to create your own masterpieces in time for the holiday card season!
Nov 20, 2008 | rubber stamping
 I hope you're enjoying the swap samples I'm sharing….this is created by Andrea – a traditional red & green Christmas card! It uses the Stampin' Up! sets Christ Is Born and Canvas. She's accented it with gold brads, linen thread and riding hood red taffeta ribbon. In my opinion, you can never go wrong with heat embossing at the holidays!! Gold embossing powder on the sentiment makes it stand out, and the poinsettia is cut out and mounted on the card using Stampin' Dimensionals. Another lovely sample!
Nov 19, 2008 | rubber stamping
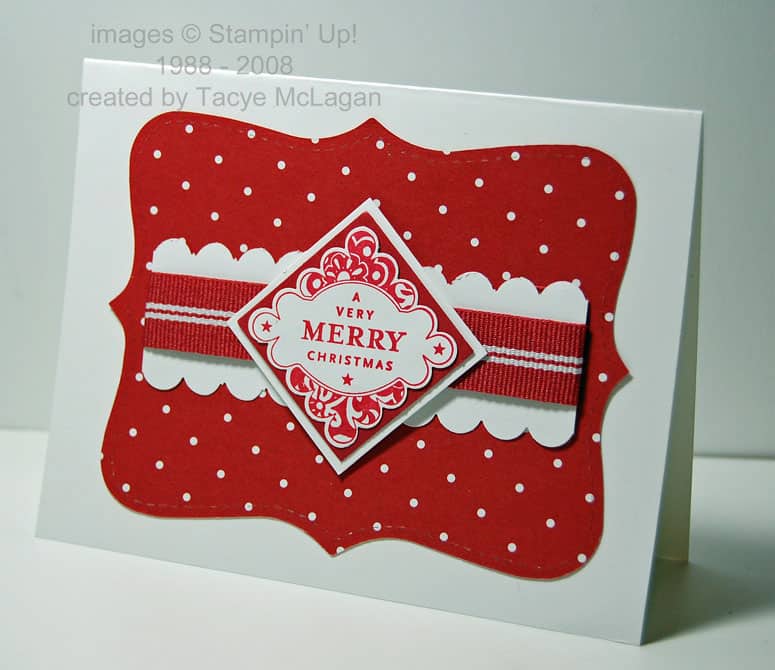
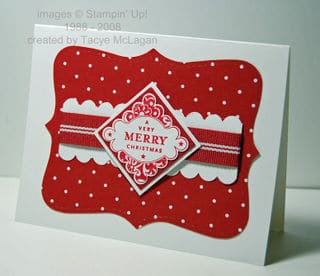 This wonderful card was created by Tacye out in BC. It's a fantastic use of the Top Note, here in riding hood red. She's used the scallop edge punch on whisper white cardstock and wrapped it with riding hood red grosgrain. The main image is from the hostess level one set Punches Three, this stamp coordinating with the scallop square punch. The monochromatic theme of this card makes it clean & classy.
Tomorrow will bring another sample for you…plus another week of the 12 weeks of Christmas in your inbox if you've subscribed to my email newsletter!
Nov 18, 2008 | 3D samples, Tutorial
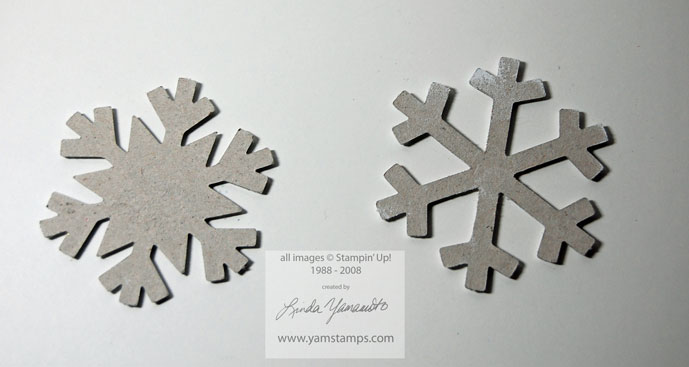
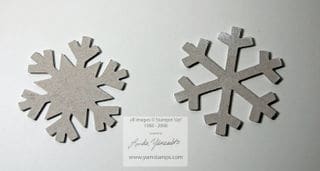 These are two of the snowflakes from Stampin' Up!'s die cut chipboard set On Board Something Seasonal. They're made of high quality acid-free chipboard and are very easy to pop out of the board. I was trying to decide which method to use to decorate the chipboard for the next Scrappers Club. So here's the "naked" chipboard.
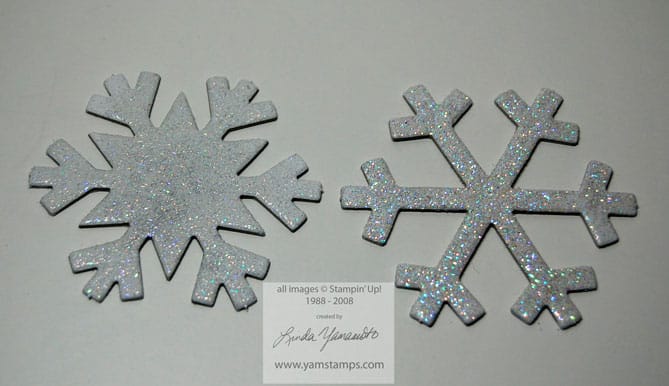
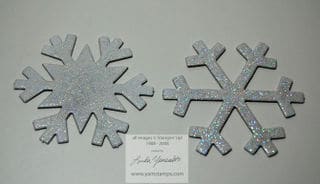 Here are the decorated snowflakes. I used white craft ink on both of them. I placed the snowflakes face down into the craft ink pad to coat them to get good coverage. Then, I used iridescent ice embossing powder (EP) on the left snowflake – coated with the powder & heated until it melted. The snowflake on the right was coated with heat & stick powder, melted with the heat gun, then coated with dazzling diamonds glitter & re-heated to "set". The EP snowflake is a little more subtle and glossy, the heat & stick/glitter snowflake a bit more sparkly and showy. You can click on the photo for a slightly larger view.
Thought I'd share this side by side comparison in case you were wondering which treatment to use on your chipboard. The Country Living Holiday Collection Chipboard shapes can also be treated in this manner. I used the heat & stick powder because I'm not great with glue…I'm a bit of a messy gluer (it ends up everywhere) so I personally find the heat & stick a bit more "neat".