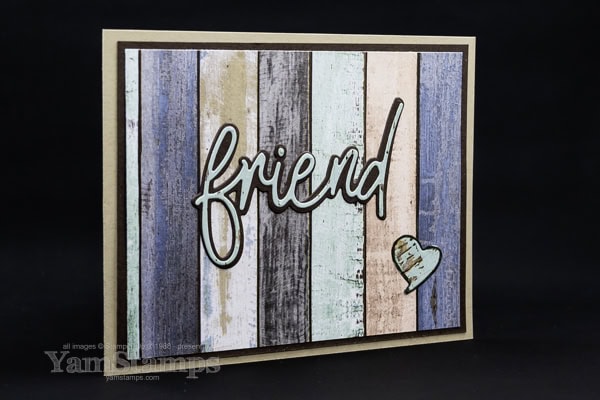
This Friends for Life Card is a snap to make!
I think Stampin’ Up! Canada’s Friends for Life bundle is one of my favourites right now. I used it along with the Country Woods Designer Series Paper to create this Friends For Life Card – and it’s easy to re-create! I’ll share a couple of tips that might make this card a bit easier as well.

First off, the Country Woods Paper has some gorgeous wood grain / painted wood grain images including this multicoloured/striped one. That makes for an easy background for my Friends For Life Card! I used Early Espresso Cardstock for the backdrop, but before I stuck everything down, I cut the backing die for the word “friend” from the centre of that cardstock. I love that thrifty trick. The hole was then covered by the patterned paper and noone’s the wiser. I chose to die cut the detailed text and the heart from another sheet of the paper that had the lighter blue toned “paint”.
The trickiest part about this Friends for Life card is not losing the dot for the “i” when you pop everything out of the die!! If I am sending out die cut pieces like this to my Card Club Members, I fold some Press ‘n Seal in half around the pieces to encase everything safely. The other thing that the Press ‘n Seal can do is to hold the die cut in the original shape. Sometimes when I pull a thinner die cut word out of the die, it will stretch/spread, so I have to smush it back into the original orientation to fit onto the background. I hold the die horizontally, close to my work surface (covered in a bit of Press n’ Seal), use the brush tip for my Take Your Pick tool, and run it over the die to push out the die cut shape and drop it directly onto the Press ‘n Seal (or with as little handling as possible) to keep it in the original ratio/shape.
One other thing to make it easier with thinner or more detailed die cuts – I often will use an Adhesive Sheet on the backside of the paper – so that I just have to peel off the liner and it’s ready to attach. The other option is to use Multipurpose Liquid Glue – small dots, and it’s good to let it dry just a bit so that it doesn’t “smoosh” out everywhere.

To tie everything together and add a finishing touch to my Friends for Life Card, I took the brush end of my Early Espresso Stampin’ Write Marker (part of the Neutrals Stampin’ Write Markers set) and ran it around the edge of the heart so that it matched the word “friend” and the general design of the card. Put everything onto a Crumb Cake Card and it’s done!

Starting today and running until the end of July, it’s Stampin’ Up!’s BONUS DAYS! For each $60CAD in product that you order, you’ll earn a $6CAD coupon that you can spend in August! Product total must be before shipping/taxes and after any discounts or codes are applied. It’s a great way to get an extra reward for making sure you’ve got crafty supplies on hand! Shortcut to shop in Canada is YamStamps.com/shop or you can message me with your order if you’d like to pay by etransfer or if you need assistance placing your order. Happy Shopping, and Happy Bonus Days!!


