Apr 28, 2018 | Announcements
It’s on its way! The 2018-2019 Stampin’ Up! Canada Annual Catalogue! Need a copy? Click on the image or click here! Complete the form by noon (eastern) on Monday, April 30th to get a copy. If you’re close to Burlington ON, you can also pick one up at my New Catalogue Open House & Retired Product Sale – Saturday, June 2nd 9am til noon. RSVP to get directions and to make sure your name is on the list for a catalogue!
Apr 26, 2018 | 3D samples, scrapbooking, Stampin' Up!
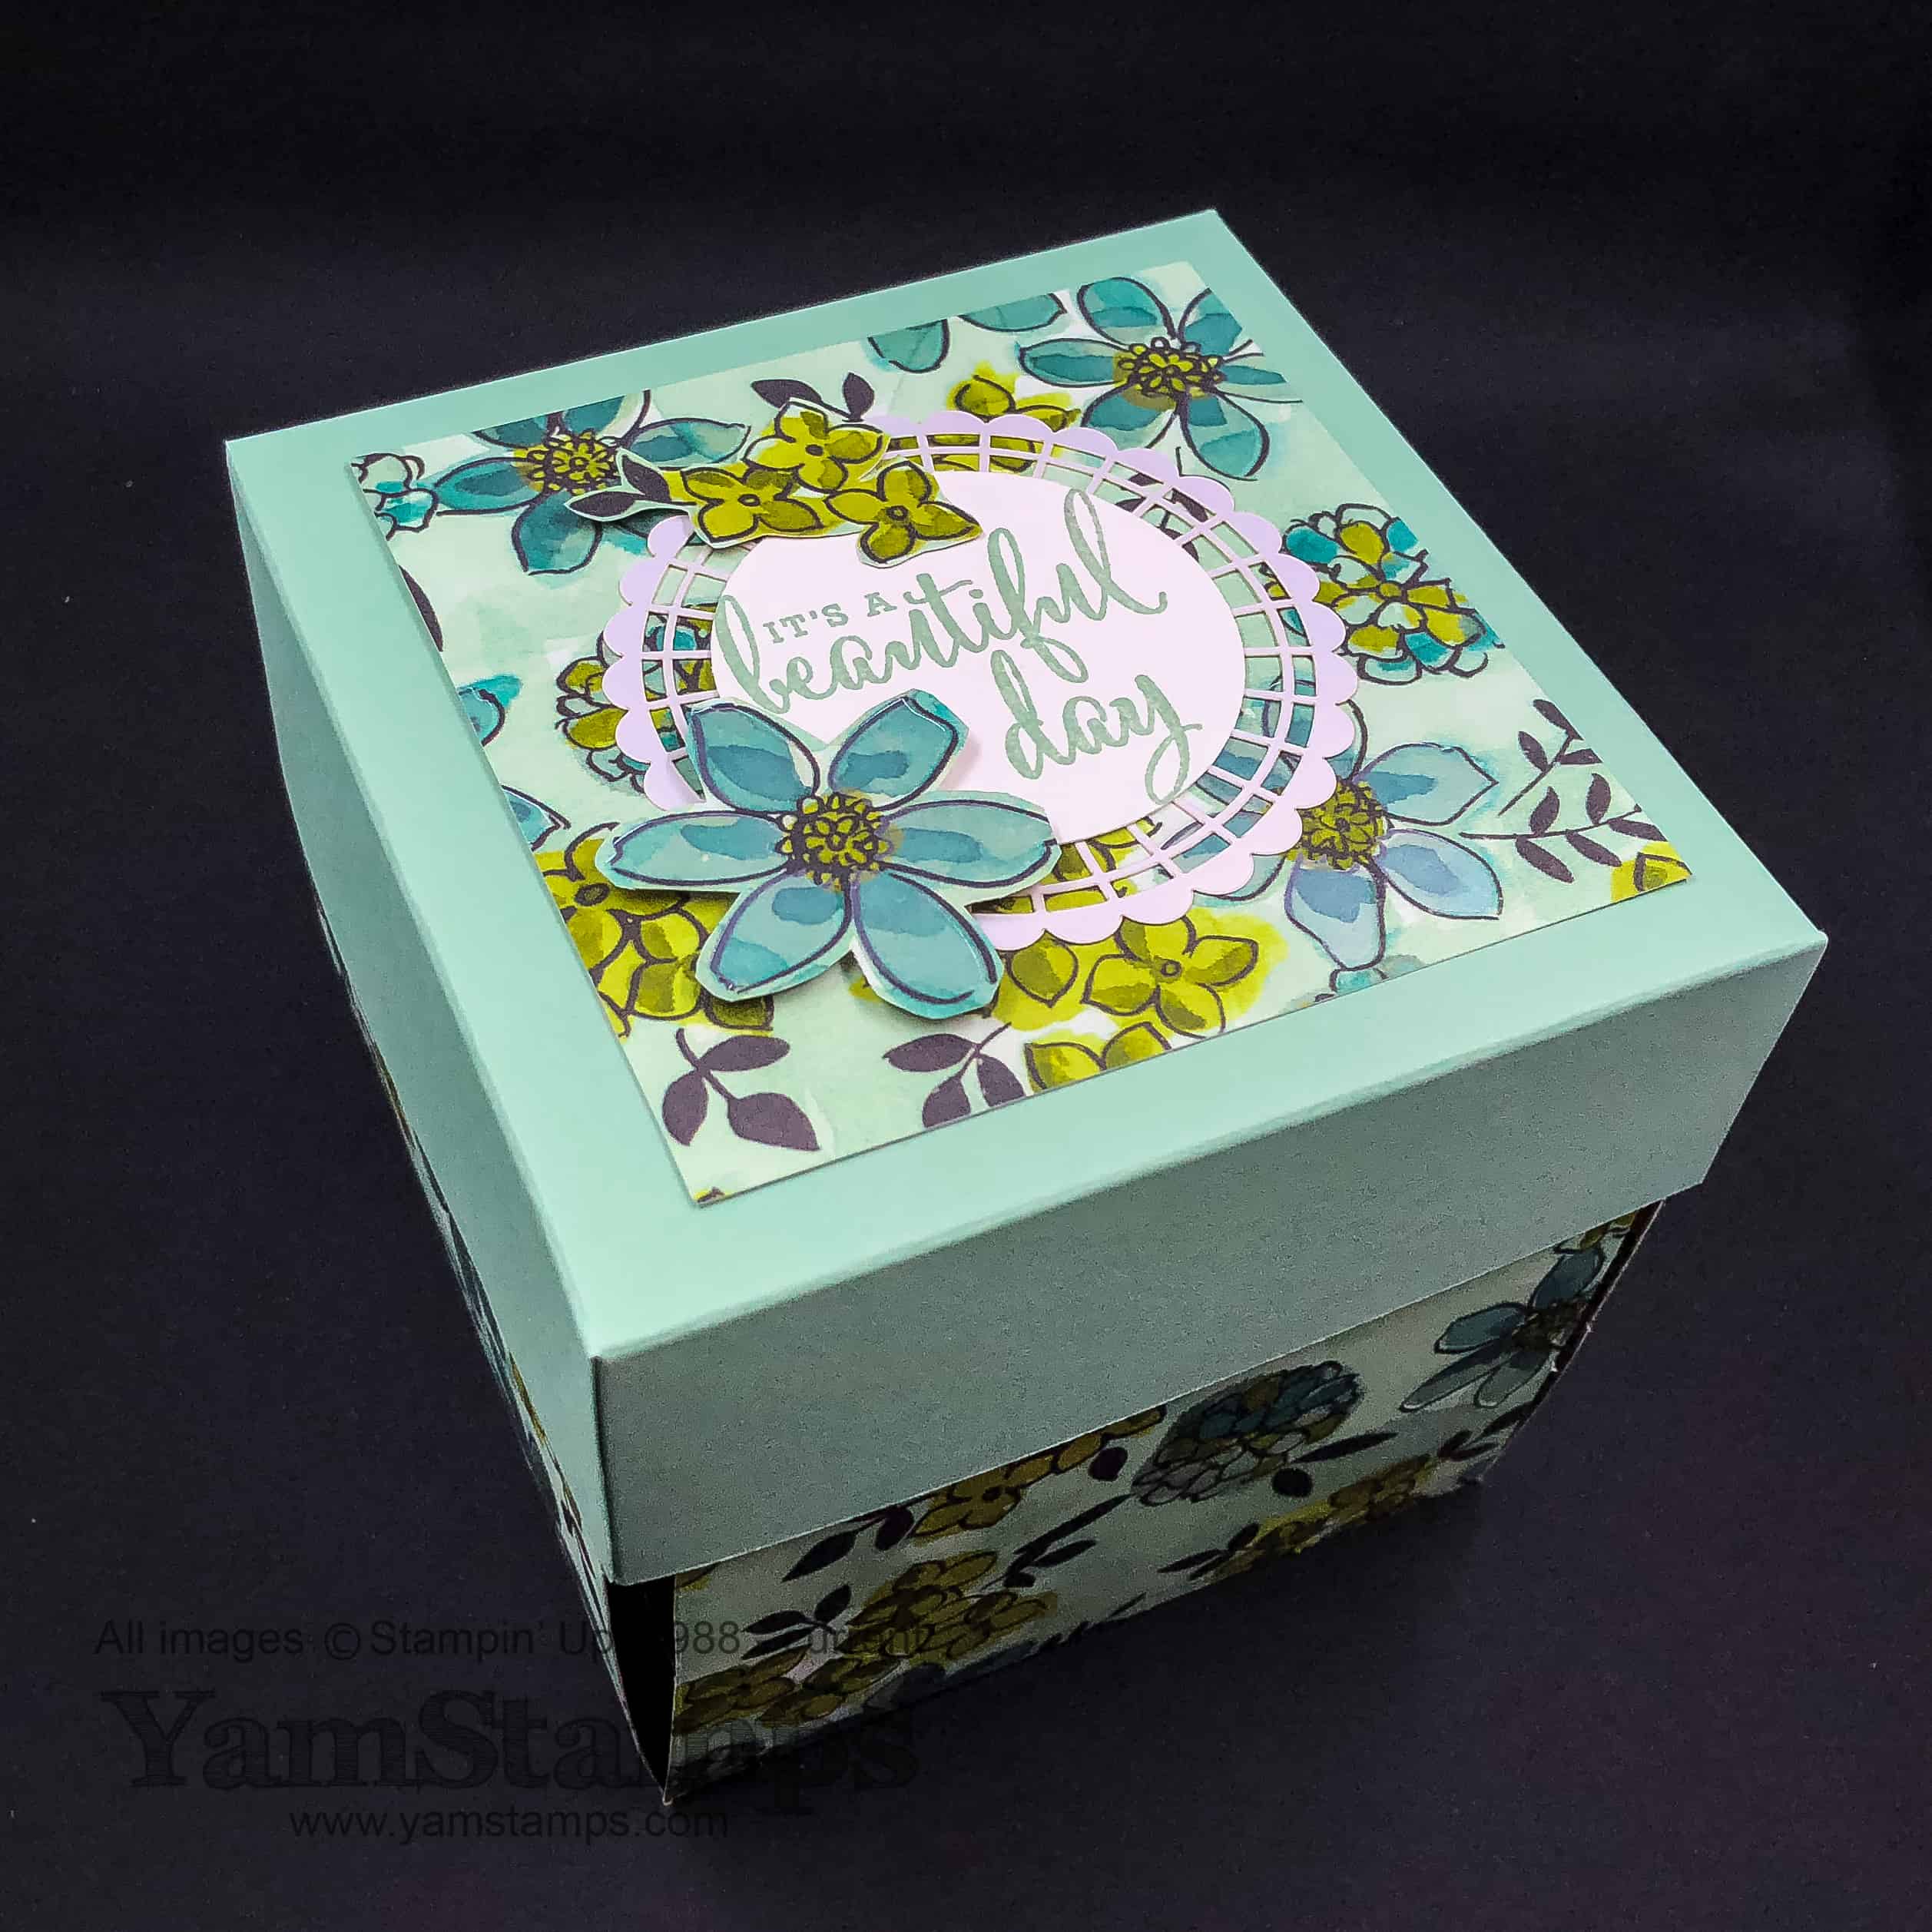
Welcome to the last of the Share What You Love North America Events Council Blog Hops. This time we’re featuring our Share What You Love Class projects! Our presentations at On Stage were focused on how we could use the products in this suite in a class situation or some other business project. I had a few things to share. My main class project is the Scrapbook in a Box using the Share What You Love Specialty Designer Series Paper. I think that this is one of my favourite items in the suite. Have I said that already?!
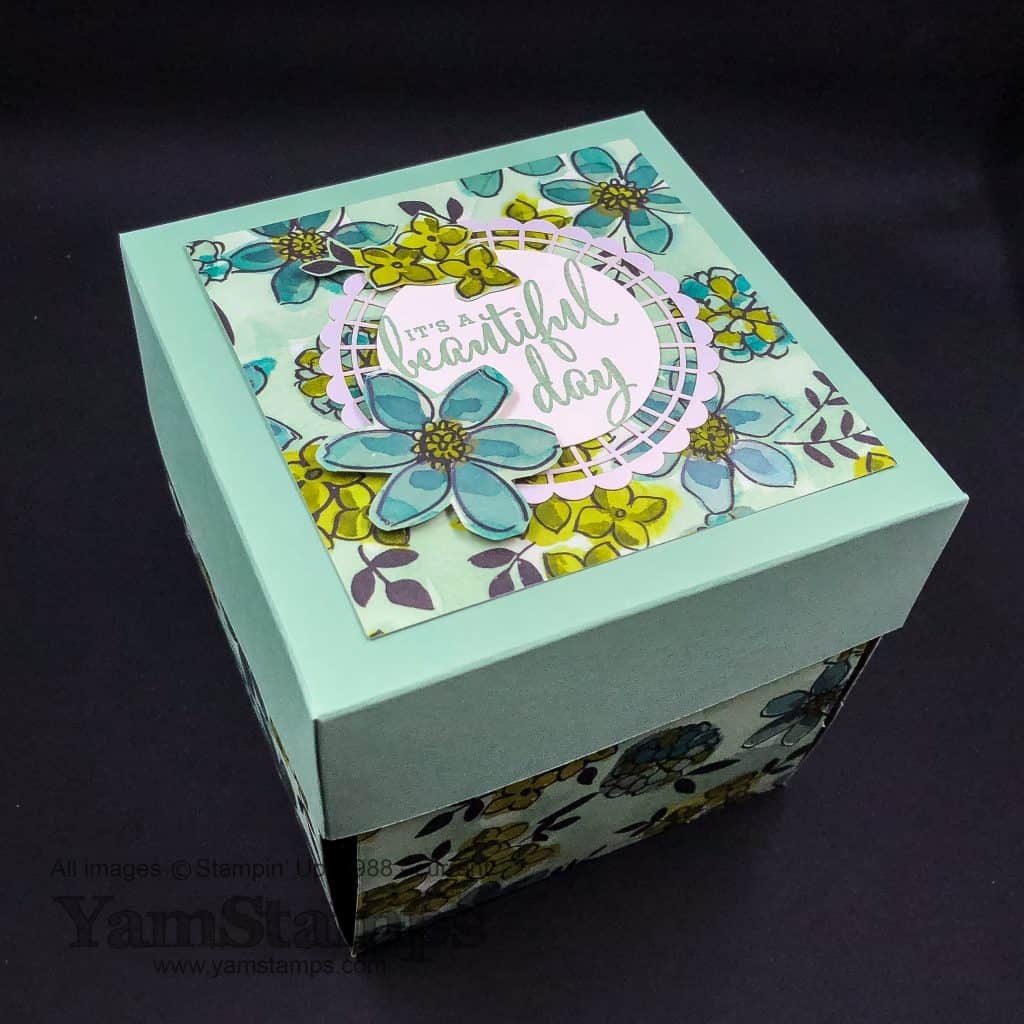
I haven’t done a scrapbook in a box in a while, and this Designer Series Paper is perfect for 3D items as it’s a bit heavier than normal. Plus it’s gorgeous on both sides, which is showcased in a project like this. The above picture is the box when it’s closed. Basically the lid just holds it shut.
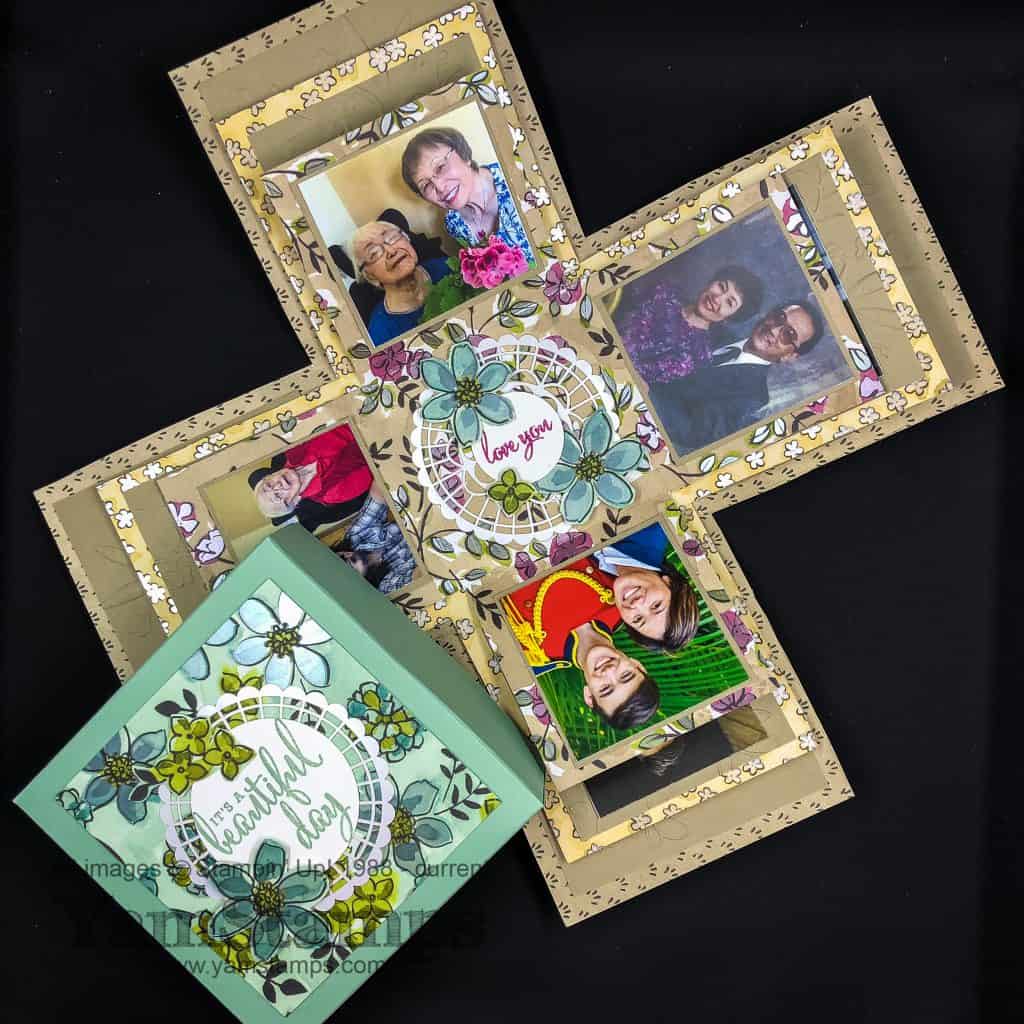
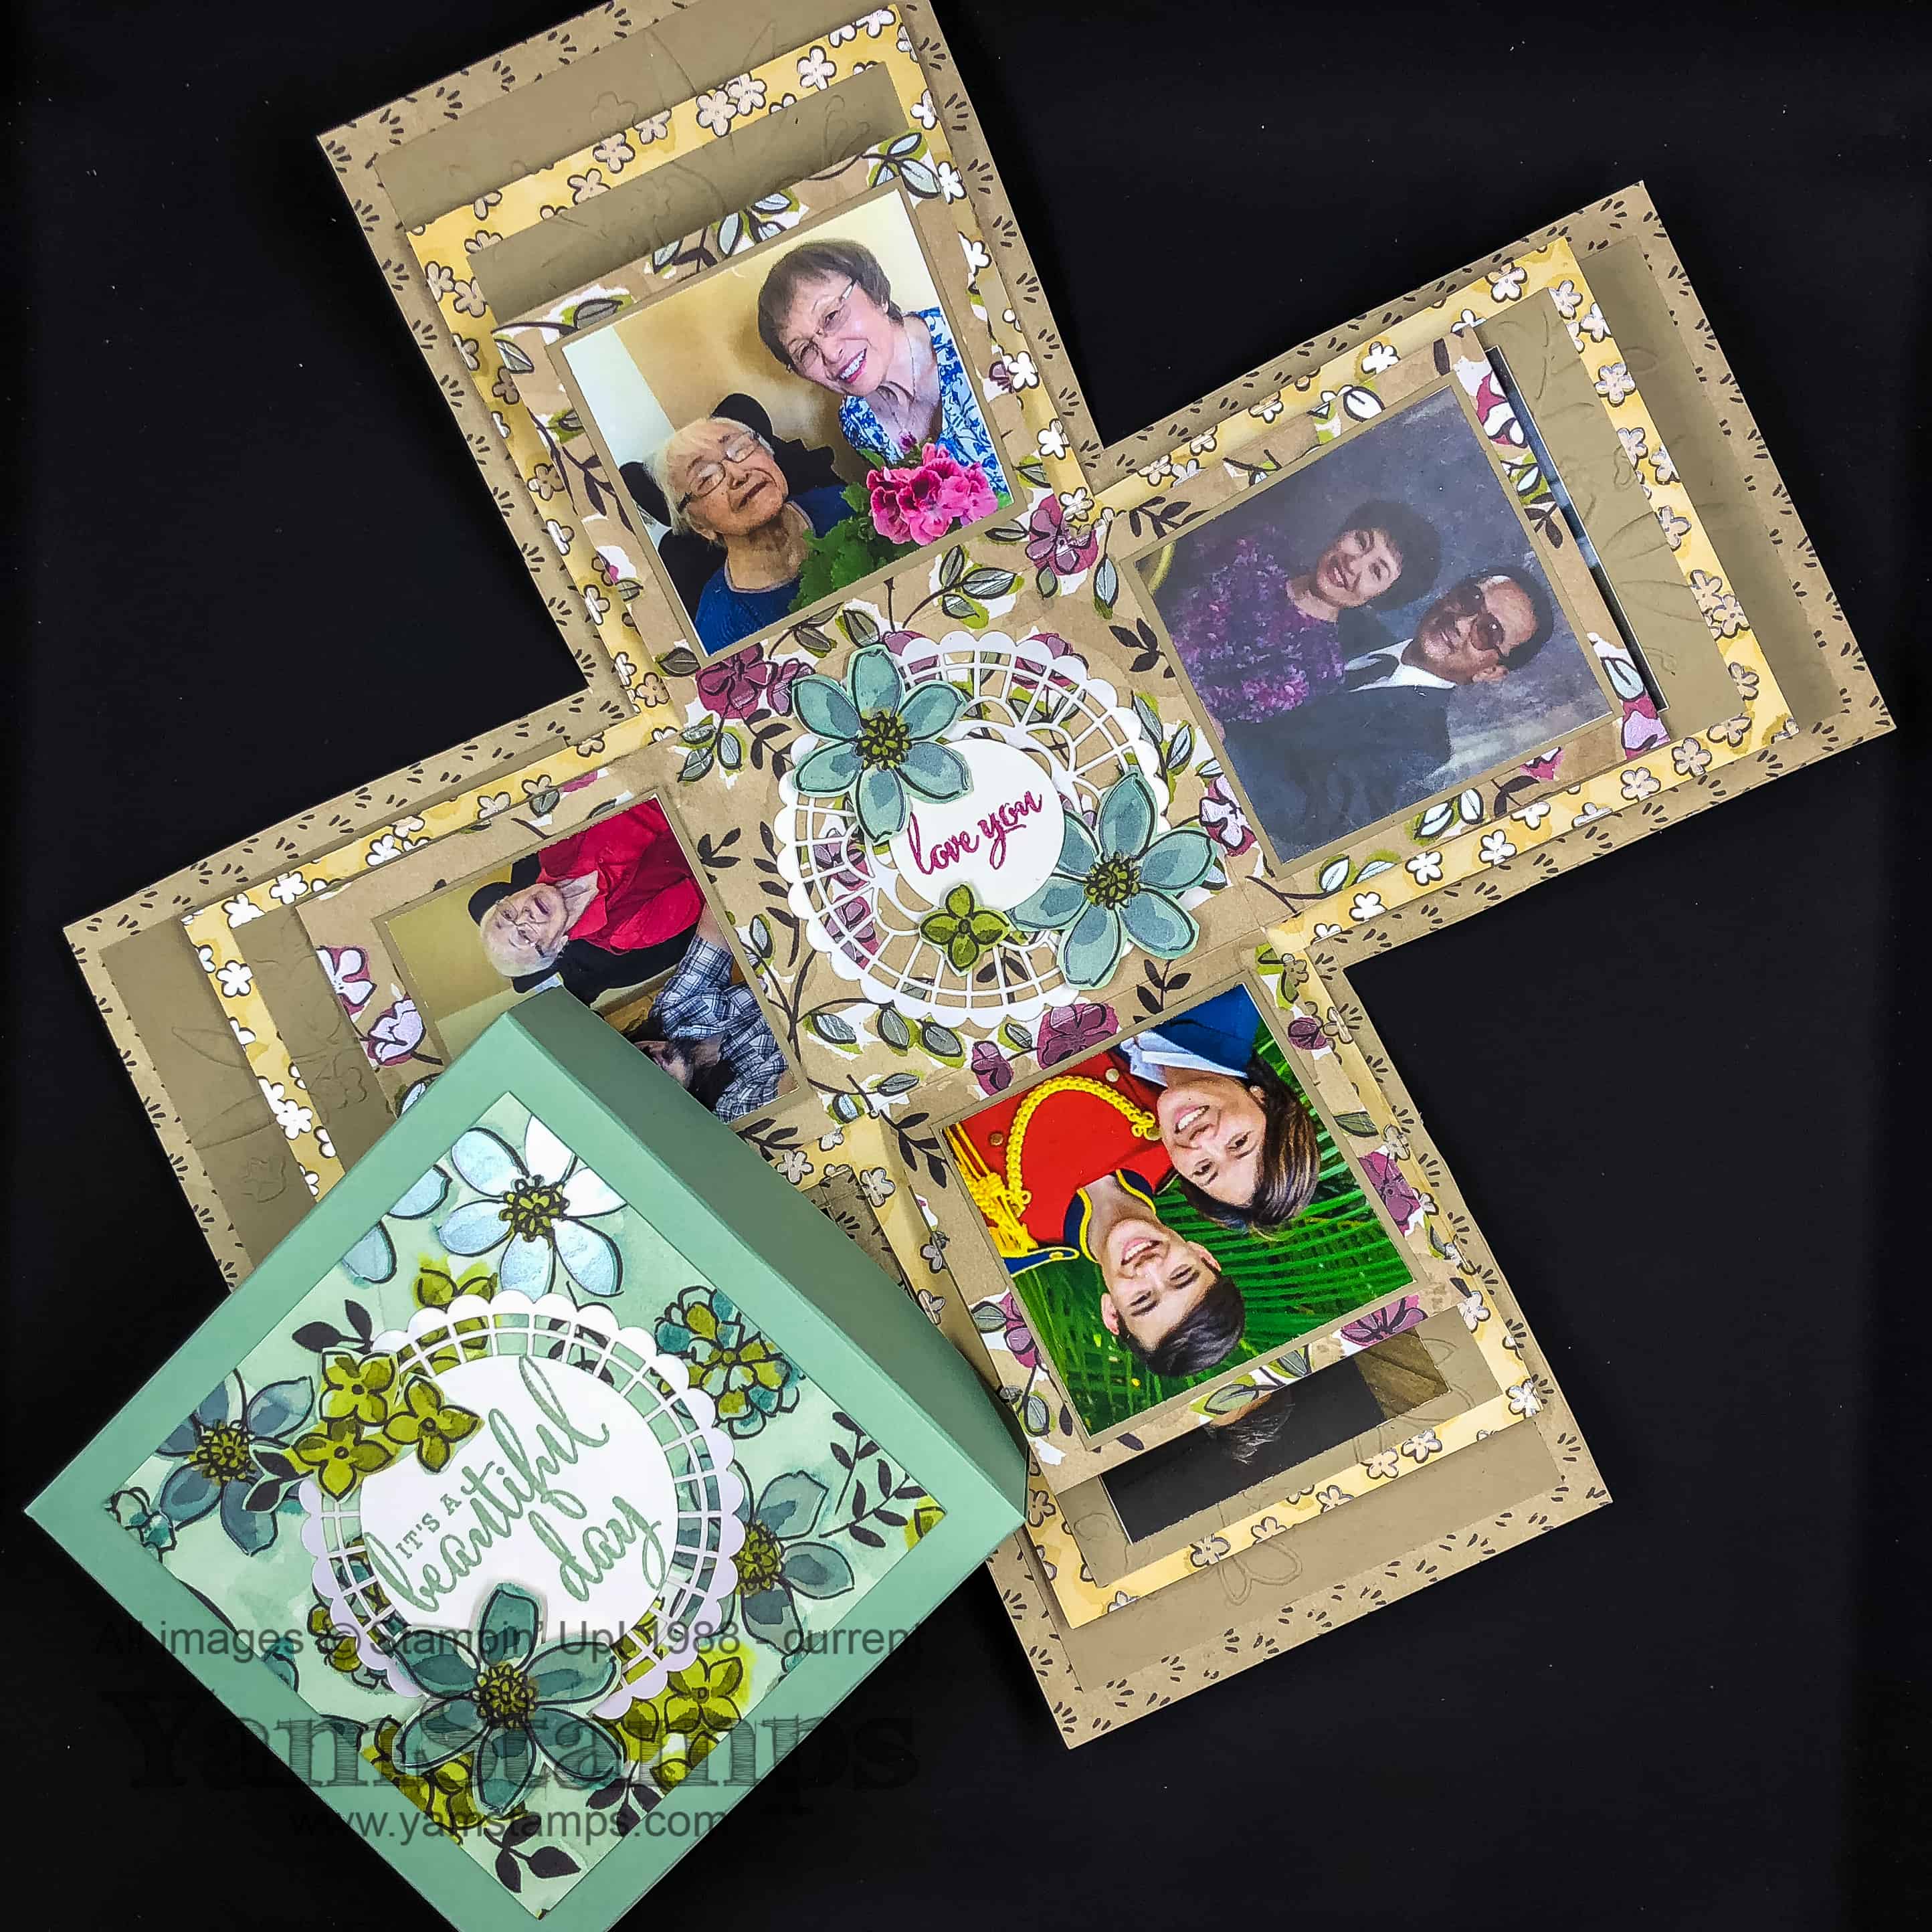
This is the box when it’s open. It looks a little complicated, but it’s actually not that bad. It uses 3 different sheets from the DSP package (this package has 24 sheets in it rather than 12, so you could make LOTS of these boxes!). It also uses some of the new pearlized doilies and the Love What You Do stamp set. And yes, I did do some fussy cutting! I don’t do that much, but this was pretty easy – I just cut around a few of the flowers. (I am not into fussy cutting a whole lot, but in some cases, it’s definitely worth it, especially if it’s not TOO fussy – fussy cutting! ha). To adhere the doilies in place, I put some SNAIL on the back of the doily and/or where it’s going to be on the DSP – since the centre of the doily is also covered by a punched circle with the sentiment it covers any exposed adhesive.Of course, if you’re more particular about it, you could always use Fine TIp Glue or the Multipurpose Liquid Adhesive.
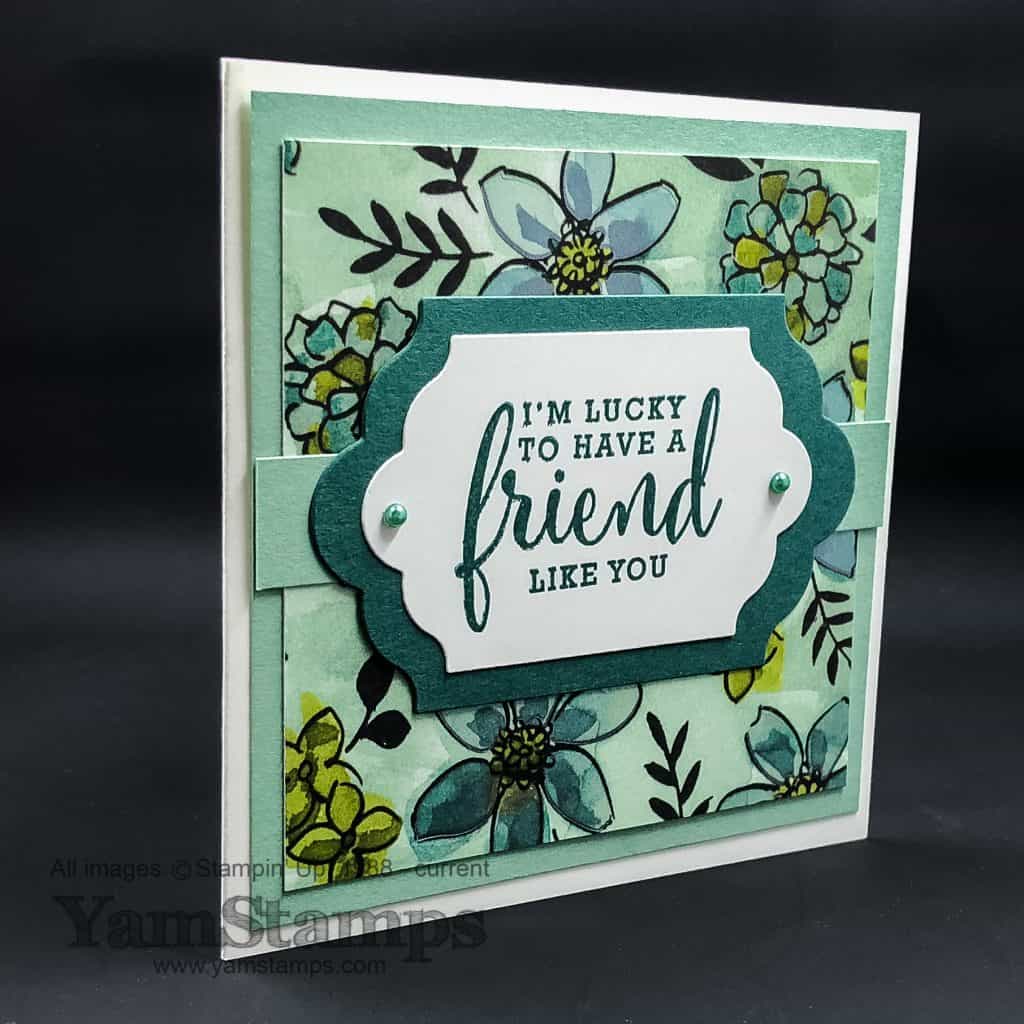
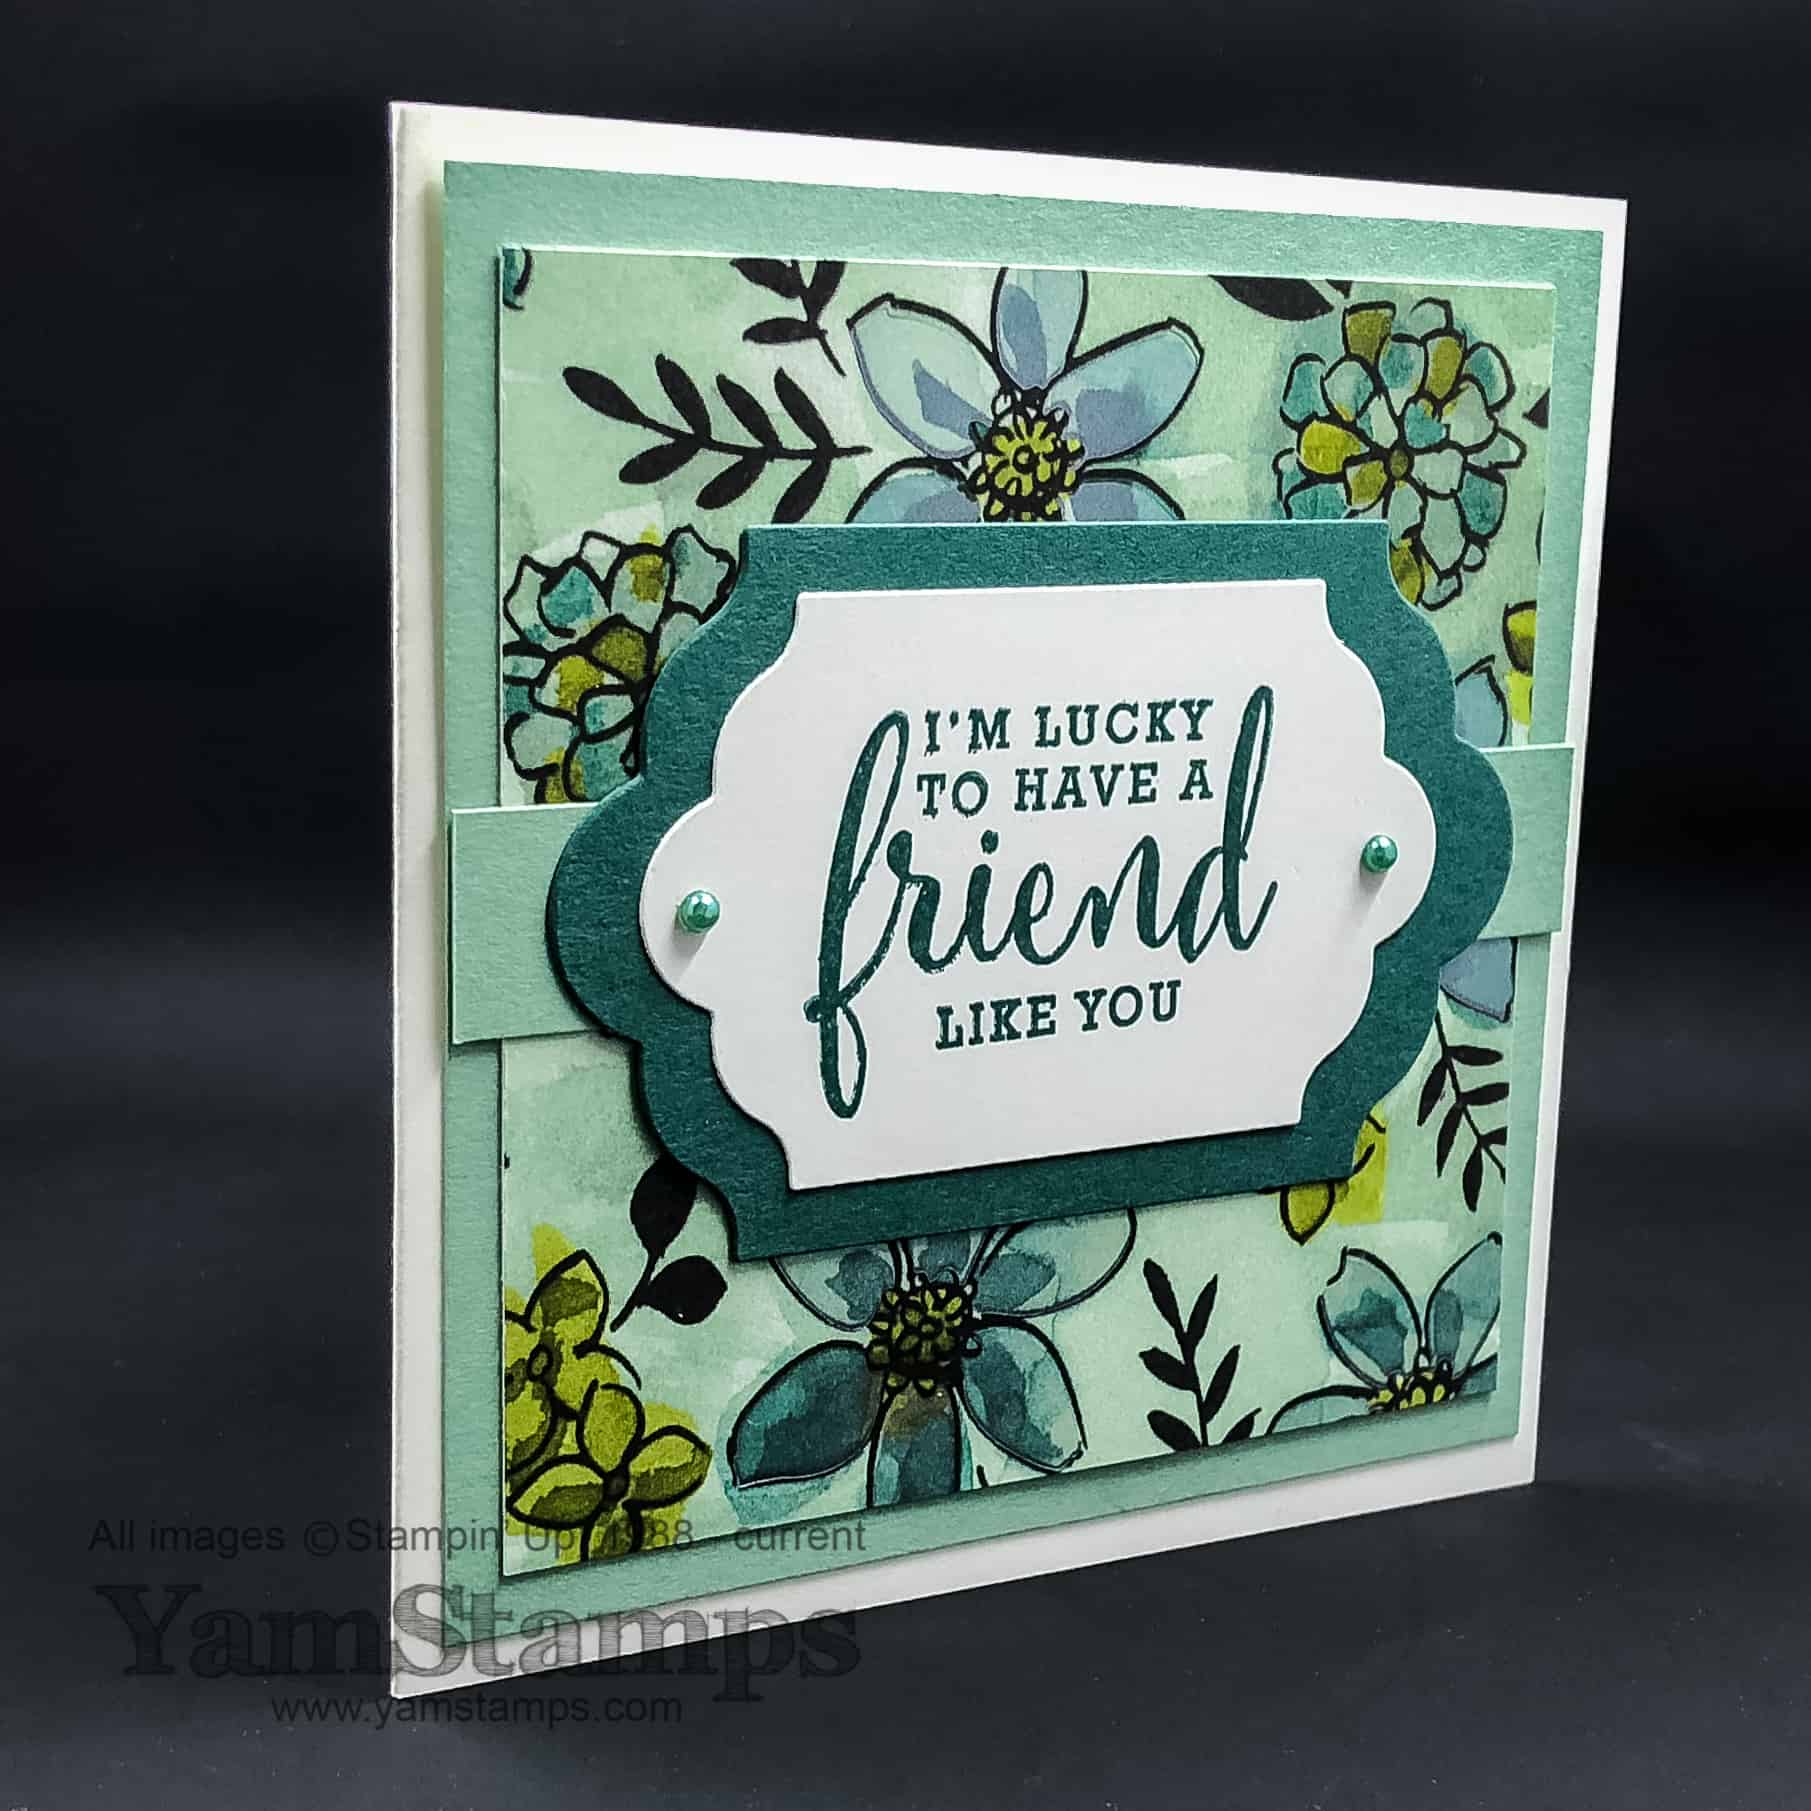
The above card is what you can use some of the spare DSP to create (see how the corners of the box are cut out?) – you could give this WITH the scrapbook in a box, or create a few of them to have on hand.
While demonstrators are able to purchase these products right now, everyone will be able to get their hands on this suite in May! There are special bundles, exclusively available during May – you’ll be hearing more about that closer to May 1st – no point in teasing you too much!
Good news – if you are close to Burlington ON, I’m having a Scrapbook in a Box Class where you can create one of these in time for Mother’s Day! Wednesday, May 9th, at 1pm OR 7pm. I will supply all the materials required to make the box. We’ll construct it in class, and then you’ll take it home and add your pictures in time for Mother’s Day, or whatever occasion you might like to use this for (hint: you can also keep it yourself!! haha!). The cost will be $25 and will include the necessary supplies. Space and supplies are limited, though, so you’ll need to register and pay ASAP. Deadline is Monday May 7th. If you aren’t local to me, I’m also going to be offering it as an online class, details to follow shortly.
In the meantime, if you’ve visited here as part of the Blog Hop, thanks, and I hope you will stop back in to check my YamStamps blog sometime soon (and those of my fellow Events Council Members!). A special mention to Robyn Ryan aka STAMPFANatics, who wasn’t able to participate in our Stampin’ Up! North American Council blog hops as her blog is not functional at this point in time. I am so grateful for the opportunity we’ve had to get to know each other and to give back, just a little, to the company and demonstrators who have enriched my life. Today is actually my anniversary of becoming a Stampin’ Up! Canada demonstrator – sixteen years ago!! Here’s to the next 16 years – and beyond!!
Next – visit Bonnie Allers O’Neill

Go back to see Sherry Roth

Apr 25, 2018 | cards, Retired List, Stampin' Up!
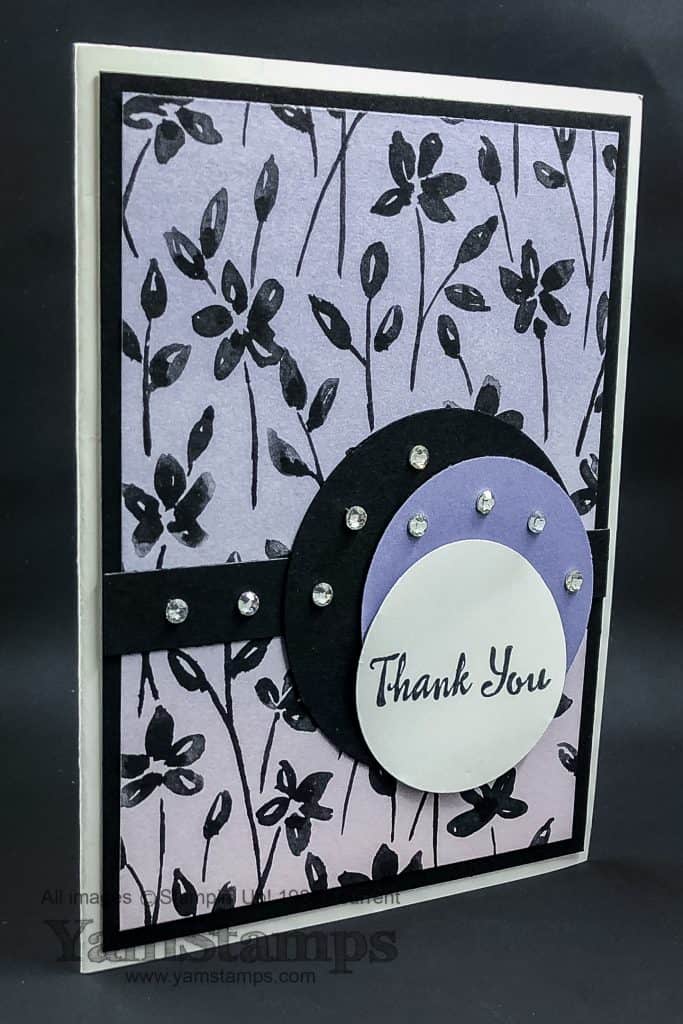
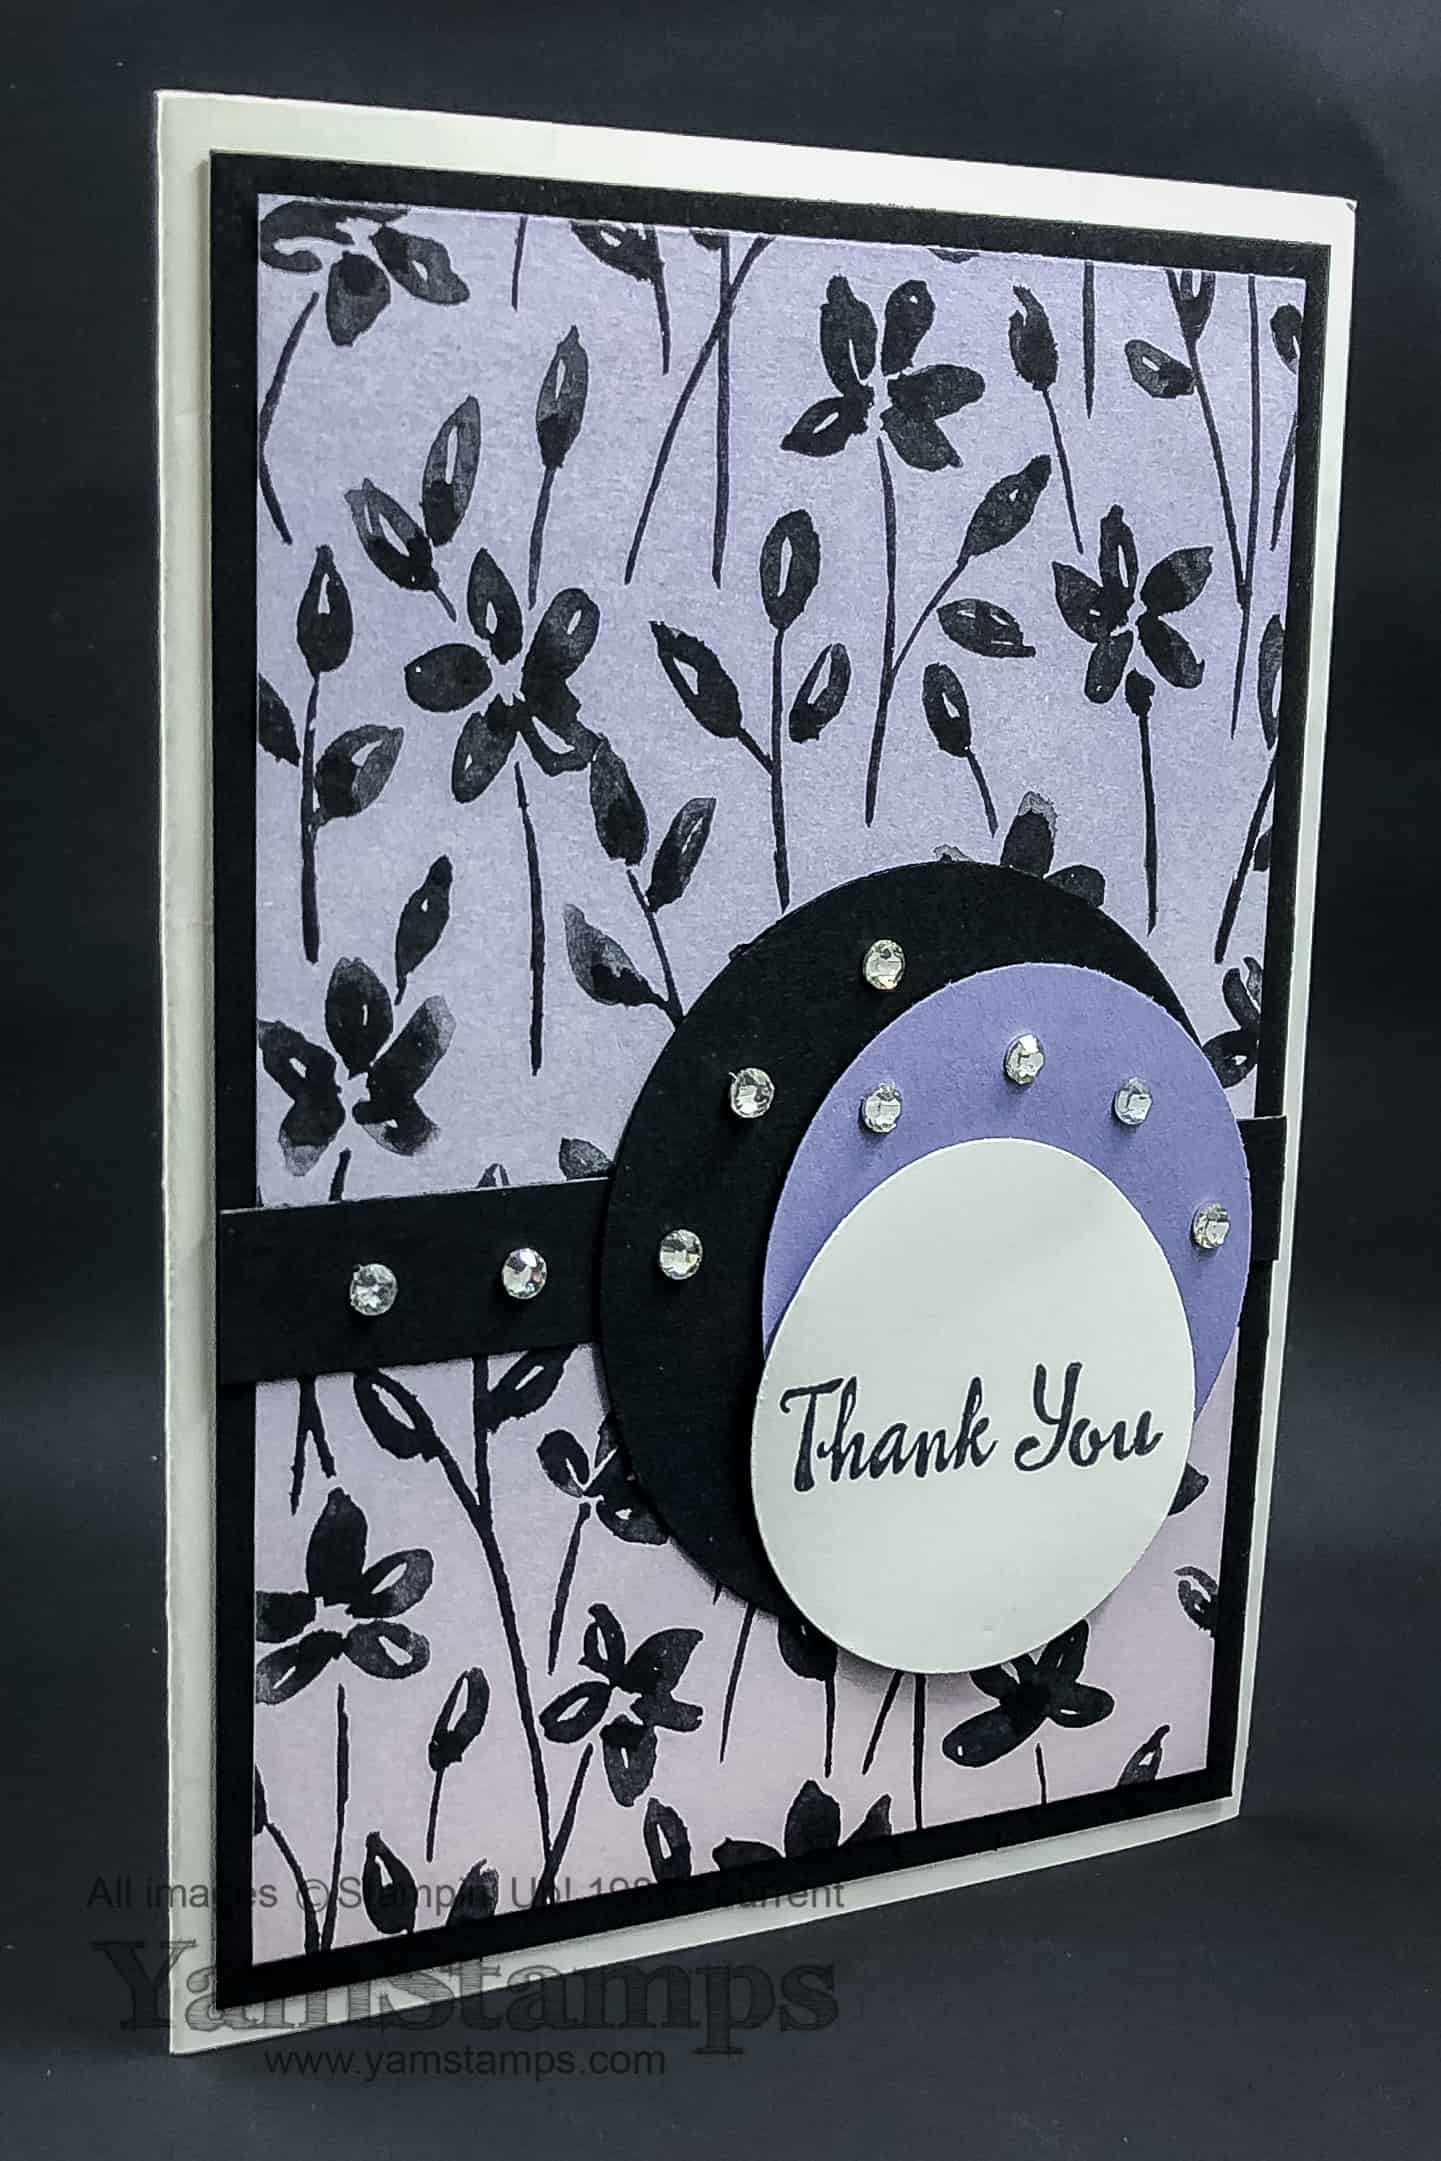
This is a quick ombré thank you card – and it’s easy to recreate! The graded shading (ombré) look is created by using a sponge brayer. For this card, the quick part is that the background patterned paper is the Stampin’ Up! Petal Passion Designer Series Paper (“DSP”) – which is a set of black and white patterned papers. I brayered two retiring colours onto this paper – Wisteria Wonder and Pink Pirouette. I started with just the Wisteria Wonder, inking up my brayer by rolling it on the ink pad repeatedly in one direction – roll across the ink pad, lift, then roll again across the ink pad, continuing in the same direction. Inking by rolling back & forth will give you a hard line of colour on your brayer, which will transfer to your project. Then I rolled the brayer on the paper. For this, you can roll back & forth, but you’ll want to change directions when you’re off the paper itself. So, working on scrap paper, start off the paper, roll across right off the other side, then come back across the paper off onto your scrap paper again before changing directions. Hmm. Maybe I’ll post a quick video on the YamStamps Facebook page later today LOL!! Anyway, I rolled the Wisteria Wonder starting at the top of my DSP, continuing down. The colour naturally fades out, and then I reinked my brayer and did the same thing again, starting at the top. When I finished, I wanted the difference in shading to stand out a bit more, so I added some Pirouette Pink, brayering from the bottom upwards. I used a new brayer roller for this to make the colour lighter and more pure (otherwise it would still look mostly purple).
The sentiment from Petal Palette (available in Clear Mount or Wood Mount) is stamped in Tuxedo Black Memento Ink, and I just used the Circle Punches – 1-3/4″, 2″ and 2-1/4″ – because sometimes I don’t feel like hauling out my Big Shot and dies. (Shocking, I know, but true). (OK well, slight exaggeration, since my Big Shot is always out anyway…haha!) Thought I’d add a bit more “wow” by adding some Rhinestone Basic Jewels. Might have gone a bit overboard….I blame the grey, wet day today – I needed some flash to compensate for the dull weather! So – tada – my quick ombré thank you card. Honestly, I think it took more time to write this blog post than it did to actually make this card! I’m still doing a bit of catch up on Thank You cards – so I think this might be my Thank You for March orders….if you ordered from me during March, you’ll have to find out if this is the design I end up using or not!!
If you want to recreate this quick ombré thank you card yourself, you’ll want to place your order for supplies sooner rather than later, since some of the items are on the retiring list. While retiring stamp sets have guaranteed availability until May 25th, individual ink pads and refills are only guaranteed until May 7th. Ink Pad Collections and everything else are “while supplies last” only. You can shop online 24/7 in the YamStamps Stampin’ Up! Canada store, which is the recommended way to go during the Retiring LIst season – you can enter it when you’re ready and you’ll know right away if everything you want is still available or not. If you live in Quebec or would like assistance placing your order, you can always email me directly. I’ll do my best to help you as quickly as I can – though extra steps always mean a bit of time, and a bigger risk that items will be sold out if you’re waiting until the last minute to grab retiring product.
Last reminders – if you’d like a copy of the upcoming Stampin’ Up! Canada Annual Catalogue, please complete this form and I’ll be in touch to organize getting you one. Tomorrow brings the last North American Events Council Member Blog Hop, sharing our class project ideas using the upcoming Share What You Love Product suite, so please come back to the YamStamps Blog to check it out!
Apr 22, 2018 | cards, Events, Retired List, Stampin' Up!
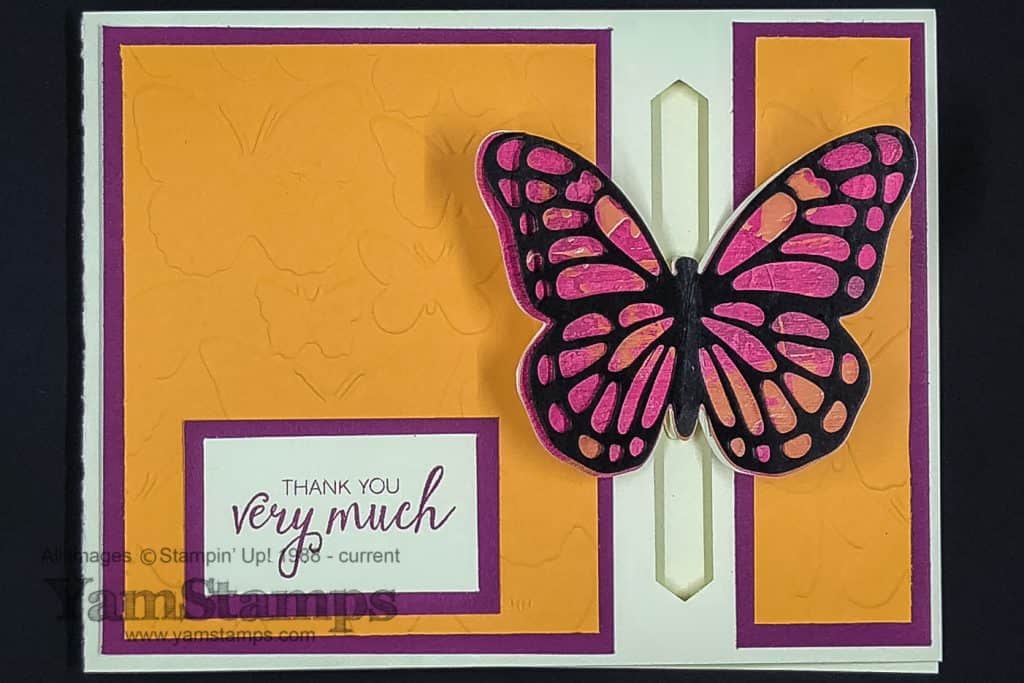
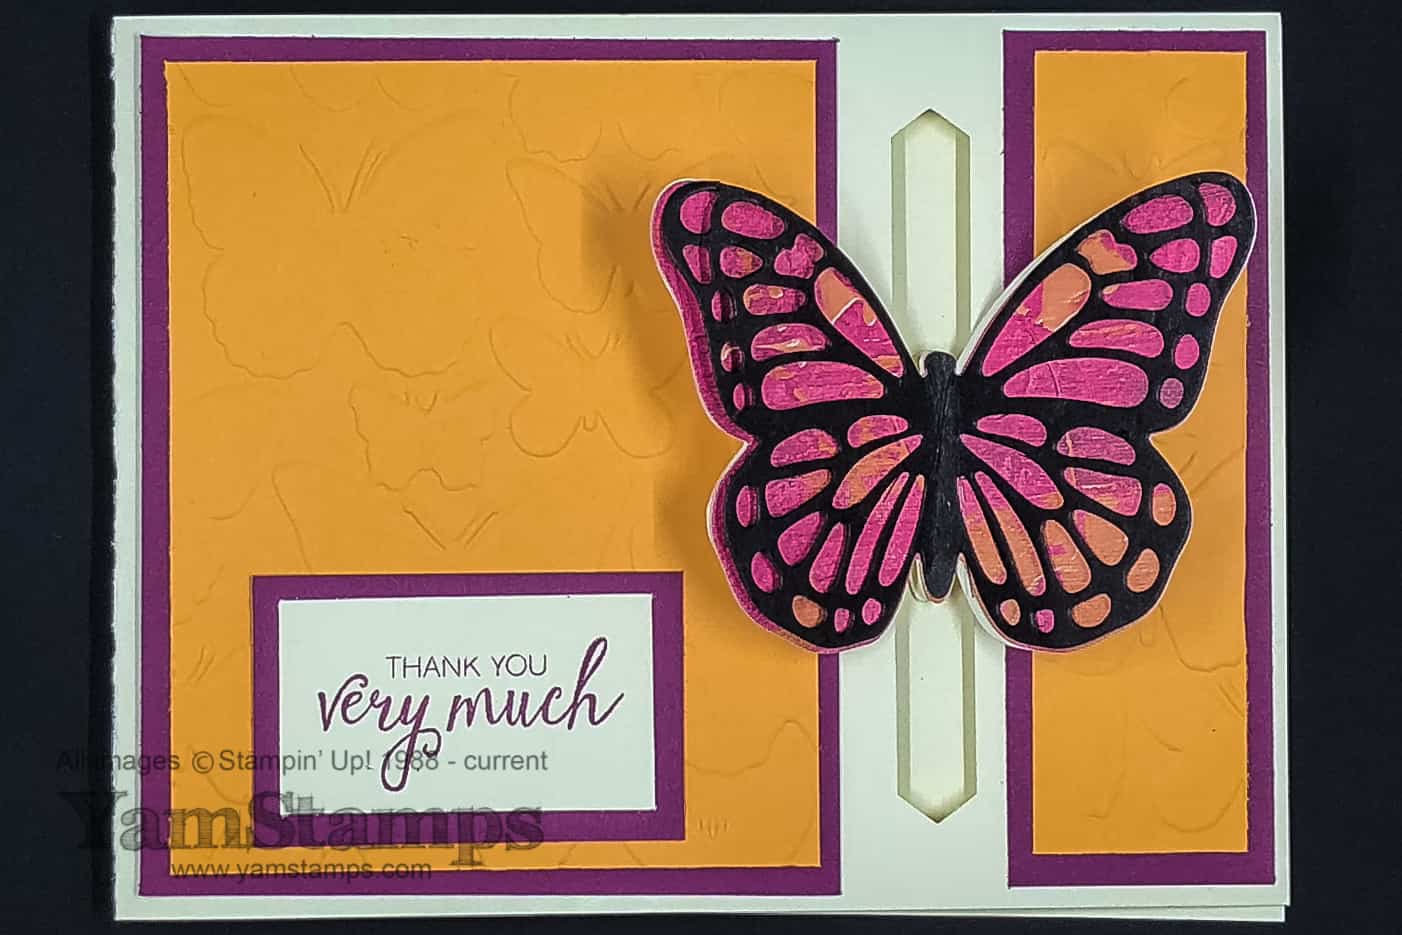
This is a fun butterfly card made easy by using Stampin’ Up! Designer Series Paper and die cuts – but if you want some of these products, you’ll have to move fast as they are on the Retiring List and fluttering away! Stampin’ Up! retiring stamp sets are available until May 25th – guaranteed, but after that, and all other retiring Stampin’ Up! products are only while supplies last.
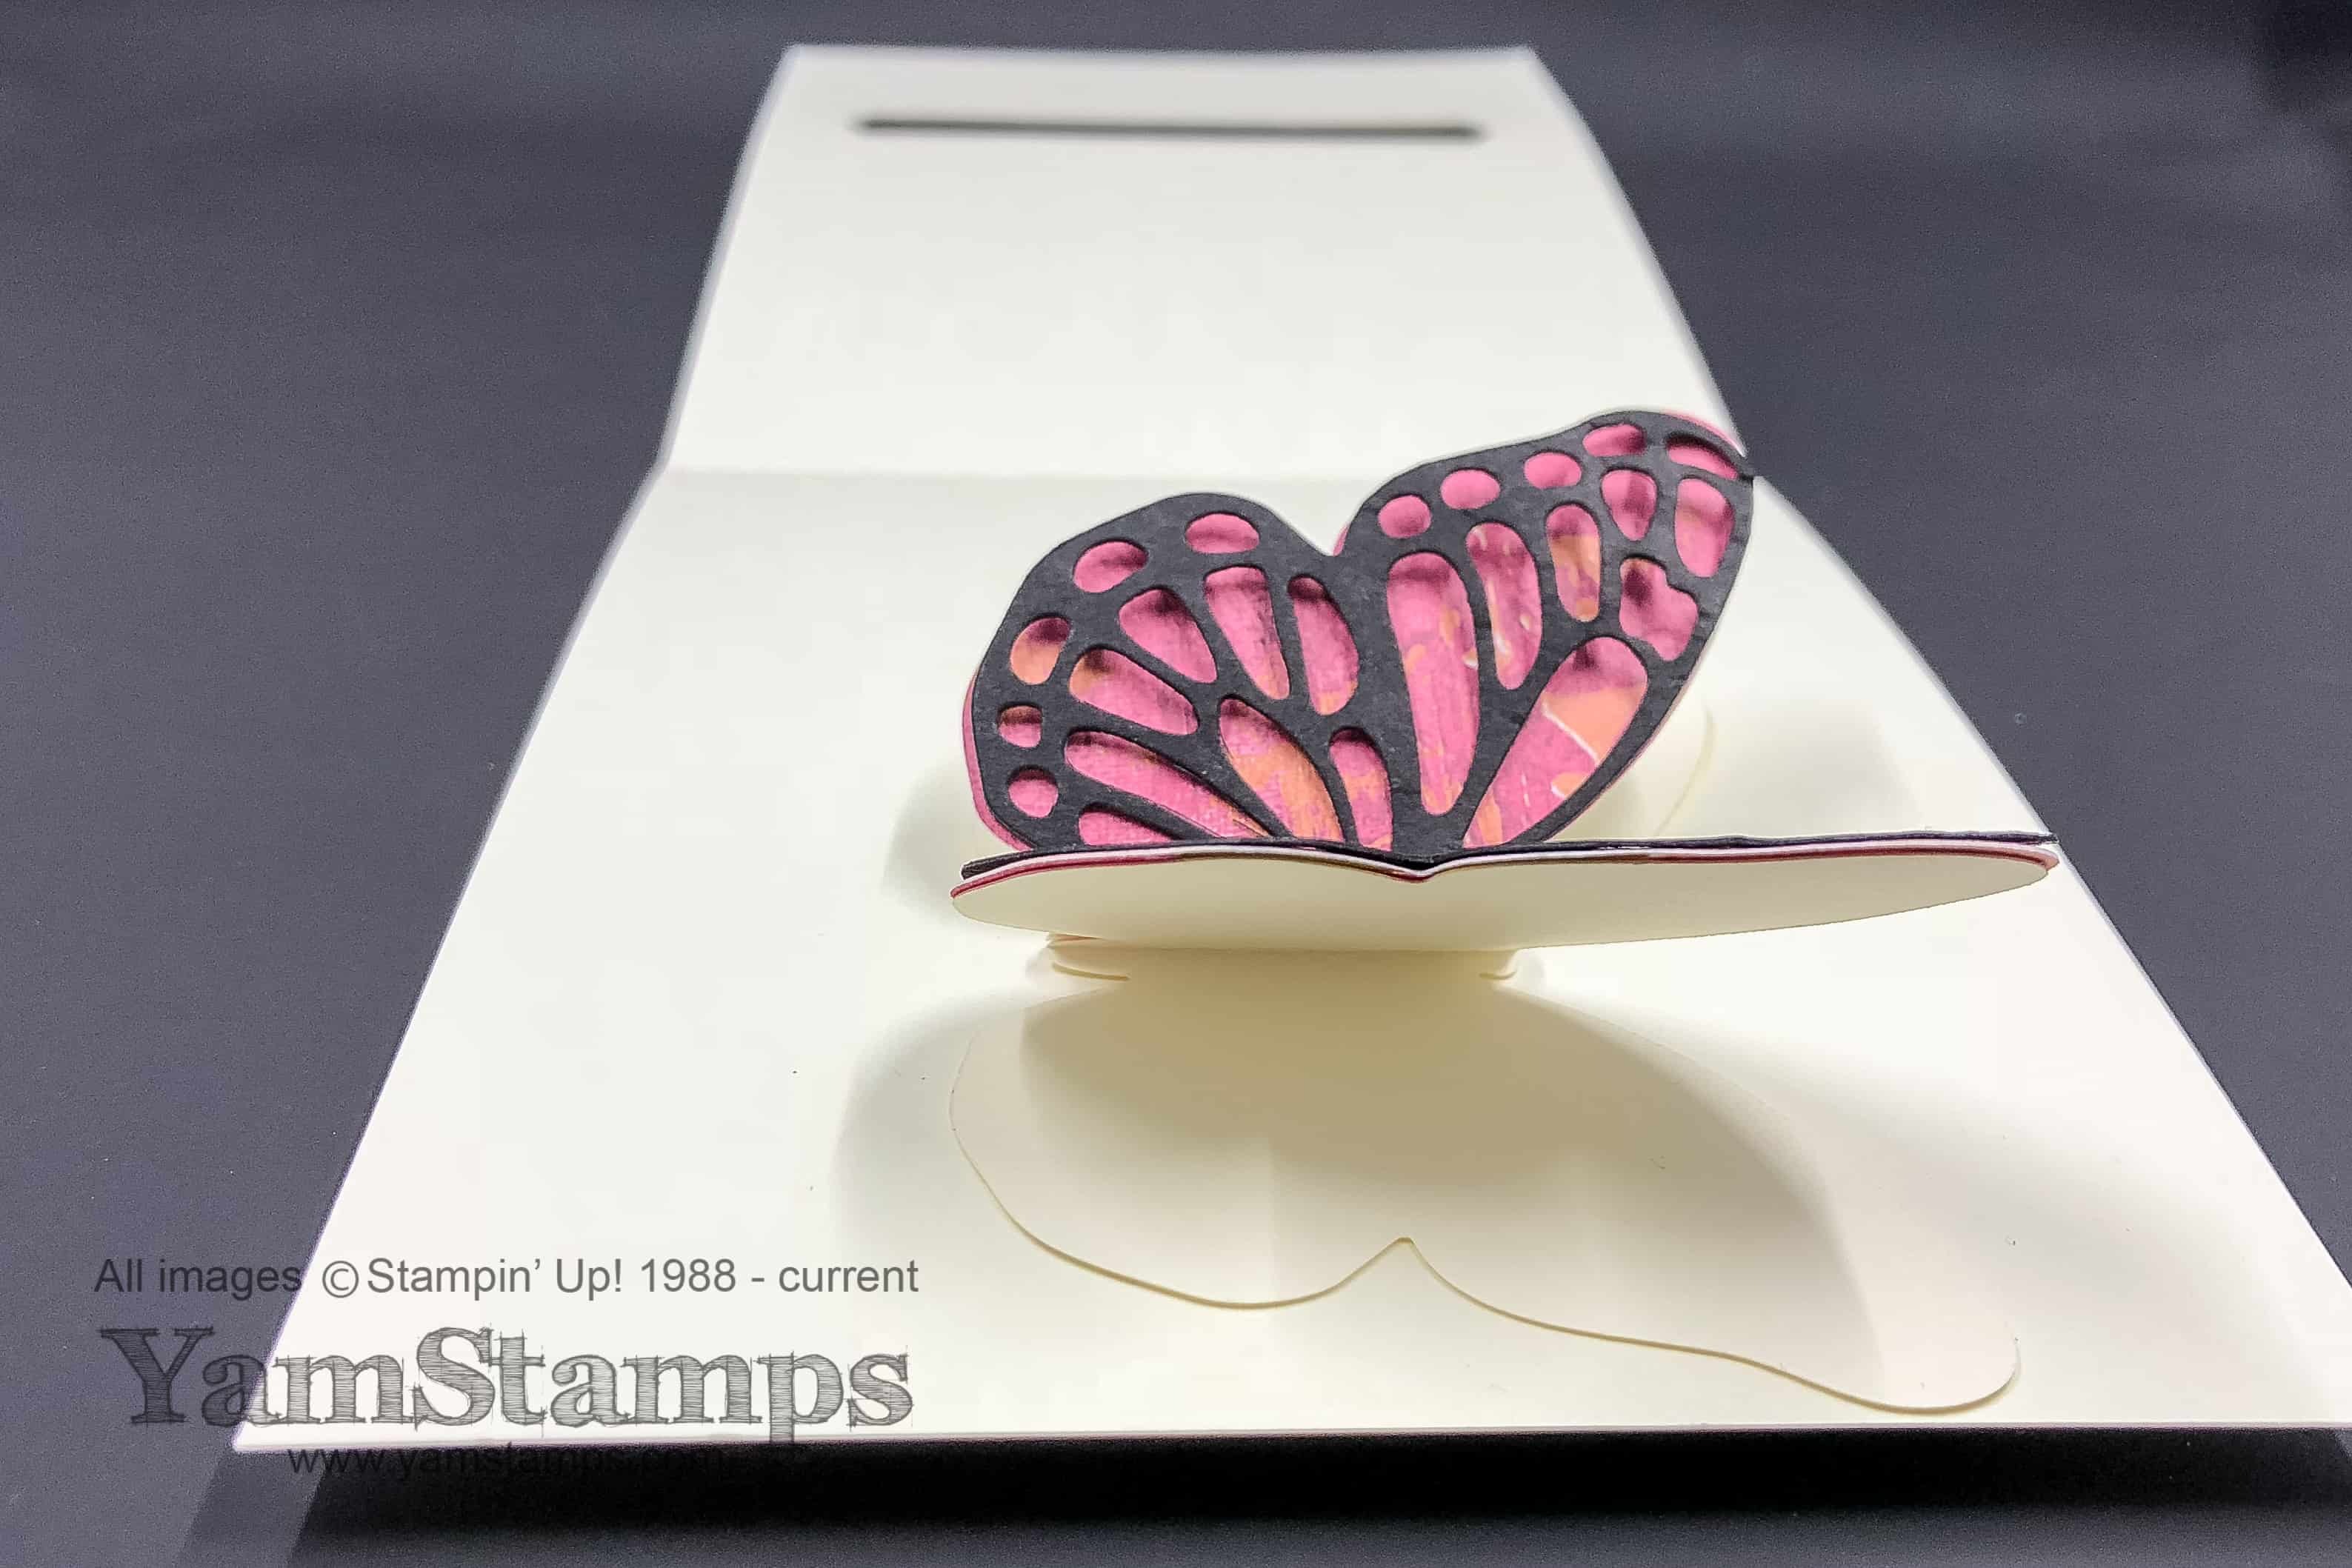
It’s not a colour combination that I would have though of, but I took it from the Desginer Series Paper…. The Painted With Love Specialty Designer Series Paper has been one of my favourites, and it will be retiring at the end of the month. It’s used on the solid butterfly behind the detailed die cut black butterfly. One of the Stampers Club members used the side of the DSP that featured some metallic gold splashes and it was really striking. The solid butterfly die cut is from the Bold Butterfly Framelits, and the detailed butterfly die cut is from the Butterflies Thinlits dies. Both of these die sets are retiring, and (I just checked) only the Bold Butterfly framelits are still available. The Peekaboo Peach Cardstock featured in the foreground of the card is retiring, as it’s a 2016-2018 In Colour – making room for new in colours. It’s embossed with the (already sold out) retiring Fluttering Embossing Folder. The Rich Razzleberry cardstock is still available, since it’s not a retiring/revamped colour, and the sentiment is from the Bunch of Blossoms stamp set, which is NOT retiring so no worries about that availability! The slot on the front of the card (the butterfly pops through it) is created by punching the Classic Label Punch twice in a row to make a longer slot that will comfortably fit the butterfly. It’s also NOT retiring so will be available into next year. A fellow demonstrator, Ronda, shared the construction of this card – it’s fun and different. There are two Very Vanilla solid die cut butterflies underneath the solid butterfly of DSP. Each vanilla butterfly is folded in half, and one half is attached to the inside of the card, while the other half is attached to the back of the DSP butterfly which helps the DSP butterfly fold upwards as well as anchoring it to the inside of the card. See the detail of the butterfly card in the photo below:
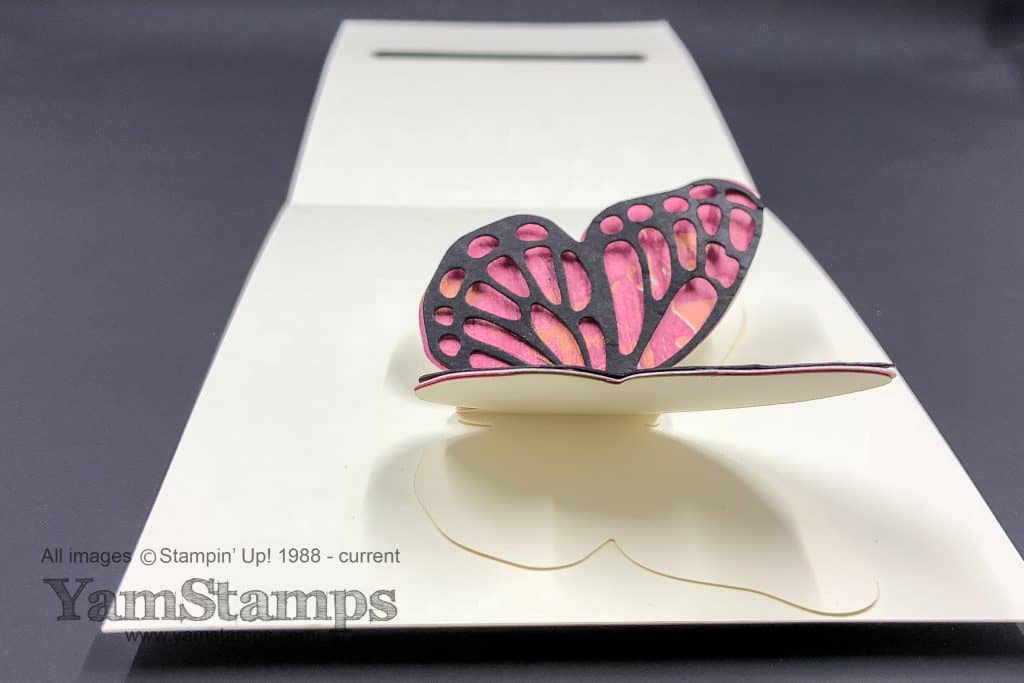
For my butterfly card, the detailed die cut black butterfly is adhered on top of the DSP, but if you don’t have that detailed die cut, you could easily just leave the plain DSP butterfly exposed, or you could stamp the butterfly body from Watercolour Wings onto the die cut butterfly to give it more definition.
While I’m sad that the butterflies are fluttering away, I can’t wait to get my hands on more new product from the next Annual Catalogue! If you are in Canada and don’t already have a Stampin’ Up! demonstrator, please complete this form before April 29th and I will see about getting you your own hard copy! If you are local to Burlington ON, please mark SATURDAY, JUNE 2nd 9am til noon on your calendar – that will be my New Catalogue Open House and Retired Product sale! Please RSVP to ensure I have a copy of the catalogue waiting for you!
Apr 19, 2018 | cards, Events, Stampin' Up!
Thanks for following along on the North American Events Council Blog Hop. Thanks for visiting the YamStamps Blog! I’m Linda, here in Burlington, Ontario Canada. This week, we’re sharing some more samples from the Share What You Love Product Suite! The Events Council members were the lucky ones who got to play with these products that will be available in special bundles only available for purchase next month, ahead of their individual item appearances in the new Annual Catalogue!
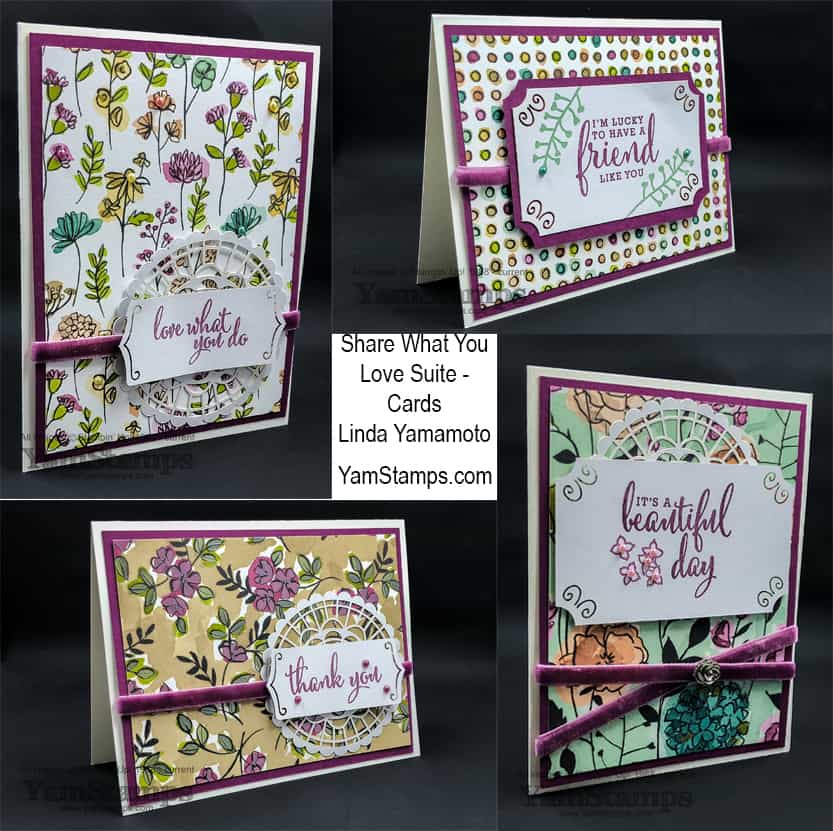
These are some of the cards I created as part of the display for Stampin’ Up!’s On Stage event in London Ontario. The first image shows four cards created on the same basic design premise – a half sheet card (5.5″ x 8.5″ folded in half), with a 5″ x 3.75″ piece of the Share What You Love Specialty Designer Series Paper, matted onto a 5.25″ X 4″ piece of Rich Razzleberry cardstock. Each card also used the Rich Razzleberry Velvet Ribbon and tags from the Share What You Love Embellishment Kit. The Artisan Pearls are on most of the cards, and I used the Silver Self Adhesive Flower (from the Embellishment kit) on a card too.
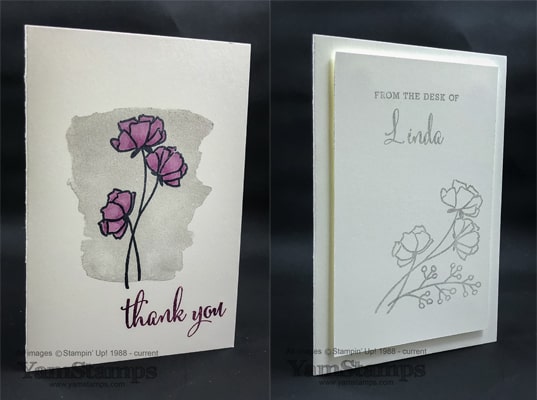
These next samples are clean and simple cards, using Stampin’ Up!’s Notecards. I used the Stampin’ Blends markers on the flowers on the left card, and featured the Make A Difference stamp set on the right card. It has an alphabet in both script and block capital styles. My hint that I shared at On Stage – to get the individual letter images close together, I used the Stamparatus, and placed every other letter on one plate, and the remaining letters on the other plate. Since the notecard is a personalized one, I figured I would make a bunch up in bulk, which means that the Stamparatus is perfect for that. For a “one off” card, I might be brave and just wing it – stamping one letter at a time tends to work best (rather than spelling out entire words on a block). I did that for the scrapbook page that I shared last week.
We have one more North American Blog Hop event scheduled for next week featuring this product suite – so hope you’ll be coming back to join us!
Go to Bonnie Allers O’Neill
Go back to Sherry Roth: