Jun 20, 2017 | Big Shot, cards, Stampin' Up!
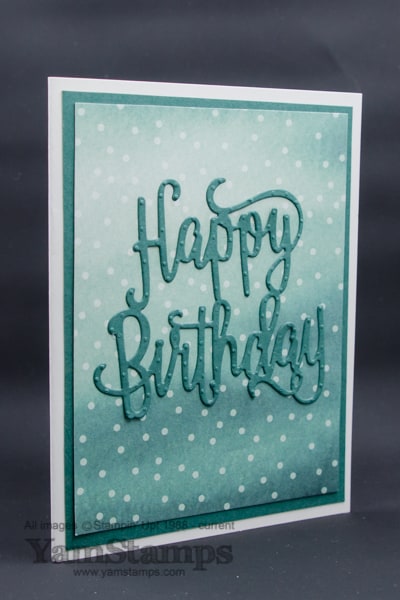
If you’ve attended a card making class with me, you’ll know that one of of my favourite thrifty techniques is to die cut or punch from the mat layer of a card. This thrifty die cut birthday card is an example of that technique! The words are cut with the Happy Birthday Thinlits die – and they come out as a single piece which makes it easy to adhere in place. I used the Multipurpose Adhesive Sheet to make it even easier! I cut my Tranquil Tide cardstock to 4.25″ x 11″, and placed it onto the adhesive sheet. I replaced the top liner sheet and then trimmed the adhesive sheet/liner so it lined up with the edges of my cardstock. I then cut the cardstock (with the adhesive and back liner in place) to 5.25″ x 4″ (reserving the left over for other projects or smaller die cut pieces). The words were die cut from the centre of this piece of cardstock. Since the Designer Series Paper goes on top of the cardstock, noone knows about the gaping hole!
The Designer Series Paper showcased on this card is Delightful Daisy. I love the watercolour / wash type effect on this paper – it gives more interest when you’re using it as a backdrop for projects. It’s adhered onto the (front side of the) Tranquil Tide cardstock with SNAIL, but then I just peeled off the backing from the adhesive on the backside of the cardstock and adhered it onto my Whisper White card. I peeled the backing from the back of the die cut words and adhered them in place on the cardfront. No fuss, no muss, and no waiting for liquid adhesives to dry (I’m usually an impatient crafter).
I was really happy to see the return of adhesive sheets in the latest Stampin’ Up! Annual Catalogue. They make this thrifty die cut birthday card easy peasy! Another way to use the adhesive sheets is to take a die cut piece and place it onto the adhesive to transfer the adhesive to the back of the die cut shape. (I’m getting ready to re-shoot my Subscriber bonus video and use that technique in the project I share).
Stampers Club members got to make this card as part of the club class this month. I like this card so much, it may appear in a future Monthly Card Class as well! If you are local to Burlington, please consider joining me for a class! No experience is needed, and your class fee covers all supplies required for the projects. This Saturday, June 25th (which by no coincidence is 6 months until Christmas), I’ll be having a Christmas Card Class! We’ll make 4 different holiday cards. I’ll be having holiday card classes each month leading up to December, so the more classes you attend, the more cards you’ll have ready to mail out before the postage deadline! Please contact me to register and make arrangements to pay the $20 class fee for the Christmas Card Class by this Thursday. Check out the YamStamps Events page for upcoming dates. See you soon!
Jun 12, 2017 | cards
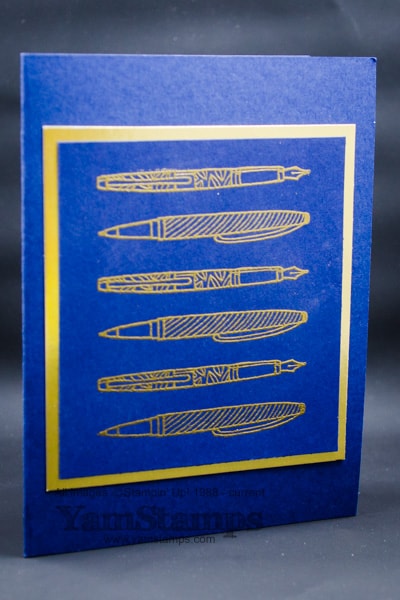
I love the combination of gold and navy, and this masculine card idea shows how classic this colour combo is! The pens are from Stampin’ Up!’s Crafting Forever stamp set (available as wood mount or clear mount), and they’re embossed in gold on Night of Navy Cardstock, with a Gold Foil Sheet layer behind to show it off. I don’t often do dark cardbases, but I wanted to keep this design clean and classic. If you do a dark cardbase, you can adhere a piece of paper or Whisper White cardstock inside so that your sentiment can be easily read – or use the White Stampin’ Chalk Marker.
If you check out the images in the stamp set, you’ll notice that the stamp with the pens actually has 3 pens, all facing the same direction. I decided to do a little “surgery” on my stamp, and actually cut the pens apart! (I have the clear mount version of the set). I did a single cut line between each pen, and then snipped off the corners (I often find if I have right angle corners on the image, I end up getting ink on them and messing up my stamped image). By doing this, I can re-align the images so they appear as their original version, should I desire. For this masculine card idea, I used two of the images and placed them facing in opposite directions on my clear block. I then stamped three times in Versamark, and heat embossed with Gold Stampin’ Emboss Powder. That was it! OK maybe not quite, I forgot to mention I used the Embossing Buddy on the Night of Navy cardstock before stamping to limit my stray embossing powder. Using the Embossing Buddy leaves a slight layer of magic dust that seems to reduce static (plus absorb any oils from my skin) so that the embossing powder sticks to the stamped image and nowhere else.
This would be a great graduation card or Father’s Day card, and while I did call this a masculine card idea, it’s not just for men – it would be suitable for any time you don’t want a frilly, flowery card. The YamStamps June Paper Crafting Projects Newsletter has other project ideas, including a fun gift card holder that is great for Father’s Day or someone who likes DIY. The big newsletter comes out the first Tuesday of each month. All new subscribers receive the current month’s Project Newsletter so you don’t miss out on the most recent version (i.e. if you subscribe today, you’ll still be able to check out that project I mentioned!). Plus you’ll receive a weekly update featuring different projects and updates, so you will constantly get new ideas in your inbox as well! Please let me know if you have any questions – otherwise I’ll “see” you online or in your inbox!
Jun 7, 2017 | Uncategorized
Join me on June 25th at 1pm to get a jump on your holiday cards! After all, it will be SIX months until Christmas!
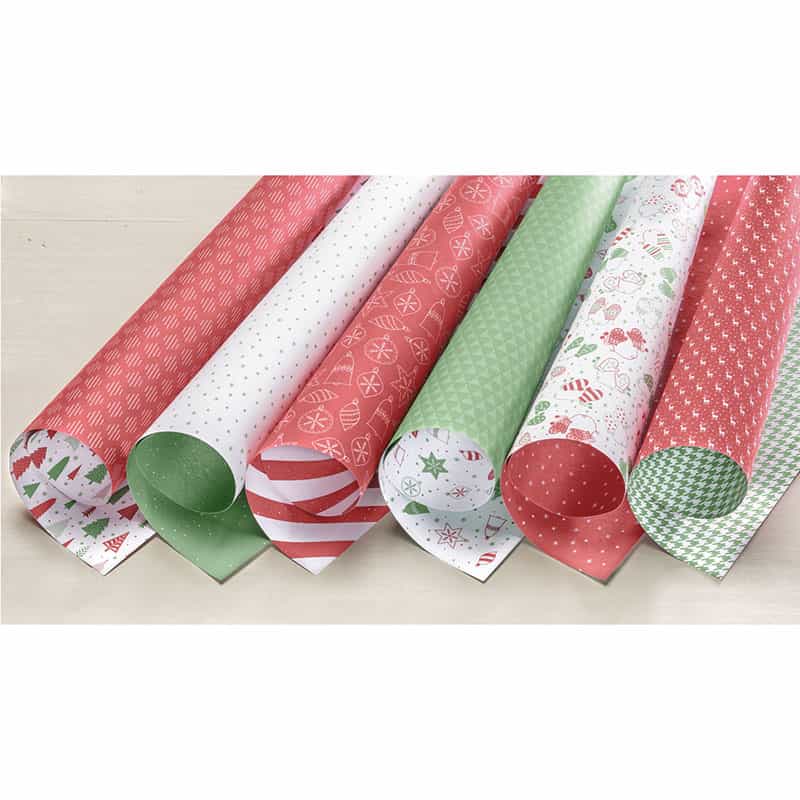
Two options – Class Fee Only – $20 includes all supplies required to make 4 different Christmas Cards OR Class and Product – $30 includes all supplies to make 4 different Christmas cards, plus a package of the Be Merry Designer Series Paper (pictured above) – you’ll use a portion during the class and take the rest of the package home to use on other paper crafting projects.
Class and Product Registration Deadline: June 12
Class Only Registration Deadline: June 21
Contact me to register!
Payment due at time of registration please & thank you.
Jun 1, 2017 | cards, Stampin' Up!
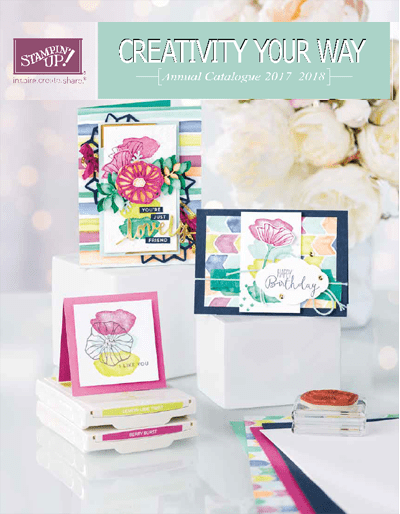
Happy New Stampin’ Up! Catalogue Day! The new catalogue is now in effect! Please note that we will be able to place orders online around 2pm Eastern (12 pm Mountain) – so until then we have to wait patiently with our wishlists in hand…. The image above is linked to the Canadian English version pdf file – if you’d like the French version, please click here. Once online ordering is up, you will be able to place your order through my online Stampin’ Up! Canada store here. If you would like assistance or are in Quebec and would like to place an order, please contact me – I can place the order for you and have it delivered to your door (online ordering currently not available in Quebec, sorry).
There are so many great things in the new Stampin’ Up! Catalogue – it’s hard to pick a few! As demonstrators, we were able to place preorders for selected merchandise, but today will be the first day that we can order anything our heart desires….*sigh*. I have a wishlist that I’ve worked hard to keep to a “manageable” level…
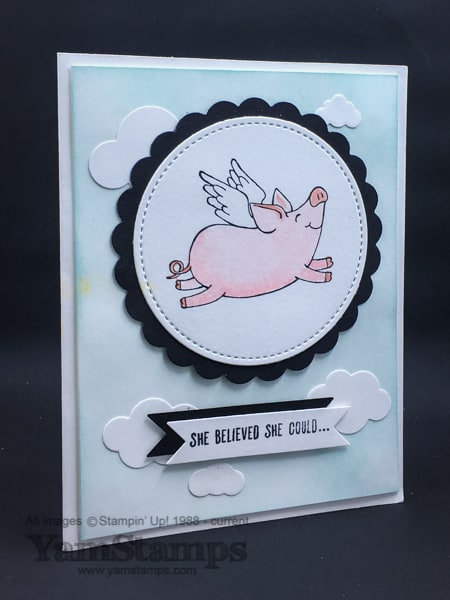
This is me believing I can keep my wishlist to a manageable level. Haha! This fun card was sent to me by one of my newer team members and longtime club member, Arlene. She used the new stamp set, This Little Piggy. I love this set and sentiment! It’s available in English and French, and you can see it on page 48 of the new Stampin’ Up! catalogue. Right now, I can’t link to the actual set in the online store because as I write this…the online store/ordering isn’t yet available. I will be sure to come back and link it later when I can!
If you requested a new Stampin’ Up! catalogue from me, or placed an order with me in the last year, I will be following up in the next few weeks to be sure that you received it! I do know that I still have catalogues going in the mail this week, so please bear with me. In the meantime, there’s always the downloadable version (which I do like because you can enlarge it on the screen…LOL no need for reading glasses…).
In the meantime, I will leave you to your catalogue perusal…and remind you once more to contact me if you have any questions, or need assistance placing your order. I will also remind you that if you are in the Burlington area, contact me to RSVP for the New Catalogue Open House and Retired Product Sale THIS Saturday, June 3rd! Doors will open promptly at 9am…no sooner….no later (because if history repeats, the first people in line will ring the doorbell if their watch shows 9am and the door isn’t open yet!). Hope to see you there!
May 28, 2017 | cards, Stampin' Up!
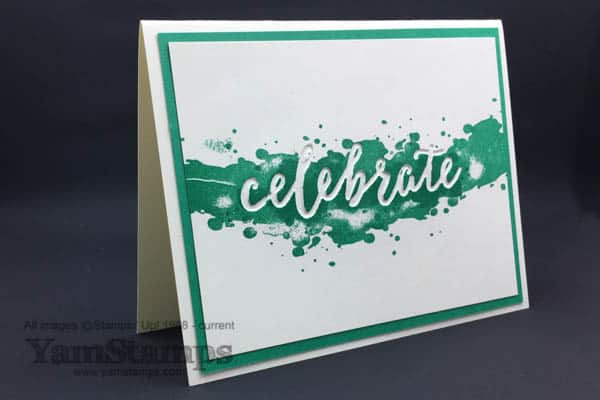
I have to admit that initally, I wasn’t so overwhelmed with the colour in this card – Emerald Envy….but as I used it on this design, it REALLY grew on me! I love the bold tone, and it’s perfect for this easy and effective card design to celebrate any occasion! You may have overlooked this combination of products in the catalogue…I know I did initially! It combines the Celebrations Duo Textured Impressions FolderS (yes, you get two of them – one says Celebrate, the other says Happy)…and the Happy Celebrations stamp set. You emboss the word – well, I guess it technically debosses, because the word is indented – and then stamp over it with the sploosh image (for lack of a more technical term) to have the word really stand out.
The thing I love about the more graphic background type stamps is that they are very forgiving. If you don’t get a perfect image, or if you happen to smudge it with your finger….it kind of fits in still. It does help to stamp on top of a Silicone Craft Sheet or Stampin’ Pierce Mat when you are using Photopolymer stamps – that extra cushion helps with the images. Since the stamps are a little more flat than the traditional red rubber stamps (no extra padding behind the image), you do have to watch when you ink them up as well. Too aggressively inking your stamp will often wind up with you having ink on the block and then in unwanted spots on your card (or your hand). Ask me how I know these things…. Let’s return to the Easy and Effective Card Design to Celebrate though, shall we?! hahahaha.
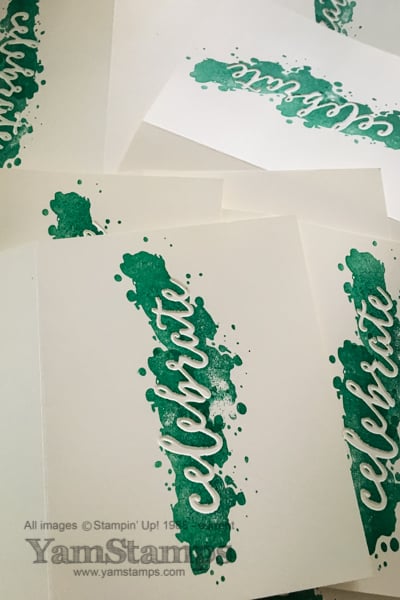
Thanks to my helper (thanks Mom!), I produced a whole whack of these easy and effective card designs over the past little while – and now am in the process of delivering them all… Since I was doing an epic production, I ended up doing just a single layer version of this card (see the stack in the image above). I like simple designs anyway, and this simplifies the design a bit further. Sometimes it’s more important to be able to just get things done rather than fussing with them forever and then never getting the card sent. I figure that the recipients of the single layer cards can always trim down the front of the card to 5″ x 3.75″, adhere it onto a 5.25″ x 4″ piece of Emerald Envy, and then adhere it onto a half sheet card (8.5″ x 5.5″, folded at 4.25″) for that extra layer look if they wish, right?! When I send thank you cards or follow up cards to customers, I usually have a sticky note inside that reads “please reuse this card” so that the recipient can “pay it forward” so to speak – or they can keep it as a prototype to copy for their own creations. “Sharing is caring” as my son often says to me (though usually that’s when I have some food or something that he wants….).
This Saturday is my Annual New Catalogue Open House & Retired Product Sale from 9am til noon. Please RSVP if you are able to join us in Burlington ON – I’ll send you directions, and will set aside a copy of the new catalogue for you. If you are intending to shop the retired products, it’s first come, first served, and cash sales. Please let me know if you have any questions, and I look forward to seeing you soon!









