Feb 17, 2015 | specials, Stampin' Up!
I hope you had a good Family Day (if you’re here in Ontario!). We had a relaxing day around here, and I had the opportunity to be on The Night Side on NewsTalk 1010 Radio last evening! I was interviewed on turning Passion into Profit (around here known as “50 Shades of Cardstock” LOL). I will post a link to the audio file that they kindly sent to me. It was a fun experience. If you would like to know more about having your own Stampin’ Up! business, check out this page here or contact me for more information.
In the meantime – here are this week’s deals! Great buy on the Designer Series Paper! Click on this link or the image to see the items in the YamStamps Online Stampin’ Up! Canada store.
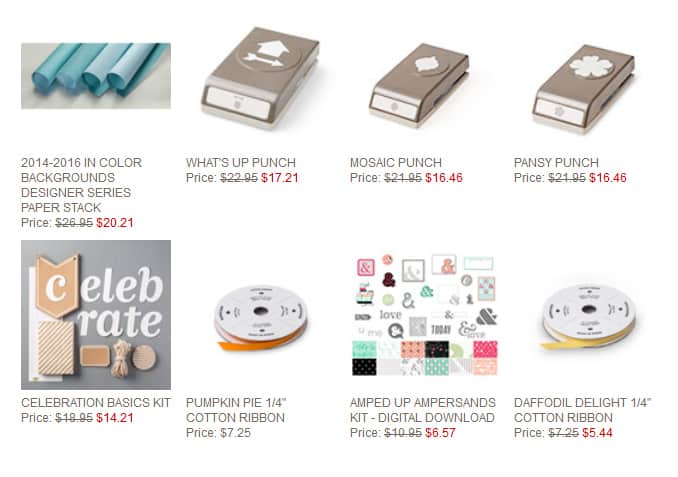 Please feel free to contact me if you have any questions. In the meantime, happy shopping! (and if you’re in my neck of the woods – stay warm!!)
Feb 16, 2015 | cards, Stampin' Up!
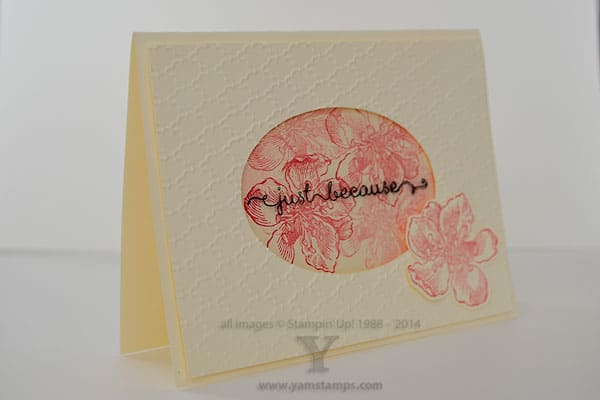 This is a recent card that we created in Stampers Club. Now, those of you that know me, don’t be too shocked, but YES that is a “fussy-cut” flower on the front!! I do tend to avoid fussy cutting as a general rule, especially in classes or clubs – it’s a polarizing thing (some people REALLY dislike cutting things by hand) and I also like to keep my crafting simple. However, there are times when a punch, die cut or whatever just don’t quite do it, and this is an example.
Other than that, this is a pretty straight forward card – really! It uses one image only – one of the flowers from Everything Eleanor. The sentiment is from A Dozen Thoughts and is stamped in Staz On onto a Window Sheet. The flowers are initially stamped in the centre of the cardfront, varying between first generation (ink the stamp, stamp on the paper) and second generation images (re-stamped onto paper without re-inking the stamp) to add variation and interest. The oval window is die cut from another piece of Very Vanilla cardstock, and THEN embossed with the Fancy Fan folder. Important to cut first, then emboss, otherwise your embossed pattern tends to get squashed when the cardstock is run through the Big Shot again. Stamp onto your window sheet, adhere to the back of your embossed cardstock, then put onto the front of the card with Stampin’ Dimensionals. As a bonus – if you don’t like how your sentiment stamped, clean the Window Sheet with some Staz On Cleaner and you can start again!! Hand cut one flower with your Paper Snips and then adhere to the cardfront for a finishing touch.
It’s always great to have a stash of cards on hand, and a “Just Because” card is so multipurpose and so fun to receive! Remember when we were so thrilled to get an email and were innundated with “snail mail”? It’s the opposite these days, isn’t it? Share the joy and send a hand made card! I am working on this for myself this year – send more cards! (Especially to those people who place orders with me, nudge, nudge! LOL). If you would like to build up your card stash, please consider attending a class with me! Monthly Card Class is always open to all levels of crafters – next one is Wednesday, March 4th. Hope to see you soon!!
Feb 12, 2015 | 3D samples, Occasions, Stampin' Up!
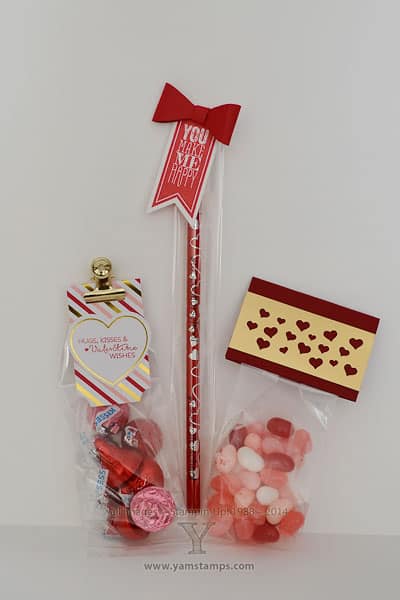 It’s easy to whip up a few quick sweet treats for your Valentine! These are some that I created for my Morning Live appearance – always good to have lots of samples on the table I think. (even if you can’t get a good look at them all…). It doesn’t have to be complicated to show someone that you care!
I used the Confetti Heart Punch with the Gold Foil paper for the jelly bean bag topper – super quick and easy – just fold a piece of Cherry Cobbler cardstock over top of a cello bag and seal closed. The pencil features a bow from the new Bow Builder Punch, and the project on the left is created using last month’s Paper Pumpkin kit.
Paper Pumpkin is Stampin’ Up!’s subscription kit – you receive a fun box of crafting supplies to create a project each month, with plenty of supplies left over to embellish other projects. You can also deviate from the instructions and come up with your own ideas. You get photopolymer stamps, an ink spot and the project supplies; you even get an acrylic block in your first kit. OK, I did have to supply my own candy for this one though… If you’re interested in the Paper Pumpkin program, right now, the three month subscription is on special – plus you’ll qualify for a Sale-a-Bration reward too!
Feb 10, 2015 | specials, Stampin' Up!
 Tada! Here are this week’s deals from Stampin’ Up! Canada at a glance. Click on the image or HERE to see all the specials in my online store. This week the specials include the From the Garden Photopolymer bundle which is a current item from the Occasions store. The Bundle is normally already discounted 15%, so you’re getting an EXTRA good deal here – but only until Feb 16th so don’t hesitate.
Seems like it might be a bit of a boring Tuesday around here this week…no TV appearances for me, no meeting lead singers of groups I’ve admired for years…*sigh* Might have to do some paper crafting to make myself feel better….
Feb 8, 2015 | cards, Seasonal Catalogue, Stampin' Up!
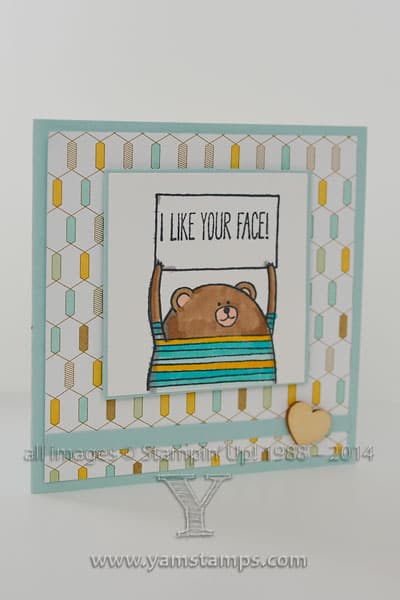 I thought this Stampin’ Up! set was so fun when I saw it! It’s Cheerful Critters from the Occasions catalogue. There’s a number of different critters and sentiments that you can mix and match, so I thought this one was good for Valentine’s Day. I coloured the image quickly with Blendabilities (OK bad shadowing job on the sign, I know, sorry) and then popped it onto some Lullaby Designer Series Paper. I added a strip of the Pool Party cardstock (easy way to add an accent if you can’t find your ribbon…) and then added a little wooden heart from the Essentials Wooden Elements.
It’s fun to spend a bit of time adding colour with Blendabilities. Don’t forget that you should use the Memento Tuxedo Black Ink Pad for good results. If you’d like other tips using your Blendabilities, I will be holding another Blendabilities class Thursday, March 12th at 7pm – featuring the colours Old Olive, Daffodil Delight, and Wisteria Wonder. Cost will be $80 and includes all three sets of Blendabilities markers PLUS a Colour Lifter and the stamp set “A Happy Thing” from the Sale-a-Bration catalogue. If you already have those colours, you may order other colours instead, but please bring those colours with you to class. Registration will open tomorrow and will close Sunday, February 22nd. Check back to the blog and subscribe to my mailing list to get notification of all my events!