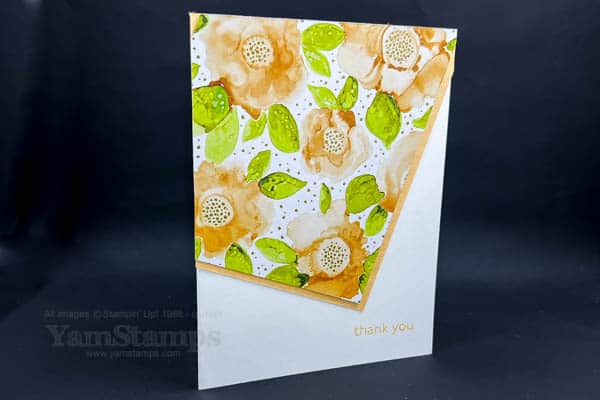
This eye catching angled patterned paper card is easy to make!
angled patterned paper card
I’m here with another super easy but super effective card. This angled patterned paper card features some pretty standard dimensions but the end result is not standard at all!
In North America, the “typical” card size cardmakers create is 4.25″ x 5.5″ – or half a sheet of 8.5″ x 11″ cardstock folded in half. Easy math for cardmakers – make layers 0.25″ larger/smaller based on your cardfront size if you want it covered. So if you wanted full coverage of the cardfront with your Designer Series Paper (“DSP”) and cardstock backing, your sizes are 4″ x 5.25″ for the cardstock backing, and 3.75″ x 5″ for the Designer Series Paper.
For this angled patterned paper card, I adhered the Designer Series Paper onto the cardstock backing, leaving an even border around the edges. (or as even as I could manage at this particular time!). I folded the 8.5″ x 5.5″ cardstock in half to create the cardbase, then positioned the DSP layer at an angle I liked, making sure the top corner of the card was covered, and stuck it in place. I flipped the card over and then trimmed off the excess DSP/cardstock layer so it was even with the cardfront. That’s it!
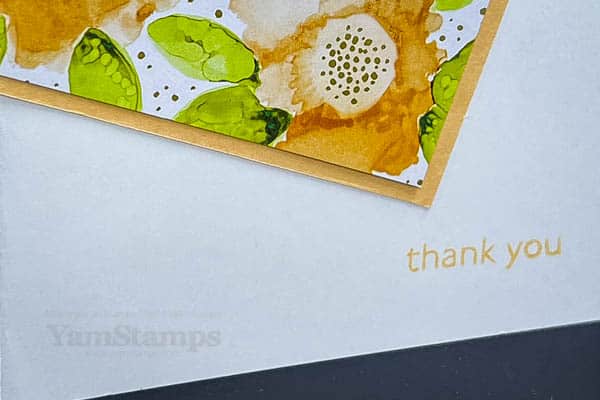
One note (aka “learn from my mistakes”) – you may want to shift your DSP layer so that it’s just the DSP layer showing at the top corner. My sample has a bit of the layering cardstock showing. Not the end of the world, but something to think about. (and now you’ve all scrolled back up to look at the picture, haven’t you….)
I used the retiring and no longer available Expressions in Ink Specialty Designer Series Paper. When Stampin’ Up! labels a DSP as “specialty” it’s because there’s usually some extra feature to the designs – in this case, it was metallic foiled elements (the dots are all gold foil). I used Pale Papaya Cardstock for the backing layer since it’s one of the colours used in the pattern. It’s also a retiring In Colour, so it will be gone as of the end of day Monday!
angled patterned paper card close up
I love that with the patterned paper taking centre stage, you can just add a sentiment and the card is done! I used Pale Papaya ink and the Art Gallery stamp set sentiment to give a clean and simple finish to the card.
Don’t forget that Monday 2 May is the last day for sales from the current 2021-2022 Annual Catalogue. Starting Tuesday, you’ll be able to shop from the 2022-2023 Annual Catalogue!Be sure to check YamStamps.com for links to the online version of the catalogue. Hard copy catalogues are en route to those who have shopped with me in the past year or waiting for pick up at my Rubber Garage Sale on Saturday 7 May!RSVP for directions and parking instructions if you’re able to come by the sale on Saturday from 9-11 in Burlington ON! Cash sales preferred, but etransfer/debit/credit card purchases also available. Hope to see you soon!
This fun fold bay window card fits in a standard Medium Stampin’ Up! envelope!
Bay Window Card
This is the challenging time of the year for a Stampin’ Up! Demonstrator….the new catalogue is just around the corner, there’s lots of retiring products and things are selling out one by one…which means sometimes our project posts that have been prepared in advance feature now unavailable product – and that just feels mean to show off some of them now! The main featured products for this card are still available (at time of writing…). Your fastest way to check if something is still available is to go to the YamStamps Online Stampin’ Up! Canada store (shortcut is https://yamstamps.com/shop) – all available products will show in the store. You can place your order online there, or if you’d prefer to pay by etransfer or want assistance placing your order, you can email me.
This fun fold bay window card is a standard sized card, but with a few extra score lines to create a popped out area. The card easily stands on its own, but mails in a regular sized medium Stampin’ Up! envelope, which honestly, is a key point for me.
The base is a 4.25″ x 11″ piece of cardstock scored at 3/8″, 1-7/8″, 3-5/8″, 5-1/8″, 5-1/2″, and then I just cut a 6″ wide piece of Designer Series Paper to 1/8″ narrower than my scored areas. The “leftover” piece was used for the anchor piece on the inside of the card for the final tab to slide under to keep the cardfront in the bay window position.
Can you tell what Designer Series Paper I used for this bay window card? Hard to believe, maybe, but it’s the Waves of the Ocean! It’s not just blue themed patterns! The die cut label for the sentiment is from the Waves Dies. The Waves Dies and the coordinating Waves of Inspiration stamp set (and discounted bundle) will be available in the next Annual Catalogue that starts Tuesday 3 May 2022 – but the Waves of the Ocean Designer Series Paper will NOT be there – so you’ll want to purchase that by Monday 2 May 2022 if you need it in your stash! (or before then, because there’s that pesky “while supplies last” clause).
We created this bay window card in Stampers Club this month – if you’re interested in regular craft nights, consider joining us! We are meeting virtually right now – so you don’t need to be close to Burlington ON to join in (though you do need to be within Canada). We meet once a month (typically the third Monday of each month, though it may occasionally change depending on stat holidays and club consensus). You can see more information about Club (and other events in my business) on the YamStamps Events Page, or you can always message me if you have any questions.
In the meantime, happy crafting and don’t miss out on those retiring products!
I love clean and simple type cards and this layered monochromatic card fits the bill!
One Colour Card with Dimension
Easy and effective paper crafting is my motto – and this card fits the bill. This layered monochromatic card is not difficult to make, and by using Stampin’ Dimensionals to lift the die cuts on the cardfront, it creates a really stunning effect I think!
This card features the Floral Squares Dies – which are sadly already sold out, but I couldn’t resist sharing this design with you. If you missed out on these dies, try it with dies that you have in your craft room (I’m sure you have some….). Stampin’ Up! has a number of ways to help you “elevate” your paper crafting: Stampin’ Dimensionals, Mini Stampin’ Dimensionals, (both available in the Black Stampin’ Dimensionals Combo Pack for your darker coloured projects), Foam Adhesive Sheets(great for putting on cardstock before you die cut) and Foam Strips – great for shaker cards or along thin edges like the frames of these die cuts. Any of these items can help you to create your own layered monochromatic card easily!
My go to product to pop up anything on my projects tends to be the Stampin’ Dimensionals. Using Foam Adhesive Sheets is fantastic when I know I’m going to want to pop up a die cut…but I don’t always know this when I’m designing on the fly! My thrifty tip for Dimensionals – after using up all the hexagons from the sheet, there’s a frame around the outside that’s left over – use your scissors to snip that up for more Dimensionals – though they’re not as pretty, they’re still functional! (Besides, who is going to see the underside of those popped up images?!).
Tomorrow is the day for the next YamStamps newsletter – subscribers will get to see what exclusive project I have in store for them when it goes out around 1pm Eastern. Are you signed up? Use the box here on the YamStamps site or click here to register – you’ll get access to an exclusive video tutorial as well!
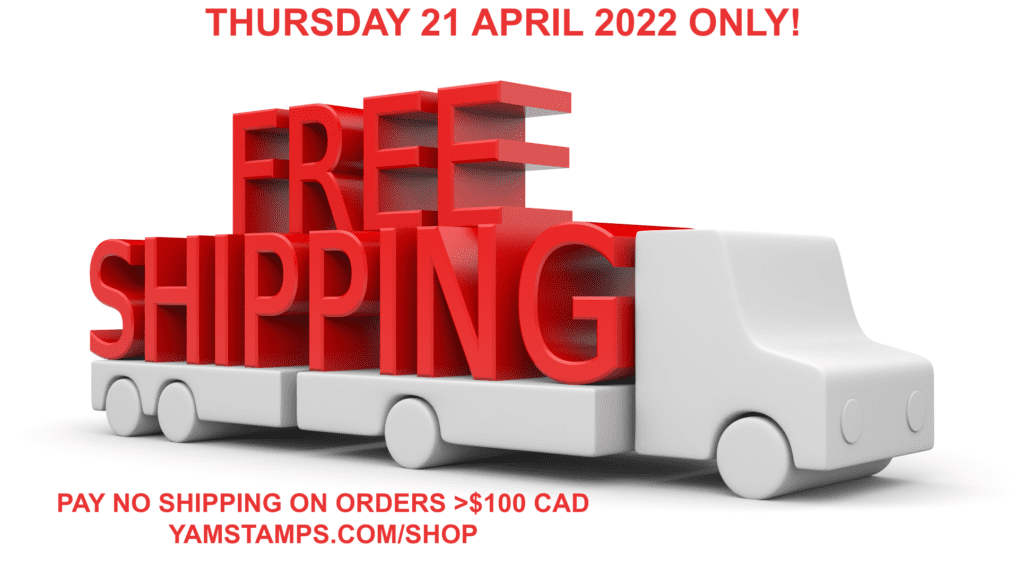
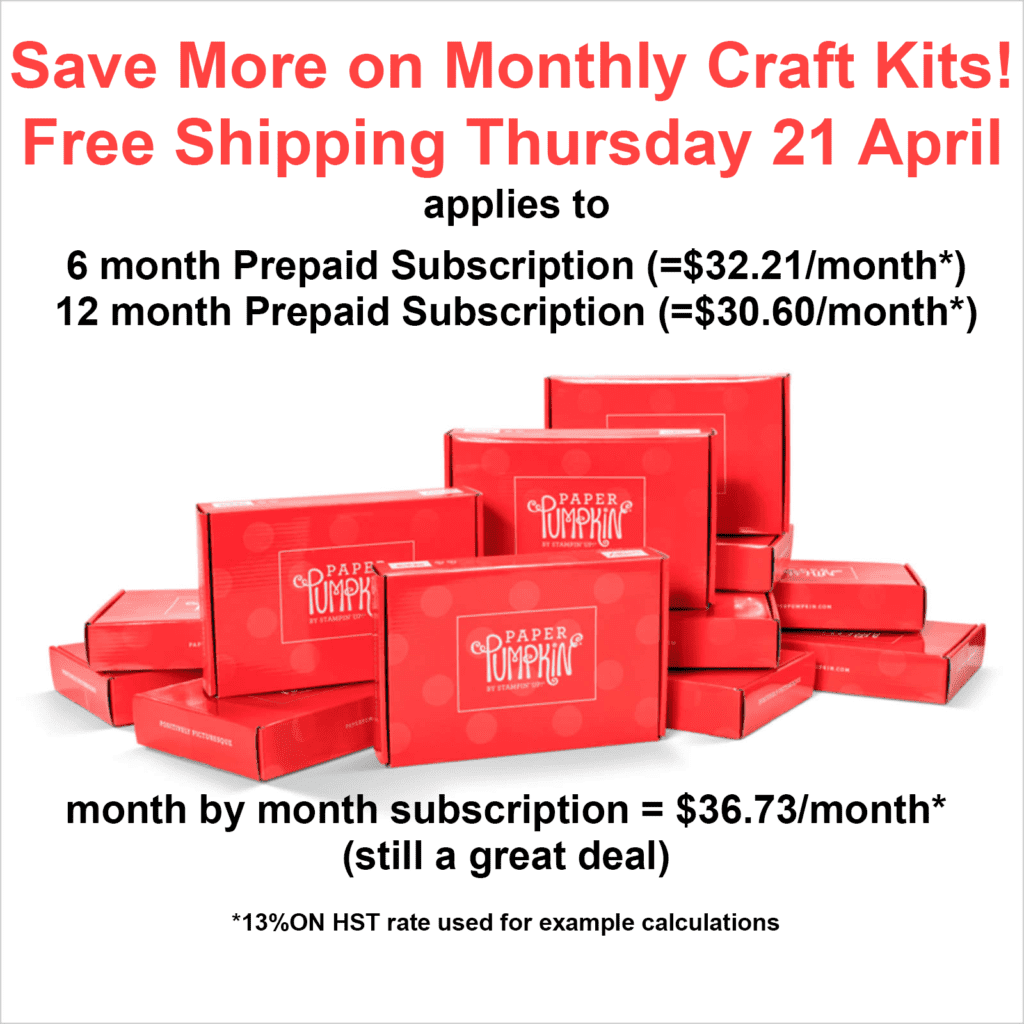
Today! Thursday 21 April until 1159pm Mountain Time – place an order with $100CAD product and pay NO SHIPPING COSTS! Shop at https://yamstamps.com/shop or you can message me to have me place the order for you. If you have an order for less than $100CAD and can pick up your order in Burlington, ON, message me by 7pm tonight and I will include your order in a group order that I will place – everyone will be able to get free shipping! It will ship to me in Burlington and I will let you know when it arrives so that you can come by to do a pickup.
Is there anything that you’ve had your eye on lately? Now’s the time to grab it! If you like having new things on a regular basis, consider the Paper Pumpkin kits – the six month and twelve month prepaid subscriptions always help you save on the monthly cost of the kit – but during free shipping, you’ll save even more! See the breakdown below. You pay shipping costs on these kits only when you purchase a prepaid subscription (not for the month by month option).
If you have questions, want to pay by etransfer or want to get in on the group order, contact me! Remember – group orders must be to me by 7pm Eastern so that I have time to enter everything and confirm payment options. Thanks!
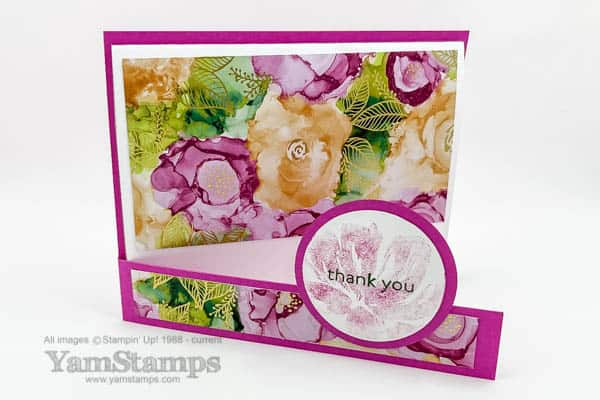
This easy fun fold card has a floral theme and is sure to brighten someone’s day!
Easy Fun Fold Floral Card
I am always on the hunt for effective card designs that aren’t too difficult to create and this one fits the bill! It’s an easy fun fold card – and I used some of my favourite retiring products. I used the Expressions in Ink Specialty Designer Series Paper as the main focal element for the card, and then used Magenta Madness (retiring 2020-2022 In Colour) for the card base. I always choose my colours for cardstock and ink from the colours used in the Designer Series Paper – Stampin’ Up! coordinating colours make it so easy! The sentiment is stamped in Garden Green, and I added the flower in the background for interest – but after I inked the stamp in Magenta Madness, I stamped it onto scrap paper a couple of times first so that the image was a faint background for the words.
Easy Fun Fold Card – Partially Opened
The Magenta Madness cardstock is cut to 4.25″ x 11″ and folded in half, and then the front of the card is cut to leave a strip along the bottom. The inner card is Basic White cardstock folded in half. One piece of Designer Series Paper is cut so there’s a smaller strip along the bottom that gets adhered to the Magenta Madness cardfront strip, and the rest goes onto the Basic White card – so that the pattern is continuous. I think that’s the big thing to take away when you’re using patterned paper and you cut it into smaller strips or pieces to use – try to keep the pattern in the right order so that when you put it down, the pattern is continuous across the pieces. It makes this easy fun fold card look more impressive!
If you’re interested in other fun fold or fancy fold cards, I currently have two online classes with this theme (and more to come!). They are some of the most popular online classes I have – there’s the Fancy Folds Class and the More Fancy Folds Class. Not sure what I’ll call the next one in this theme…LOL. Once you purchase access to the class, you’ll have lifetime access! If you have any questions, you can always contact me.
In the meantime, this weekend has an intersection of holidays – so whether you are celebrating Easter, Passover, Ramadan, or just celebrating spring, I hope that it is meaningful for you and you are able to spend it with those you love.