This card for a dreamer would be a great graduation card!
Card for a Dreamer – like a grad!
This is the Sunday Swap share on the YamStamps Facebook Page – and it’s a card that I made as my contribution. One of the fun things about being a Stampin’ Up! Demonstrator is participating in swaps and other events. A fellow demonstrator organized a card swap – where each person created multiples of the same card and then sent them in – and then a little while later we get back a whole variety of cards – one from each person who participated! It’s a great way to get ideas and see how other demonstrators are using their new product – including product that I may not necessarily own (I know, it’s shocking, but true).
I used a few host only items from the 2022-2023 Annual Catalogue for my card for a dreamer. The paper is from the Design a Daydream Designer Series Paper package, which is 48 sheets of double sided designs (4 each of each design) – it’s twice the amount of the typical Designer Series Paper set! The sentiment is from the Begin with a Dream stamp set, also a host exclusive. I decided to die cut a cloud from the Waves dies and then heat embossed the word dreamer in gold.
For the single word, I used a “template” in my Stamparatus to help me position the cloud perfectly every time. I die cut a cloud from a scrap piece of cardstock, then placed the cardstock with a hole in it in my Stamparatus and held it in place with the magnets. I put a die cut cloud into the cloud hole, and once my stamp was lined up correctly, I just kept an assembly line going!
If I get the chance, I’ll see if I can upload a video of the template system – it’s super easy. Right now, my craft room is in sheer chaos as I’ve downsized my room (since I’m no longer an empty nester…). While I managed to sell a fair bit of retired product at my Rubber Garage Sale last weekend, it still feels like I have a whole lot of stuff around still! I’m trying to purge and organize and place all at the same time, so it’s a little slow going…If you have any organization tips, throw them my way!!
This card for a dreamer has a lovely sentiment that I think is good for graduates – like my son! It’s hard to believe that he’s done four years at university already. He really enjoyed his university experience, and I think he learned a bit along the way too! I think I might use this card for him, but add in “but remember, a dream with a deadline is a goal!”….hahaha!
If you’re interested in benefits of being a Stampin’ Up! Demonstrator with my team, you can check out this information page here (shortcut is yamstamps.com/join), or message me with any questions you might have. It’s a great time to join since there’s a special until the end of May! All Starter Kits include In Colour products (on TOP of the $165 of product that you select). You’ll get the 2022-2023 In Colour Ink Pads, cardstock, Designer Series Paper and grid paper – a $90 value – but only if you purchase your starter kit before the end of May. Once you read the Information Page, you can either message me with any other questions, or just click on the link on that page to start picking your starter kit items!
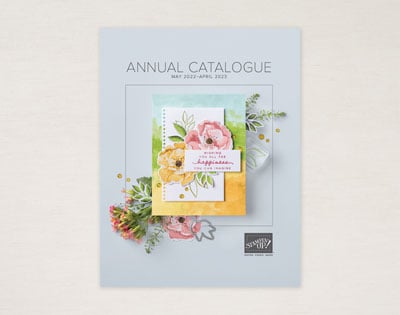
If you’re local to Burlington ON and can make it to my retired product garage sale on Saturday, you can pick up a hard copy while you shop the deals at my Rubber Garage Sale! RSVP for directions/parking instructions and to ensure there’s a copy set aside for you. If you’re not local to Burlington, you can fill out this form and I’ll be in touch to get a copy to you. I’ve also automatically bought enough catalogues to cover anyone who has placed an order with me in the past year, so if I don’t see you Saturday, I’ll be making arrangements to get your copy to you.
PLUS THERE’S AN IN COLO(U)R SPECIAL!
From today until the end of the month, when you purchase a Starter Kit, you get a bonus! The “normal” starter kit includes $165 product of your choice, plus basic business supplies (catalogues, order forms), and a previous Paper Pumpkin kit. During May, you’ll also receive an In Color Bundle that includes the five In Color Ink Pads, Cardstock, Designer Series Paper and Grid Paper so you don’t mess up your work surface (though it’s so pretty you may not want to mess it up either!). It’s a $90 value (so that’s $255 worth of product alone) for $135 CAD. No shipping costs and only Provincial Sales Tax applies. (If you’re in a province that has a blended tax, this means you don’t pay tax on the kit).
I’d love to welcome you to the “Eh” Team, which is my group of demonstrators! You can get more information at yamstamps.com/join. You can also email me with any questions, or to RSVP for my Information Evening, which is happening online via Zoom, Thursday 12 May at 7pm Eastern.
In the meantime, I’ll be prepping for my Rubber Garage Sale. Literally in my garage this year….which in part is because my son has moved home from university and I’ve moved my craft room – so everything is in chaos in our house. Or perhaps I should say “more chaos than usual”. Hope to see you Saturday, or online at the Zoom!
This eye catching angled patterned paper card is easy to make!
angled patterned paper card
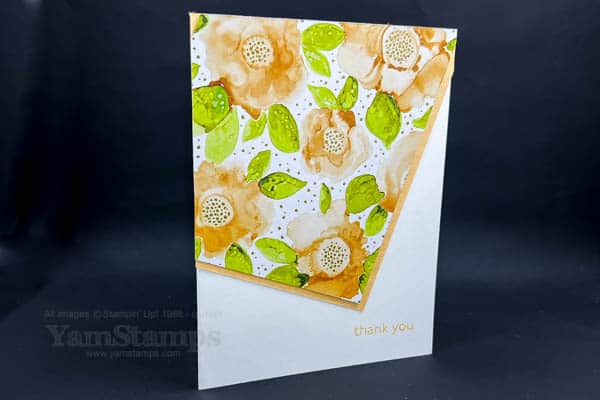
I’m here with another super easy but super effective card. This angled patterned paper card features some pretty standard dimensions but the end result is not standard at all!
In North America, the “typical” card size cardmakers create is 4.25″ x 5.5″ – or half a sheet of 8.5″ x 11″ cardstock folded in half. Easy math for cardmakers – make layers 0.25″ larger/smaller based on your cardfront size if you want it covered. So if you wanted full coverage of the cardfront with your Designer Series Paper (“DSP”) and cardstock backing, your sizes are 4″ x 5.25″ for the cardstock backing, and 3.75″ x 5″ for the Designer Series Paper.
For this angled patterned paper card, I adhered the Designer Series Paper onto the cardstock backing, leaving an even border around the edges. (or as even as I could manage at this particular time!). I folded the 8.5″ x 5.5″ cardstock in half to create the cardbase, then positioned the DSP layer at an angle I liked, making sure the top corner of the card was covered, and stuck it in place. I flipped the card over and then trimmed off the excess DSP/cardstock layer so it was even with the cardfront. That’s it!
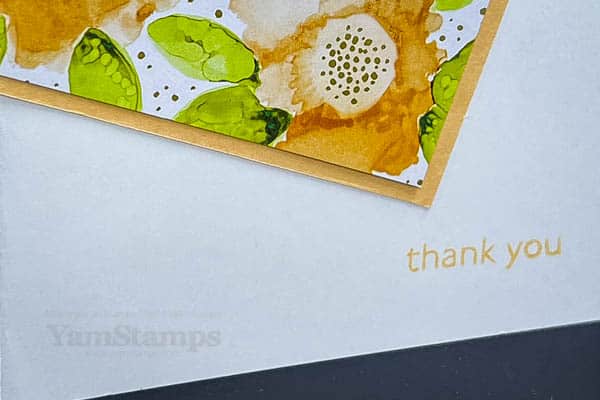
One note (aka “learn from my mistakes”) – you may want to shift your DSP layer so that it’s just the DSP layer showing at the top corner. My sample has a bit of the layering cardstock showing. Not the end of the world, but something to think about. (and now you’ve all scrolled back up to look at the picture, haven’t you….)
I used the retiring and no longer available Expressions in Ink Specialty Designer Series Paper. When Stampin’ Up! labels a DSP as “specialty” it’s because there’s usually some extra feature to the designs – in this case, it was metallic foiled elements (the dots are all gold foil). I used Pale Papaya Cardstock for the backing layer since it’s one of the colours used in the pattern. It’s also a retiring In Colour, so it will be gone as of the end of day Monday!
angled patterned paper card close up
I love that with the patterned paper taking centre stage, you can just add a sentiment and the card is done! I used Pale Papaya ink and the Art Gallery stamp set sentiment to give a clean and simple finish to the card.
Don’t forget that Monday 2 May is the last day for sales from the current 2021-2022 Annual Catalogue. Starting Tuesday, you’ll be able to shop from the 2022-2023 Annual Catalogue!Be sure to check YamStamps.com for links to the online version of the catalogue. Hard copy catalogues are en route to those who have shopped with me in the past year or waiting for pick up at my Rubber Garage Sale on Saturday 7 May!RSVP for directions and parking instructions if you’re able to come by the sale on Saturday from 9-11 in Burlington ON! Cash sales preferred, but etransfer/debit/credit card purchases also available. Hope to see you soon!
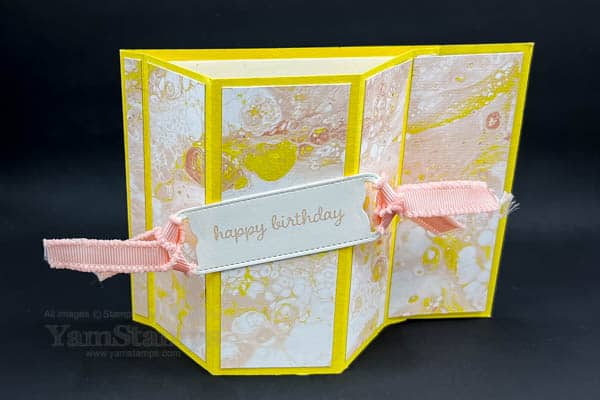
This fun fold bay window card fits in a standard Medium Stampin’ Up! envelope!
Bay Window Card
This is the challenging time of the year for a Stampin’ Up! Demonstrator….the new catalogue is just around the corner, there’s lots of retiring products and things are selling out one by one…which means sometimes our project posts that have been prepared in advance feature now unavailable product – and that just feels mean to show off some of them now! The main featured products for this card are still available (at time of writing…). Your fastest way to check if something is still available is to go to the YamStamps Online Stampin’ Up! Canada store (shortcut is https://yamstamps.com/shop) – all available products will show in the store. You can place your order online there, or if you’d prefer to pay by etransfer or want assistance placing your order, you can email me.
This fun fold bay window card is a standard sized card, but with a few extra score lines to create a popped out area. The card easily stands on its own, but mails in a regular sized medium Stampin’ Up! envelope, which honestly, is a key point for me.
The base is a 4.25″ x 11″ piece of cardstock scored at 3/8″, 1-7/8″, 3-5/8″, 5-1/8″, 5-1/2″, and then I just cut a 6″ wide piece of Designer Series Paper to 1/8″ narrower than my scored areas. The “leftover” piece was used for the anchor piece on the inside of the card for the final tab to slide under to keep the cardfront in the bay window position.
Can you tell what Designer Series Paper I used for this bay window card? Hard to believe, maybe, but it’s the Waves of the Ocean! It’s not just blue themed patterns! The die cut label for the sentiment is from the Waves Dies. The Waves Dies and the coordinating Waves of Inspiration stamp set (and discounted bundle) will be available in the next Annual Catalogue that starts Tuesday 3 May 2022 – but the Waves of the Ocean Designer Series Paper will NOT be there – so you’ll want to purchase that by Monday 2 May 2022 if you need it in your stash! (or before then, because there’s that pesky “while supplies last” clause).
We created this bay window card in Stampers Club this month – if you’re interested in regular craft nights, consider joining us! We are meeting virtually right now – so you don’t need to be close to Burlington ON to join in (though you do need to be within Canada). We meet once a month (typically the third Monday of each month, though it may occasionally change depending on stat holidays and club consensus). You can see more information about Club (and other events in my business) on the YamStamps Events Page, or you can always message me if you have any questions.
In the meantime, happy crafting and don’t miss out on those retiring products!
I love clean and simple type cards and this layered monochromatic card fits the bill!
One Colour Card with Dimension
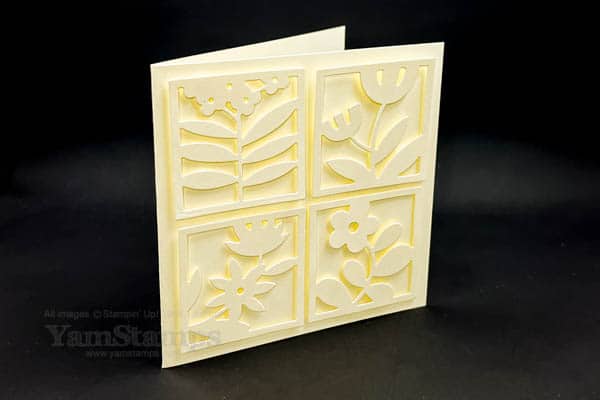
Easy and effective paper crafting is my motto – and this card fits the bill. This layered monochromatic card is not difficult to make, and by using Stampin’ Dimensionals to lift the die cuts on the cardfront, it creates a really stunning effect I think!
This card features the Floral Squares Dies – which are sadly already sold out, but I couldn’t resist sharing this design with you. If you missed out on these dies, try it with dies that you have in your craft room (I’m sure you have some….). Stampin’ Up! has a number of ways to help you “elevate” your paper crafting: Stampin’ Dimensionals, Mini Stampin’ Dimensionals, (both available in the Black Stampin’ Dimensionals Combo Pack for your darker coloured projects), Foam Adhesive Sheets(great for putting on cardstock before you die cut) and Foam Strips – great for shaker cards or along thin edges like the frames of these die cuts. Any of these items can help you to create your own layered monochromatic card easily!
My go to product to pop up anything on my projects tends to be the Stampin’ Dimensionals. Using Foam Adhesive Sheets is fantastic when I know I’m going to want to pop up a die cut…but I don’t always know this when I’m designing on the fly! My thrifty tip for Dimensionals – after using up all the hexagons from the sheet, there’s a frame around the outside that’s left over – use your scissors to snip that up for more Dimensionals – though they’re not as pretty, they’re still functional! (Besides, who is going to see the underside of those popped up images?!).
Tomorrow is the day for the next YamStamps newsletter – subscribers will get to see what exclusive project I have in store for them when it goes out around 1pm Eastern. Are you signed up? Use the box here on the YamStamps site or click here to register – you’ll get access to an exclusive video tutorial as well!