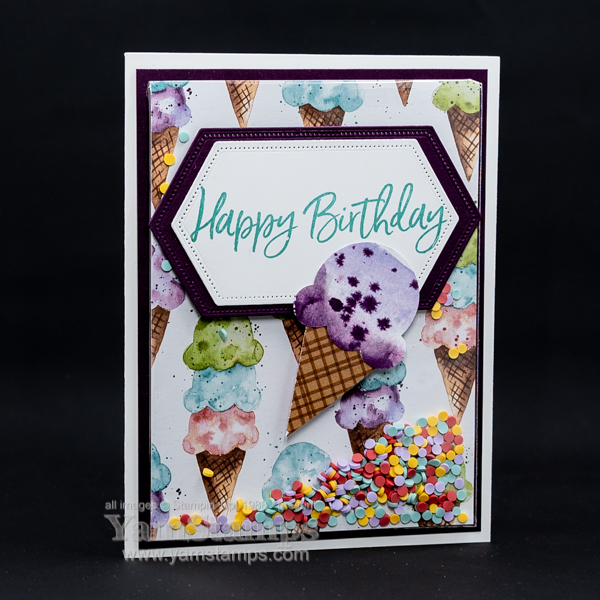
I do like crafting, but I don’t like crafting that’s too complicated or overly messy…LOL. Here’s a take on a shaker card that doesn’t have to deal with window sheets or foam tape. “Shaker card – but make it easy”
Easy Shaker Card
This card uses products from the Ice Cream Corner Suite in the January-June 2021 Mini Catalogue. I love how Stampin’ Up! gives the “easy” button for coordinating products – one item code gets you all the items in the suite. For this card, I used the Ice Cream Corner Designer Series Paper, the Ice Cream Corner Sprinkles embellishments, the Ice Cream Corner Builder Punch and the Sweet Ice Cream Stamp Set. The punch and stamp set are available together in a discounted bundle. I also used the Stitched Nested Labels Dies, which are retiring from the Annual Catalogue, so only available while supplies last/until May 3. (Bonus: they’re sale priced right now). I will also give the heads up warning that the punch and sprinkles are showing as low inventory right now, so may go on back order/unorderable status.
I had an easy shaker card tutorial in a past weekly email newsletter (get on my mailing list so you don’t miss future installments), but essentially you use Stampin’ Up!’s medium clear envelopes and insert everything inside and seal around the Designer Series Paper. The sentiment and the punch art ice cream cone are actually on the front of the sealed envelope (not inside). Easy peasy. The colour coordinating products make it seamless too!
Stampers Club members made this in a previous month’s class. Right now, the club class focuses on techniques and fun folds that aren’t heavily stamp/ink based, since we aren’t meeting in person. I can prep the projects and send out supplies ahead of time, and then we create them together. (Stampin’ Up! regulations prohibit us from pre-stamping items as part of class materials). It’s definitely keeping my brain working! If you’d like to join us, new members can start their 6 month membership at any time. You can contact me for more information. At this point in time, we will be continuing online (via Zoom), and likely will be doing so for the rest of 2021. I think even when we do get back to in person classes, I may still offer the online version as well if there’s demand for it!
In the meantime, we continue the countdown to the new Stampin’ Up! 2021-2022 Annual Catalogue product launch on May 4th! It seems like the catalogues are starting to arrive in mailboxes – so I’ll be following up with those on my list to make sure everything arrived safe and sound. Don’t forget that retiring 2020-2021 Annual Catalogue products are only available while supplies last/May 3 2021 – whichever comes first. Online shopping shortcut is yamstamps.com/shop or email me for assistance placing an order!
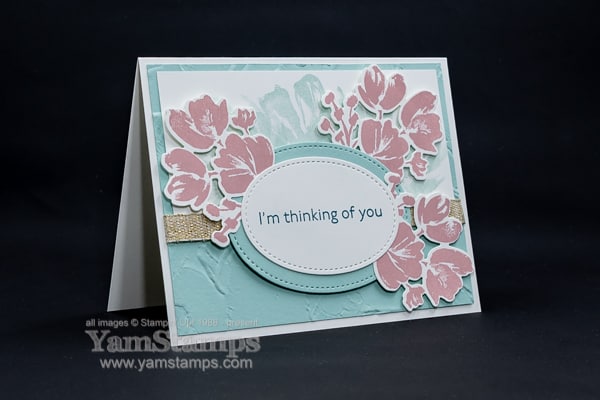
Can I say that this “Thinking of You Card” goes out to everyone who stops by here? Especially since there’s been a bit of radio silence here on YamStamps.com for a little bit. Apologies, but know that I truly was thinking of you all, and I’m working on getting more consistent here. (I’ve been really good with my email newsletters <shameless plug – sign up here>, so there’s that, I suppose….)
Thinking of You Card
Working in Ontario home healthcare is my main occupation, though I reduced the days I work a number of years ago, in an effort to keep a bit of a balance in my life. Obviously for the past year like everyone else, I’ve been dealing with the COVID situation, and truthfully, I’m finding that my energy lags a bit and that also affects my creative mojo at times. This past weekend was a bit of a boost to me though, so I’m thankful for that.
On Saturday, I participated in Stampin’ Up!’s On Tour Demonstrator event. Originally designed to be a small event held in various locations around the Stampin’ Up! world, it was moved to an online format, but still had designated “locations”. Demonstrators could register for an event close to their geographic location so it was possible to meet up with other demos in your area (roughly). We watched presentations featuring product from the upcoming new Annual Catalogue and chatted with other demos in our breakout rooms – I realized that one of my favourite thing about demo events is meeting up with my demo friends – old and new. It was a boost to my spirits for sure. Can’t wait until we can meet up in person again!!!
So – back to the Thinking of You card…the Stitched Shapes Dies are on the Retiring List so are available while supplies last. They’re one of my favourite sets of dies because of the variety of shapes and the layering-ability. I combined them with the Art Gallery Bundle (which includes the Art Gallery Stamp Set and coordinating Floral Gallery Dies), the Painted Texture 3D Embossing Folder and the Fine Art Ribbon. All those items are from the January-June 2021 Mini Catalogue, so we have a bit more time before we have to worry about what’s retiring from that catalogue LOL.
Tonight I’ll be meeting online with my Stampers Club members and later this week with my “Eh” Team demonstrator group, so I’m looking forward to those events, which always give me a boost. Another <shameless plug> – if you’re interested in joining either of these groups, please click on the links or message me for more information!
I’ve made this pleated paper card in the past and pulled out this design again to revisit the technique! It’s a great way to show off Stampin’ Up!’s two sided patterned Designer Series Paper.
Pleated Paper Card
As usual, I picked the colours for my cardstocks and inks from the Designer Series Paper colours. In this case, I used the retiring Peony Garden Designer Series Paper so used Petal Pink and Grey Granite, since those are the colours in the paper design I used. I added a stitched oval from the retiring Stitched Shapes dies (insert my stifled sob here) and a sentiment and images from the Free as a Bird stamp set. To keep the background from being too plain, I embossed the strip at the top of the pleated paper with the Ornate Floral 3D Embossing Folder.
pleated paper card – closeup
We did this card in Stampers Club, and I am mean enough to make everyone score and cut their own paper! I sent the original 3-1/2″ x 9″ strip and then together during the Zoom class we all scored the intervals, cut the paper on an angle and folded. I figure by having to do that part of the card (rather than me having done it ahead of time for all), each class member will have a good chance of being able to make one again in the future (and having access to the recording of our Zoom session should also help?). Essentially there’s a 1-1/4″ wide section alternating with a narrower section of 1/2″, repeated until the end of the paper, and then accordian fold.
pleated paper card
I am looking forward to making another pleated paper card (or two, or three) in the near future – in part, to use up my Designer Series Paper stash, and also to show off some new papers too! Stampin’ Up! Demonstrators get to preorder selected items from the new Annual Catalogue starting tomorrow, April 1st (no fooling!!). Did you know that if you purchase a starter kit in April you can also select preorder items for your product choices? Please message me or leave a comment below if you have questions about becoming a demonstrator with my team, or if you need assistance placing the starter kit order. I’d love for you to join our group of demos!
Available while supplies last. Stampin’ Up! has let us know that they will guarantee STAMP availability until April 23, otherwise everything is available while supplies last or May 3 (end of the catalogue sales period). Selected items are also available at a discount.
You can go to yamstamps.com/shop to order products and have them delivered to you in Canada, or you can message me with your order if you would like assistance placing it, or would like to pay by etransfer.
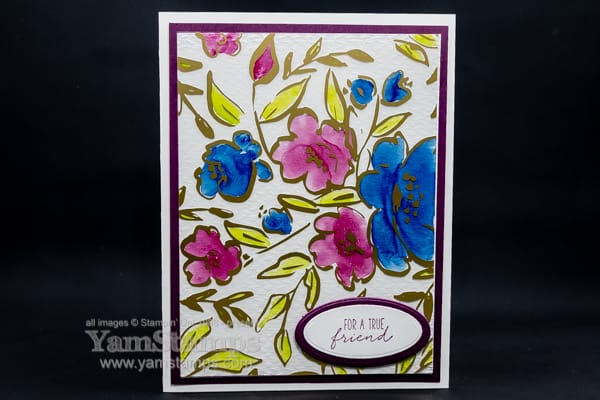
I love how quickly this easy and elegant card came together. It’s another one of those “looks like it’s more difficult than it actually is” type of techniques – aka my kind of technique!
Easy and Elegant Card
This card uses the Golden Garden Designer Specialty Acetate, which is available in the January-June 2021 Mini Catalogue. Trust me when I say the hardest part of this card is peeling off the layer of protective plastic from the back of the acetate. I actually thought that maybe these sheets didn’t have that layer because I couldn’t seem to catch the edge of it…but trust me, it’s there. And trust me, you need to take that layer off for this technique to work well.
Anyhow! Once I was able to peel of the plastic…..I simply added colour with my Stampin’ Blends alcohol based markers on the back of the acetate. I used Night of Navy, Rich Razzleberry and Granny Apple Green, and I actually only used one of the shades – I didn’t do any shading/blending. The variation in the colours that you see is just from the way I coloured and the way that the ink collected on the acetate and I love the effect!
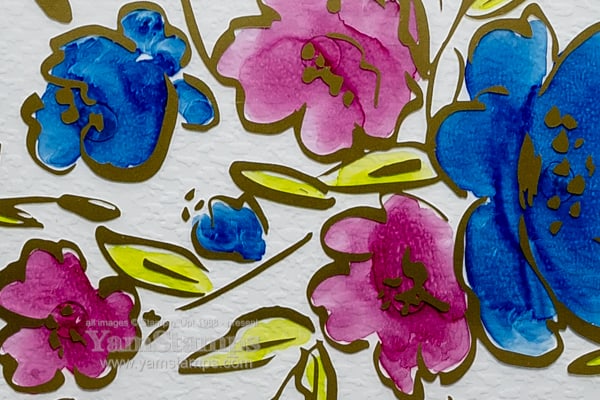
Easy and Elegant Card close up
You can see that the colouring doesn’t have to be super precise! I’m not sure that it shows very well, but the background paper has been embossed with the Tasteful Textile 3D Embossing Folder, just to add a little texture without distracting too much from the main image.
On the close up of my easy and elegant card, you may be able to pick out the Mini Glue Dots that I used to attach the acetate to the cardfront – I placed them in the centre of the flowers, because I figured even if they showed a bit, they just make the centres more distinctive.
If you’d like more ideas directly into your email inbox, please be sure to be signed up for the YamStamps email newsletters. You’ll get access to a video tutorial when you first sign up, and then every week you’ll get an email from me with paper crafting ideas, inspiration and tutorials.
I’ve spent the weekend in a virtual crafting session and it’s been so fun! In all honesty, I haven’t actually completed many of the projects, but it’s been great to watch the classes and get inspired. It’s also given me a bit of a kick in the pants to get working harder on -my- next online class offering! I think I actually prefer the online versions to the in person versions as a student….because there’s no rushing to get anywhere….and I can stay in my comfy clothes (which may or may not be my pyjamas…). Have you ever participated in an online class or retreat? I’ll be sure to let mailing list subscribers know when I’m ready to launch my next online class. Don’t forget that commenters have the opportunity to help me clear out my collection of sample cards! I’m randomly selecting a few commenters and sending some happy mail their way.