See the painfully slow progress as I am organizing my craft room!
My son has recently returned home after finishing university (what? how fast was that?!) and we have switched out his bedroom and my craft room….so I’m in the process of organizing my craft room. Well, to be truthful, I’m still in the process of unpacking and placing, so I’m trying to organize at the same time – so it’s painfully slow. (Plus I’m still running my Stampers Club, making projects and shooting videos and photos for classes and social media, so you can imagine how efficient I am right now….LOL).
My new craft room is smaller than my old one (don’t judge me, I delusionally thought that he wouldn’t be living at home full time again), so I’m also downsizing. My retired product garage sale a while back did help to free up some space, but there’s still so much stuff!
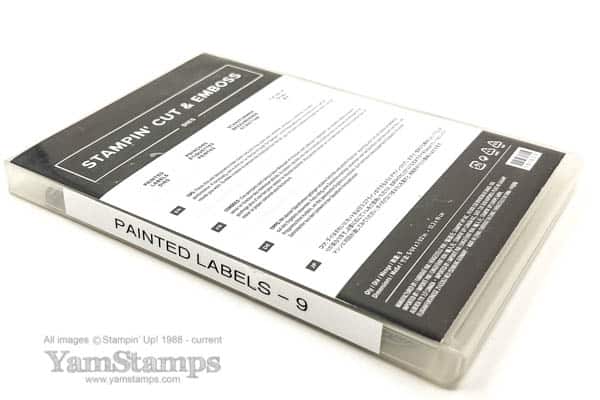
Organizing my craft room – old way of storing dies
I used to store my dies in stamp cases, with magnetic sheets inside, which is fine if you’ve got room. I’m a visual person, so I need to see what is there (and there’s no way I’m relying on my memory these days LOL!)
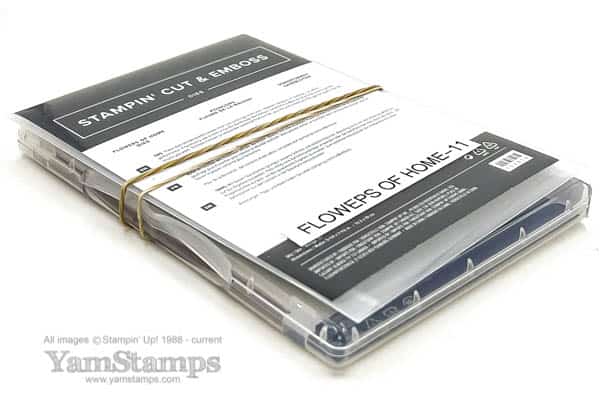
Organizing my craft room – storing dies now – ignore the typo on my label
For now, I’ve gone back to leaving them in their plastic sleeves; I add in a magnetic sheet if I have one, or if there was one in the case in which it used to be stored. I’m also using a rubber band to keep the stamp set and coordinating dies together (which also helps when I’m getting prepped for retired product sales, so I know what was bundled together!). I also use the labels to show the name of the dies in large print (because my eyes are not what they used to be), and how many dies are in the set (because I tend to take them out and leave them around).
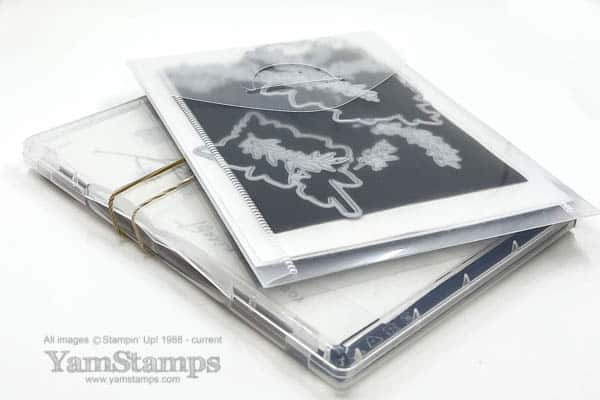
Organizing my craft room – dies with magnetic sheet
This process has just begun, and since it’s a “working craft room”, it means that sometimes organizing my craft room is the last thing on the priority list… I do have some time off from my “other” job so I am hoping to get a bit more organizing done.
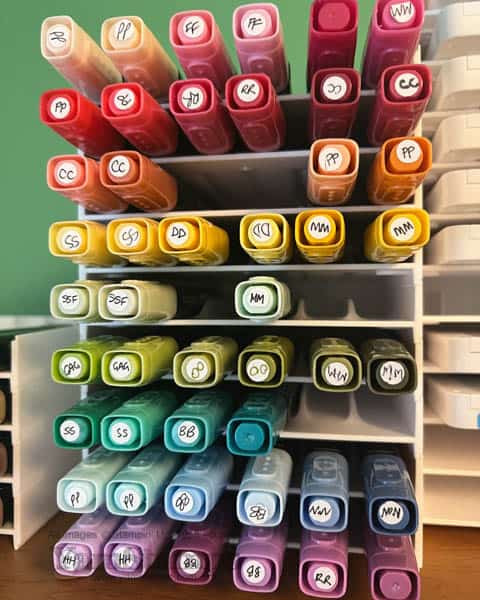
I recently finished the videos and projects for my Stampin’ Blends 101 Online Class so when I was putting my Blends markers away in the Blends Storage trays, I thought I would change how I stored them. I am a “Sort by Stampin’ Up! Colour Family and in Alphabetical Order” kind of girl, because I usually search for things by their name. For example, if I’m trying to coordinate ink/cardstock with a Designer Series Paper, I check which colours are used in the DSP (it’s on the backing sheet) and then I go grab those colours. For the Stampin’ Blends, when I’m colouring an image I often find I choose based on hue vs specific colours – “I need a green” vs “I need Old Olive” for example. So…..
Organizing My Craft Room – Stampin’ Blends
I was so brave and did the ROYGBV thing! OK, OK, you’re probably thinking “what’s brave about that?” but for me, this is stretching the boundaries a bit. You can see my little labels on the caps (because I still need to know what colour it is LOL). I did have them originally sorted by Stampin’ Up! Colour Family and in Alpha Order (because I’m me…), but I actually found that putting them away took longer because I had to read the label, remember what Colour Family they were in, and then put them in the right spot alphabetically. (and then I would often wonder if I was putting them in the right spot and had to move them around). Sometimes being slightly obsessive about these things is not good….LOL. So rainbow order it is for now! I also tried to go paler shades to darker shades….
Have any good organizing tricks? Throw them my way! Perhaps at some point in time I’ll have the craft room organized (and cleaned) enough to do a room tour. Don’t hold your breath, though, that’s going to take a while!!! I think the Blends are the best organized thing in the room so far LOL.
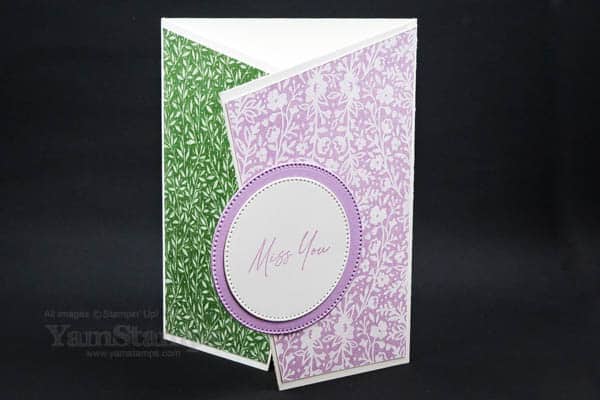
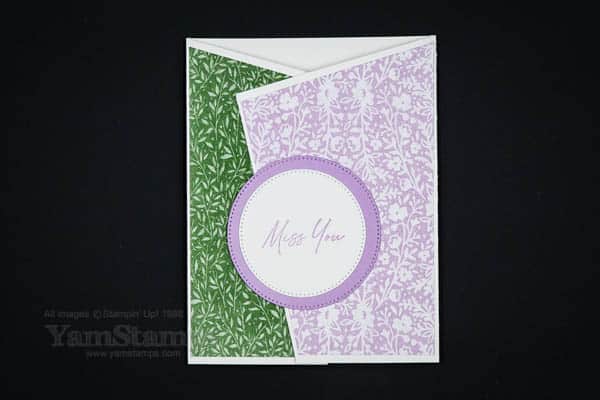
This eye catching angled fun fold card is easy to make!
angled fun fold card – slightly open angle
Another in my quest for eye catching, “different” card designs that aren’t overly tricky to make – the angled fun fold card! This is like a “gatefold card”, where the two ends of the card are folded towards the centre. In this case, the flaps overlap, and you just trim the top and front edge at an angle (and it’s the same on both sides) to create this look.
For this angled fun fold card, start with a 5.5″ x 11″ piece of cardstock. Score at 3-3/8″ and 7-5/8″ to create the gatefold design. Mark 1″ down from the top on the front/long edge of each flap, and 1″ in from the edge along the bottom/short edge of each flap. Cut from the top of the score line to the first mark, and then cut from the first mark to the mark along the bottom of the flap to create the angle. That’s it!
I used the Heart & Home Designer Series Paper from the January-June 2022 Mini Catalogue (retiring soon and on sale right now!). I cut two pieces from the same paper to 3-1/4″ x 5-1/4″. I stacked the papers so that the designs that I wanted to show on the front of the card were facing each other on the inside, then I cut them the same way that I cut the edge of the card – from the corner, to 1″ along the long edge, and then from that spot to 1″ in along the bottom edge.
angled fun fold card (closed flat)
To finish off the card, I added some circles from the Stylish Shapes Dies – my new “go to” dies. The sentiment is from Honeybee Home, which is part of the Heart & Home Suite with the Heart & Home Designer Series Paper.
This was another of the Stampers Club Cards in May. We’re getting set for another session of Stampers Club this month and looking forward to welcoming new members starting in June. The good thing about virtual Stampers Club is that when people can’t make the live Zoom meeting, it’s recorded and uploaded to a members only site. I know that many members actually prefer to go through the card construction with the recording and use the “live” time to watch and chat with other members. You can find more information about Stampers Club on the YamStamps Events Page.
Another option, if you want a “one off” for card classes, is to check out my online classes. They are all “stand alone” classes – so you can purchase whatever one suits your crafting needs. Once you’ve purchased a class, you’ll have lifetime access – so you can definitely take your time going through the step-by-step videos!
In the meantime – give this angled fun fold card a try! It’s a great design to have in your crafting repertoire!
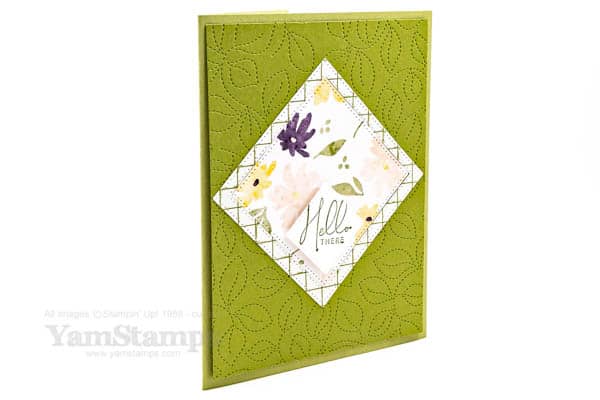
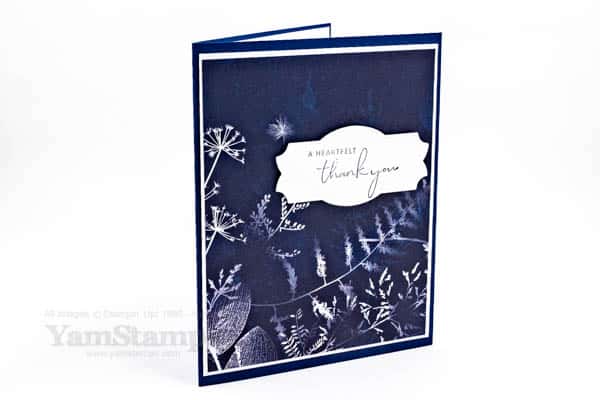
This easy Hello There Floral Card is perfect for brightening someone’s day
Hello There Floral Card
I love the new Stylish Shapes Dies that are in the Stampin’ Up! Canada 2022-2023 Annual Catalogue, and we used them to create a fun frame effect on this Hello There Floral Card that we made in Stampers Club in May.
Frugal Friday Tip….the frame and main image are the reverse sides of the same piece of Designer Series Paper! I die cut the largest square with the lattice design up. I then flipped that square over so the floral side was up, and then die cut the next smaller square. The die has a stitched edge on it, so I wanted the main stitched area to be the “right way” (indented) on the floral piece. It’s reverse on the inner edge of the lattice patterned frame, but I don’t mind that as much. This paper is the Design a Daydream Designer Series Paper – and it’s a huge package of 48 sheets which you can only select with your Stampin’ Rewards. You earn Stampin’ Rewards when you place a single order with product of $200 or more – this could be a workshop order where many people place orders at one time (like for my Stampers Club), a single person order, or in my case, a single Demonstrator order…LOL.
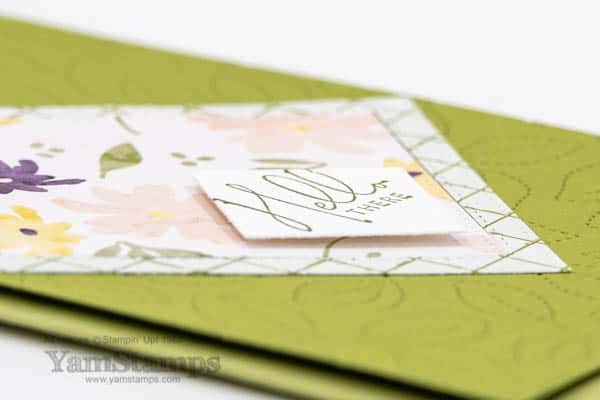
Hello There Floral Card Closeup
I thought I’d tie in the stitched theme on my Hello There floral card by using the Stitched Greenery Die on the background. This is one of my favourite dies because it adds texture and interest but doesn’t take away from the main focal element! I stamped the sentiment from the Nature’s Prints stamp set on a small square and then adhered it at the same angle with some Stampin’ Dimensionals to give it some lift.
If you’d like to join our Stampers Club, our next get together will be Monday 13 June. We continue to meet virtually at this time via Zoom. The one good thing about meeting by Zoom is that we can record the sessions and members have ongoing access to the recordings in our Members Only site. The other good thing is that if you don’t live close to Burlington Ontario, you can still join, since all I have to do is mail your class packet to you, and you can join us virtually too! Contact me if you’d like to join us for a 6 month membership. You can get more information on the YamStamps event page, or you can message me if you have any questions.We’d love to have you join us!
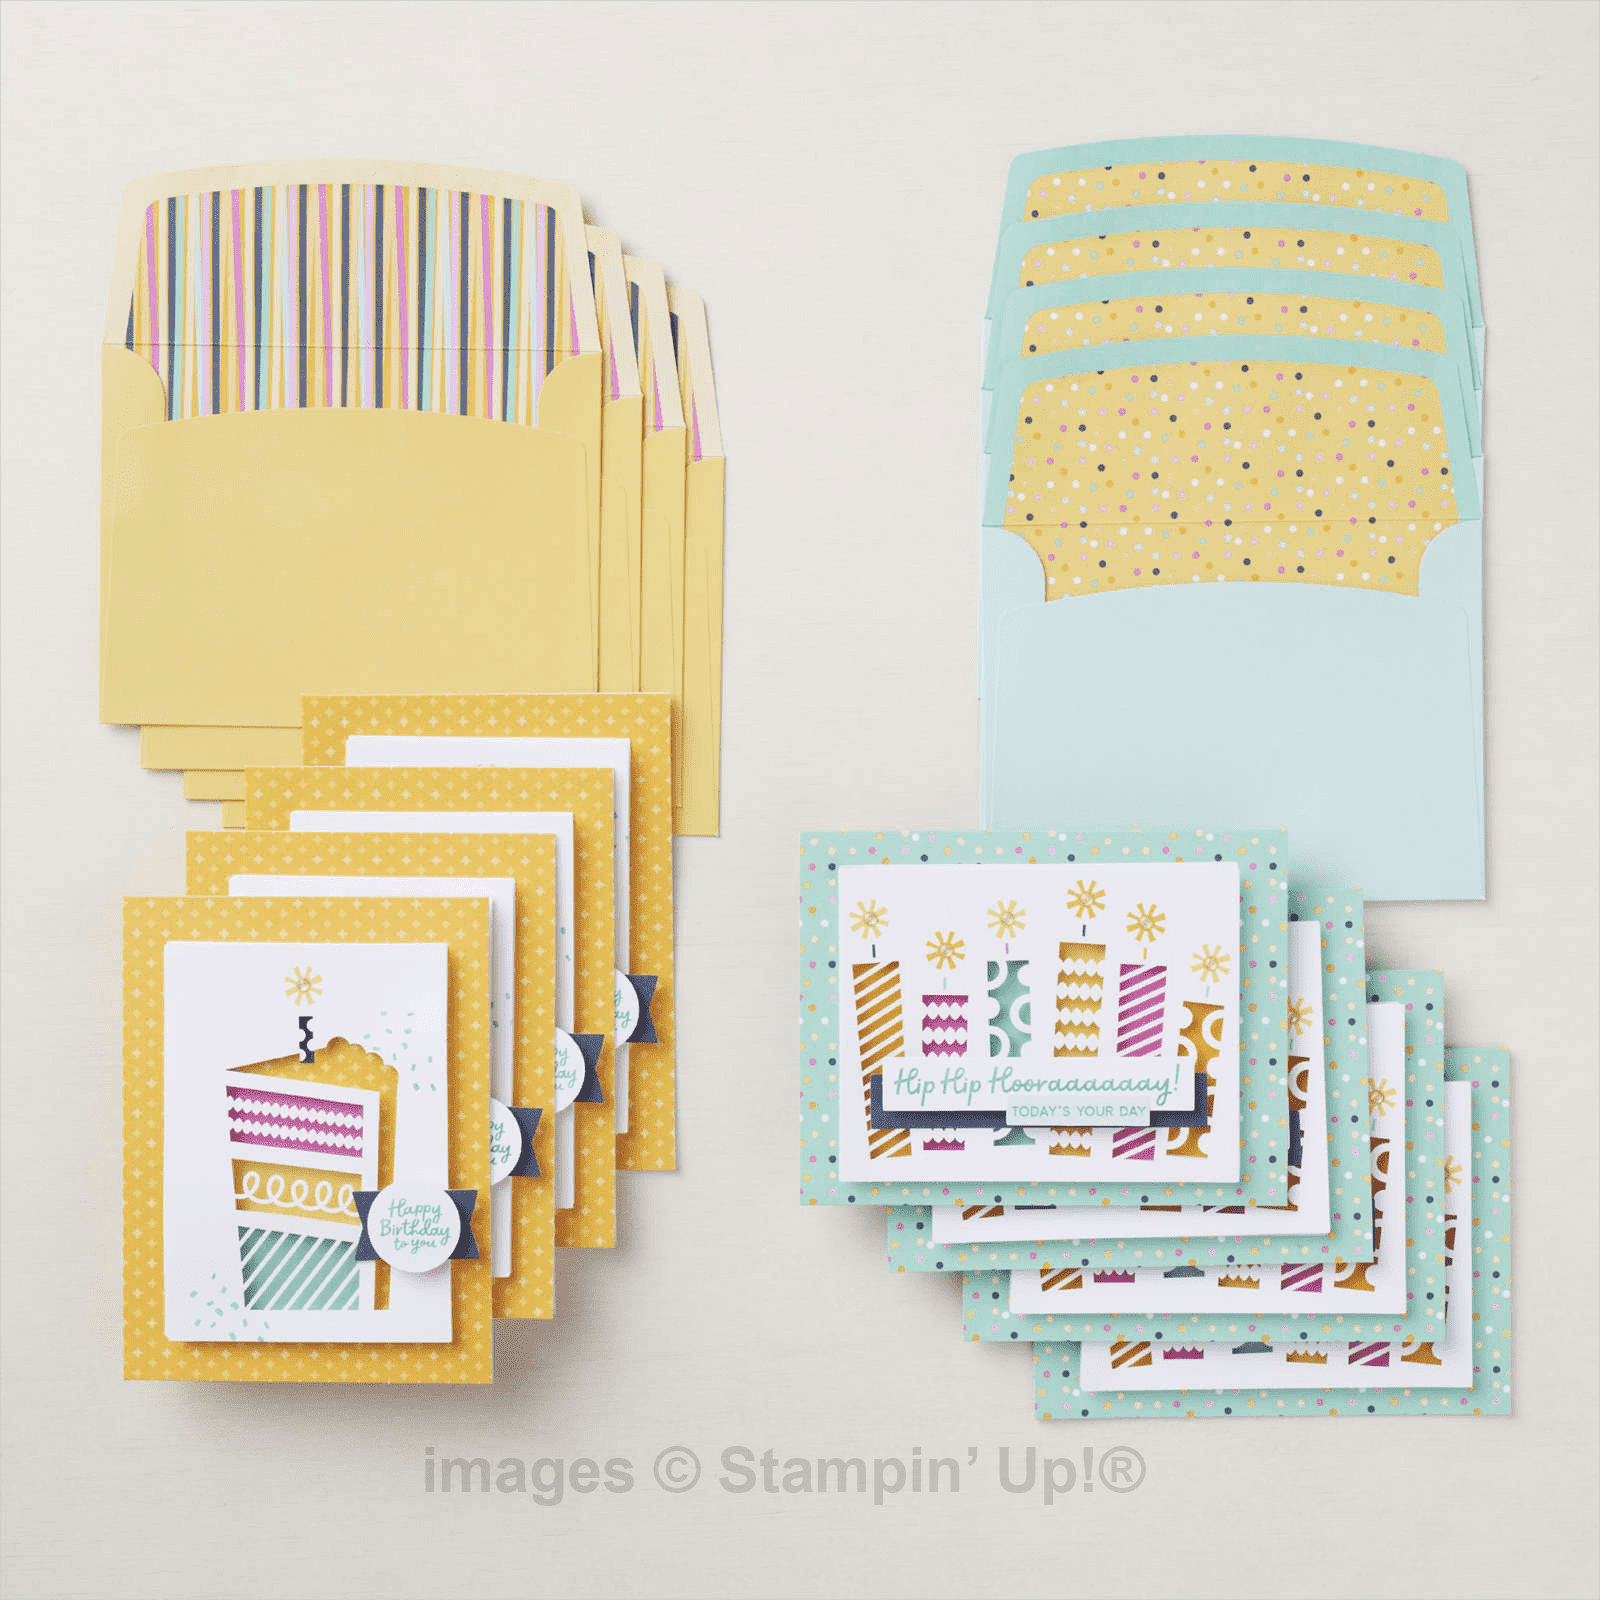
Light the Candles has been one of the most popular items in the Kits Collection by Stampin’ Up! – and you can get it for 50% off during June!
Light the Candles Kit
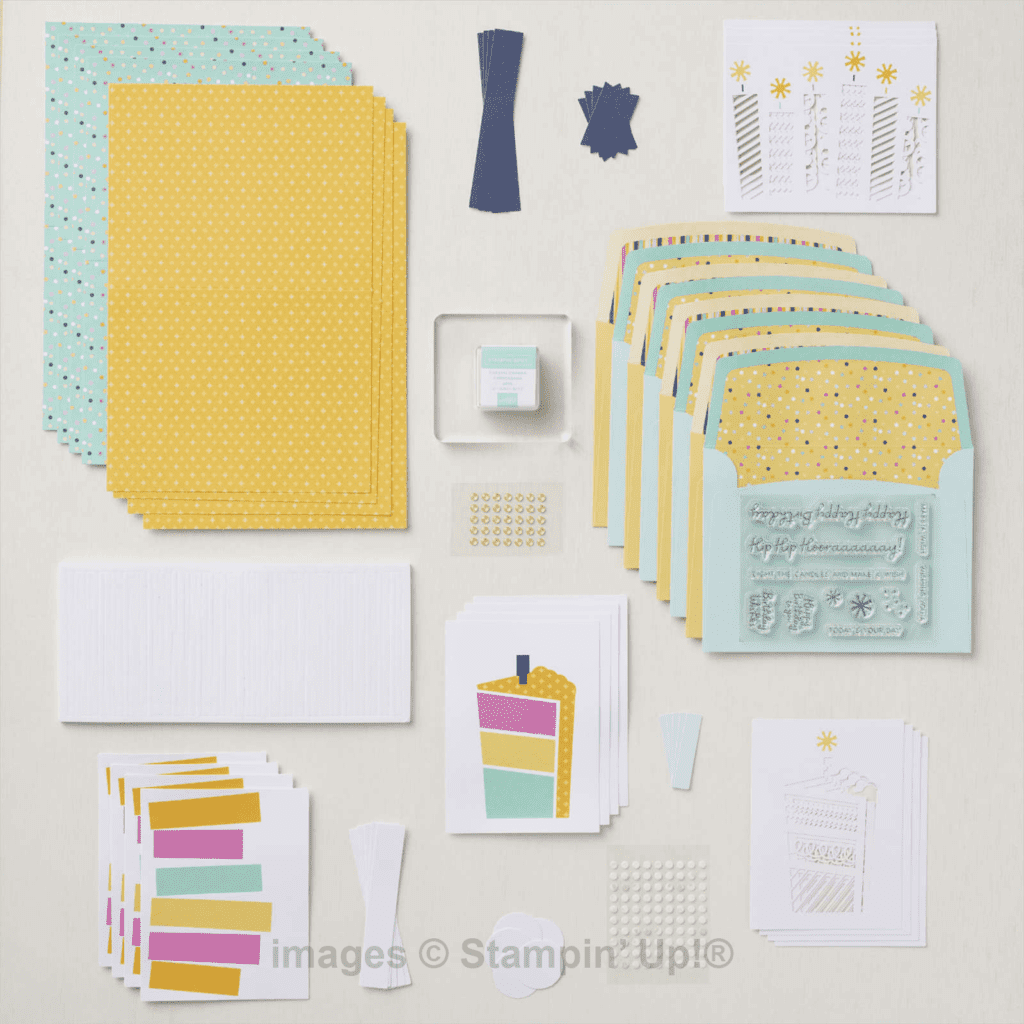
The Light the Candles Kit is back in stock and just in time! Starting today and running until the end of June – Buy One, Get One Half Price on the Kits Collection by Stampin’ Up!The Kits Collection refers to a number of project based kits that are available while supplies last. Often kits will sell out, and then re-appear later on – as is the case with the Light the Candles Kit. That being said, there is no guarantee that they will always come back! The kits contain supplies to create the projects – but you can use your imagination and come up with your own variations! They will often – but not always – include ink spots and adhesive, too. You just need to read the description of the kit to know what’s included.
Who are these kits for?
Anyone who likes to craft! Seriously! It’s great for beginners because most of the supplies are prepped and ready to go. It’s great for experienced crafters because it’s a compact crafting set that you can take with you anywhere. It’s great for when you want to create, but don’t have the energy to come up with a design on your own. It’s great for when you want to come up with your own designs, because it gives you a “jumping off” point. It’s great for crafters with limited space for lots of supplies – it fits in one box!
Stampin’ Up!’s Light the Candles Kit Contents
The BOGO sale is perfect if you have a friend or family member that you’d like to craft with. You could each get whatever kit interested you and then enjoy each other’s company while you work on your own kits. This is a great sale as well to have some kits on hand for the upcoming summer holidays, when you hear the “I’m BOOOOOORED” call, or want some time out of the sun and away from screens for a little while.
The shortcut to all the Kits Collection in the YamStamps Online Stampin’ Up! Canada store is yamstamps.com/kits. When you shop the online store and add two kits to your shopping cart, the more expensive one is automatically calculated at a 50% discount. There’s no limit to how many kits you purchase! (well, other than your crafting budget limit!). Please note that Paper Pumpkin (another great kit offering from Stampin’ Up!) is NOT part of this promotion. Shortcut to shopping is yamstamps.com/shop otherwise. If you would like assistance placing your order, or would like to pay by etransfer, you can message me! Happy BOGO shopping!
The January-June 2022 Mini Catalogue will be retiring 30 June 2022 – and Stampin’ Up!’s Last Chance promotion lets you get some retiring product at a discount STARTING TOMORROW (1 June 2022). There are retiring products on sale for 10%, 30% and 50% off!
Remember that retiring products are available while supplies last or to the end of the catalogue sales period (30 June 2022) – whichever is first.
Shortcut to shopping is https://yamstamps.com/shop or you can message me for assistance placing your order or if you would like to pay by etransfer. SALE STARTS TOMORROW!
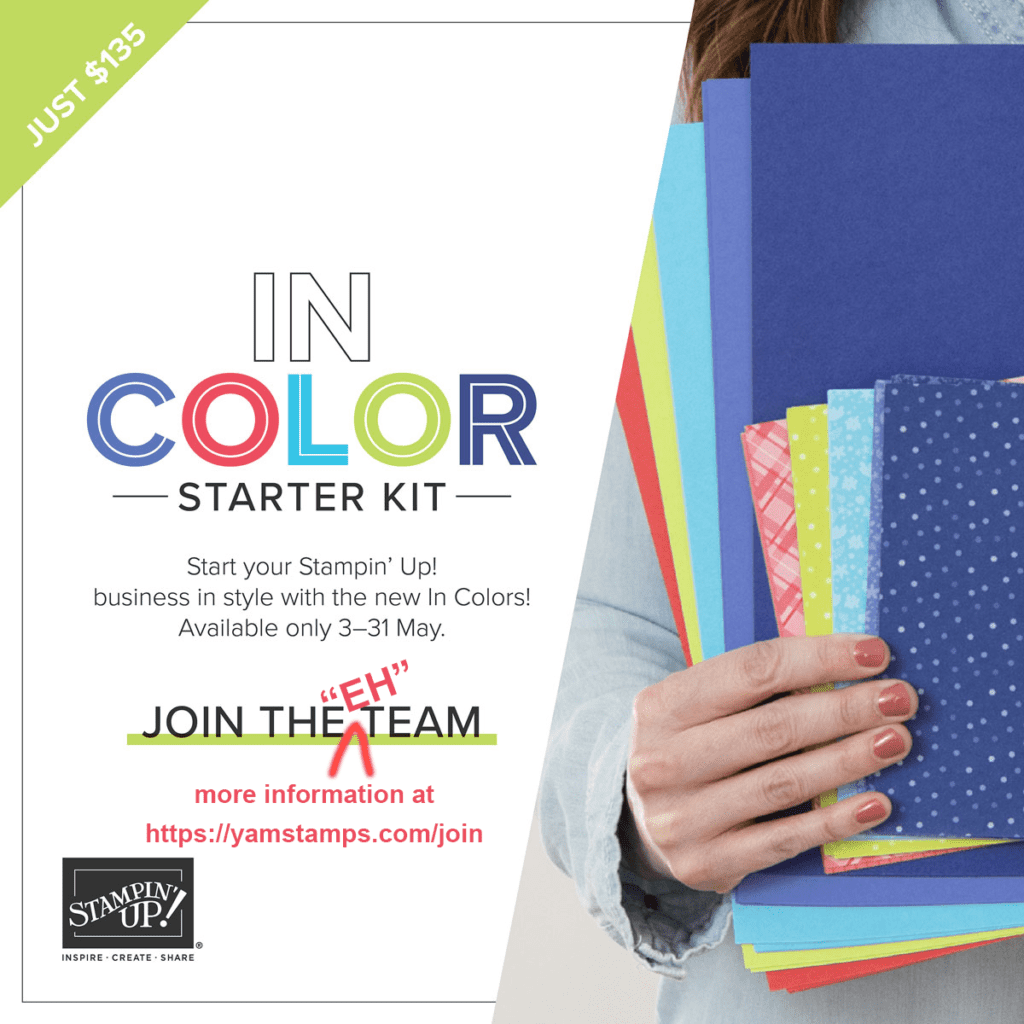
This starter kit promotion ends on 31 May 2022 (Tuesday).
For $135, you’ll be able to select $165 worth of product of your choice, plus a past Paper Pumpkin kit and basic business supplies (the usual great starter kit deal). Until 31 May, you’ll ALSO receive a free set of In Color Ink Pads, a package of the Assorted In Color Cardstock, Designer Series Paper and Grid Paper! That’s over $90 of additional product for free! Start your business with a bang!
I did a film photography class years ago, and one of the things we did was to make sun prints like this when we were learning to develop our photos. I have no idea where those prints are now….but I don’t need to worry because Stampin’ Up! created this gorgeous paper. I know that many times they use actual art work to create the images for the sheets (painted canvas, acrylic pours etc) so I wouldn’t be surprised if that was the case here as well.
If you like getting a regular dose of crafting inspiration and information, be sure to be signed up for the YamStamps newsletter! Each week brings something new and exclusive to your inbox. The projects and tutorials I share in the newsletter don’t appear elsewhere on my social media, so you’ll need to be subscribed to get them! Use the boxes on the YamStamps site or click here! The big monthly newsletter is going out on Tuesday 31 May (since I can’t wait until the first Tuesday in June – close enough, right?!). Sign up before 1pm Eastern so you don’t miss out!
I did an unboxing video where I was as surprised as anyone watching…
Please tell me I’m not the only one – you know when you have those moments that you walk into a room and can’t remember why you are there…and you only remember when you leave that room?! Anyway, I filmed an Unboxing Video when my first order from the 2022-2023 Stampin’ Up! Canada Annual Catalogue arrived. I knew I’d liked everything that I’d ordered, I just couldn’t remember what exactly that was, so I was as surprised and excited as everyone else!
Check out the video below. I posted it on the YamStamps Youtube Channel and Facebook Page as well. I was going to try going live, but it’s been a while since I did that, so I thought it would be safer to shoot a video. I’ll figure out the live stuff again later…
Unboxing Video
I have already used a bunch of items from this order – including the Masking Paper which I was most excited to try!
Don’t forget that during May, when you purchase a Demonstrator Starter kit, you get a bonus! As usual, you’ll get to select $165 worth of product for $135, get a free past Paper Pumpkin Kit and get all the basic business supplies you’ll need to get started. You pay no shipping, and Provincial Sales Tax only (if you’re in a province with blended tax, you pay NO tax at all!). Until 31 May 2022, you’ll also receive an In Colo(u)r Product Bundle worth $95! It includes 5 full sized ink pads; cardstock, Designer Series Paper and special In Colo(u)r Grid Paper! Check out the details on this page. If you want more specifics or have questions, feel free to contact me. I’m happy to chat by email or Zoom or phone – whatever preference you have, and would love to welcome you to my group of demonstrators known as the “Eh” Team!
I hope you liked the Unboxing Video peek into my first catalogue order. What other types of videos do you want to see? Let me know – you can message me or leave a comment below.
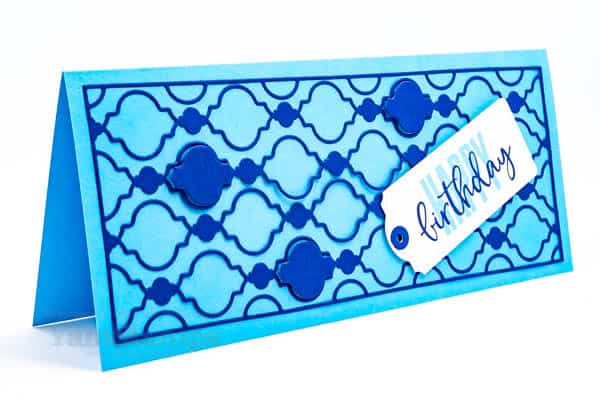
Check out this Slimline Birthday Card with a fun die cut background!
Stampin’ Up! makes it easy to make and send slimline cards – with appropriately sized dies and envelopes!
Slimline Birthday Card
We made this fun slimline birthday card in Stampers Club this month. It features new In Colours and a fun die from the January-June 2022 Mini Catalogue. The cardbase is Tahitian Tide, and the accent die cut is Starry Sky. I used the Slim Card Dies to die cut the Starry Sky cardstock – but not before I added strips of Adhesive Sheets to the back of the cardstock. For this sample (which was my prototype) I just added smaller strips of the sheet at the borders of the die – so you may be able to see that the centre details aren’t totally adhered to the card. When I prepped for club, I put the adhesive all over the back of the cardstock so everything could be totally flat and stuck down. Some of the die cut shapes were added back in place as a design element – Stampin’ Dimensionals help them stand out. This card fits in the Slimline Envelopes from Stampin’ Up! so you don’t have to worry about how to send them!
I decided to make a slimline birthday card, so I made a tag from the Tailor Made Tags. I die cut the reinforcement from one of the shaped discard pieces so that it had adhesive on the back already – which made it easy to adhere in place on the tag. The sentiment is from the Biggest Wish stamp set. I love layering the two fonts on top of each other! I try to stamp the script word in the darker ink (in this case, Starry Sky) so it stands out against the bolder, larger font (stamped in Tahitian Tide).
A tip if you’re planning on recreating the slimline birthday card…I removed adhesive from one portion of the die cut first – along the top edge. I placed the die cut where I wanted it before removing the rest of the liner strips and adhering the rest of the die cut. Since this creates a rather fine/lacy die cut, you just have to watch that it doesn’t get stuck to itself when you’re peeling off the liner.
If you need a regular crafty “fix”, consider joining the Stampers Club! We are meeting virtually each month right now and participants receive their package of supplies for the cards before club so we can craft together. If members can’t make it to the “live” Zoom class, they have access to the recording after the fact in our private membership area, so they can craft at their leisure. See more information here on the YamStamps Event Page, and then contact me to join us! New members can start each month. Our next Club meeting is Monday 13 June at 6:30pm Eastern. Open to anyone across Canada since we are meeting virtually right now!
This card for a dreamer would be a great graduation card!
Card for a Dreamer – like a grad!
This is the Sunday Swap share on the YamStamps Facebook Page – and it’s a card that I made as my contribution. One of the fun things about being a Stampin’ Up! Demonstrator is participating in swaps and other events. A fellow demonstrator organized a card swap – where each person created multiples of the same card and then sent them in – and then a little while later we get back a whole variety of cards – one from each person who participated! It’s a great way to get ideas and see how other demonstrators are using their new product – including product that I may not necessarily own (I know, it’s shocking, but true).
I used a few host only items from the 2022-2023 Annual Catalogue for my card for a dreamer. The paper is from the Design a Daydream Designer Series Paper package, which is 48 sheets of double sided designs (4 each of each design) – it’s twice the amount of the typical Designer Series Paper set! The sentiment is from the Begin with a Dream stamp set, also a host exclusive. I decided to die cut a cloud from the Waves dies and then heat embossed the word dreamer in gold.
For the single word, I used a “template” in my Stamparatus to help me position the cloud perfectly every time. I die cut a cloud from a scrap piece of cardstock, then placed the cardstock with a hole in it in my Stamparatus and held it in place with the magnets. I put a die cut cloud into the cloud hole, and once my stamp was lined up correctly, I just kept an assembly line going!
If I get the chance, I’ll see if I can upload a video of the template system – it’s super easy. Right now, my craft room is in sheer chaos as I’ve downsized my room (since I’m no longer an empty nester…). While I managed to sell a fair bit of retired product at my Rubber Garage Sale last weekend, it still feels like I have a whole lot of stuff around still! I’m trying to purge and organize and place all at the same time, so it’s a little slow going…If you have any organization tips, throw them my way!!
This card for a dreamer has a lovely sentiment that I think is good for graduates – like my son! It’s hard to believe that he’s done four years at university already. He really enjoyed his university experience, and I think he learned a bit along the way too! I think I might use this card for him, but add in “but remember, a dream with a deadline is a goal!”….hahaha!
If you’re interested in benefits of being a Stampin’ Up! Demonstrator with my team, you can check out this information page here (shortcut is yamstamps.com/join), or message me with any questions you might have. It’s a great time to join since there’s a special until the end of May! All Starter Kits include In Colour products (on TOP of the $165 of product that you select). You’ll get the 2022-2023 In Colour Ink Pads, cardstock, Designer Series Paper and grid paper – a $90 value – but only if you purchase your starter kit before the end of May. Once you read the Information Page, you can either message me with any other questions, or just click on the link on that page to start picking your starter kit items!