Don’t know if you saw – but I edited my “Hey Cupcake” blog post – because the very resourceful Linda Snyder did some research for me! She had the smarts to track down Megan Munro (who very kindly responded) and find out that the dotted background was created using the Wood Words stamp set (you can see it here in red rubber clear mount or wood mount options).
Thank you, Linda! (and Megan!)…..and YOU for reading too 🙂
PS apparently there might be an issue with leaving comments on the blog? Could someone please test that for me by leaving a comment below?? Thanks.
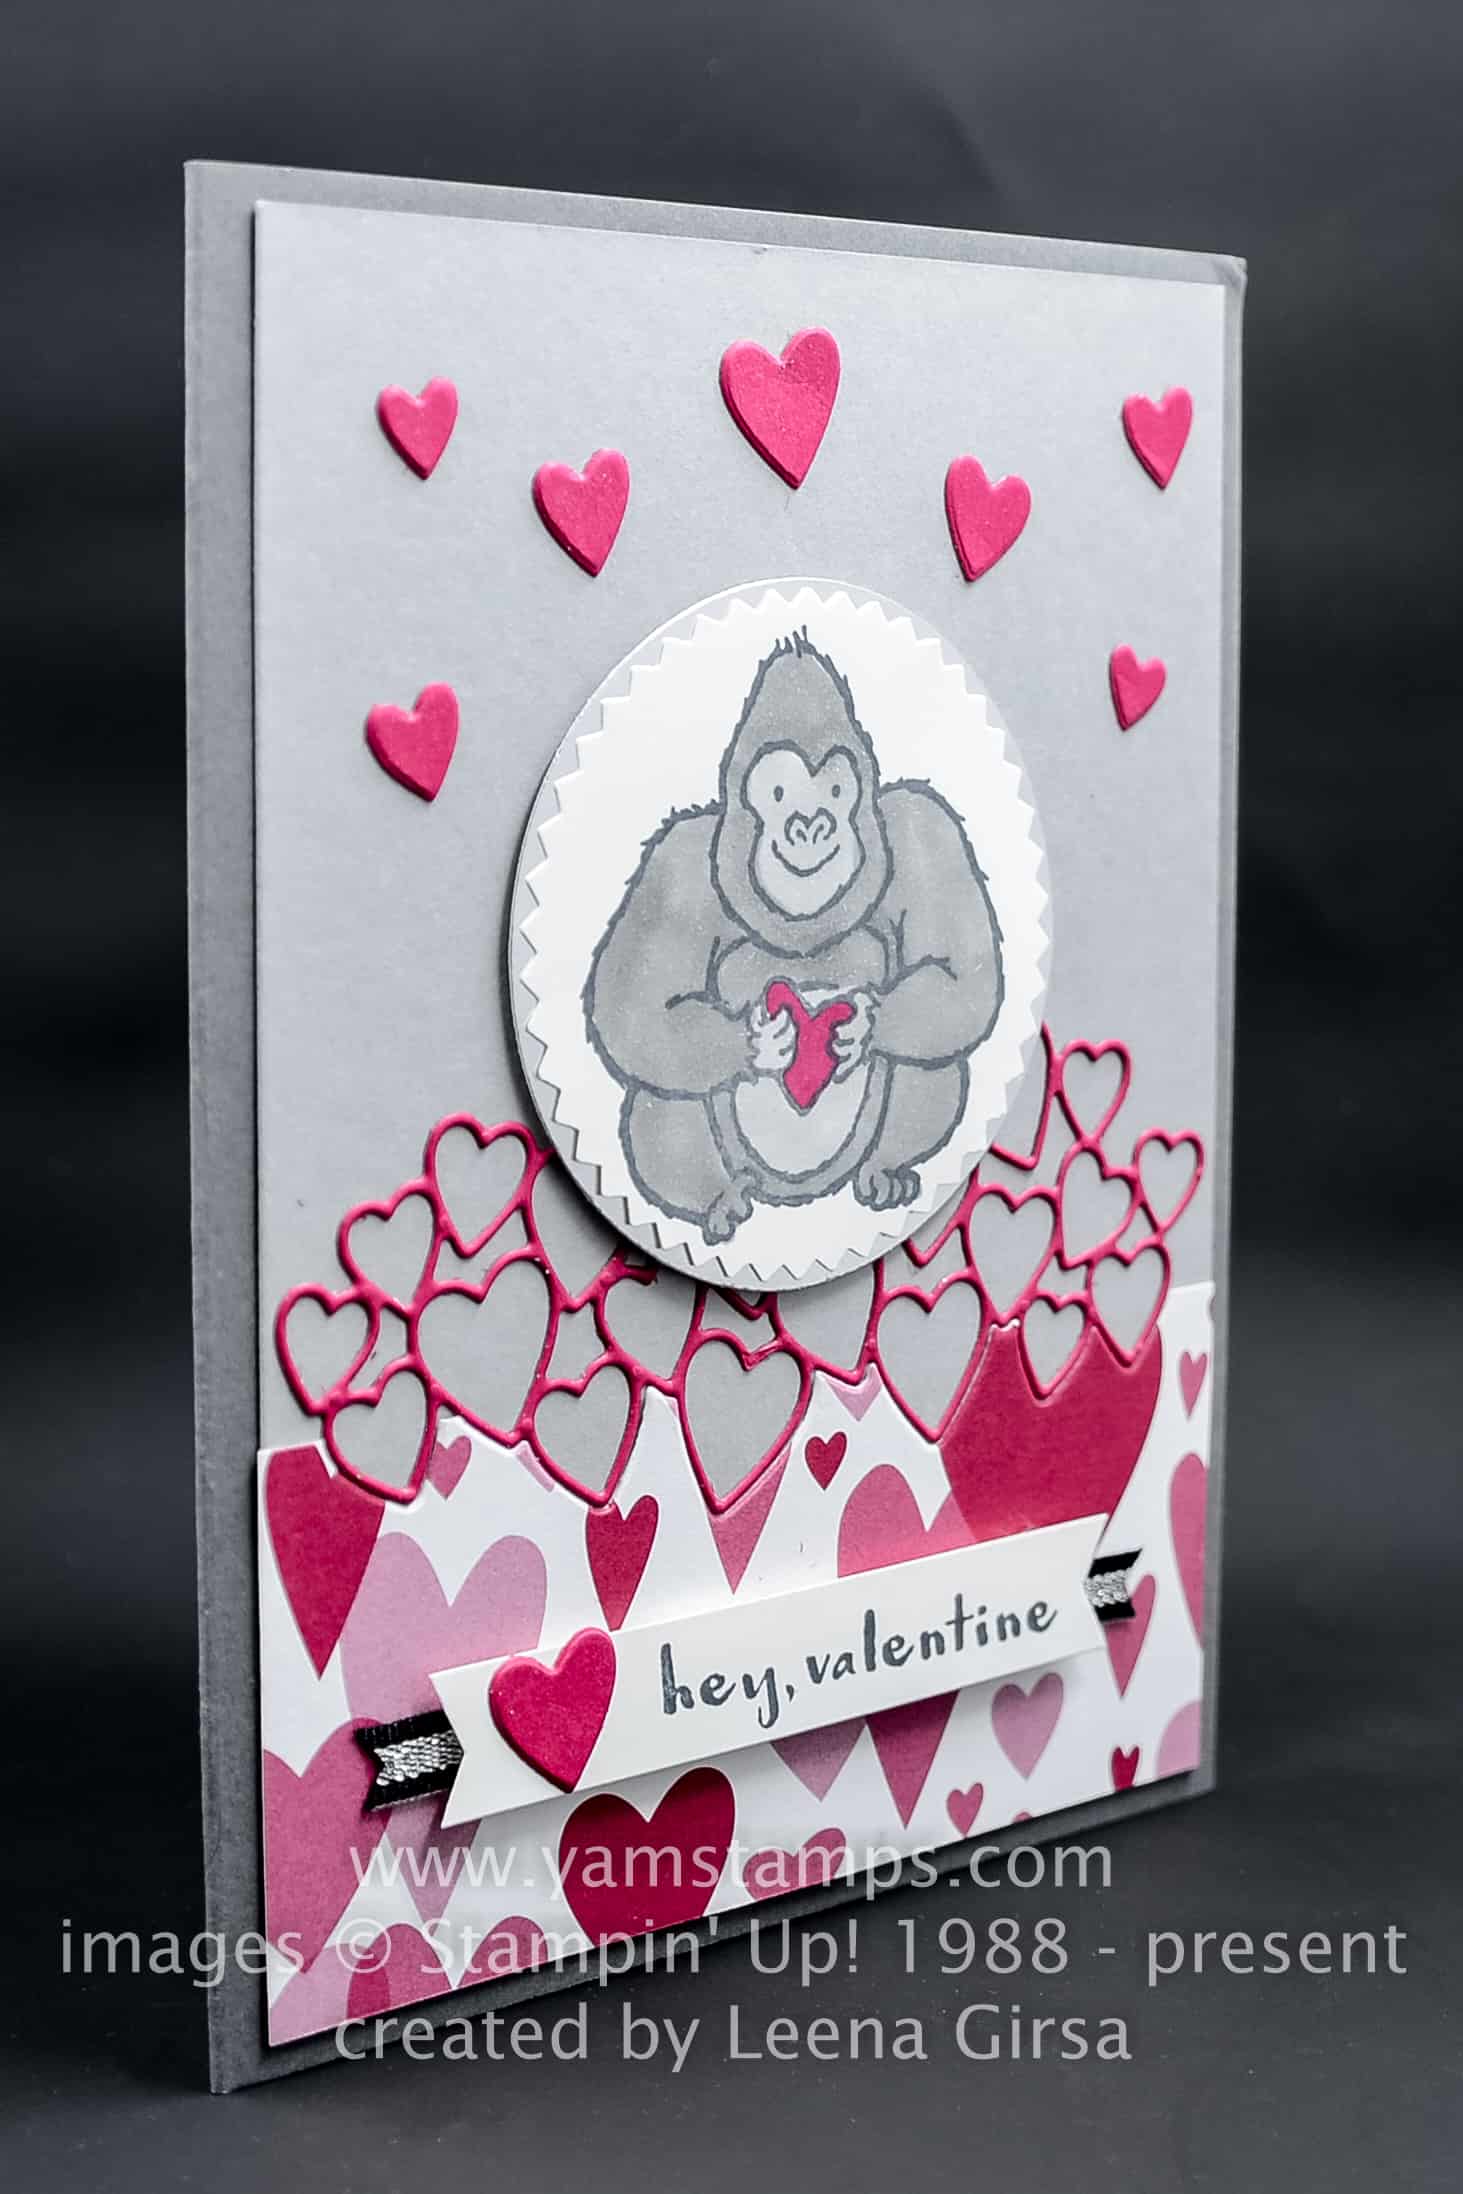
Isn’t this fun? Created by Leena Girsa, it features a few love themed Stampin’ Up! products. The image is from the Occasions Catalogue Hey Love stamp set and is punched out with the Starburst Punch. The paper along the bottom of the card is from the All My Love Designer Series Paper package, and the die cut is from the Be Mine Stitched Framelits Dies. I love how you end up with the outline of the small hearts plus all the solid small hearts to use on projects! I also love how Leena inlaid the diecut by cutting the top edge of the Designer Series Paper as well. The sentiment strip is accented with a piece of the Black and Silver Striped Ribbon. I think this would be a great card for a young man. Hey Valentine!No frilly stuff here!
You still have a few days to make your own Valentine’s Day cards – Stampers Club members will actually have the opportunity to make one on Monday – just in time for February 14th. We welcome new members at any time! If you’re local to Burlington, Ontario, why not come and join us? Check out the YamStamps Events page for more information, or contact me! Stampers Club is a great way to meet some fellow crafters and get a monthly creative fix – plus once during your 6 month membership you’ll get FREE product! Afraid of commitment? Well then, theMonthly Card Class is for you – sign up for the dates that work for you! The First Wednesday of the Month is Card Class (usually….check the Events page just in case…) and the third Monday of the Month is Stampers Club (usually…depending on stat holidays). Due to the crazy weather we’re having in Southern Ontario, we had to cancel February’s Card Class – and I noticed when I was posting on the YamStamps Facebook Page, that LAST February’s Card Class was also affected by weather! Hmmmmm…..
Anyway – hope you can join us in person at some point – or if not, there’s always the Online Club option. Hey Valentine – there’s no excuse not to get some crafty “Me” time in! Happy creating.
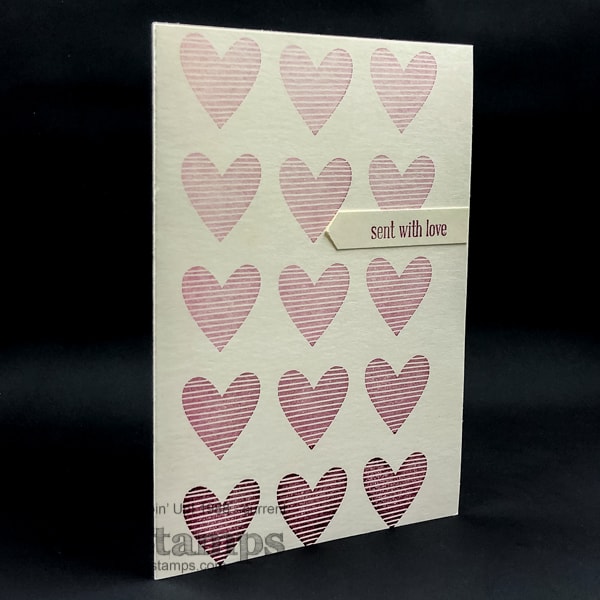
While I appreciate the ornate “over the top” type of cards and paper crafting, it’s not a style that I always do so well with – I’m more of a clean and simple type of paper crafter…hence this simplified heart card.
So for this simplified heart card, I used Merry Merlot ink and the striped heart from the Meant To Be stamp set, but I used a Very Vanilla Note Card as the base – so it’s slightly smaller than a half sheet card, and then I stamped the sentiment and punched it with the Classic Label Punch and snipped off the one side with my Paper Snips so I could adhere it flush to the edge of the notecard. I love the ombré effect and it makes this simple design a little more eye catching.
Stampin’ Up! note cards are great for creating something quickly, and they’re more the weight of the Thick Cardstocks, so they’re great for one layer (or no layer) cards. Plus they’re a perfect size for dropping in the mail to send a quick hello to someone.
If you want to see the process of creating this card, you can check out the Facebook Live that I did where I first shared this simplified heart card. I’m trying to do these Live videos more often because I think they’re a great visual aid – and sometimes it’s easier for me to show and talk than it is to write everything out. If there’s anything you’d like to see or learn in an upcoming Facebook Live video, please leave me a comment below, or leave a comment on the YamStamps Facebook Page! While you’re there – please be sure to “like” and “follow” the page so you’ll be notified next time I go live – and join the Paper Crafting with YamStamps group to see more ideas and participate in some creative challenges.
Happy Year of the Pig! It’s the Lunar New Year (Chinese New Year) and the year of the pig, to be precise, Earth Pig. (At least that’s what it said when I looked it up online). In any case, it was enough encouragement for me to revisit a previous favourite Stampin’ Up! stamp set, This Little Piggy.
The perils of being a demonstrator – sometimes I get so distracted by the latest releases and upcoming products that some older items get a little neglected at times. This Little Piggy is available in red rubber clear mount and red rubber wood mount. I stamped the image in Staz On Jet Black ink onto watercolour paper (see the YamStamps Facebook Page post from yesterday to see how I excluded the sentiment on the image). I then did a quick colouring job with my Aquapainter and drops of ink refills. The whole idea behind this card was to get it done and not be tooooo fussy (that’s my reasoning for colouring outside the lines LOL). I used Blushing Bride for the body of the pig, with a bit of Balmy Blue for the sky and Pear Pizzazz for the grass. The flower is So Saffron, and I scribbled onto a clear block with my Neutrals Basic Gray Stampin’ Write marker before picking up the colour to add to the pig’s hooves. I die cut the image and mounted it onto a scallop square using the Layering Squares Framelits for both. Since it was a square image, I placed it on a square card, and now I’m ready to send it to someone in honour of the Year of the Pig! (Want it? Let me know!)
Part of the reason I’ve been distracted by new, shiny objects…Stampin’ Up! will be releasing a second set of Sale-a-Bration products on February 15th, so be sure to come back here to see the new options! Plus, on March 1, there will be more product available to purchase that was designed to coordinate with existing Sale-a-Bration products, so your crafting will be even easier. Demonstrators are able to preorder all these items NOW, so I have been figuring out what I “need”….
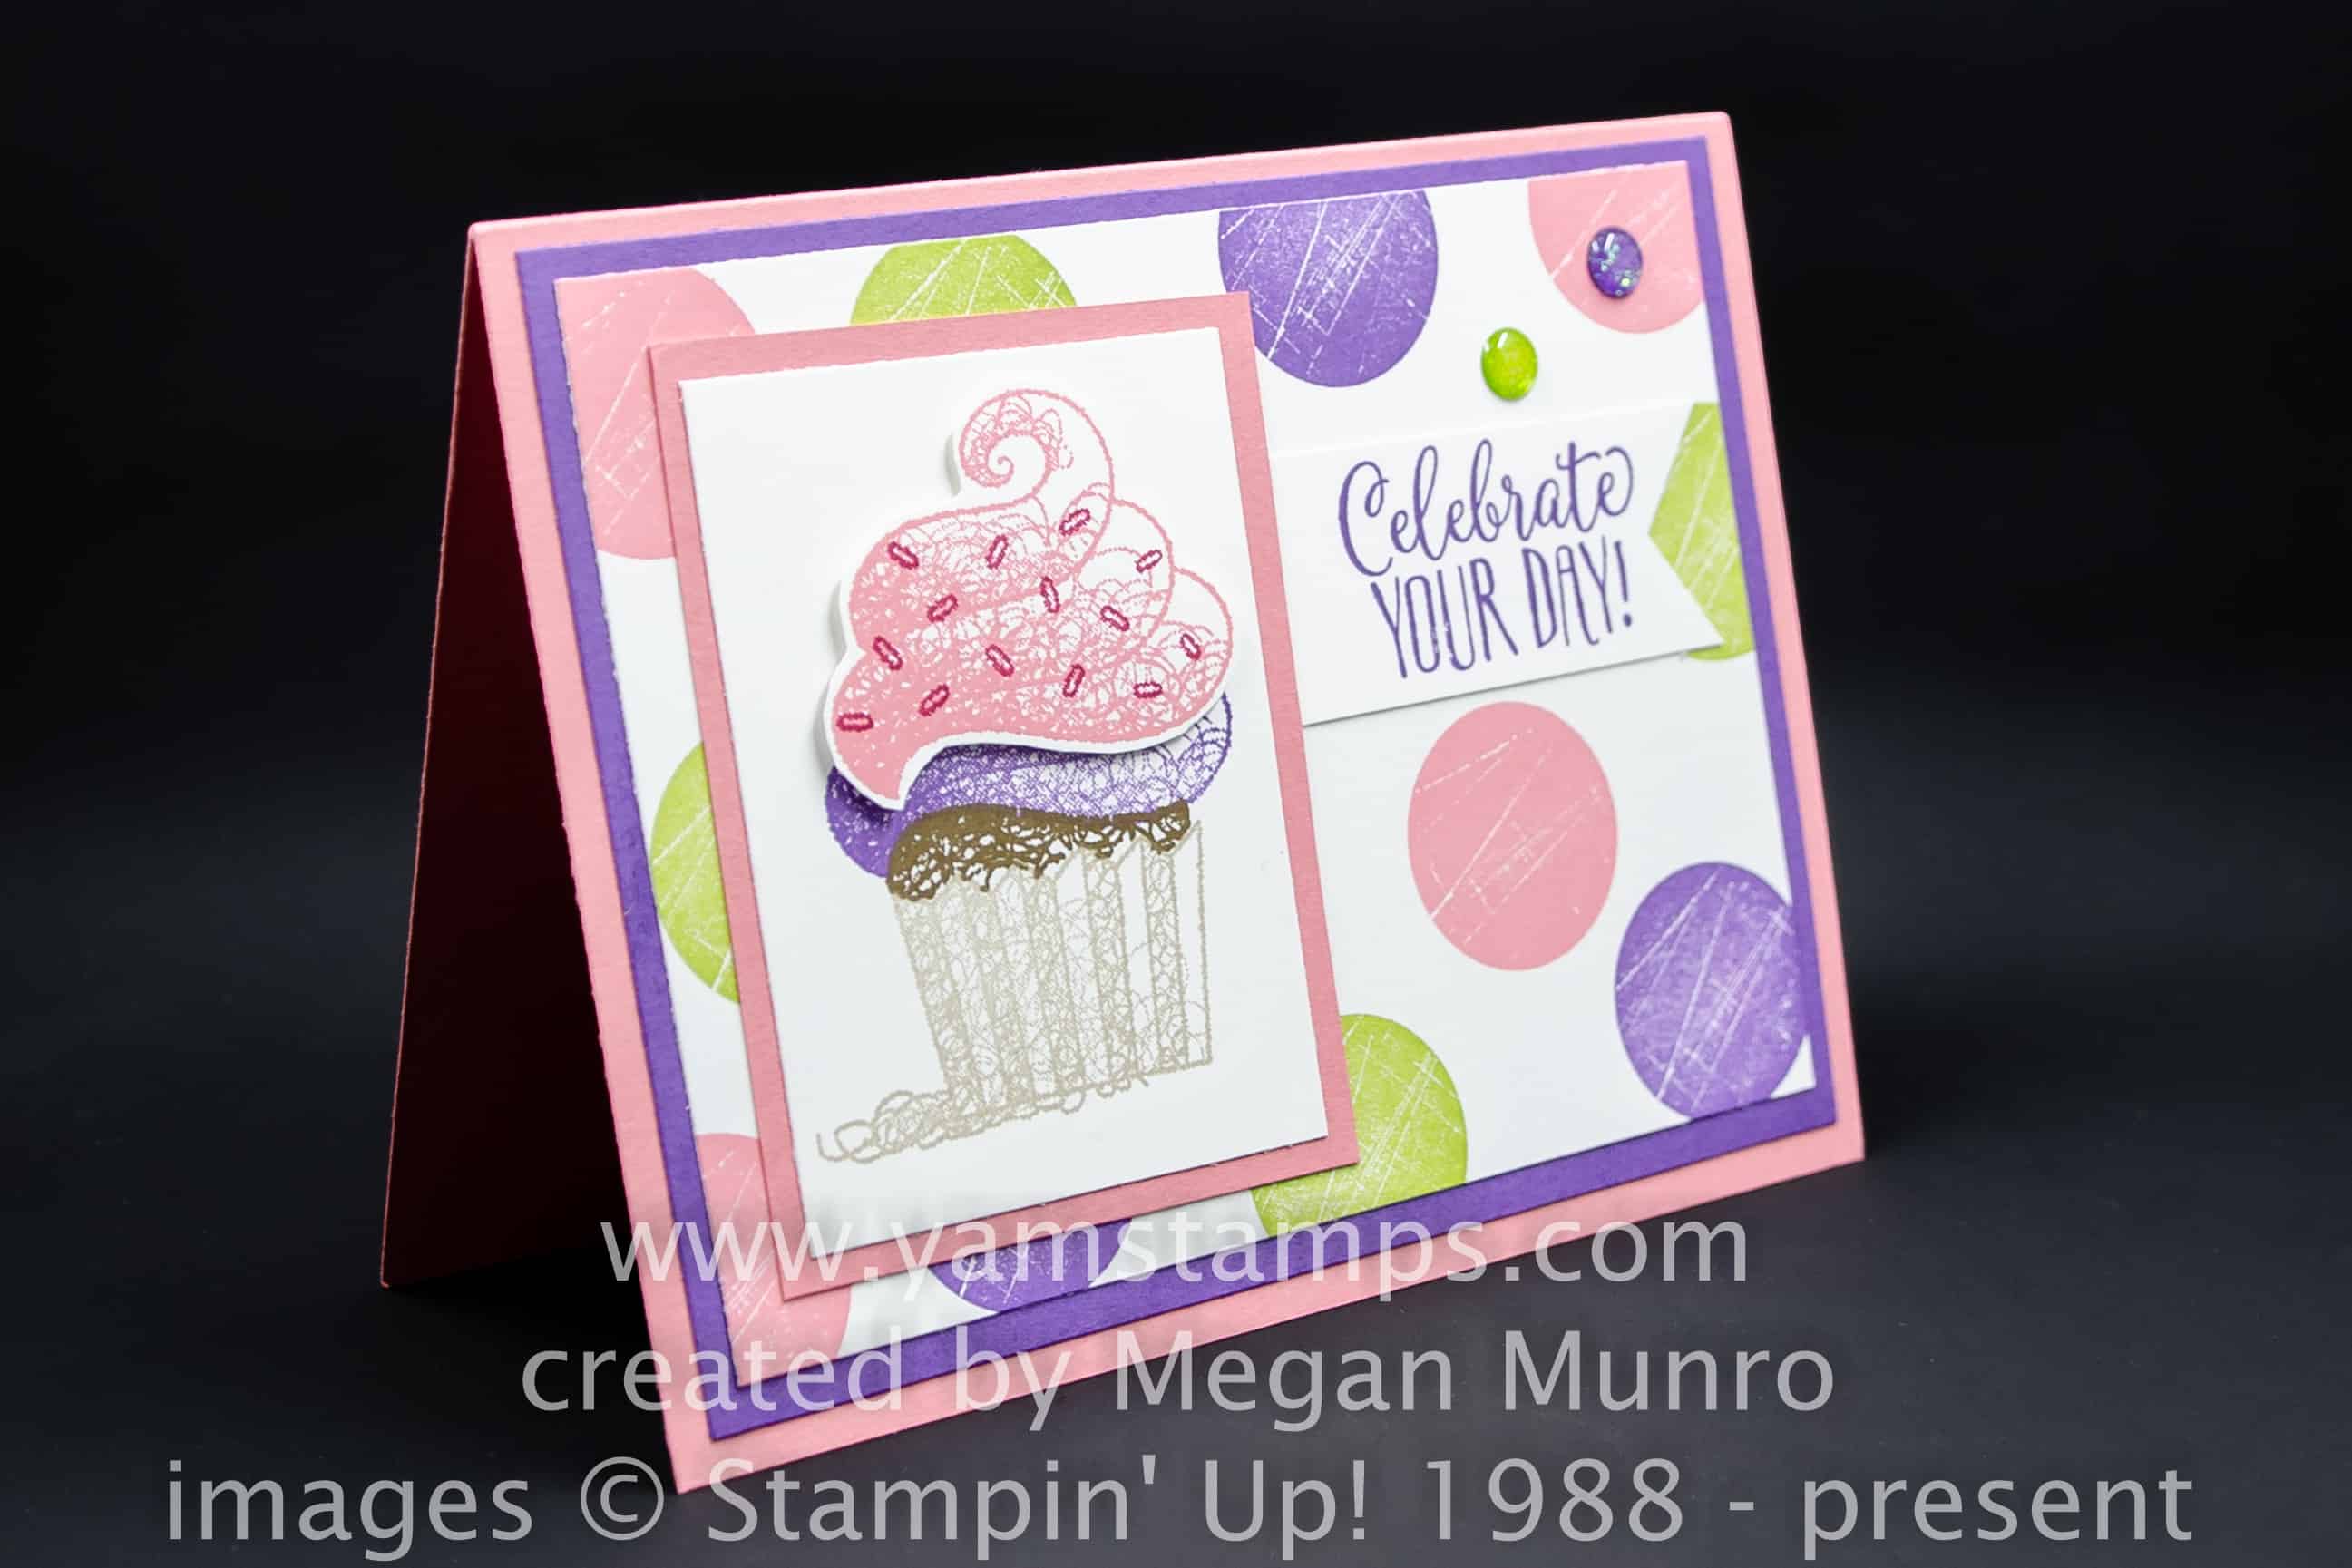
Hey cupcake!Send a sweet greeting to a friend using Stampin’ Up!’s Hello Cupcake photopolymer stamp set. This is a Level 1 Sale-a-Bration reward that you can select for free with a product purchase of $60 CAD.
It’s Sunday, so that means a Sunday Swap Share – like this card created by Megan Munro. (Check out the YamStamps Facebook Page, where I’ll be posting a different cupcake card idea!). Apparently there’s also some sort of a sporting event happening today, but since it’s not the Olympics, I’m not really keeping track…
It’s such a fun card! Love the Glitter Enamel Dots accents. Also – true confessions – I can’t figure out what paper or set she used as the background paper, so if you can, let me know…LOL. **EDITED TO ADD: Thanks Linda Snyder! She was diligent and actually contacted Megan (haha why didn’t I think of that?!) and Megan kindly responded and let us know that she used the stamp “Wood Words” (available in red rubber clear mount or red rubber wood mount) to create the background!!**
One thing to notice on this card and the one I’m sharing on Facebook – both creators took the time to “fussy cut” the icing image. If you know me, that will often knock a card out of “I’m going to copy this card” contention. HOWEVER – starting in March, Stampin’ Up! will be featuring some limited time items that coordinate with Sale-a-Bration products – including FRAMELITS for the Hello Cupcake set!! So hey cupcake, guess what card is now back in the “copy” category for me?! These items will be available for purchase as of March 1 – and I will definitely post more information closer to that time.
In the meantime, I’ll try to stay focused while I’m waiting for my product preorder to arrive! One of the fun aspects of being a demonstrator is that we can preorder upcoming products ahead of their general release. This is in order to give us a chance to come up with some fun samples and prep to use them in clubs and classes (or just to have fun playing with the product ourselves….LOL).
If you’re interested in hearing more about becoming a Stampin’ Up! demonstrator with my group, you can RSVP for my free Information Evening! The next one will be held Thursday, February 7 at 7pm. You’ll find out more about what’s involved and how I can help you run your business in a way that works for you. If you can’t make that time, contact me to set up a different time to meet up, or check out my FAQ page here.
Oh – and hey cupcake, don’t forget to visit the YamStamps Facebook page to see another cupcake card sample! Happy Superbowl Sunday 🙂
January 31 is Inspire Your Heart With Art Day! Who knew that there was an “official” day for this?! I think that technically this is any day when I get to craft, but it’s nice to mark it this way.
Here’s a card I created to commemorate Inspire Your Heart With Art Day. I was a little literal….so it has a heart on it…
I hope that you are able to take a moment or two today to Inspire Your Heart With Art. Crafting is a great creative outlet for me. I also find inspiration in other art forms, especially music. I often listen to music while I craft – usually something I can sing along to. Are you a “craft in silence” or “craft with distractions” kind of person? For me it often depends on if I’m working to a deadline or not…and how close that deadline is looming!
If you are looking for a creative outlet, don’t forget the YamStamps Monthly Card Classes! Next class is this upcoming Wednesday, February 6th at 1pm or 7pm in Burlington, ON. Please contact me to register (or use the link on the YamStamps Events Page). If you aren’t able to make it on a class date, consider getting a group of friends together and booking a private class!
In the meantime, I’m looking to Theatre Night tonight – a group of friends and I have a subscription to attend shows in Toronto. It’s always fun to get together and enjoy a night out. I am definitely taking the “Inspire Your Heart With Art” theme seriously!
Did you get the video tutorial? Every new YamStamps newsletter subscriber gets a link to a free video tutorial sharing an easy but impressive paper crafting technique (it’s one of my favourites). Each week, I send out a new email featuring paper crafting projects (complete instructions, supply list and photo), ideas, inspiration and tips and tricks. The first week of each month brings the big projects newsletter – featuring a whole bunch of different types of paper crafting projects (cards, scrapbook pages, techniques etc), and following weeks tend to feature an individual project, or spotlighting different social media content you might have missed.
You can sign up by using the box here on the YamStamps website, or by clicking on the image below or this link. I look forward to sharing lots of inspiration with you! As always – please feel free to contact meif you have any questions.
A simple handmade sympathy card is what is called for at a time that you may not feel very creative, and there’s often more of a time pressure element involved. This monochromatic card is perfect in that situation, though the sentiment could easily be changed out for another occasion, since this graphic is not occasion specific. It’s also good for a “Manic Monday” share – a quick card to make when life is hectic.
This card features the Flourishing Phrases Stampin’ Up! stamp set (red rubber clear mount or red rubber wood mount), which also has coordinating framelits. The only framelit used on this card, though, is from the Stitched Labels Framelits dies – for the sentiment. I think it adds something to this otherwise simple sympathy handmade card, but it’s also added with a purpose. A slightly crooked image for this card is not going to be noticeable (and could be an artistic choice), but a crooked sentiment will likely be more noticeable (especially by the person making the card LOL)….so by adding it with a die cut afterwards, you avoid that grief! I stamped the sentiment on a scrap piece of Very Vanilla cardstock, then used the framelit with the Magnetic Platformon the Big Shotto cut out the sentiment, saving myself a bit of stress in the meantime. Simply position the framelit around the sentiment so the sentiment is straight and you’re good to go.
Stampin’ Up! has announced that they’re going to be moving to all photopolymer (the see-through stamps) or red rubber cling mount stamps. The only stamps that will still be available in red rubber wood mount will be the large background stamps. (Check out this quick comparison of the types of stamps). I personally have always loved the wood mount option, primarily because I am a bit of a lazy crafter, and the less steps involved in crafting the better for me. I liked being able to grab a stamp set and be ready to stamp right away – no looking for blocks etc. I do have to admit, though, that with the arrival of the new cling mount labels and the Stamparatus, I’m not missing the wood mount option so much! Who’d a thunk it? The new cling mount labels are super sticky and there’s no shifting of the rubber stamp when I clean it, and the Stamparatus is my favourite tool for multi-step stamping. A little work to get the images positioned correctly initially and I’m ready to go, and encouraged to make multiples of cards at the same time – good for my card stash, and for my card sending efforts for sure! My set for this simple handmade sympathy card is a wood mount set, but I am starting to choose the non-wood mount option more often. Plus, Sale-a-Bration is a great time to pick up a Stamparatus, or Stamparatii (if you are getting more than one…isn’t that the proper plural form?). One Stamparatus will get you a Level 1 Sale-a-Bration reward, two Stamparatii will get you a Level 2 Sale-a-Bration reward (or two Level 1 Sale-a-Bration rewards!), and so on…and so on…
I’m planning on doing a quick Facebook Live today on the YamStamps Facebook Page (once all my technology is properly charged up), so be sure to like and follow the page to get notified when I go live! In the meantime, if you need assistance placing your order or have any questions, please contact me! See you online.
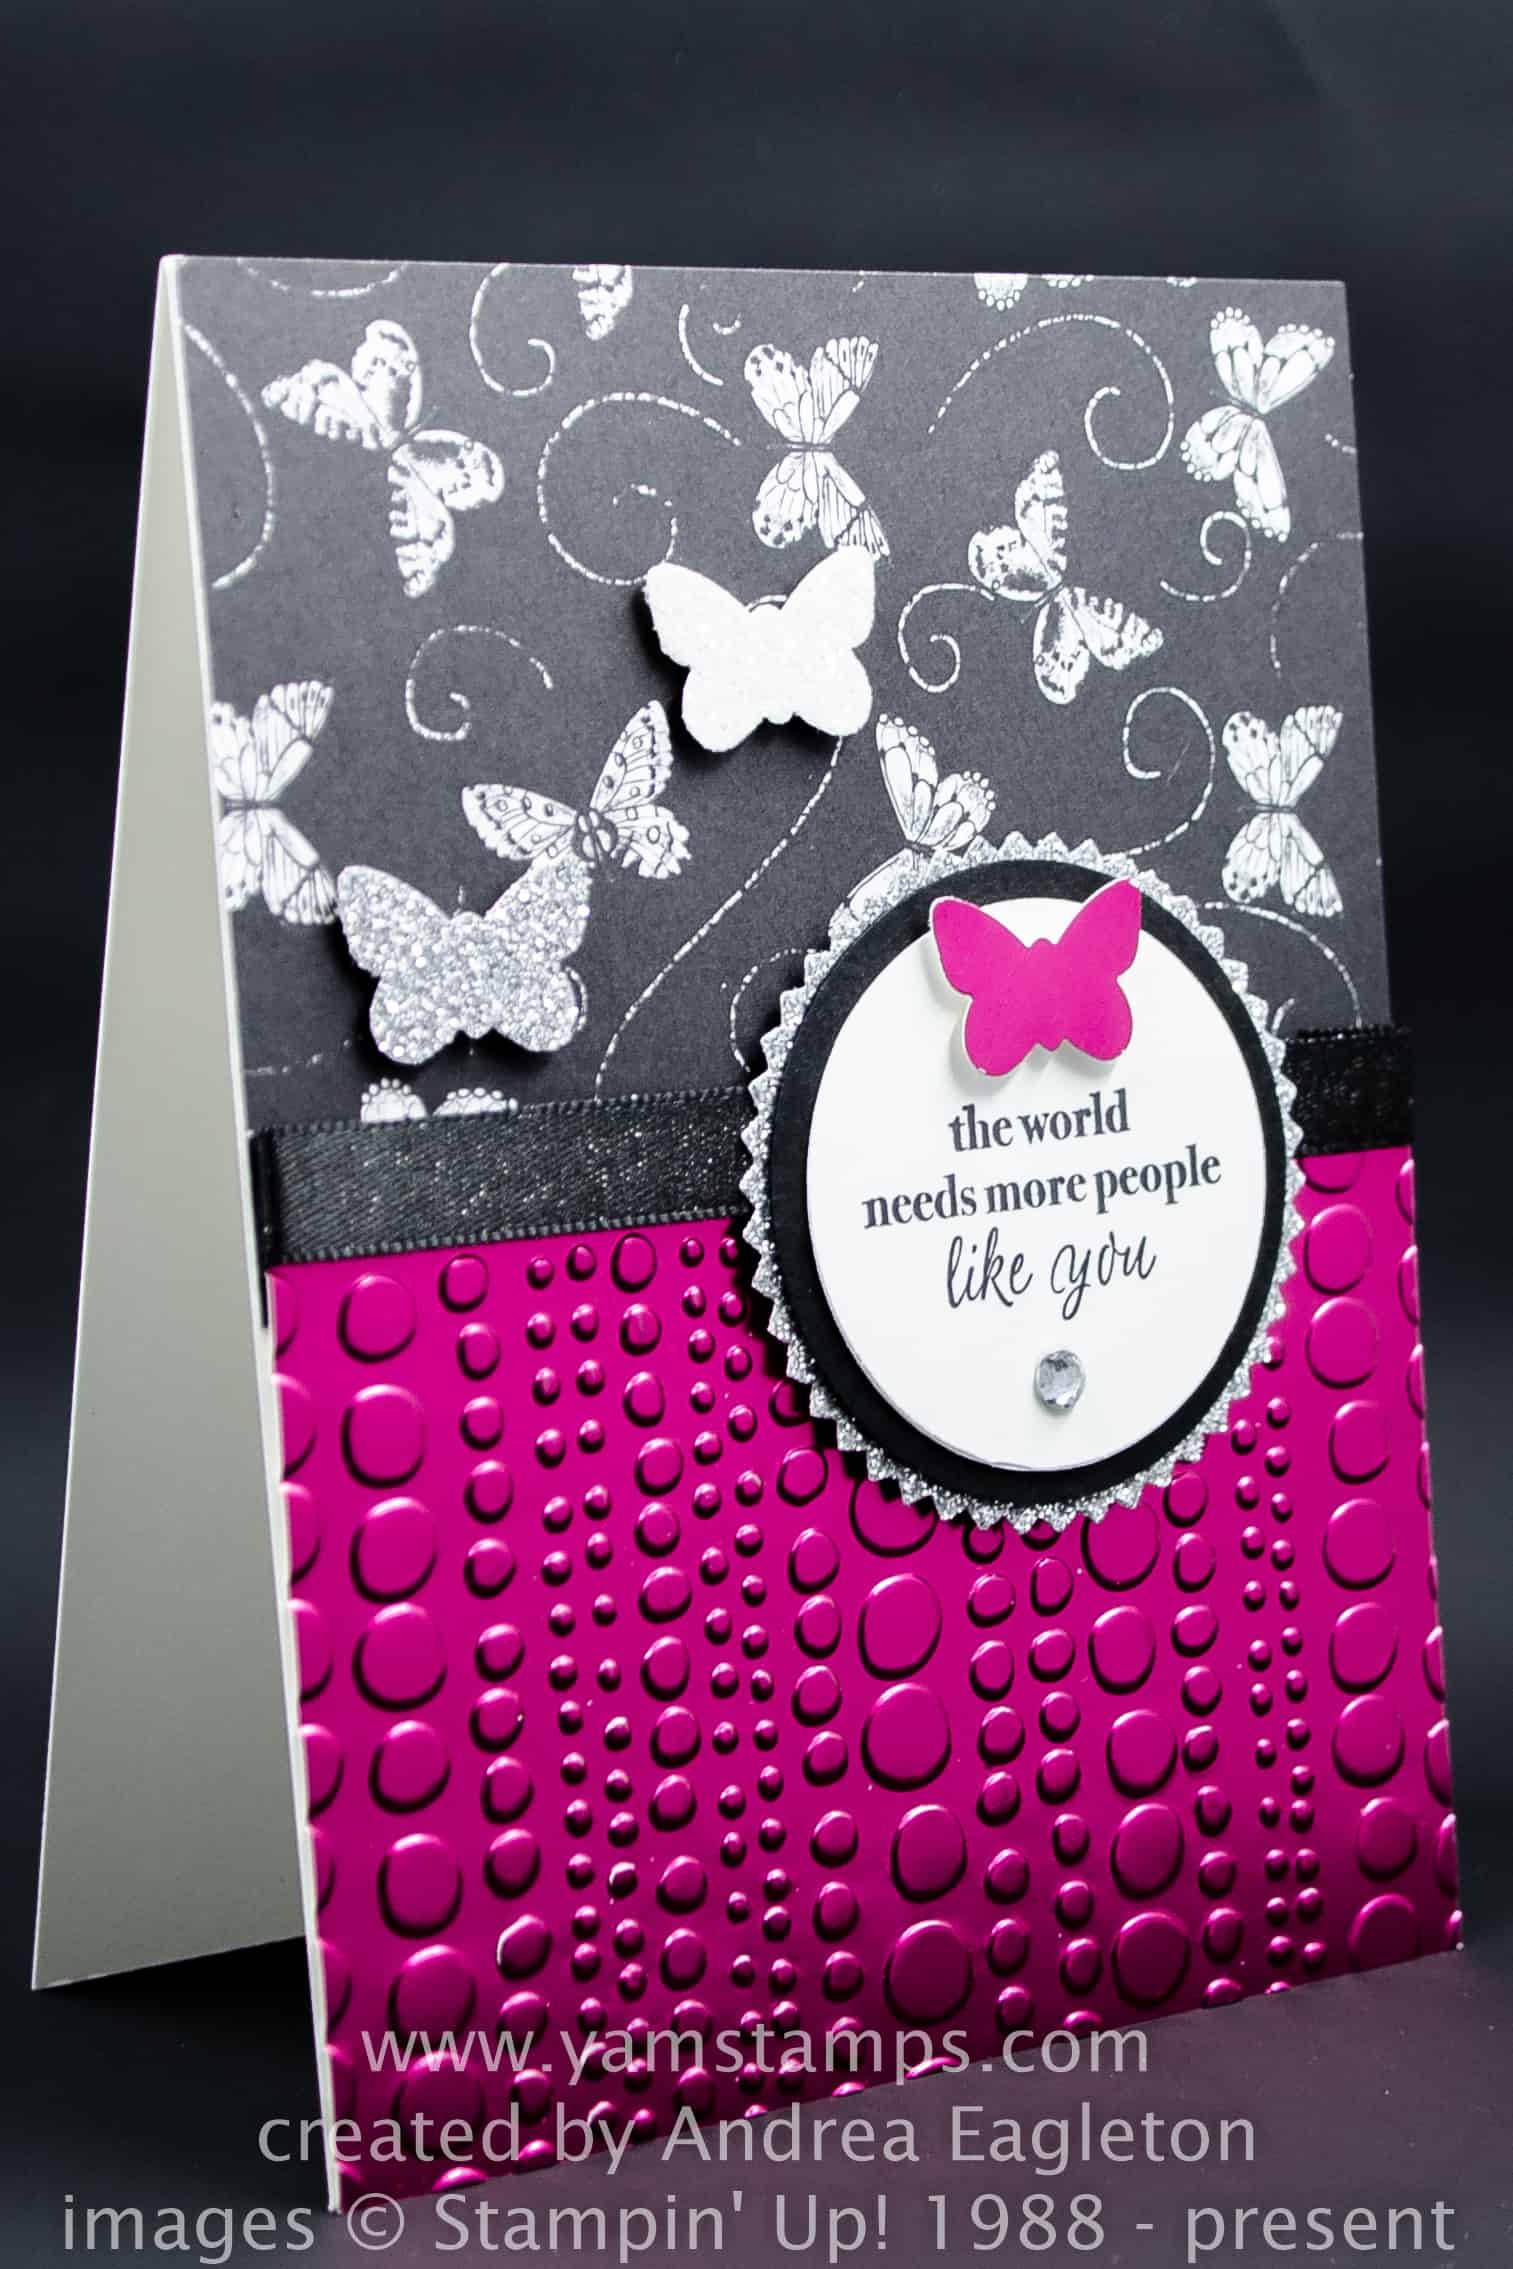
It’s great to send a card for no reason other than to say hi or offer some encouragement. Stampin’ Up!’s stamp set, Part of My Story is perfect for that! It’s got some great friendship quotes that are perfect for your handmade cards. Bonus – it’s a Level 1 Sale-a-Bration reward! That means that you can select this set for FREE with a $60 product order! This week’s Sunday’s Swap share is a gorgeous sample using this set, created by Andrea Eagleton.
Love it! There’s a number of freebies featured on this card, actually! One of the great friendship quotes from the Part of My Story stamp set, the black and white butterfly print paper is from the Botanical Butterfly Designer Series Paper (Level 1 Sale-a-Bration reward), and yet another freebie is on the bottom of the card – part of a Lovely Lipstick Foil Sheet – you get a package of 4 Lovely Lipstick and 4 Grapefruit Grove sheets in a package! She’s embossed the foil with the Dot to Dot Embossing Folder for some awesome texture. More “bling” factor from a Rhinestone Basic Jewel, the Black Shimmer Ribbon and Silver Glimmer Paper, and the overall effect is WOW.
The small butterfly is from the Butterfly Duet Punch – which has been SO popular that it’s sold out for now! Stampin’ Up! is currently awaiting shipment of more product, but anticipating delays in receiving due to shipping port congestion and Eastern shut downs for Chinese New Year…but I will be sure to let you know when it’s available to order again! In the meantime, there are a number of pretty smaller size butterflies in the Butterfly Beauty Thinlits Dies (which is available in a discounted bundle with the Beauty Abounds stamp set).
A great way to grab some of these freebies is by hosting a cardmaking party for your friends. It’s so much fun to get together and do something creative while spending some quality time together. The most popular choice is the standard cardmaking class – each person pays a class fee of $20, and I bring all the supplies and tools needed for each person to create 4 different cards. Contact meto book a date, or discuss other class options! I’m off to do a private class this afternoon for Susan and her friends – will share some of the projects here on the YamStamps Blog in the coming days!
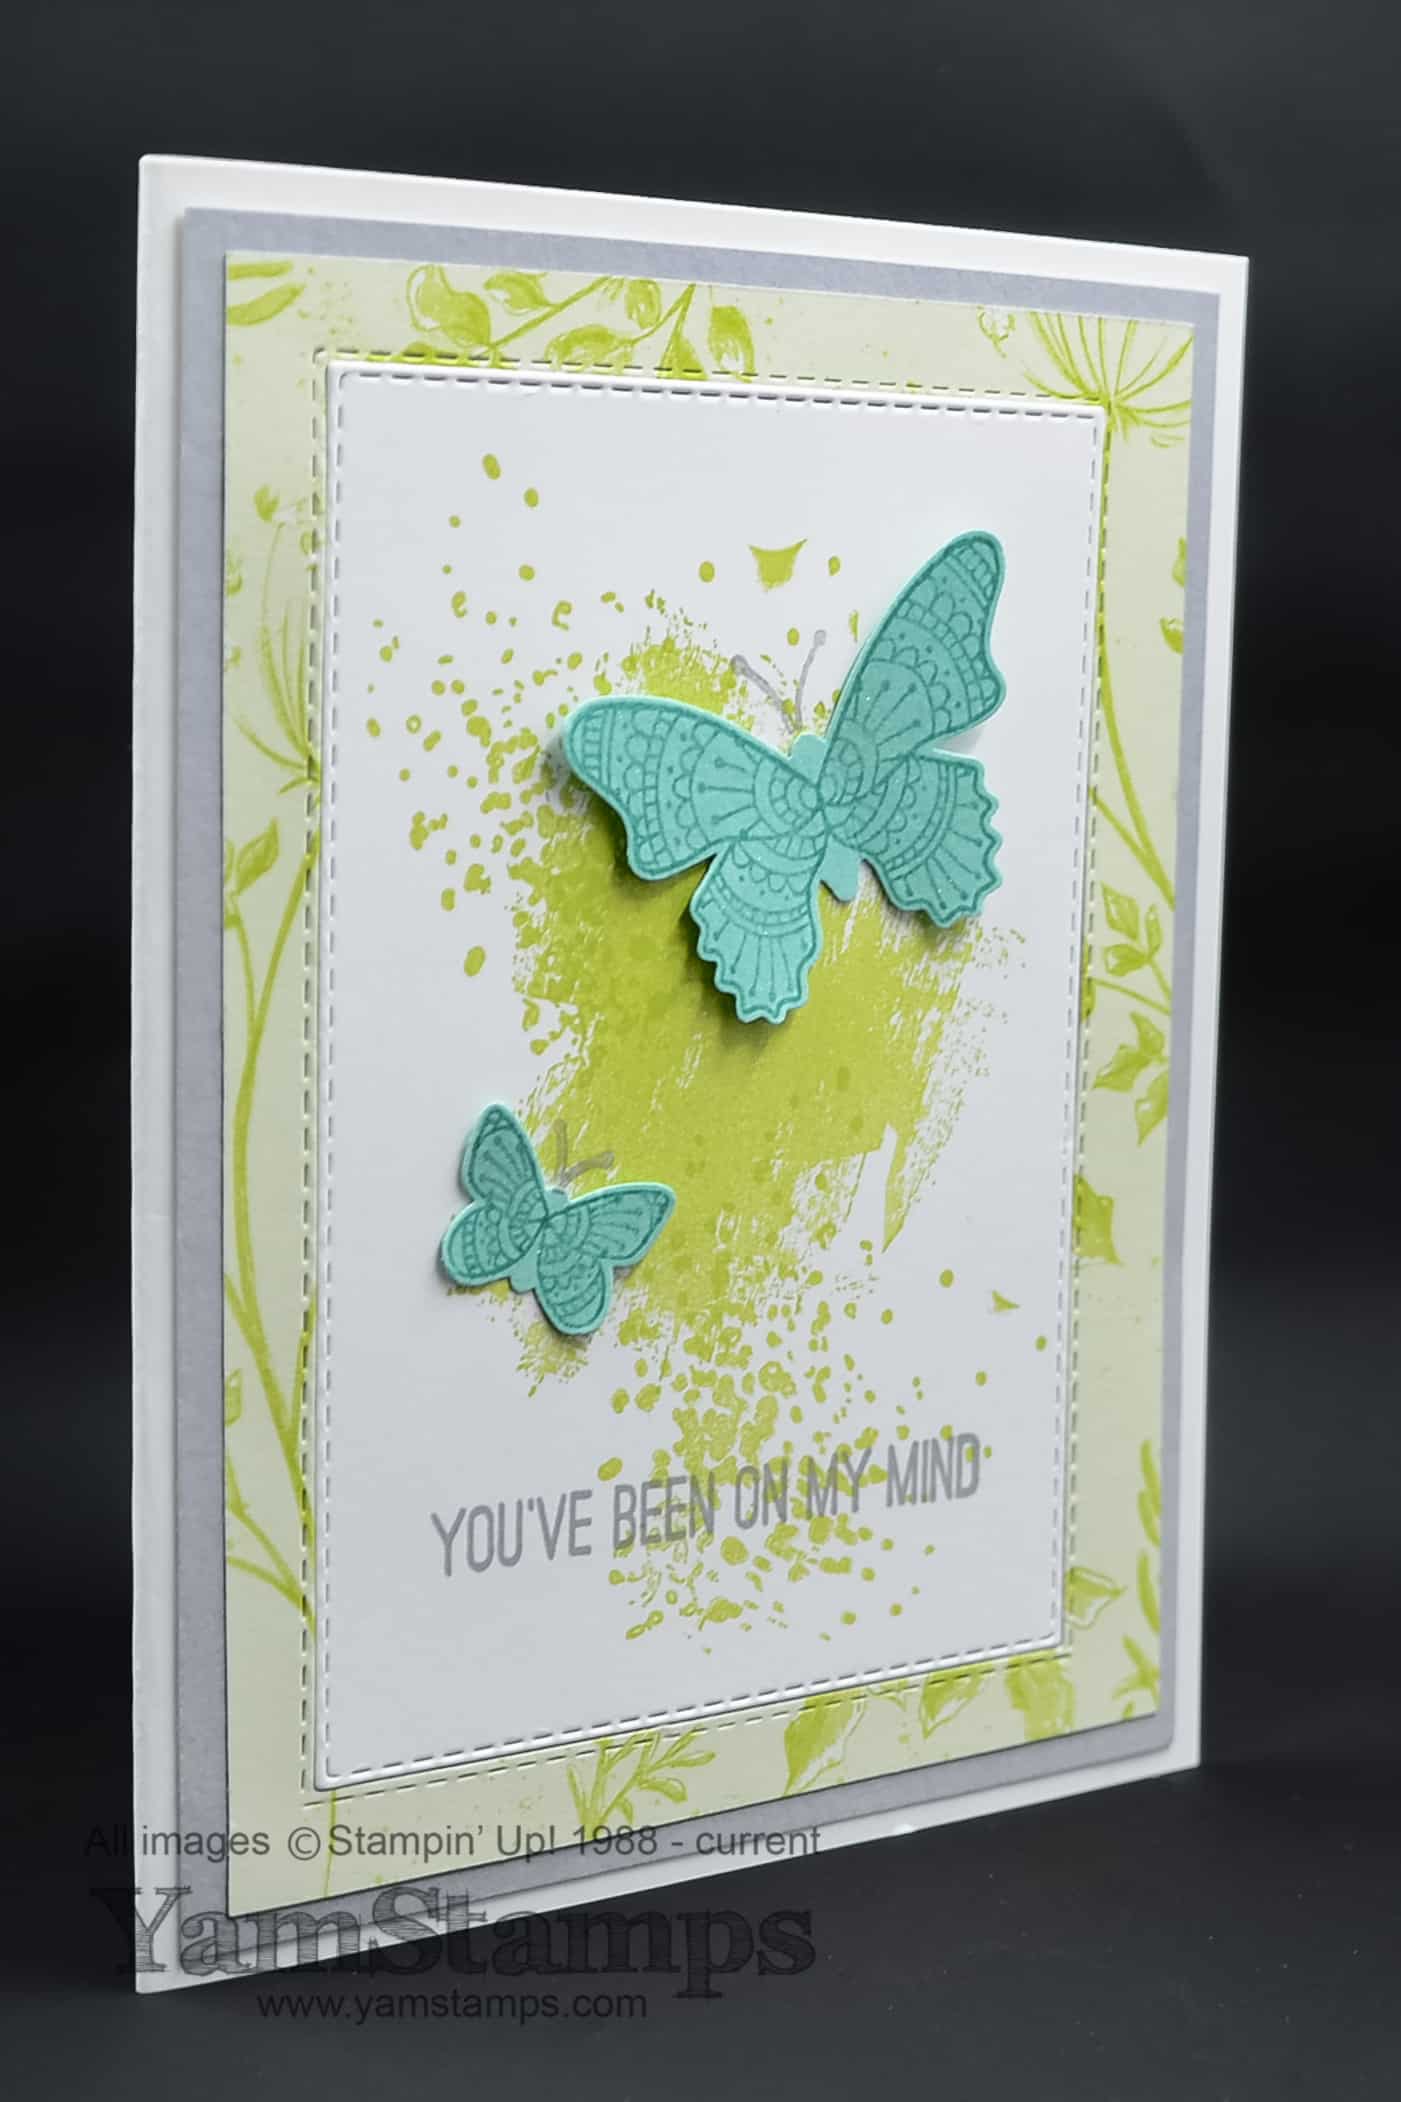
I always have great intentions of sending out a lot of cards…and then end up having to be happy I sent out “some”. I just did a bit of a catch up on mailing a little while ago, and so I’m keen to get back on track with my card sending! This is a great thinking of you card – perfect for someone like me! You’ve been on my mind is the ideal sentiment for a lot of the cards I want to send to friends and family – because they HAVE been on my mind – but I haven’t always been able to reach out and let them know that personally. If you’re like me, you’ll want this set so you can do a bit of card catchup too!
Do you remember that I mentioned that I apparently have a thing for butterflies?! More proof here… This thinking of you card features the Butterfly Gala photopolymer stamp set, which pairs perfectly with the Butterfly Duet punch. You can purchase the items separately, or together in a discounted bundle. I used the Artisan Textures stamp set to create the background – the smoosh and splatter images are great to add texture and interest to any background or image. The set is available in red rubber wood mountand red rubber clear mount. Since I figure I’ll be sending this to someone I feel like I’ve “owed” a card to, I wanted to add some more detail to this thinking of you card! The Whisper White cardstock piece is cut with a Rectangle Stitched Framelit. I used the same framelit to cut the middle out of a piece of the Botanical Butterfly Designer Series Paper as well. The framelit adds a stitched effect on BOTH sides of the cut line. So the centre piece of the DSP gets saved for another project later on, and the outer piece is used to frame the Whisper White piece. You can get this DSP for free as a Level 1 Sale-a-Bration reward with a $60 product order until March 31, or you’ll get a half sheet of each of the double sided designs as part of the YamStamps Occasions Catalogue Designer Series Paper share.
One last little detail for the butterflies. I stamped the butterfly image in Bermuda Bay ink onto Bermuda Bay cardstock, and after they were punched out, added some Clear Wink of Stella Glitter Brush to the wings (which may not be totally visible in the picture…). That’s one of my most favourite card making hacks – add some Wink of Stella to add some “wow” to the project quickly and easily!
I’m off to finish up prep for Susan’s private cardmaking class this weekend – we’ll be doing a variety of cards with her friends and family. It’s a great way to spend a wintery weekend afternoon! If you are looking to get some quality time in with friends, contact me to book a private cardmaking class! I bring ALL the crafting supplies you’ll need for the projects we’ll be making. It’s a great way to get together, catch up and maybe learn something new – plus you’ll end up with four handmade cards that you’ll have ready to give to someone special!