Happy World Cardmaking Day! The first Saturday in October is designated as a day to celebrate the art and craft of cardmaking, so I’m sharing this easy elegant card that I created and haven’t yet shared here. I hope you are able to take a bit of time to be creative this weekend! More significantly for me, I plan to follow up with Card SENDING Day. True Confession: I seem to have issues with getting things into the mail – I’m one of those people that will walk around with mail to post and days later I will still have it on me and not into a mailbox yet. I’m getting better….but it’s a work in progress. Like most of my life LOL.
Anyway – here’s the card. It’s one that highlights the beauty of the patterned paper and die cuts, and it’s a quick one to make. Probably faster for me to make than for me to get into the mail….
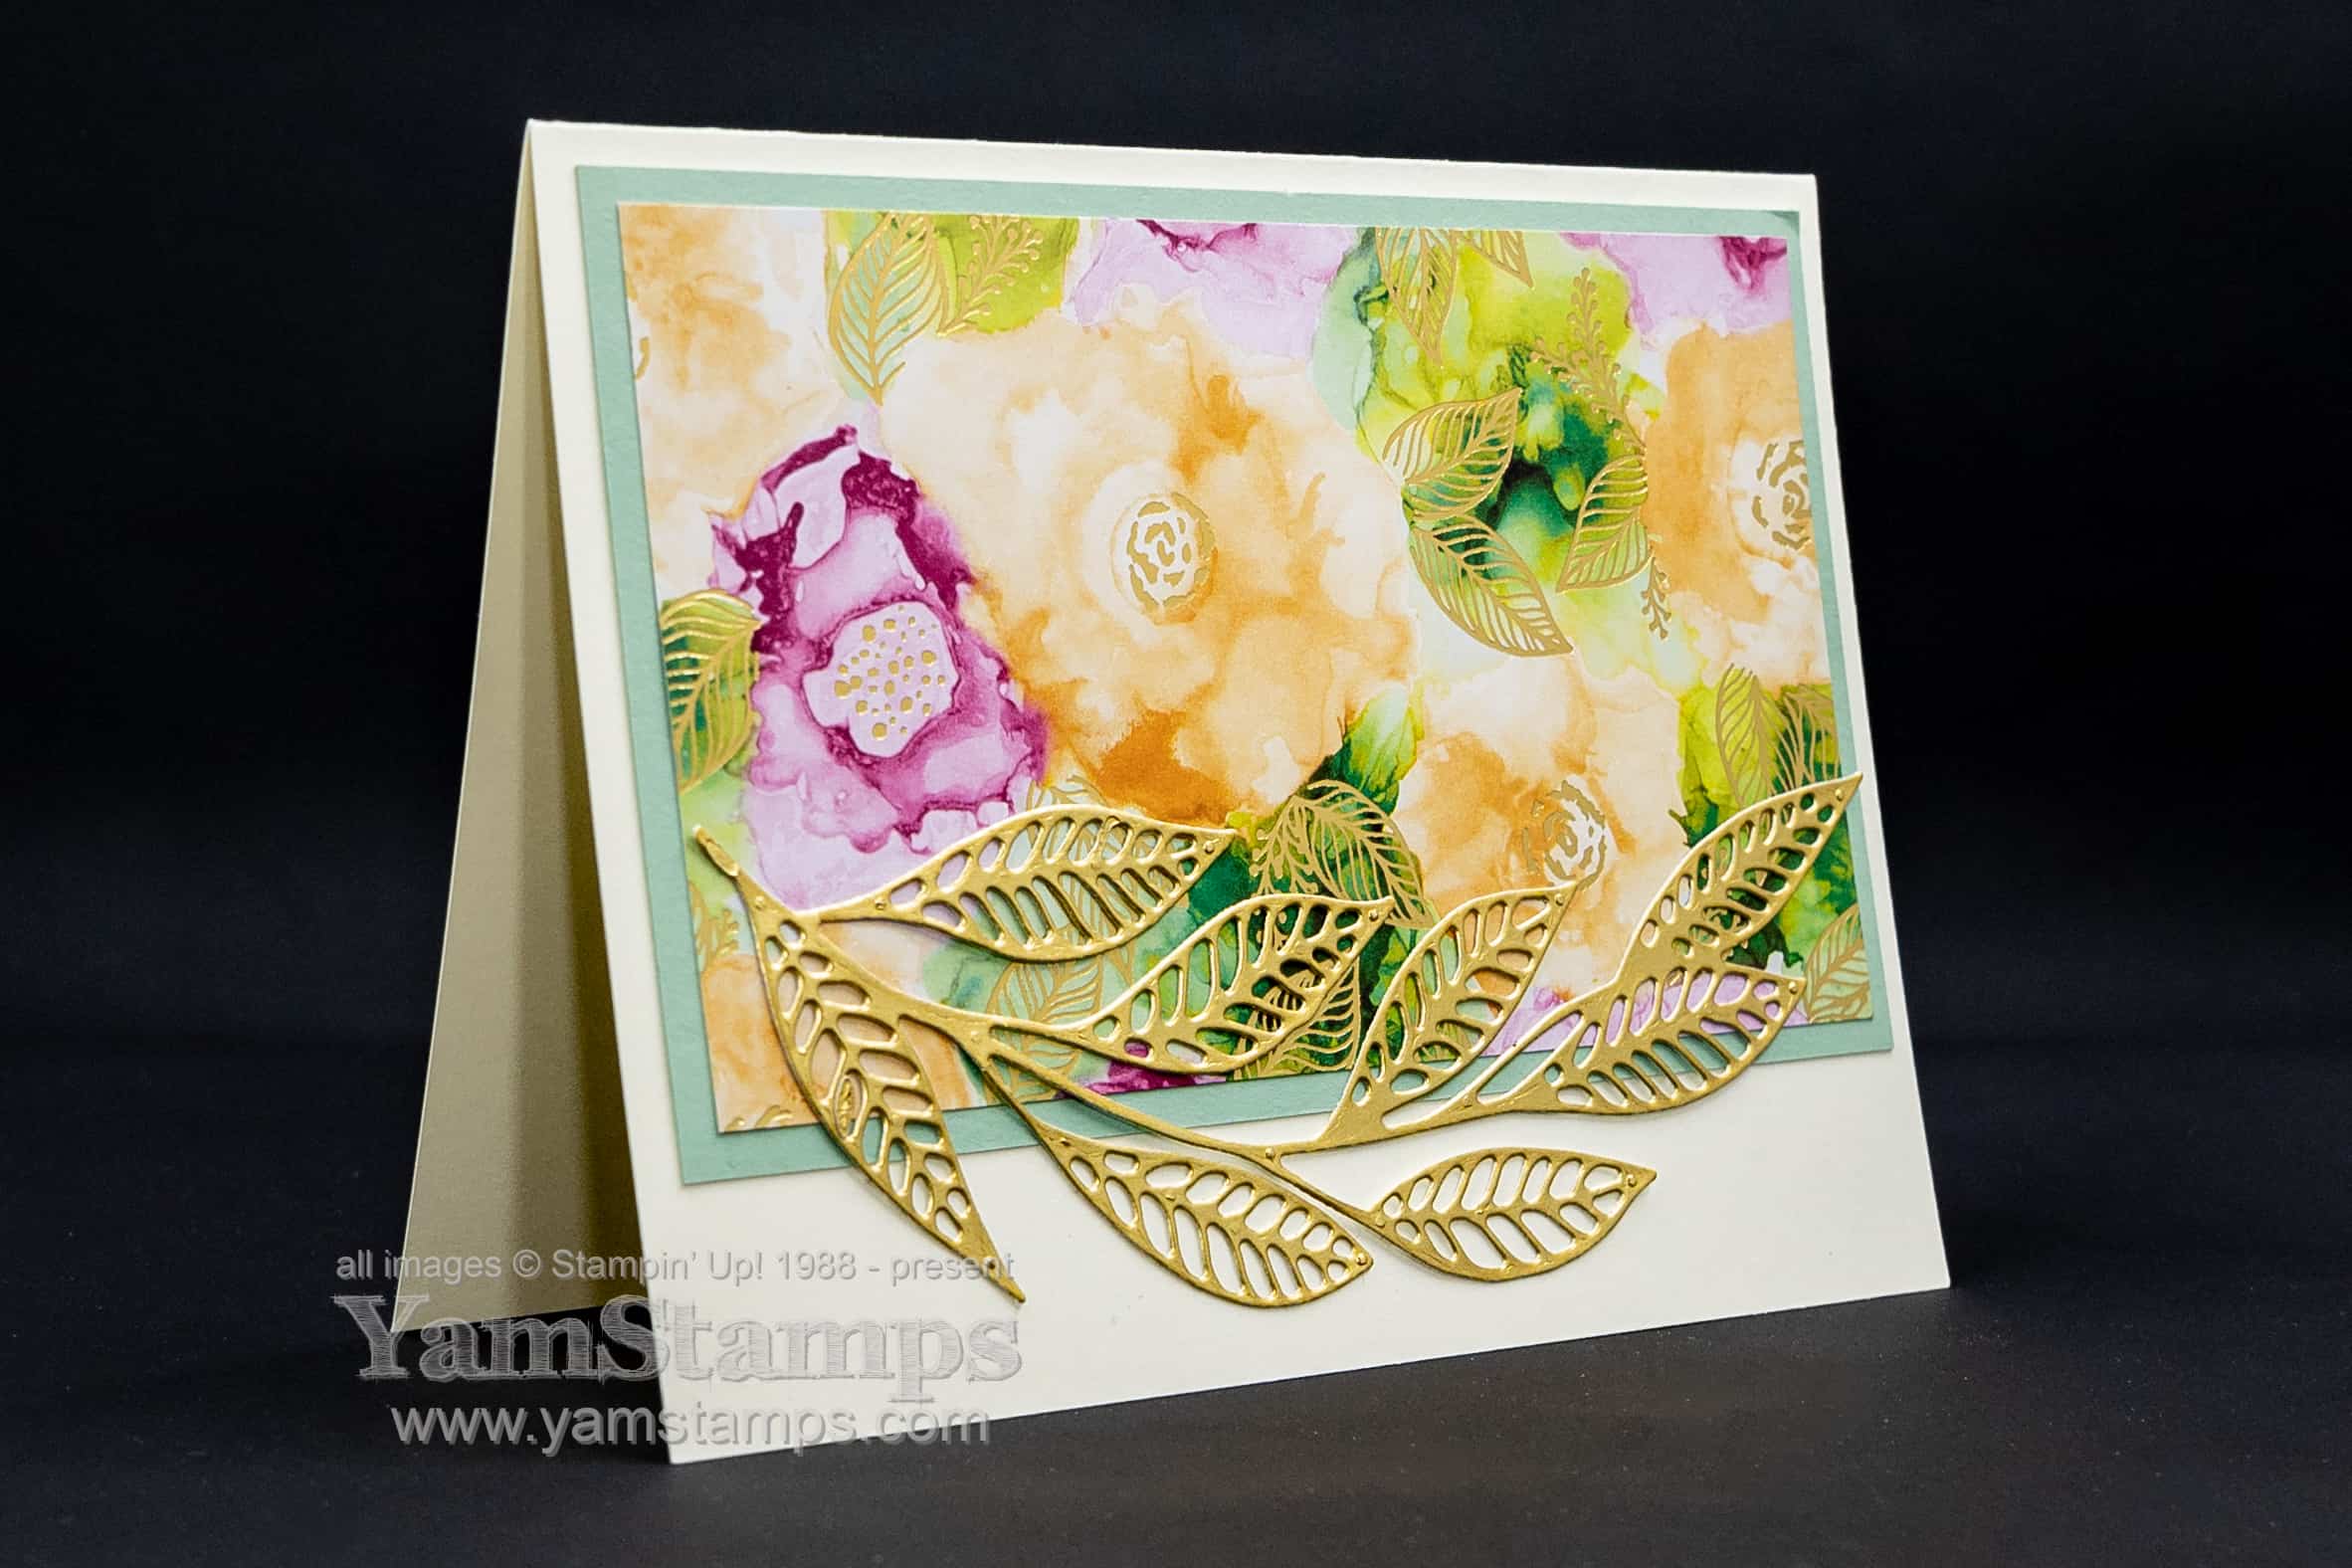
easy elegant card
One of my current favourite Designer Series Papers, Expressions in Ink, is the main focal point of this easy elegant card. Since this design has gold foiled leaves on it, I used the similar leaf die from the Artistic Dies (also part of the Expressions in Ink Suite Collection) to cut out some Gold Foil Sheet. To make adding the die cut to the cardfront clean and easy, I put a strip of the Adhesive Sheet on the back of the Gold Foil Sheet prior to running it through the Stampin’ Cut & Emboss Machine. I also find that after die cutting, and using the Brush Tip attachment for my Take Your Pick tool, when I take off the liner for the Adhesive Sheet, it tends to pull off any remaining bits from detailed die cuts. Yay! Even cleaner and easier!
easy elegant card – close up
Cardmaking doesn’t have to be difficult to be enjoyable – both for the creator and for the recipient of the finished card!
I send out project tutorials, crafting ideas and information weekly to YamStamps Newsletter Subscribers. Right now, the Twelve Weeks of Christmas are also on – so it’s double the dose of creativity in your inbox for a few months! More information about my newsletters is at yamstamps.com/nl or you can sign up in the box at the top right of the YamStamps blog.
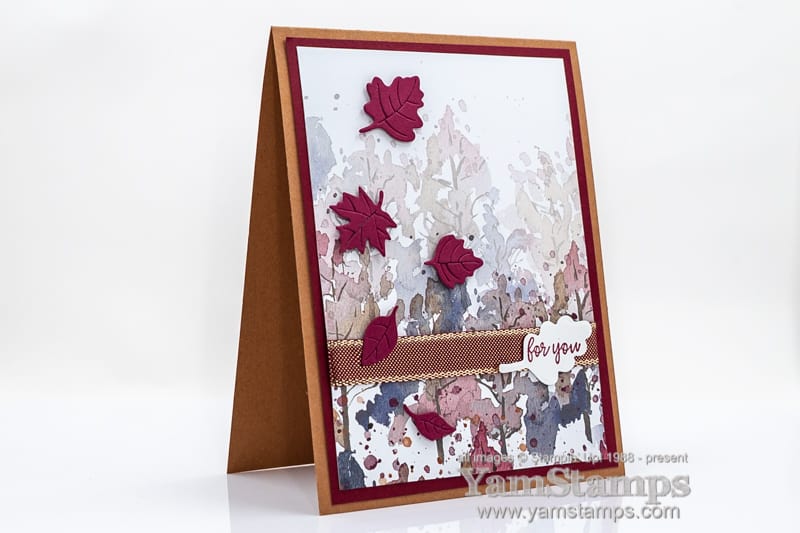
I love easy and effective paper crafting – of which this autumn card is a perfect example. Stampin’ Up! Canada’s Beauty of the Earth Designer Series Paper has colours and patterns that feature natural elements that cover four seasons so could be used for all sorts of paper crafting projects.
Autumn Card
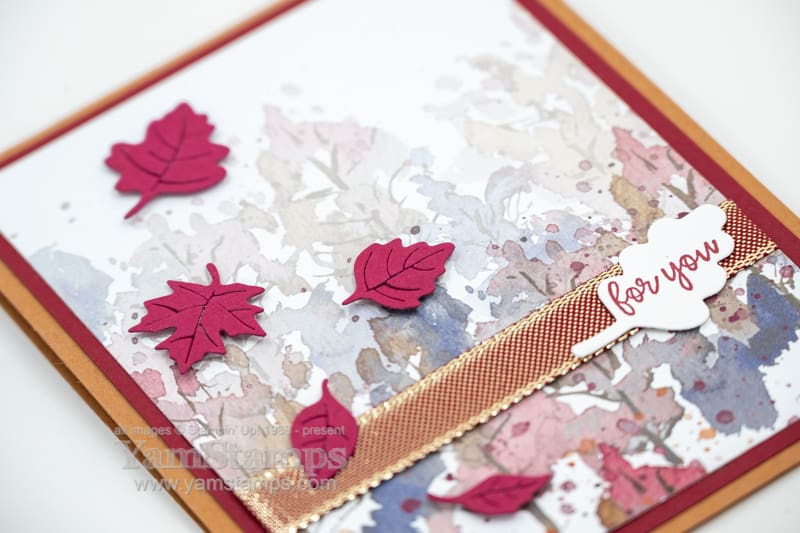
I love the pattern on this paper! It’s a border pattern, so by cutting the sheet in half, many cards could be created with this design. The leaves are all die cut from the Giving Gifts Dies, including the one used for the sentiment, which I though was a fun accent on top of the Cherry Cobber & Gold Metallic Ribbon. If you’ve been following the YamStamps blog for a while, you’ll have figured out that I cut the detailed leaves from the backing Cherry Cobbler Cardstock since the holes would be covered by the Designer Series Paper. Mini Stampin’ Dimensionals were perfect for adding the leaves in place, and by placing them at different angles, they look like they’re falling – so perfect for an Autumn card!
Autumn Card Close Up
The Cherry Cobbler ribbon is currently on backorder, which means at this time, it can still be ordered, but it will ship out separately once it arrives at Stampin’ Up!’s North American warehouse. The good news is that means that while it’s still orderable, it will count towards the total product order and can help earn Sale-a-Bration rewards. The bad news is that you will have to wait for a bit before it arrives…and there is always a risk that it could go into unorderable status. If there are too many backorders for an item, Stampin’ Up! will cut off the ability to order that product until it arrives in stock again.
Sale-a-Bration runs until September 30th. The Be Dazzling Specialty Paper is sold out, and the remaining products are while supplies last/September 30th – whichever comes first. You can place your order online at https://yamstamps.com/shop or email me if you would like assistance placing your order or would like to pay by etransfer. Canadian addresses only due to Stampin’ Up! regulations.
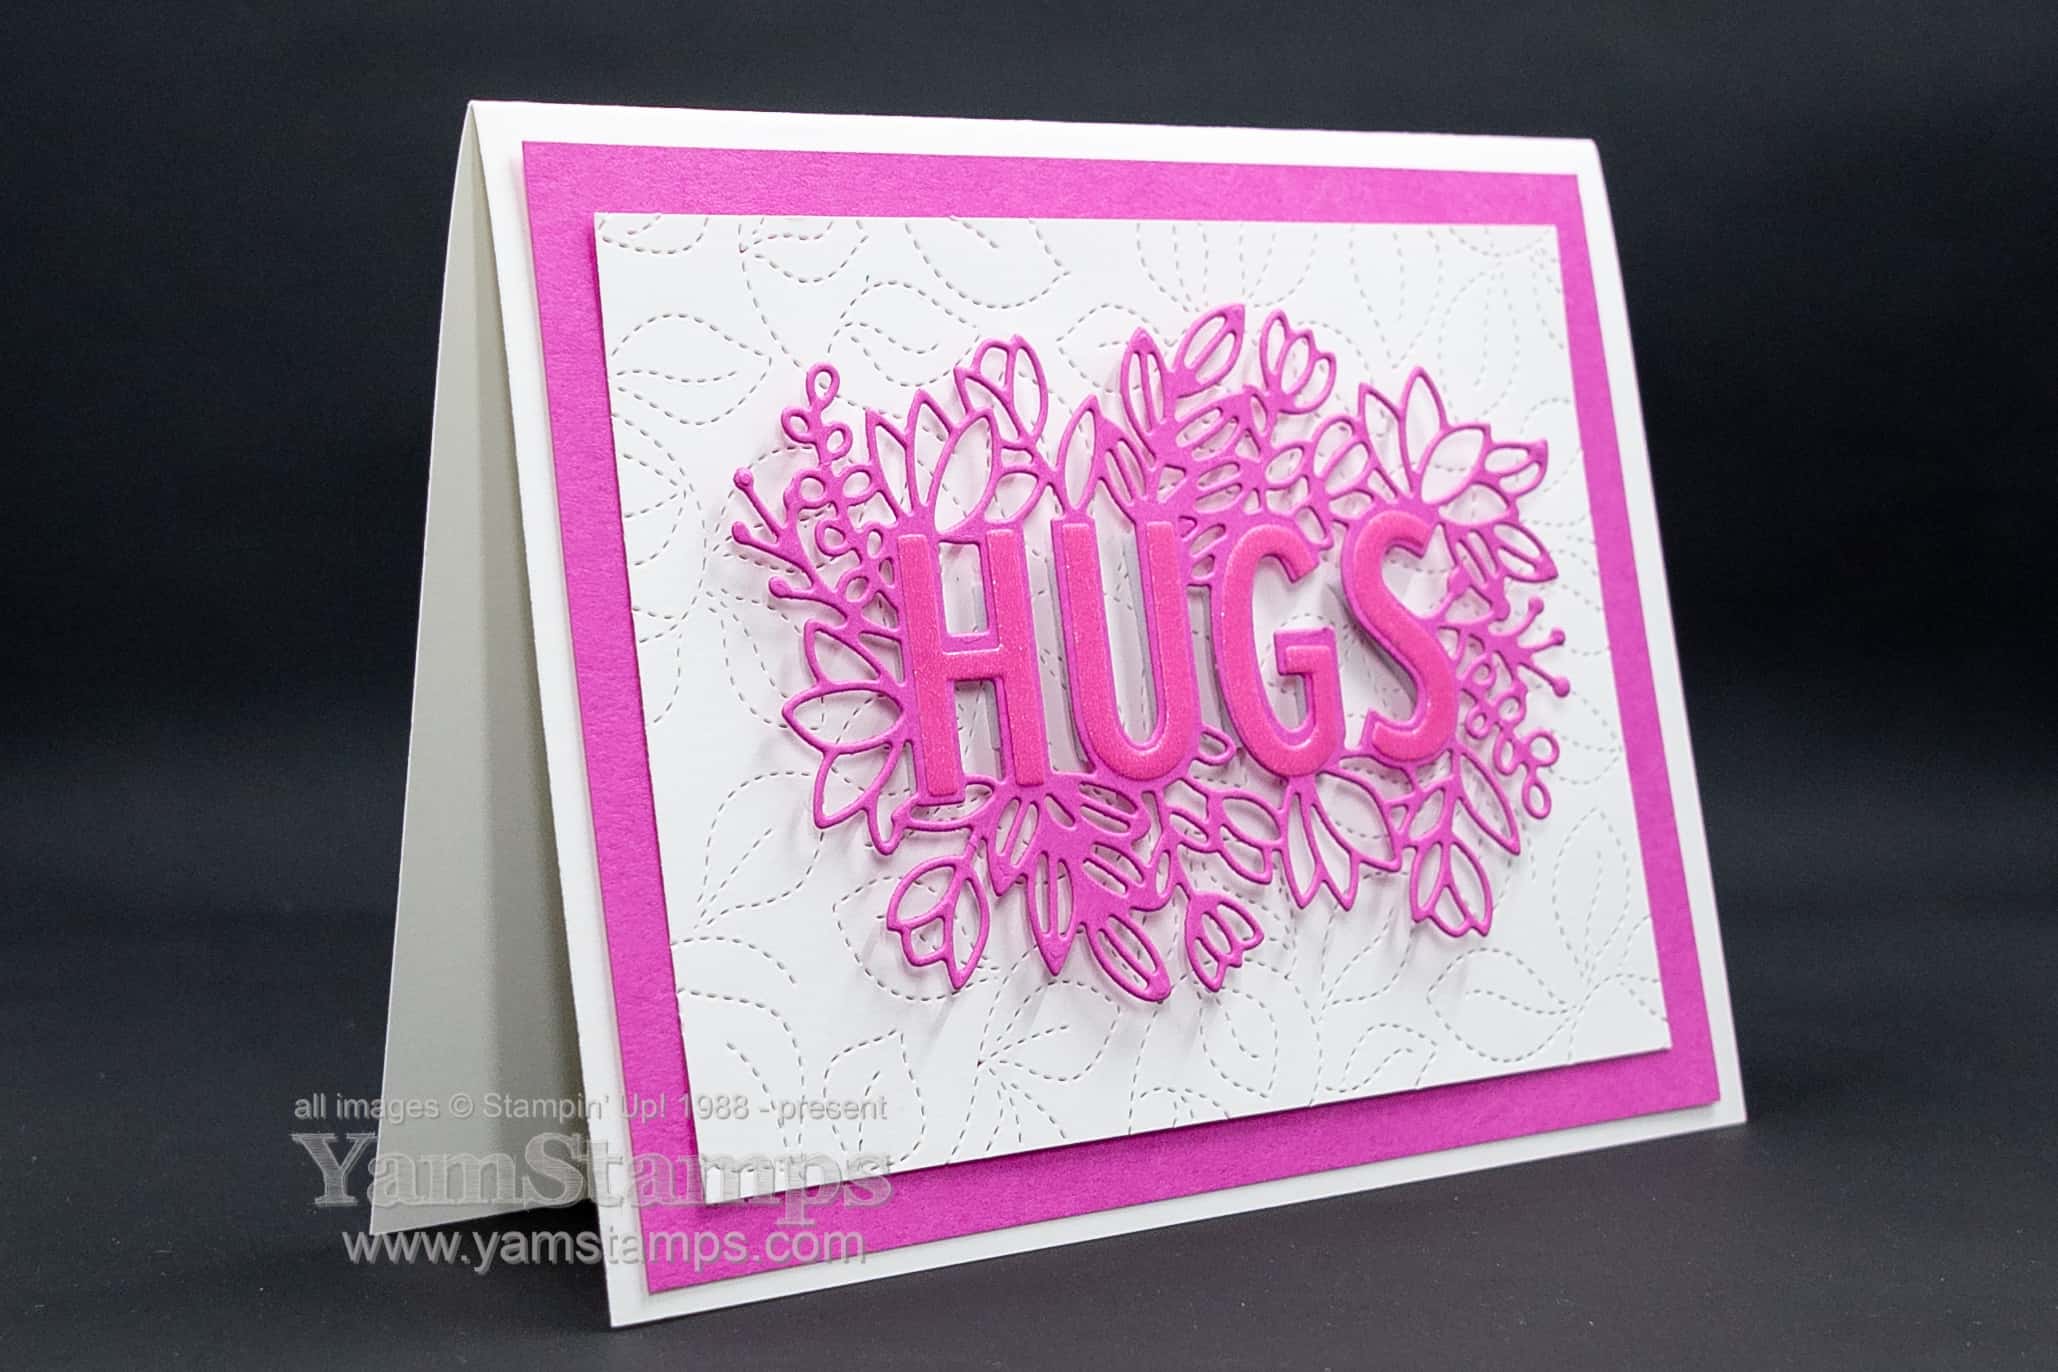
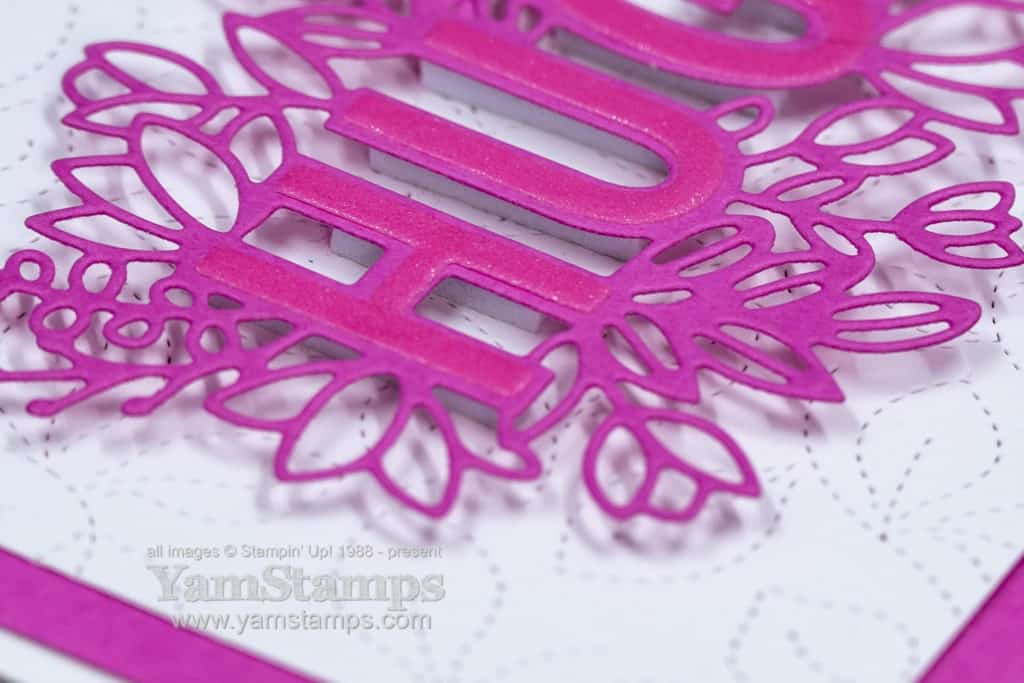
Hello! I was just dwelling on the fact that my wall calendar was still on August…as of yesterday. It’s now showing the correct month. And while I faithfully send out my weekly emails and have gotten back to posting on Facebook a bit, I am still trying to climb back on the wagon for Instagram and the YamStamps blog. So I decided I would share a paper hug with you all.
The Basic White background is given detail with the Stitched Greenery Die. I love how this die adds a stitched accent that is perfect for a background, and ties in with the botanical theme of the card. The Layering Hugs dies have one larger die that cuts the word and all the detailed flowers, and a second die that cuts out a slightly smaller version of the letters. I die cut the letters from the In Colo(u)r Shimmer Vellum – another of my favourite items in the catalogue. The letters are from the Polished Pink sheet, but the cardstock that I used was actually Magenta Madness because I wanted a bit more “pop”. The Foam Adhesive Strips were a perfect width to use behind the letters (you can see it if you look at the detailed angle shot) – so I just cut up chunks to use behind portions of the letters.
I’m sure you know of someone that could use a Paper Hug! Right now, I am still at the paper hug level – not quite to the hugging everyone level that I was at pre-COVID (LOL) but I’m working on it… I fully acknowledge that my level of caution is a little higher than a lot of others, but at this point in time, it’s what I do to keep myself calm and sane in these crazy times. (Also when you work in health care it’s sometimes hard to reconcile the levels of precautions at work with the levels of precaution that happen in the community at large).
If you’re looking for a creative outlet, consider joining my (currently online) Monthly Stampers Club! Although technically right now, I guess it’s more accurate to call us a Card Club – we meet online and create 4 different projects, and each month a different club member gets a turn to receive the Stampin’ Rewards benefits from the orders placed. New members can start at any month for a 6 month cycle. Since we’re online, you can join from wherever you are in Canada, and even if you can’t make it at club time, you can access the recording of the club session in our members only site. Contact me for more information!
In the meantime, consider yourself hugged! See you here on the YamStamps site again soon.
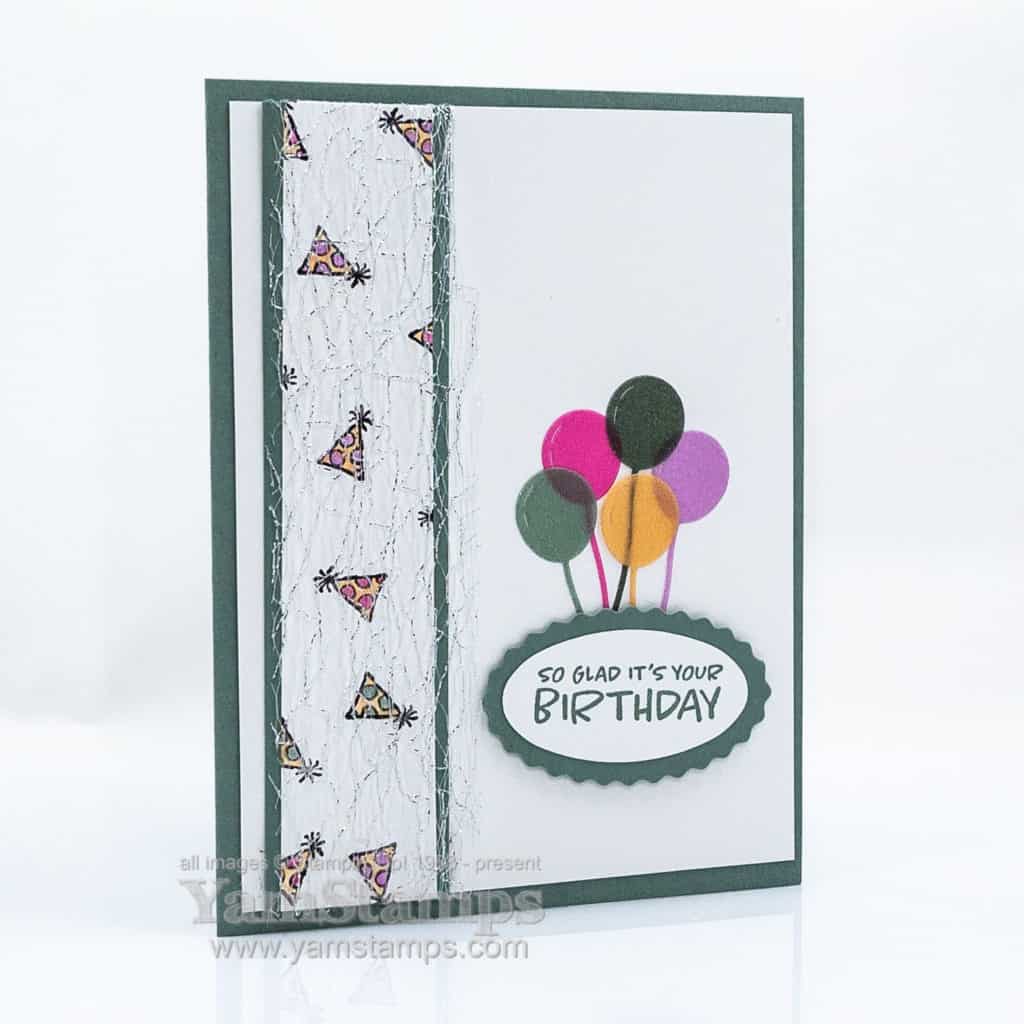
I used Stampin’ Up!’s Counting Sheep stamp set and coordinating Sheep Dies to make this fun balloon birthdaycard – a non-sheep based project!
Balloon Birthday Card
The Counting Sheep stamp set and the Sheep Dies are both Level One Sale-a-Bration items – so you can pick one of them with a $60CAD product order (before shipping/taxes) – so if you wanted both of these items and didn’t want to wait, a $120CAD product order would entitle you to two Level one items – so you could get both (plus enough supplies to make a whole bunch of these cards!).
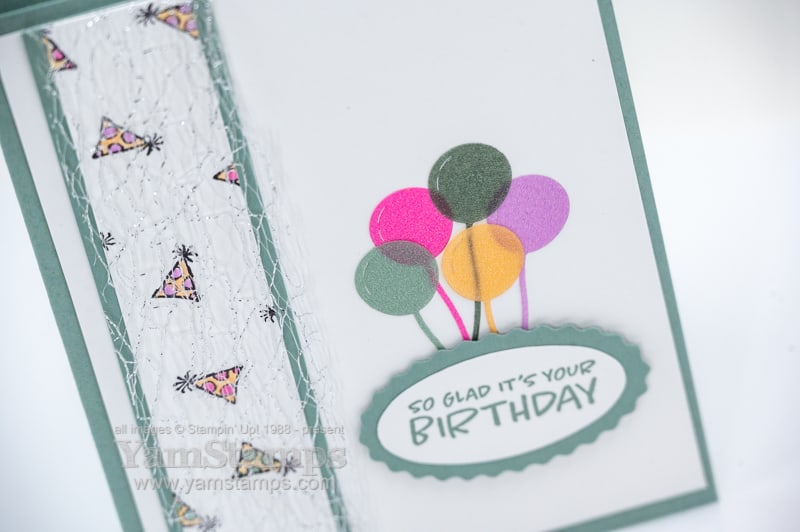
My favourite feature on this balloon birthday card is the balloons (hence the title of this post!). I die cut them (the Sheep Dies include a balloon die) from the 2021-2023 In Color Shimmer Vellum. I think that the translucent shimmer makes for some realistic type balloons – and I made sure to overlap the balloons to show off the their translucency. I used the Adhesive Sheets on the back of the Vellum (and there is definitely a back and front to this vellum) so that when the balloons are adhered in place, you really can’t see any evidence of the adhesive at all. Love it!
Sale-a-Bration runs until September 30, 2021, but Stampin’ Up! have advised us that certain items will not be guaranteed until the end of the period – the Sheep Dies are one of them – so if you have your eye set on them, or want to create your own Balloon Birthday Card, you’ll want to be sure that they are one of your first Sale-a-Bration picks…and save some of your others for your later orders. Online shopping shortcut is https://yamstamps.com/shop for 24/7 shopping in Canada (Canadian addresses only, due to Stampin’ Up! regulations). If you would like assistance placing your order or want to pay by etransfer, you can always message me. Happy Sale-a-Bration!
Here’s an easy fun fold card – though I’m not sure what the true qualifications are for a card to be a fun fold, other than “not the typical card fold”….so since it’s a little vague, I’ve decided that this design qualifies.
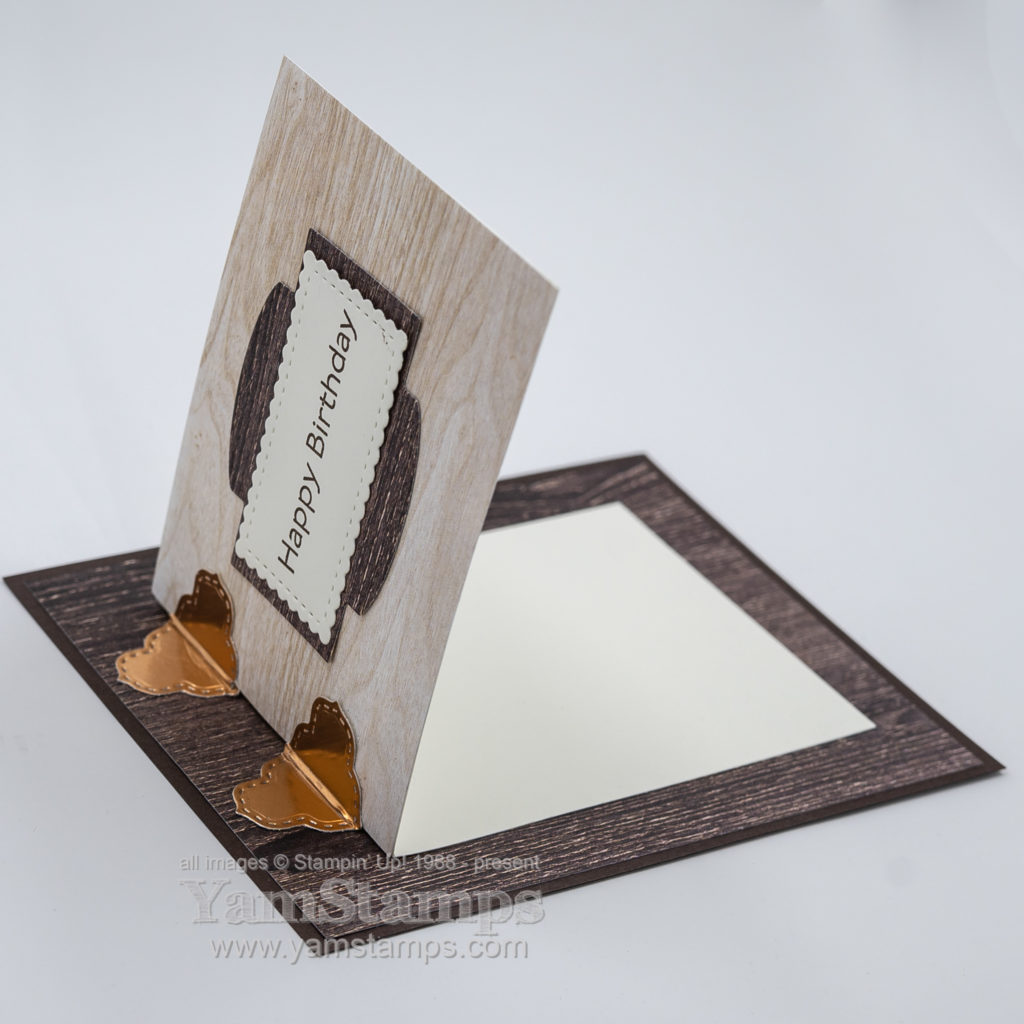
Easy Fun Fold Card – Hinged Woodgrain
This card features a mini card that opens traditionally, and it’s attached onto a backing card. It features the woodgrain designs from the In Good Taste Designer Series Paper, which is part of the Designer Series Paper Sale that runs until August 2nd – you can grab it for 15% off while the sale is on!
The dies that cut the “hinges” and the sentiment piece are from the Stitched So Sweetly Dies. I had some scrap pieces of Copper Foil Sheets with the Adhesive Sheets on the back, so after die cutting the “hinge” pieces, it was simply a matter of removing the adhesive backing and sticking them in place. I ran the rounded end of my Bone Folder along the fold of the card to make a marking in the foil hinge, and so that the mini card would open a little more easily. If you’ve been following YamStamps or have attended a class with me, you’ll know that I cut the backing piece for the sentiment from the bottom layer of Designer Series Paper – because the hole gets hidden by the mini card! This easy fun fold card is also a frugal card…
Easy Fun Fold Card – Open
The mini card itself is a 3″ x 8″ piece of Very Vanilla cardstock folded in half. The front of the mini card is covered by a piece of the lighter woodgrain Designer Series Paper – and it goes across the whole surface, rather than leaving a border, because I liked the effect better. I did still leave a bit of a border between the darker woodgrain paper and the Early Espresso cardstock.
A reminder that the Designer Series Paper sale runs until August 2 – select Designer Series Papers are 15% off. You can place an online order from anywhere in Canada in the YamStamps Online Stampin’ Up! Canada store – shortcut is yamstamps.com/shop, or you can email me for assistance placing an order.
Mini Catalogue cover
I’ve had the new Mini Catalogue and Sale-a-Bration catalogue mailed out to current customers, so they should be arriving soon, if they haven’t already! (I’m hand delivering the local ones). If you need a copy of the catalogue and don’t have a current Stampin’ Up! Demonstrator, please feel free to contact me to make arrangements to get one! If you’ve already received your copy, you may notice that it’s called the “July-December Mini Catalogue” HOWEVER it will be active on the same start date as Sale-a-Bration – August 3rd. Stampin’ Up! made the decision a few months ago to push back the official start date of the Mini Catalogue to compensate for some shipping delays that were beyond their control, and despite their planning. We are all continuing to navigate our changing situations as best we can, right?! You can be sure that there will be links for the digital versions of the catalogues available through the YamStamps Site, as well as the newsletter that will be released that day as well.
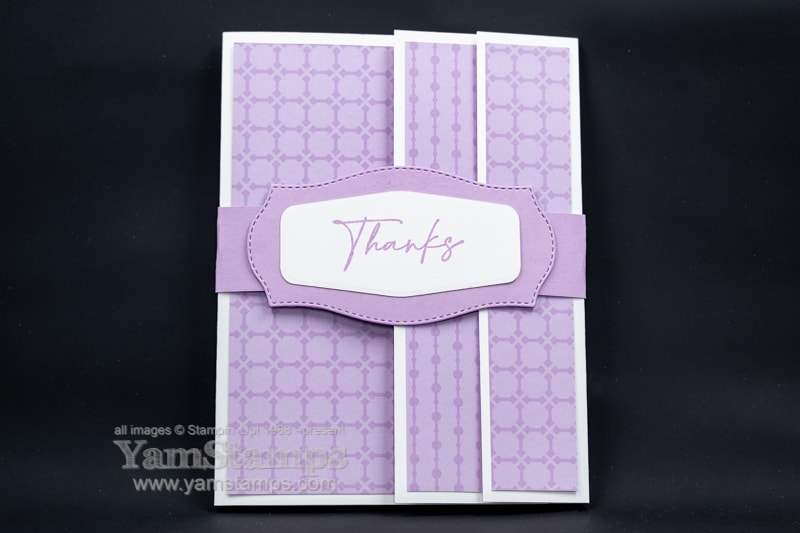
This simple thanks card is made a little less simple looking by adding a fancy fold and belly band – but I promise it’s easy! (Truly, do you expect anything else if you have been here before? haha!). This fun pattern was recently shared by Arlene Luscombe, an “Eh” Team member (my demonstrator group) in a recent online group get together.
Simple Thanks Card
This easy fancy fold is created by folding the edges of the front and back of the card to create extra “layers”. The Basic White Cardstock was cut to 5.5″ x 11″, scored at 1.75″, 5.5″ and 9.75″ then the centre score line was folded in the opposite direction of the two end score lines. A single sheet of 6″ x 6″ 2021-2023 In Color Designer Series Paper makes the coordination of the designs (and colour) simple. One design was used on the cardfront and back flap, and the flip side was used on the centre flap. Since the sheet was Fresh Freesia, that was the cardstock & ink used on the label and the belly band. The sentiment is from the Hand-Penned Petals stamp set on the Tasteful Labels Dies.
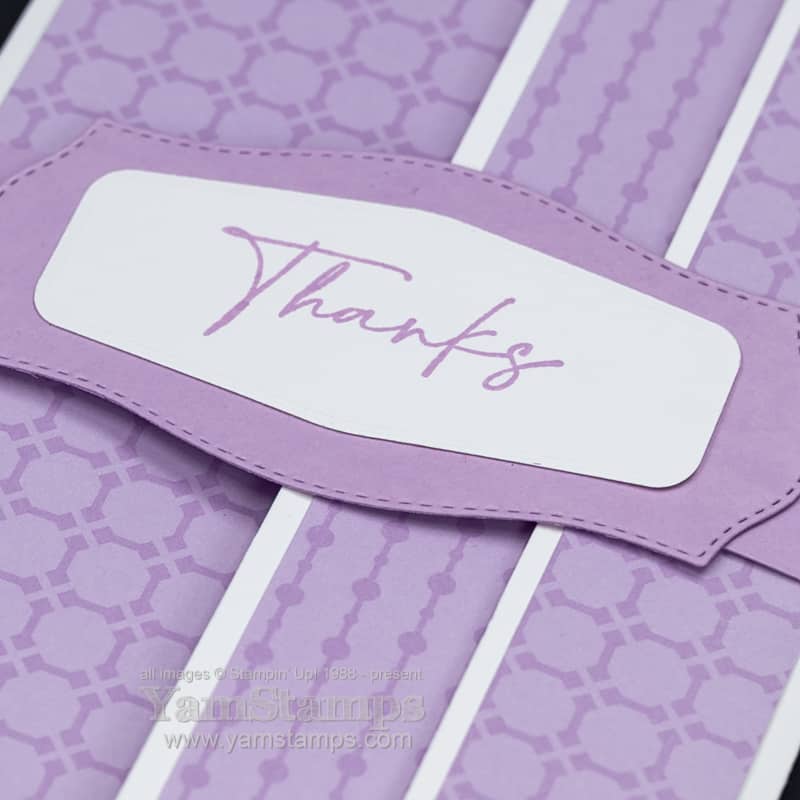
simple thanks card – fancy fold close up
My “lazy crafter” (trademark pending LOL) technique for the belly band – the band is 11″ long and the join is in the front, underneath the label. I usually place the end of the cardstock strip centred on the front of the card and then just fold the band around the card, making sure the flaps are aligned, and then adhere them together, using the label to hide the seam. I don’t fold the band too tightly around the card so that it’s not too difficult to remove. I typically find if I try to score the folds into the belly band, I mess it up somehow and it doesn’t fit properly!
We did this simple thank you card in Stampers Club last month, and I’m busy finishing prep for the June card packages so that they’re set for pickup/mailing! If you’d like to join us in club, send me a message! New members can start at any month for their 6 month membership – but it’s easiest if I have a week or two notice so that I can get your class items prepped for you! We meet the third Monday of each month, so now’s the time to join us for June!