How are your holiday preparations coming along? (*ducking and running*). Mine are behind schedule, as per usual for me…but I thought I’d share this winter thank you card for those of you who are slightly ahead of me.
winter thank you card
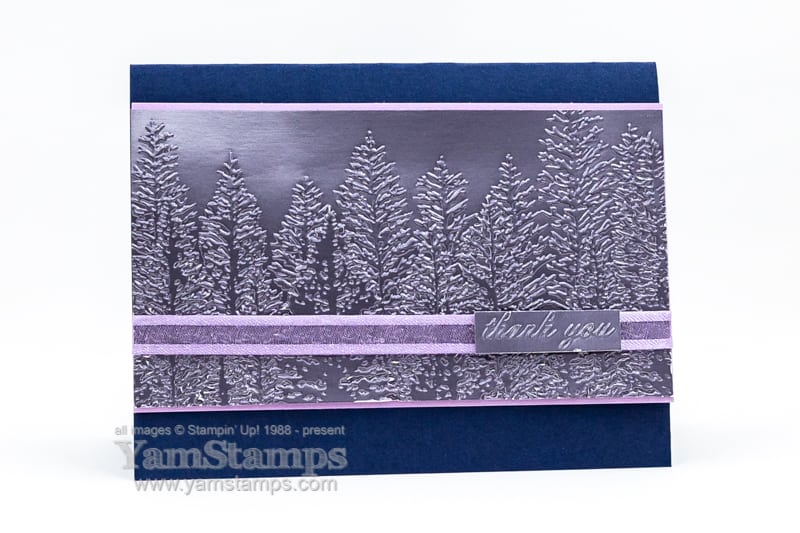
Although as I type this now, I’m wondering why it can’t be a thank you card for any season – though I think the colour in general reminds me of a winter sky. I love the Silver Foil Specialty Pack that’s in the current July-December 2021 Mini Catalogue, and I’m thrilled that it’s on the carryover list – which means I will be able to continue to purchase it in the new year! The three different finishes of the Silver Foil give such different effects. The one I used for this card is the Matte Charcoal sheet, which I feel has a slight purple tint to it – so I brought that out a bit more by adding the Fresh Freesia 3/8″ Open Weave Ribbon and backing it with the Fresh Freesia Cardstock. I liked the embossed metal kind of look, so I decided to use that effect for the sentiment as well.
I embossed a scrap of the Matte Charcoal Silver Foil with the Thank You folder from the Thanks & Hello Embossing Folders set. I held the scrap in place with some painters tape, and after it was embossed I trimmed it even closer to the letters with my Paper Snips before adding it to the ribbon. I placed all of this onto Night of Navy Cardstock to complete this winter thank you card.
Well, there’s one thank you card done…
I’m working on cards to send out to everyone whom I’ve had Stampin’ Up! send the January-June and Sale-a-Bration Mini Catalogues….so I still have a few to go… I did automatically include everyone who has made an order with me in the past months, but if you’re not sure if that included you, or would like to receive one, get in touch and I’ll confirm!
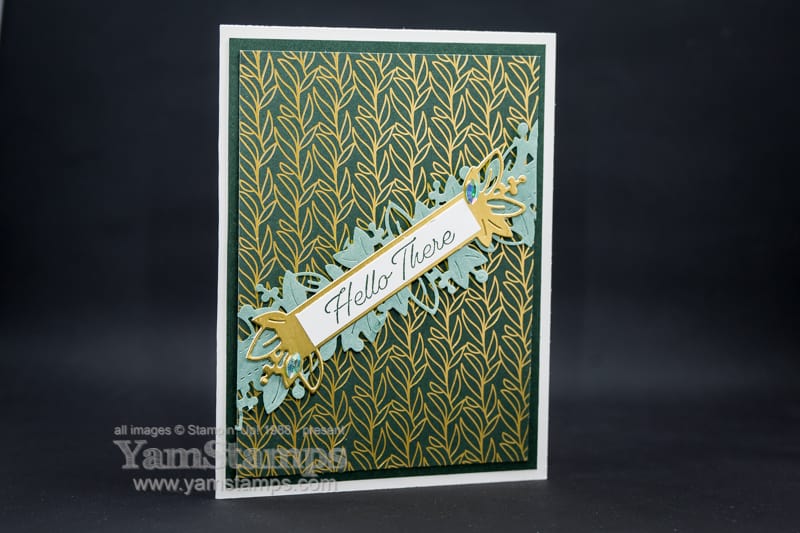
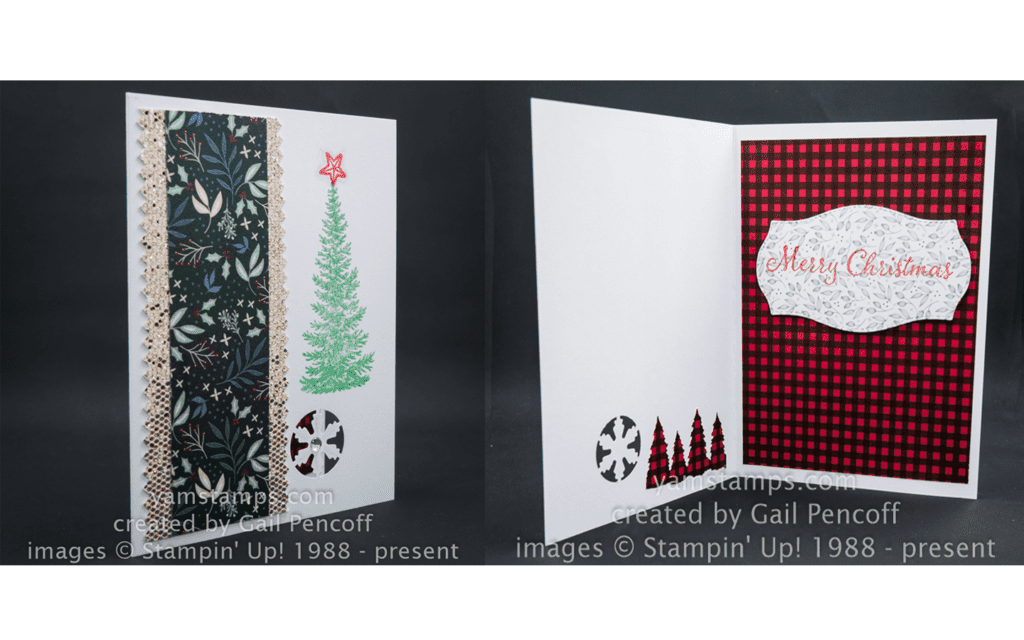
I used the dies to cut the Cotton Paper (which is almost like a tissue paper feel) and a scrap of Gold Foil. I love the gold metallic accent on the Specialty Designer Series Paper, so this coordinated well with the Gold Foil backing tag. I added some of the Garden Gems to the tag as well for an easy, elegant card. The Cotton Paper is really pliable, so I just folded the ends behind the DSP and held them in place with tape for an quick addition to the card.
If you’re on my mailing list, you’ll know that we are wrapping up the Twelve Weeks of Christmas mailings this week (um….what?!). I think I may post a bonus project next week, though. In the meantime, I need to try and get MY holiday cards mailed out, or at least get my tree decorated, right? Perhaps I will just send a number of hello there cards instead. How many cards are you sending (okay, have you “sent”, because you’re probably ahead of me) this year?
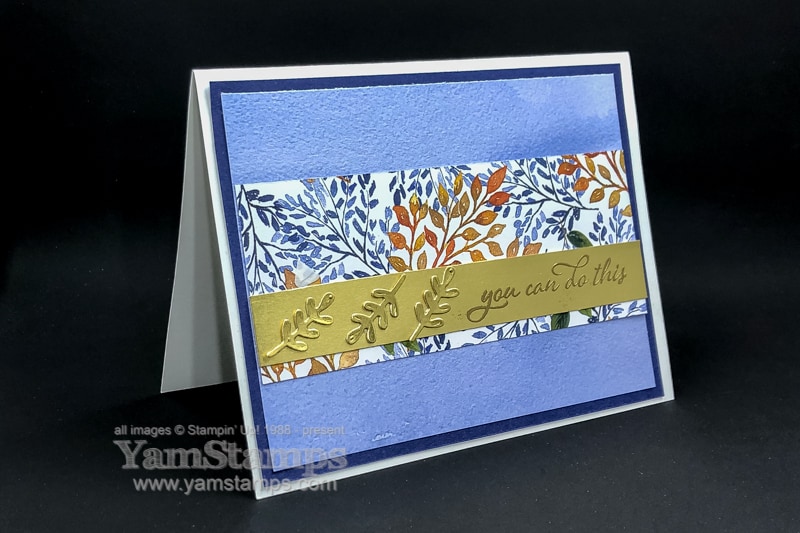
I love this embossed autumn card and how easy it was to put together. Heat embossing is a technique that I love for adding easy elegance and wow to my projects, but I haven’t used it a lot recently, so I pulled it out for this card. (If you want to learn more about embossing, you’ll want to read to the end of this post…).
embossed autumn card
Super easy card because it uses one sheet of Designer Series Paper. It’s the Beauty of the Earth Paper, and the one side of the sheet is a blue watercoloured wash effect, while the other side is a multicoloured leaf pattern. If you want to be even thriftier in your crafting then I was, you can actually just use one piece that is 3.75″ x 5″ and cut a centre strip from it, then flip it over to reveal the other side’s design. I however, was slightly lazier, and just cut another strip and adhered it on top.
If you like the look of this embossed autumn card and want to learn more about embossing for your paper crafting, you’ll want to be on the lookout for my Black Friday special! My Embossing 101 and Beyond online class is coming out of the vault for 4 days only! Friday 26 November to Monday 29 November, you’ll be able to purchase lifetime access to the class for just $5 Canadian. While some of the product used in the technique videos may have retired, the actual techniques can be used with whatever embossing supplies you have on hand (and you’ll see a couple of crafting “hacks” as well).
Are you making your holiday cards this year? It’s almost time to mail them! I’ve been sending out holiday paper crafting ideas to my mailing list – we are into the last few weeks of the Twelve Weeks of Christmas – so hard to believe! (You can still get in on the last 4 weeks of mailing if you subscribe to my list before Tuesday).
Recently a couple of my “Eh” Team demonstrator group members & I decided to do a little swap of holiday cards. We often do a little “show & tell” during our virtual meetings, but it’s fun to actually get cards in hand! So we each made a holiday card design, enough for the other people participating, and then everyone got one of each of the cards. It’s always great to be able to exchange ideas and see new designs. As a demonstrator, we don’t have to come up with all our designs by ourselves – we get inspiration & ideas from others!
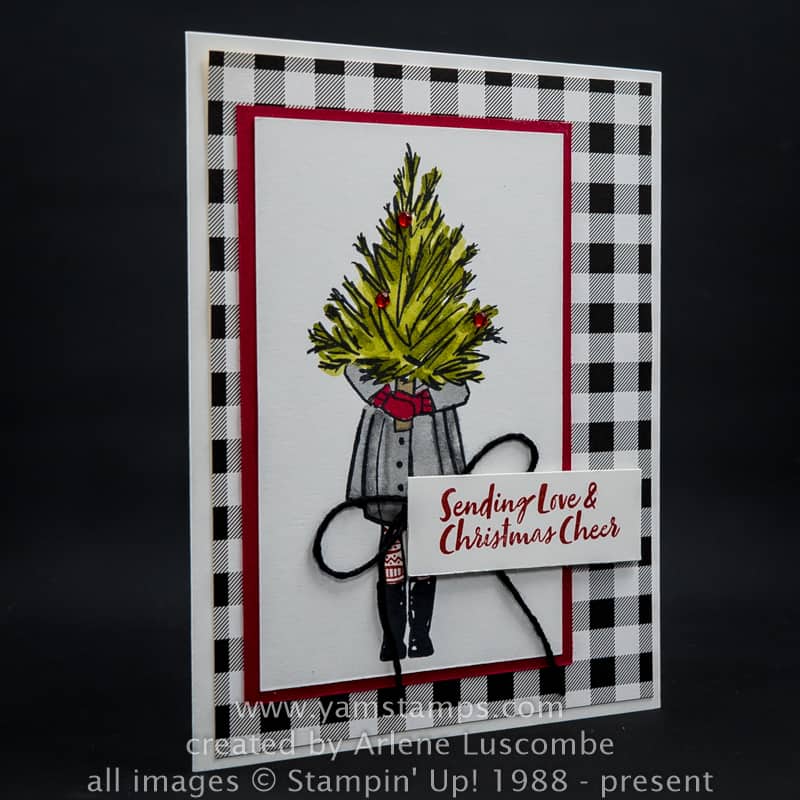
Arlene (Uptown Stamping) made this fun hand coloured card. I call her the Paper Pumpkin Queen for her beautiful variations on the monthly kits, but she also uses regular catalogue product in her projects! Here she used the Delivering Cheer stamp set from the July-December Mini Catalogue plus some of the Pattern Party Designer Series Paper that you can select with Stampin’ Rewards (earned once party orders hit $200). I think that’s my favourite host product available right now!
I enjoyed swapping ideas for holiday cards with my team and I’m looking forward to doing more swaps with my group members in the next while – I love seeing everyone’s creativity (and getting some ideas at the same time!).
If you’d like to join our group of demonstrators, now is a great time!(just ask Ruby, our latest member!) The Start with Savings promotion is running until November 30th (just over a week left). As always, you select $165 worth of creative product of your choice and receive basic business supplies plus a past Paper Pumpkin kit – BUT during November, you only pay $100!!! You save $35 off the “regular starter kit deal”. Whether you’re looking to launch a home based business or just want a creative outlet (and discounted supplies) it’s hard to deny the cost effectiveness of this kit! You can get more information about joining my group here, or message me for answers to any questions you might have. I’d love to welcome you as the newest “Eh” Team member!
I am choosing to focus on stars and rainbows today (happy thoughts, happy thoughts)….because it’s Monday and because Facebook hates me LOL. If you follow the YamStamps Facebook Page and have visited it recently, you may notice that a lot of my recent project posts are GONE. This goes for the same in the Paper Crafting with YamStamps Facebook Group. Trust me, this wasn’t by my choice! Facebook decided that it didn’t like the Canadian Stampin’ Up! official site (you know, where the YamStamps Online Store is essentially housed) – so every single post that I had tagged with a product or anything that linked to the online store got taken down without any notice. If you heard a collective wail in the wind – it was all the affected Canadian Stampin’ Up! demonstrators. Painful.
So.
I am choosing to focus on positive things and things I can control as much as I can (stars and rainbows, stars and rainbows….LOL) – like most of the YamStamps Instagram is intact, and of course, best of all, the YamStamps Site and emails are not touched by the far reach of Facebook/Meta/whatever it’s called now.
Stars and Rainbows card
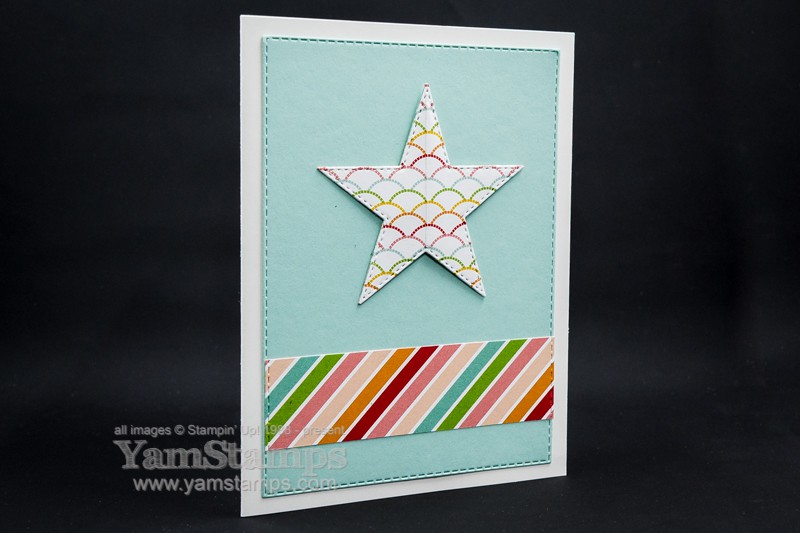
Stars and Rainbows Card! So here’s a card that makes me happy. I love the Pattern Party Host Designer Series Paper – it’s got so many patterns – black and white or full of colour, depending on which side of the 12″ x 12″ sheet you choose! Obviously for this card, I chose the full of colour sides…
It’s often the little details on a project that make it stand out – so I coordinated the stitched effect on the Stitched Die Stars and the Stitched Rectangle die cut background – and please notice the stitched edges on the strip of Designer Series Paper along the bottom of the card! I cut the strips and then ran them through my Stampin’ Cut & Emboss Machine in the Stitched Rectangle die so that I could get that effect.
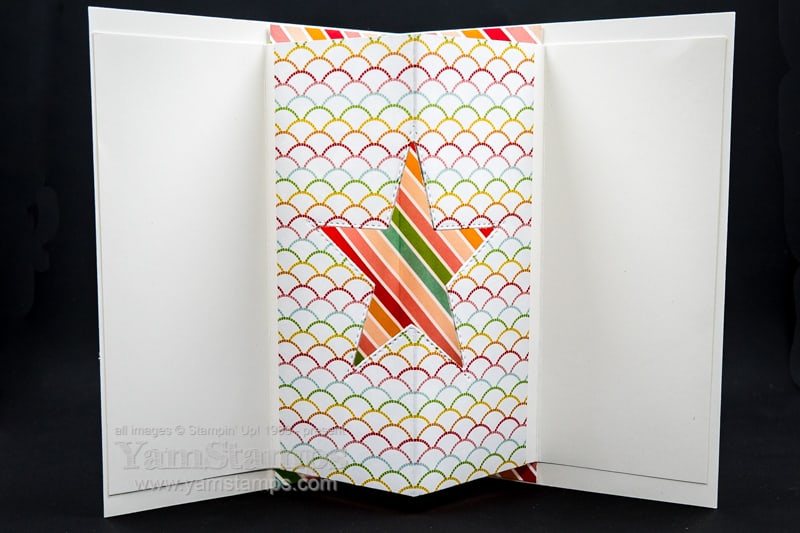
Stars and Rainbows interior
This was the fun detail from the inside of the card – I love the peek through effect. The die cut star ended up on the front of the card – so no waste on this project at all!
If you want to be sure not to miss a project that I share, be sure to come back and visit the YamStamps blog, and subscribe to the YamStamps newsletter – that way, you _know_ you’ll be seeing what I’m up to (and I will know too!). I will continue to use Facebook and Instagram too, but here’s hoping they don’t mess with my posts anymore!! Sending stars and rainbows in your direction in the meantime.
This is a purple hello card that I made recently and have been working on sending out in the mail! Honestly, the most difficult part for me is the getting the envelope delivered to the mailbox…so in the meantime, here’s the card.
Purple Hello Card
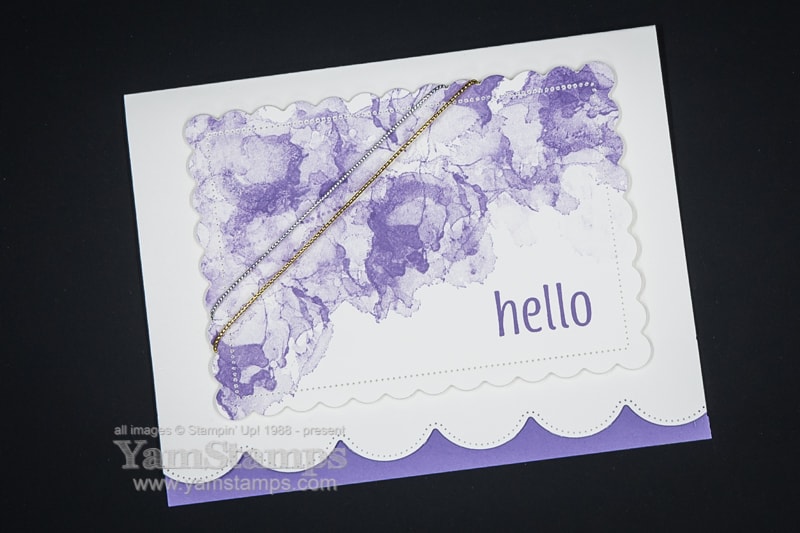
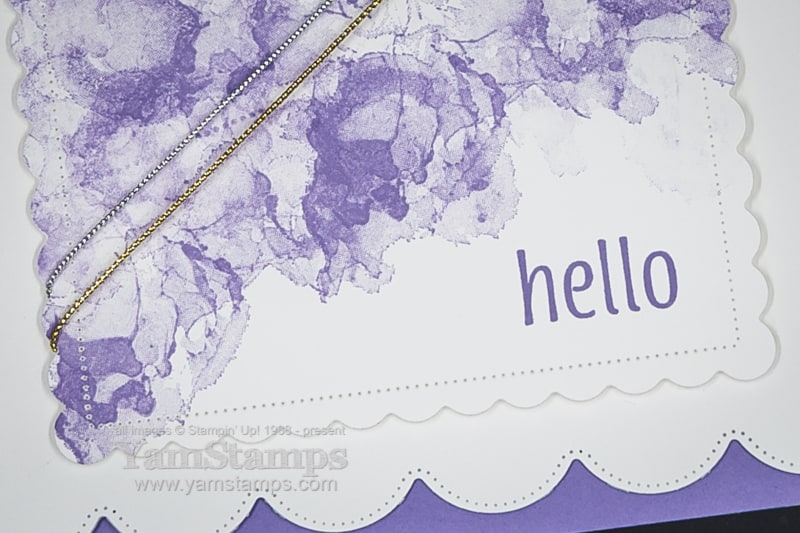
I coordinated a scalloped edge on the cardfront with the scalloped rectangle for the main sentiment/image area, and added a Highland Heather strip of cardstock along in the inside of the card to show off the detail. I love this abstract stamp! It’s from the Artistically Inked Stamp Set.
closeup – can you see what I see?
I stamped the abstract swirl numerous times on the diagonal across my die cut piece. Posting this closeup I discovered something – can you see what I see? I stamped the swirl and then would restamp to get different depths of ink and colour coverage…. Now that I post it – I can see the line of dots from where I had stamped over the stitched die cut area, and then restamped – so there was more ink left on the stamp in the area of the stitched marks that transferred to the next image! Ah well. I don’t think it’s the end of the world…and as I always say – if the recipient critiques a handmade card, they don’t deserve it!!
(by the way, if you received this particular purple hello card – sorry, oops, and consider it a unique little mark of the maker).
I mass produced a number of these for my Demonstrator Team reward recipients and recent customers. After I die cut the scalloped rectangles, I kept one outline of the rectangle (with the scalloped rectangle hole in it) and put that into my Stamparatus. I used it as a guide for placing the scalloped rectangles and lining up the “hello” stamp on the stamping plate. I only had to fuss over the alignment and placement at the beginning, and after that, I could watch Netflix and stamp cards at the same time!! Simply put a scalloped rectangle into the hole of my template, ink up the stamp on the plate and close the Stamparatus. Remove and repeat!
Hopefully that mass production tip helps you with your holiday cards…since today marks 2 months until Christmas!!! This week’s Twelve Weeks of Christmas email will be the last card project – we move on to giftables/packaging next – you can still catch the remaining weeks if you subscribe to the YamStamps newsletter today!