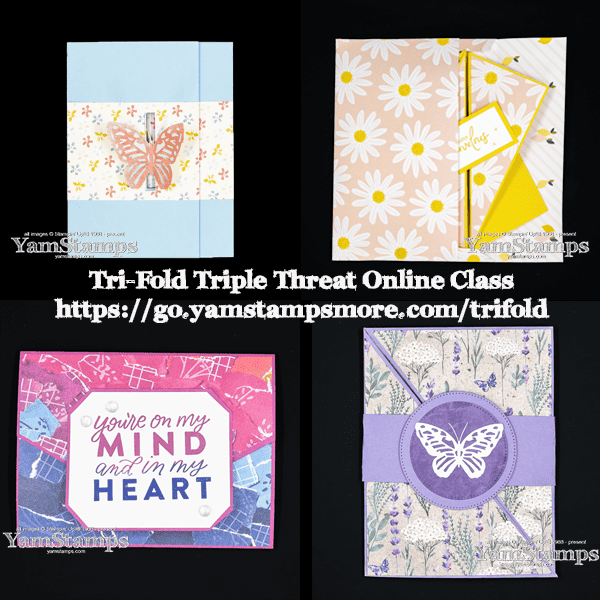
New Online Class Coming – Tri-Fold Triple Threat! Pre-Launch Sale on Now!
My next online class launches this Thursday, 14 March at 7pm Eastern and the Pre-Launch Sale is on now!
Tri-Fold Triple Threatfeatures four projects (plus a bonus tutorial) that focus on cards that have three sections and are 1) Impressive to Receive 2) Quick and Easy to Make and 3) Don’t Require Fancy Tools! (That’s a paper crafting Triple Threat in my books!). You will require a Paper Trimmer and Scoring Tool, which I consider to be a basic Paper Crafting Tool.
Pre-recorded and edited step by step videos mean that you can get crafting faster. Lifetime access means you can watch/pause/rewatch as needed, as many times as you’d like. Pre-launch pricing means that you will save $10CAD and pay just $20CAD for lifetime access if you register before 7pm Eastern on Thursday 14 March. After the class launches, you’ll still be able to register for class, but you’ll pay full price of $30CAD for lifetime access. This class is available internationally, since there is no physical product included. If you are located outside of Canada, you will be charged in CAD and your card company will convert the cost for you.
This class is hosted on my Online Classes site, so you don’t need to have a Facebook Account to access it. You’ll be taken to the registration page after you complete your payment. I’ll send out a reminder and link once the class opens on Thursday, so you’ll be first to access it!
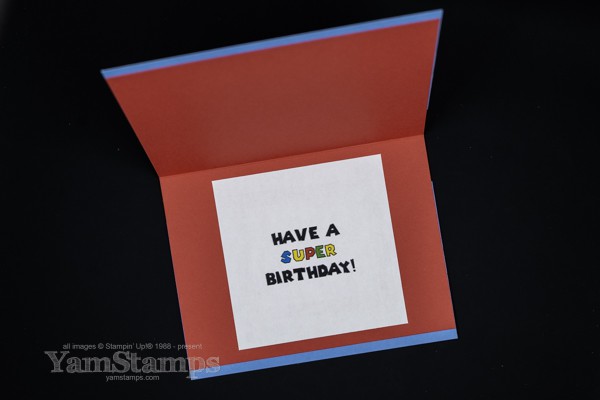
If you follow YamStamps on Facebook, you’ll know that I love sharing “Days” on the page – like today, which is Mario Day! MAR-1-0 – get it? Someone very clever (presuming someone at Nintendo) came up with that one! It inspired me to create a quick and easy Mario themed card!
I cut the Azure Afternoon Cardstock to resemble overalls, added a Poppy Parade inner card and used the cut outs from a number 8 from the Alphabet A La Mode Dies for the overall buttons. I found a free font on the web that resembled the Mario lettering and used that to create a sentiment that I stuck on the inside of the card – and it’s a SUPER card for a Nintendo lover!
I thought the overalls theme would be the easiest to use for a card – and going with this, you could also easily make a matching Luigi card by using a green inner card rather than a red one!
Did you play a lot of Mario games in the past – or are you still playing them? I played more when my son was younger since we would play together….and I do remember playing Super Mario Universe on my own after he’d gone to bed because I really wanted to beat certain levels. (I can be a little goal oriented that way I guess!!). We also played Mario Kart and Mario Party with a group, which was fun (though our family can get a little competitive at times!!). Must be a genetic thing.
Check out the quick Mario Day card video I did of the card making process – I shared it pretty much everywhere….YouTube, Tik Tok, Instagram and Facebook….and now here on YamStamps.com as well! I like being able to create quick videos and then find some appropriate and fun music to use with them….though a bunch of my TikToks are now quiet (they even removed MY voice in some of the voice overs) because they’ve stopped allowing Universal Music for Tik Toks (and apparently I used a bunch of their songs). I might get around to picking new music for them at some point (or maybe the music will be allowed again at some point in the future??). Anyway, for now, at least, the Mario Day video has sound!!
Save this so you can remember to make a Mario themed card for the game lover in your life!
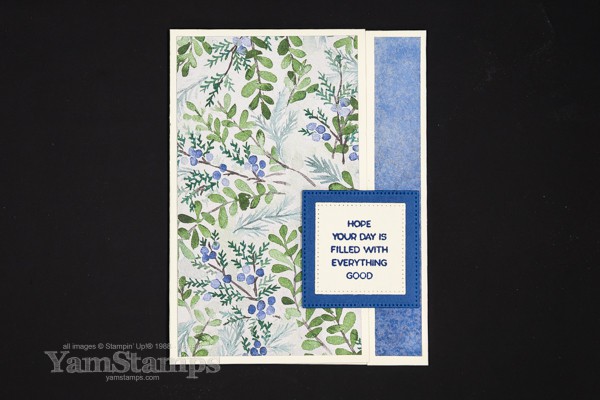
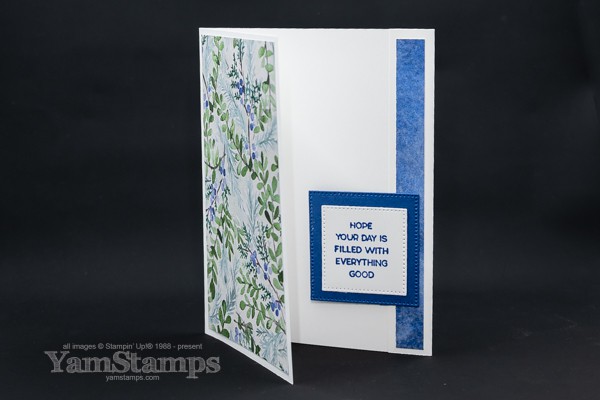
Check out this Super Simple Fancy Fold Card! (Does it still count as a fancy fold when it’s this easy?)
You may know that I love quick and easy crafting. This super simple fancy fold card is definitely in that category – to the point where I almost wondered if I could call it a fancy fold?! I decided that I could, since anything other than a standard “cut the cardstock and fold it in half” seems fancy to me.
It’s a simple extra fold with a “closure” card.
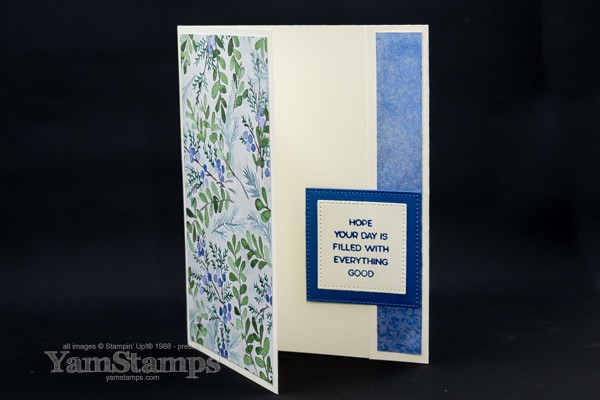
I love that we can still order the Winter Meadow Designer Series Paper – because it’s definitely still winter here. (Now we even have snow and sub-zero temperatures to boot, not like that freaky warm weather last week!!). This was one of my favourite papers from the September-December Mini Catalogue, so I’m happy that it’s still available! I featured it on this card, using two sides of the same piece which makes it even easier to create!!
It’s a standard sized card to start – so cut to 5-1/2″ x 8-1/2″, but there’s an extra score line at 1″ – so scored at 1″, then 5-1/4″. The 1″ score line is folded, and then stuck in place, leaving a shorter front portion of the card that meets up. Add a die cut shape and sentiment to the flap (making sure to ONLY stick it to the flap) and then you have a closure piece! Tada! A super simple fancy fold card! The sentiment is from Timeless Arrangements, and my go to dies for sentiments for card fronts are the Stylish Shapes Dies – so I used the squares for this card. I used Blueberry Bushel ink, Blueberry Bushel cardstock for the backing square, and Very Vanilla Cardstock for the base.
We made this super simple fancy fold card during Monthly Card Club, and my prototype was actually in Basic White Cardstock, which worked, but the more I looked at it, I felt like the Vanilla cardstock was a better match – a little “softer” look. What do you think?? Here’s the Basic White version:
The white version is definitely brighter, and I do think either one works…but went with the Vanilla version for club. I tend to use white a lot for my cards, so it’s good to force myself to remember that there’s other options for cardbases!!
If you’re interested in joining Monthly Card Club, it’s open to anyone in Canada! We meet virtually by Zoom the third Monday of each month. Participants place a minimum order, and once during their 6 month membership will receive the Stampin’ Rewards generated by club members’ orders. New members can start their 6 month membership at any time! Please contact me if you’re interested in joining us starting in March.
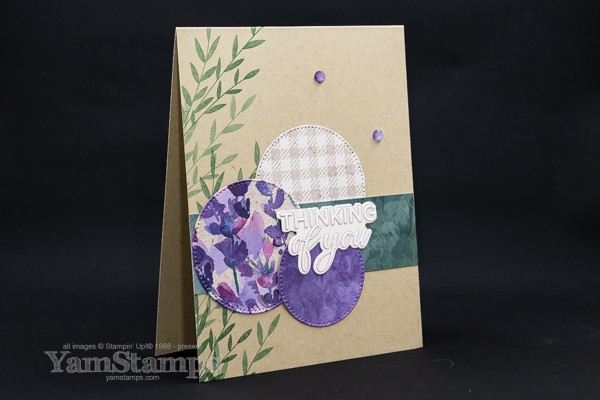
Use the Perennial Lavender Suite to create a lovely Thinking of You Card.
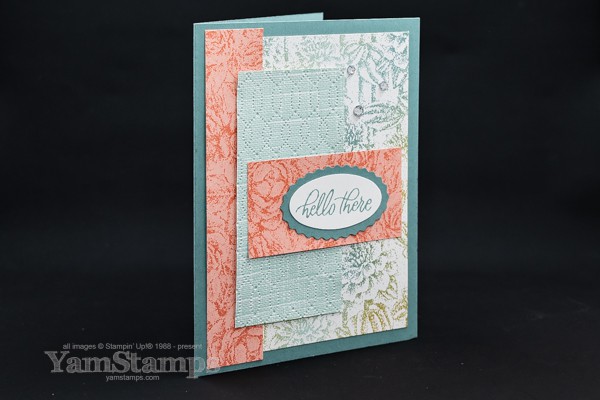
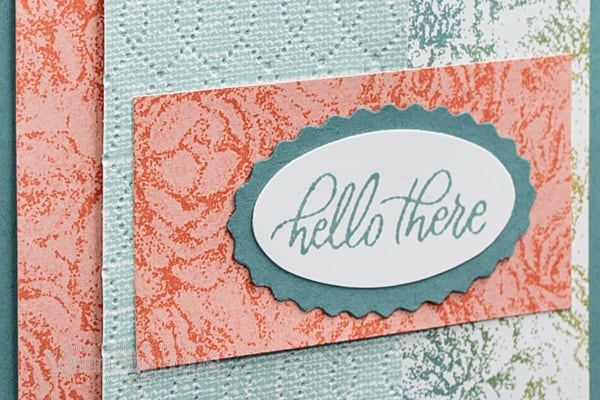
I always try to have a stash of “thinking of you” cards because they cover so many reasons you might send someone a card. I created this one for a recent Stampin’ Up! Demonstrator only card swap featuring products from the January-April Mini Catalogue. I chose to use elements from the Perennial Lavender Suite as well as the Thoughtful Moments Hybrid Embossing Folder.
Since the background of the floral print is beige, I chose to use Crumb Cake Cardstock for the cardbase to tie things together, plus I chose to use Very Vanilla Cardstock as I felt like Basic White Cardstock might be too stark a contrast. I stamped the leaves along the side in Shaded Spruce Ink (I think….I can’t quite remember and I didn’t write it down….oops)
I die cut circles with the Stylish Shapes dies from the Perennial Lavender Designer Series Paper. The horizontal strip is also from the same DSP package – since the designs are two sided, there’s twice as many options to choose from! When you use a card design like this one, your DSP stretches a long way.
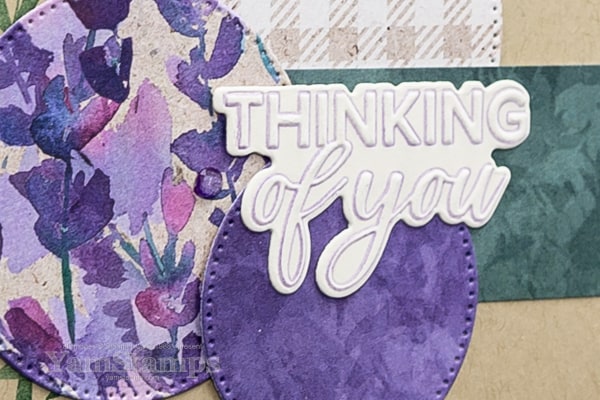
The “thinking of you” sentiment is from the Thoughtful Moments hybrid embossing folder – when you purchase it, you receive both a 3D embossing folder plus a coordinating die set. I inked up the portion that included the “Thinking of You” sentiment, “locked” the die in place (it fits around all the embossed/debossed areas) and then closed it on some Very Vanilla Cardstock before running it through the Stampin’ Cut & Emboss Machine.
I like how adding just a bit of ink to the embossing folder makes the words stand out a little bit more – plus using Highland Heather Ink ties it into the colour scheme of the card. I finished off the card with a bit of bling with the Purple Fine Shimmer Gems.
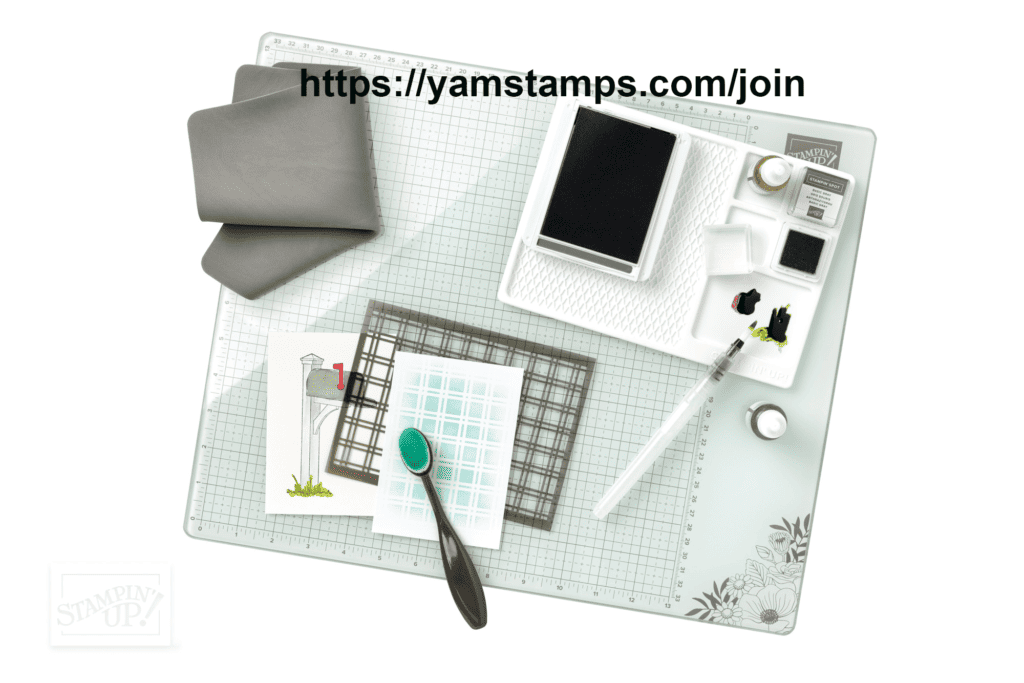
Stampin’ Glass Mat Studio – includes glass mat, grey cleaning cloth and white silicone mat
Being a Stampin’ Up! Canada Demonstrator means I get to dedicate time to paper crafting and learning new skills….and call it “work”! Or as some of the Demonstrators in my group call it – a “jobby” (job / hobby)! If you’re interested in learning more about becoming a Stampin’ Up! Canada Demonstrator with my group, known as the “Eh” Team, you can click here to read more, or contact me if you have questions. We’d love to have you join us – and during Sale-a-Bration, you can get more in your Demonstrator Starter kit – your choice of the Stampin’ Glass Mat studio, or an additional $41CAD worth of product of your choice. Sale-a-Bration runs until 29 February this year, and there’s ALWAYS a rush at the last minute – so don’t wait until the system gets bogged down with all the Last Minute Lucys – the sooner the better!
One of the best ways to show your appreciation – custom thank you cards!
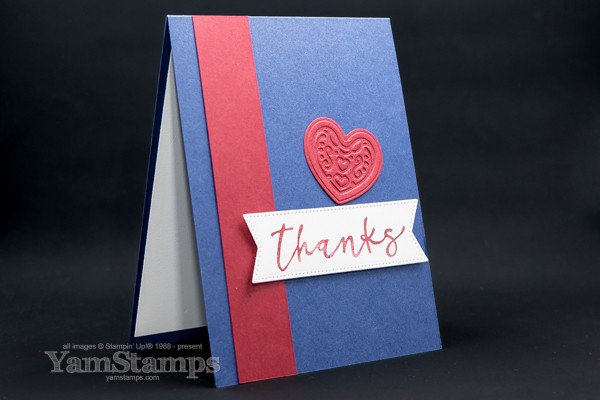
One of the things that I love about making my own cards is that I can customize them! I recently made a custom thank you card for some Burlington Teen Tour Band members.
I volunteer as a photographer for our city’s marching band – the Burlington Teen Tour Band, and recently wanted to give a custom thank you card – so this is the card I made! Quick and easy (you know, the projects that I prefer) but I added details particular to the band. I chose the colours based on the band uniforms and added a vertical stripe because their navy pants have a red stripe down the outside of the leg. Added the sentiment and had an extra embossed heart on my craft table so added that as well!
I chose to use Night of Navy and Cherry Cobbler as my colours. The sentiment is from Artistically Inked (one of my favourite ones to use for a thank you card), and it’s on a Stylish Shape die cut pennant piece. The heart was created with the Adoring Hearts Hybrid Embossing Folder – so I could emboss AND die cut the heart at the same time. Bonus – if you’re making cards in bulk, you can emboss and die cut 9 hearts at the same time!
Making a custom card thank you card doesn’t have to be difficult! Choose appropriate colours for the person receiving it – do they have a favourite colour? Or if you’re making a card for a person who has affiliations with a team or organization – pick those colours, or a detail from their uniforms – like this card, with the stripe like the band pants!
I send out a weekly email newsletter with paper crafting ideas and information – so if you’d like to get project tutorials and notifications of upcoming sales and specials, please sign up for the YamStamps Newsletter! You can sign up through the box on the YamStamps site, or click here. Weekly newsletters go out each Tuesday!
We are already over halfway through January! How will you Sale-a-Brate 2024? For every $60CAD product order, you can select a Level 1 Sale-a-Bration item for free – at $120CAD, you could select either two Level 1 items, or one Level 2 item for free……and so on, and so on, and so on…. As long as the amount is at least $60CAD in a single order (before shipping/taxes. after any discounts), you’ll qualify to get something for free!
I also used the Level 2 Sale-a-Bration Softly Sophisticated bundle – the sentiment is from the stamp set, and I used the embossing folder on the blue DSP. I like the “debossed” effect of this one – it almost looks like stitching! I did this card for the Demonstrator Only Sale-a-Bration swap, and some of the panels I debossed and others were embossed (bumpy side showing). FYI – it’s a little easier to adhere when the bumpy side is showing! Either way, I still like the effect. I used the Double Oval Punch to make the sentiment stand out.
How will you Sale-a-Brate 2024? So far, the Designer Series Paper choices have been the favourites for Sale-a-Bration – both with my customers and with the general Stampin’ Up! customer base! That being said, if you have your eye on one of the DSP choices for your Sale-a-Bration freebie, you will want to make sure you get your $60CAD product order in sooner rather than later. Sale-a-Bration items are available while supplies last / 29 February (one extra day to Sale-a-Brate this year!) – whichever comes first.
If you want to see some of the swap cards I received, be sure to check out the Sunday Swaps Page here on the YamStamps blog – I also highlight a card each Sunday on the YamStamps Facebook Page.
Demonstrator Only Swaps are one of the many fun activities that you can participate in if you’re a Stampin’ Up! Demonstrator – and it’s more fun to join during Sale-a-Bration! How will you Sale-a-Brate 2024?! You could purchase a Demonstrator starter kit and get the exclusive Stampin’ Glass Mat Studio, currently available only to new Demonstrators in the starter kit! You have to make a choice, though – the Glass Mat Studio OR you could select $41CAD more product in your starter kit. More information on joining my group of Stampin’ Up! Canada Demonstrators known as the “Eh” Team!
The Stampin’ Glass Mat Studio includes the glass mat, the grey cleaning cloth and the white silicone tray (i.e. the stencil/blending brush/water painter/ink pad/spots and reinker are not part of the studio).