I’m excited to be on Morning Live today (estimated air time 9:45 am) – sharing some cardmaking ideas in honour of World Cardmaking Day (this Saturday). I’m also hoping to boost my donation amount! For each Paper Pumpkin subscriber, Stampin’ Up! is donating to the Breast Cancer Research Foundation – $1 per subscriber, and $2 for each new subscriber by October 10th. I have pledged to match that donation personally for each Paper Pumpkin subscriber who is signed up through me. So please sign up! It’s a fun monthly paper crafting kit, and right now you’ll help raise funds for a worthy cause. Plus it comes in a pink box in October!
I’m sharing this card that I am NOT planning on sharing on TV today, since we know how that goes for me in general….I plan a blog post with a project that I’m intending to show on air, and somehow run out of time or forget to show it during the segment….so I’m not even going to try with this one! This was made with the Stampin’ Up! set You’ve Got This and stamped with the new format Archival Basic Black ink which gives a great, sharp imprint, and withstood watercolouring with an Aquapainter.
Last but not least – be subscribed to the YamStamps list by 1pm Eastern today to get the first week of the Twelve Weeks of Christmas projects! (Yes, it’s true…12 weeks until Christmas…). These projects will not be posted anywhere else – they’re exclusive to my mailing list subscribers and will NOT be resent -so don’t miss out on getting all 12 of these projects! You can sign up by filling in the box at the top right of the blog…or get more information and sign up here. No shortage of options to get on the list!
Yes, it’s almost time for the Twelve Weeks of Christmas!! Each year, in the weeks before Christmas, I send out an exclusive Christmas project to the YamStamps subscribers. These projects are not shared anywhere else – you won’t see them on the YamStamps blog, the Facebook page, Twitter, Instagram, Pinterest…well, you get the idea. They will start NEXT WEEK so be sure to be signed up to the YamStamps list by Wednesday at 1pm when the first mailing goes out. As a bonus, new subscribers get an exclusive paper crafting video tutorial. By the way, there will be no “re-sends” of the special emails, so if you want all 12 projects, you need to be in from the beginning.
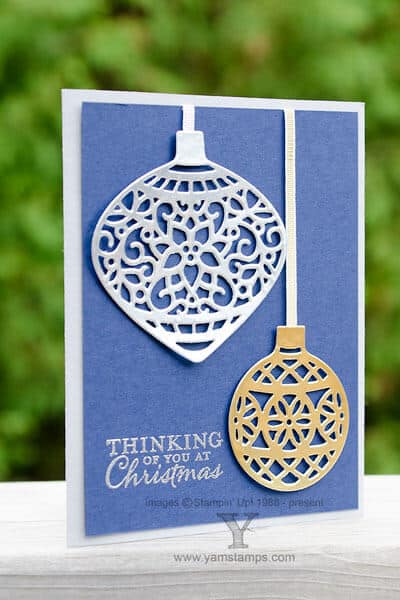
To get you into the spirit, I’m sharing a recent card featuring the beautiful Embellished Ornaments set and Delicate Ornament dies. Combined with the Gold and Silver Foil sheets, they make for an elegant card. I used Silver and Gold ribbon and silver embossed the sentiment. Smoky Slate is a great cardstock to play up the silver tones. I used the new Precision Base Plate to cut these ornaments – it’s great because it will never warp…but you do get a bit of a work out winding it through the Big Shot. I found that I didn’t need to use the dryer sheet to get these die cuts to pop out, but I did have to spend a bit of time getting the little bits to punch out of the ornament. I’m going to experiment a bit to see the most effective way to die cut the ornaments and will be sure to share my results here.
Don’t forget a couple of deadlines coming up! Registration for the October Christmas Card Class closes on October 1st – payment is due at that time so that I can place the order for the product that you get with your class fee. As well, the next Monthly Card Class will be Wednesday, October 7th. You can take a look at the YamStamps Events page for registration links or contact me to register. I look forward to seeing you in class soon!
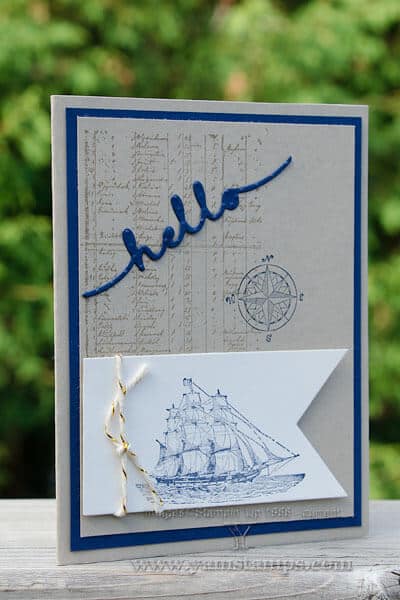
I love Stampin’ Up!’s The Open Sea set for masculine images. This card is my take on a swap card received at convention (and I apologize that I don’t have the inspiration card in front of me to give credit where credit is due…I will amend this as soon as I locate the original!). We used a banner framelit to cut out the image and the Greetings framelit set for the sentiment. A bit of masculine bling in the form of Gold Baker’s Twine completes the card.
I hope that you all survived the first week of school! So far so good in our neck of the woods. I am spending the day with friends at a crop where I’m getting the chance to catch up on some of my stamping projects – including my latest Paper Pumpkin and Watercolour Wishes kits. If YOU are ready to get back to class, don’t forget that I am offering a bonus for hosting an in home class with your friends – your pick of product from the Booking Basket, and that there’s always a Monthly Stamp Class the first Wednesday of the month in Burlington. See the YamStamps Event page for more information, or contact me if you have any questions. Hope to see you in class soon!
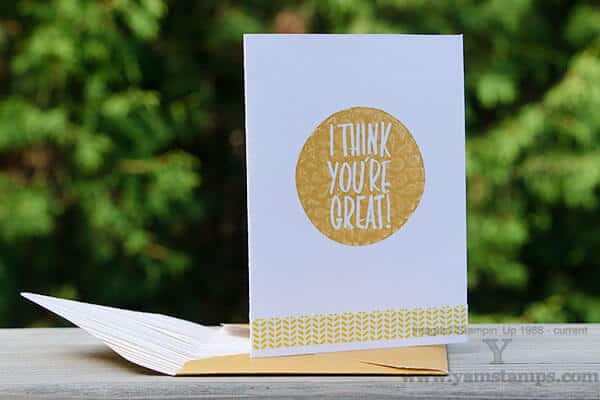
I dedicate this card to Fridays everywhere, and especially Fridays before a long weekend. Yay! This fun and quick card was made with the Stampin’ Up! set I Think You’re Great. I love the layered look you can get by the kissing technique with the stamps in this set! You literally touch or “kiss” the rubber surfaces of the stamps together to get a textured image. A touch of Washi Tape at the bottom completes the clean and simple look. This is a smaller card, and we created a custom envelope to go with it, using the In Colour Envelope Paper and the Envelope Punch Board. Perfect to add to a little gift, or as a “just because” to brighten someone’s day. I often think that the best and most appreciated cards are the unexpected ones!
Don’t forget that TODAY is the last day to register for the September 17th Christmas Card Class. Check out all the events plus registration links on the YamStamps Events Page. This month, the included product has a metallic sheen that will add some glamour to your holiday paper crafts. Have a great weekend!
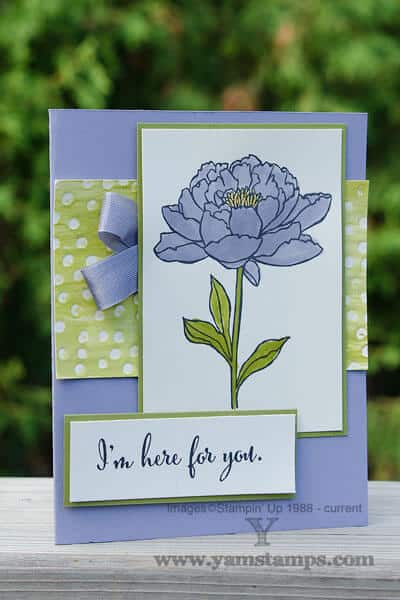
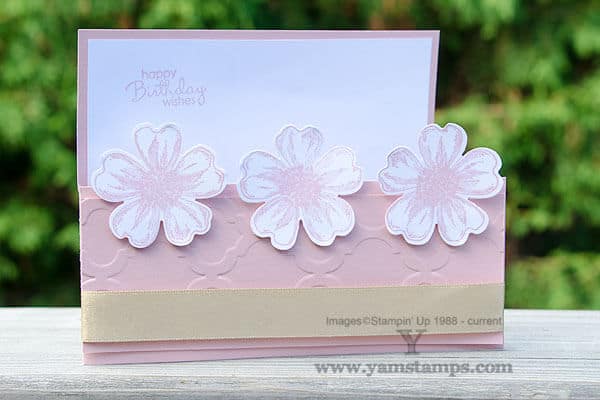
This is an easy variation on a “standard” fold card, inspired from Ronda Wade’s swap card from convention. Swapping is a sport amongst Stampin’ Up! demonstrators – you make a whole bunch of one card design, and then trade with others! This was an “organized” swap, meaning we signed up and had to make a certain number of the same card (I think it was 45). Anyway – this is a regular sized card; the cardstock is cut lengthwise so it’s 4.25″ x 11″, and then scored at 5.5″ to fold. I then trimmed 2″ off the top of the front of the card and embossed that cut portion with the Modern Mosaic embossing folder. That piece was wrapped with a bit of Gold 5/8″ Satin Ribbon and adhered to the bottom of the cardfront. The flowers along the border are from the Flower Shop set, punched out with the Pansy Punch. The sentiments (there’s also one at the bottom right corner that you can’t see) are from the Petite Pairs set. I love the Blushing Bride and Gold colour combination.
If you’d like to build up your card stash, there’s plenty of upcoming opportunities – first of all, the Monthly Card Class, happening on Wednesday, September 2nd, which is THIS Wednesday. Take a break from the week of “prepping for back to school” and come join us for a fun evening out! Please contact me to register. All supplies are included to create 4 cards for your $20 class fee. Registration is closing soon for the Tin of Cards and September Christmas Card Classes as well – details and PayPal registration links are on the YamStamps Events Page. For these special classes, product is included, so registration & payment is needed 2 weeks ahead of time to allow time for everything to arrive for class. Please let me know if you have any questions. I’m also working on some Online Christmas Card Classes so if you’re not local to Burlington ON you can still join in the fun!
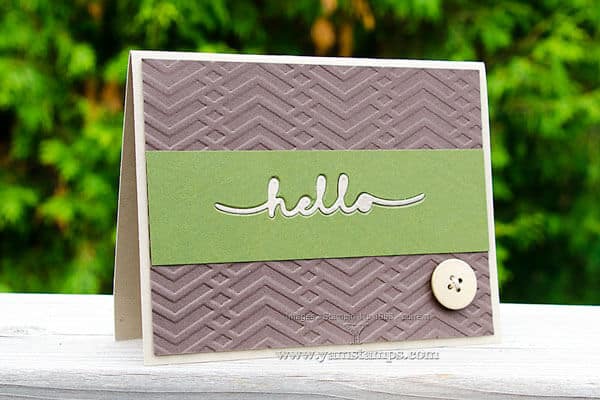
This is a fun and easy technique to do with your die cuts! This card uses one of the Stampin’ Up! Greetings Thinlit dies and the Zig Zag Embossing Folder. Die cut the “hello” from Crumb Cake cardstock, and then die cut from Mossy Meadow. Use the Crumb Cake “hello” to fill in the negative space on the Mossy Meadow cardstock – that’s how easy this technique is! Mass production tip – cut strips of Mossy Meadow and Crumb Cake cardstock, die cut with the same placement and switch out your die cut words – so you can create twice as many cards easily, with contrasting backgroound strips. The colours in this card (Crumb Cake, Chocolate Chip and Mossy Meadow) tend to give a more masculine feel, but you can switch out the colours (and the embossing folder) easily to create a different feel for the card.
Don’t forget this tip to make removing your more intricate die cuts easy. (from the YamStamps YouTube channel). With this thinlit, I found that I didn’t actually need to use the waxed paper to get easy removal. I did end up with some of the holes embossing through (the dots on the die cut) – but this occurred even if I used nothing, so I used the dryer sheet to make my life a little easier.
I’m looking forward to trying out some of my new Holiday Catalogue goodies that just arrived, so will try to get to work on posting some projects with those new items!