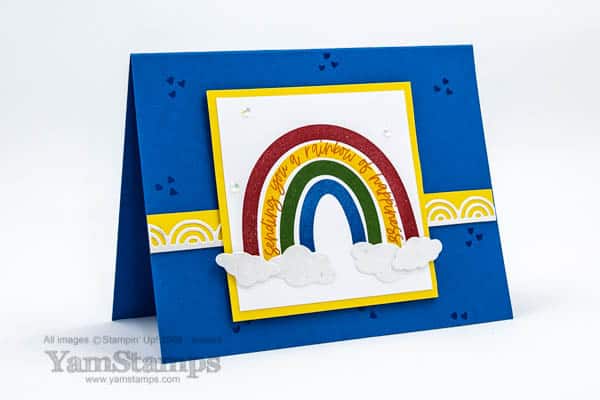
I can be a bit of a traditionalist, so I stuck to “ROYGBV” for my rainbow card – well, as close as I could get with only 5 stripes LOL. This is where the Stamparatus comes in handy! I set up the arcs so I had one on each side of a plate (and yes, I used 3 plates) so I could easily mass produce. I made 21 of these cards for a recent Demonstrator card swap, so I had to be able to reproduce them easily. The other thing about using the Stamparatus – I could re-stamp any arc accurately and easily if it wasn’t as dark as I wanted it to be the first time. The clouds and arch die cuts are out of the Mother of Pearl Specialty Paper, which didn’t show up as well as I had hoped on this photo – you can’t quite see the iridescent flecks in it. It’s also a glossy finish, so it’s extra shiny. I added some Iridescent Rhinestones Basic Jewels for a bit of bling and because they reminded me of raindrops.
Sale-a-Bration runs until 28 February, so with each $60CAD product amount you order, you can select a Sale-a-Bration item for free! If you purchase the Demonstrator Starter Kit during Sale-a-Bration, you’ll get to select TWO stamp sets from the Annual Catalogue or Mini Catalogue for free. This is on top of the $165 product that you select! All that plus basic business supplies and being part of my Demonstrator group – for just $135. You can see more about joining the “Eh” Team here, or you can contact me with any specific questions you might have.
In the meantime, I will focus on the rainbow….and not think about the impending snow storm that’s forecast for our area! (To be clear, I don’t mind the snow, it’s the clearing of the driveway about which I am less enthusiastic…).
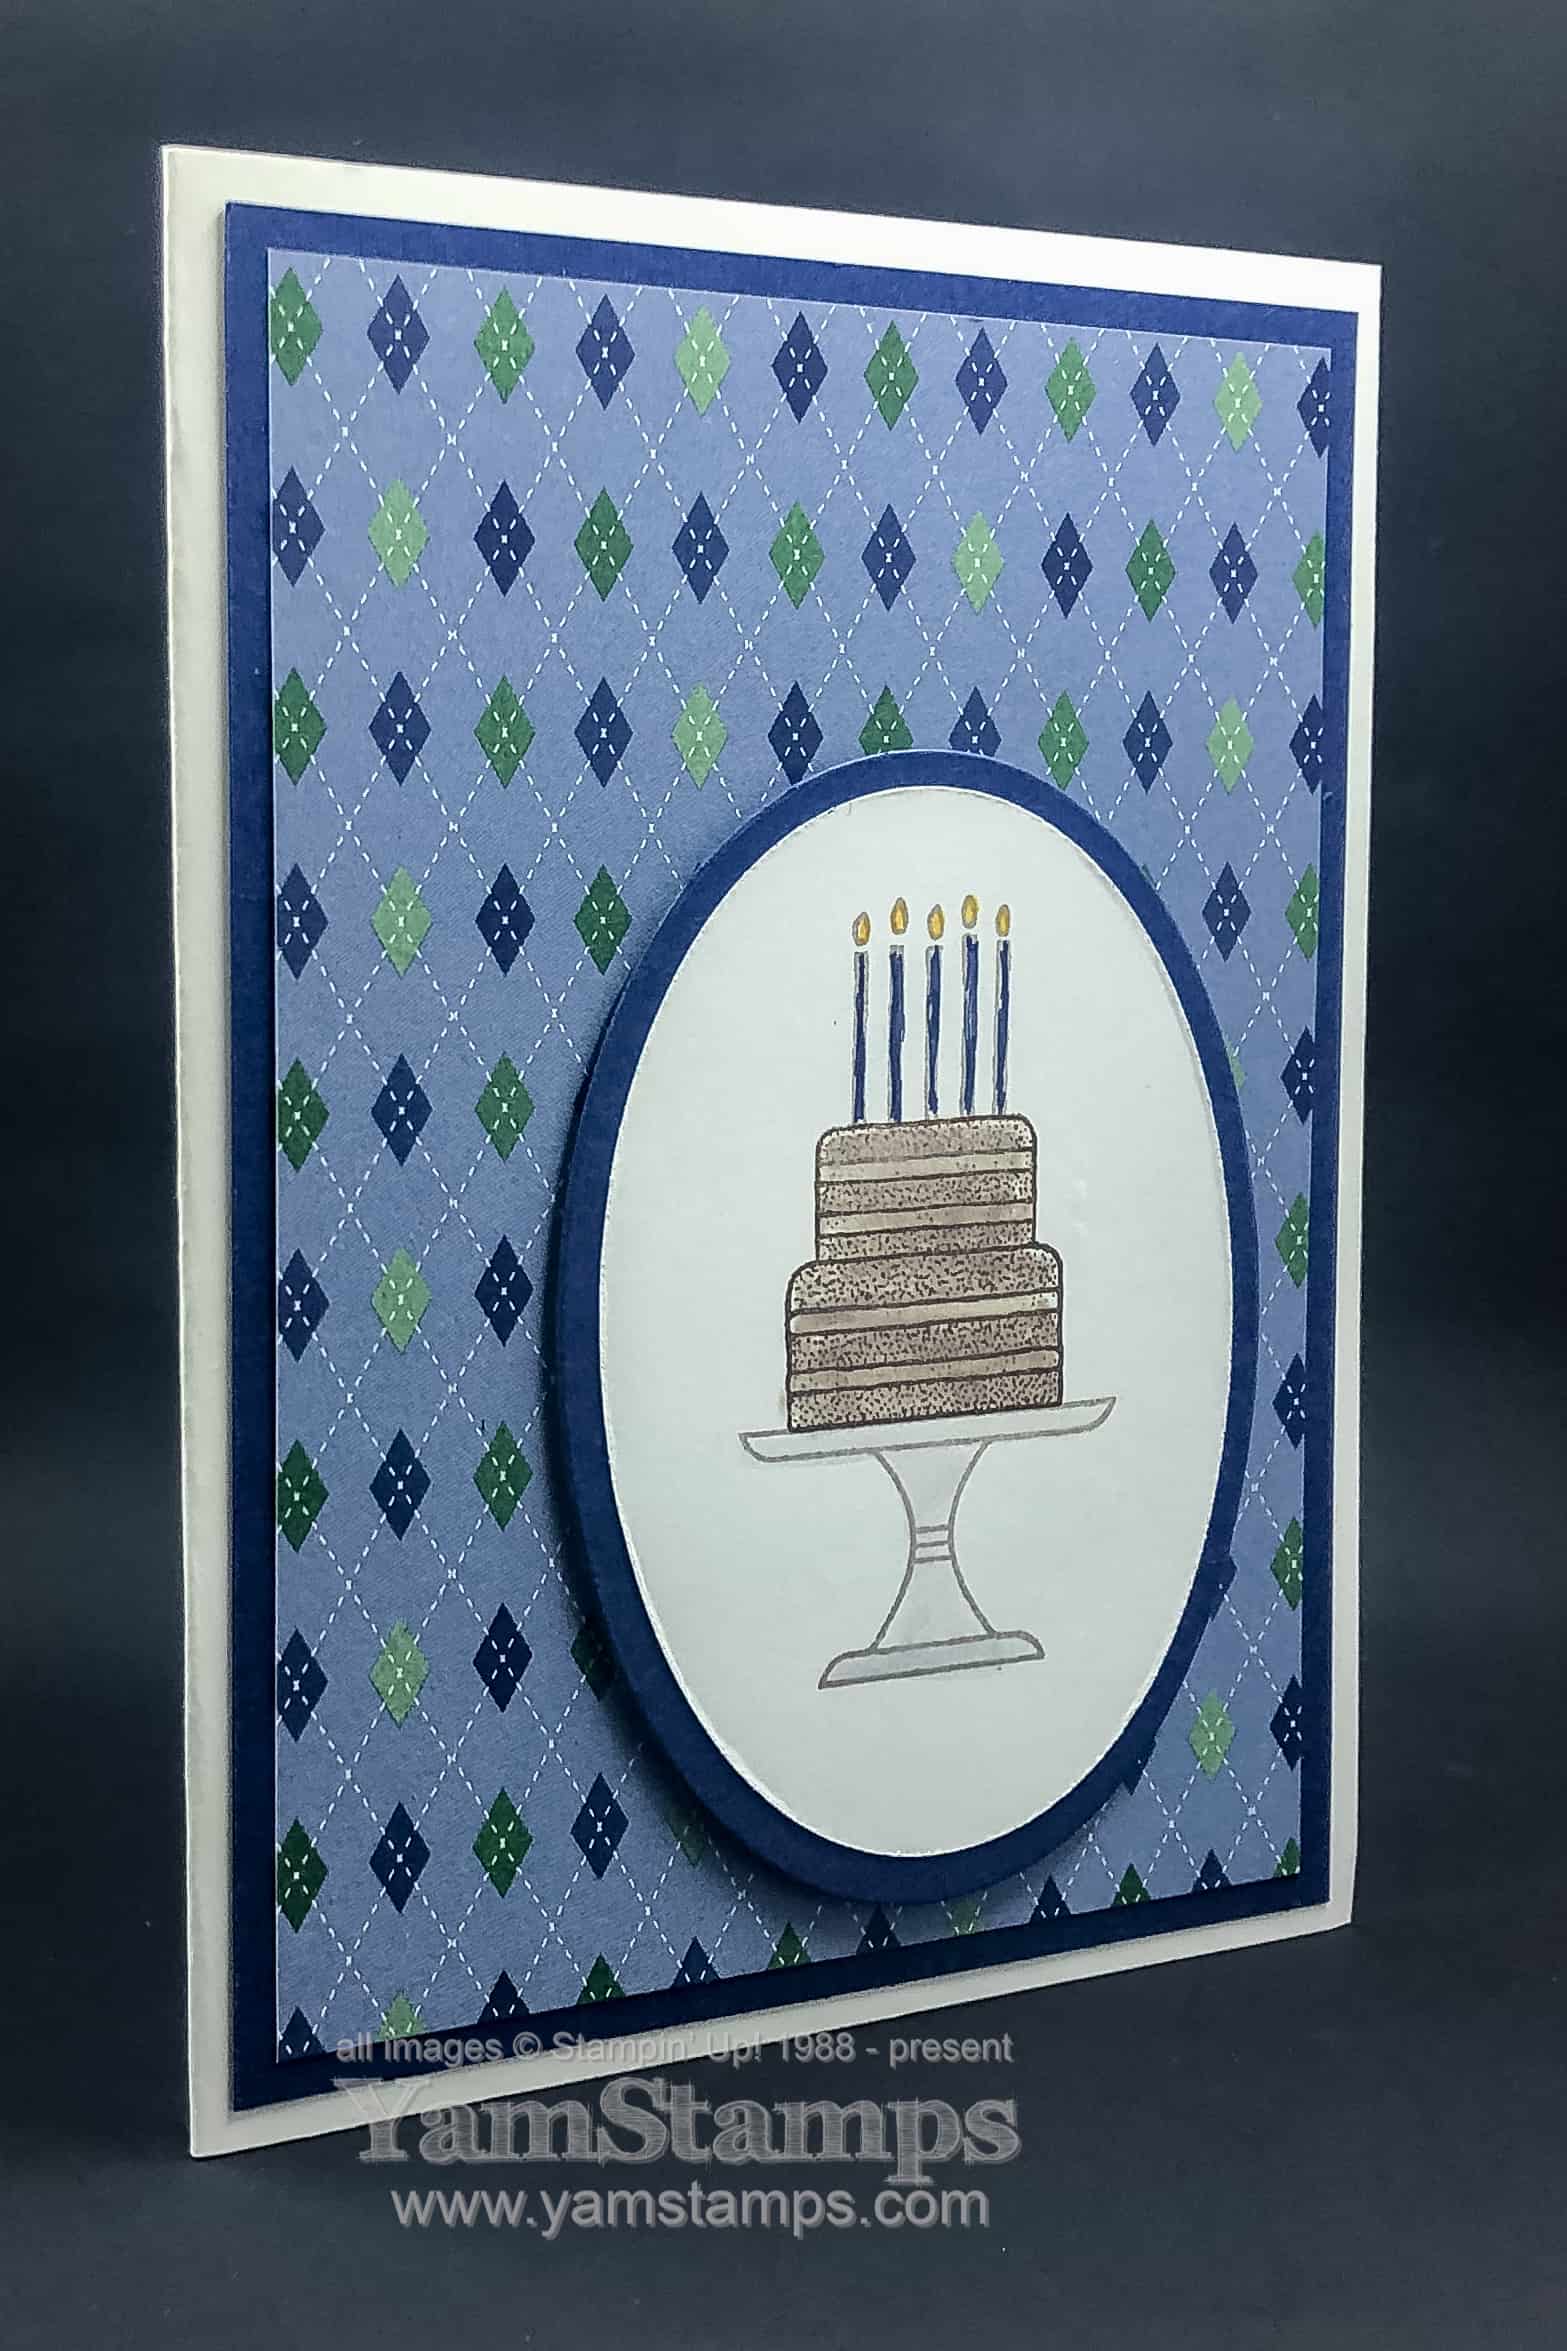
This Birthday Cake Card is today’s clean and simple card. Quick and easy to help someone celebrate!
This card is made even easier by lining everything up with the Stamparatus. If you’ve been following this YamStamps Blog for a while or have attended a class with me, you’ll realize that the larger oval is cut from the centre of the backing Night of Navy Cardstock. I used the Country Club Designer Series Paper for the background – using the argyle side rather than the obvious golf side. The main image on this card is actually three different stamps – the cake stand and outline of candles were stamped in Smoky Slate, and the cake was stamped in Early Espresso. I lined everything up on the Stamparatus so that it was easy to reproduce.
If you’re making multiples – and die cutting the stamped image, the easy technique is to line your stamps up on your Stamparatus. Place your cardstock in the corner of the Stamparatus, and stamp it. Remove the cardstock from the Stamparatus, then die cut with a Layering Oval die. Place the piece of cardstock (the one with the hole in it) back into the corner of the Stamparatus, and use that as your template/guide. For the next images, die cut the oval first, then place it in the hole in the cardstock in the Stamparatus so that your images will be in the right spot. Clear as mud? Check out this video I have on the YamStamps Facebook Page to see this technique in action. Oh – and don’t be like me in the video – place the magnet over a corner of the die cut shape so it doesn’t move…LOL.
Quick and Easy, Clean and Simple – this birthday cake card will be sure to please the recipient, and you’ll be able to whip one up at the last minute and still have time and energy to enjoy the celebration!
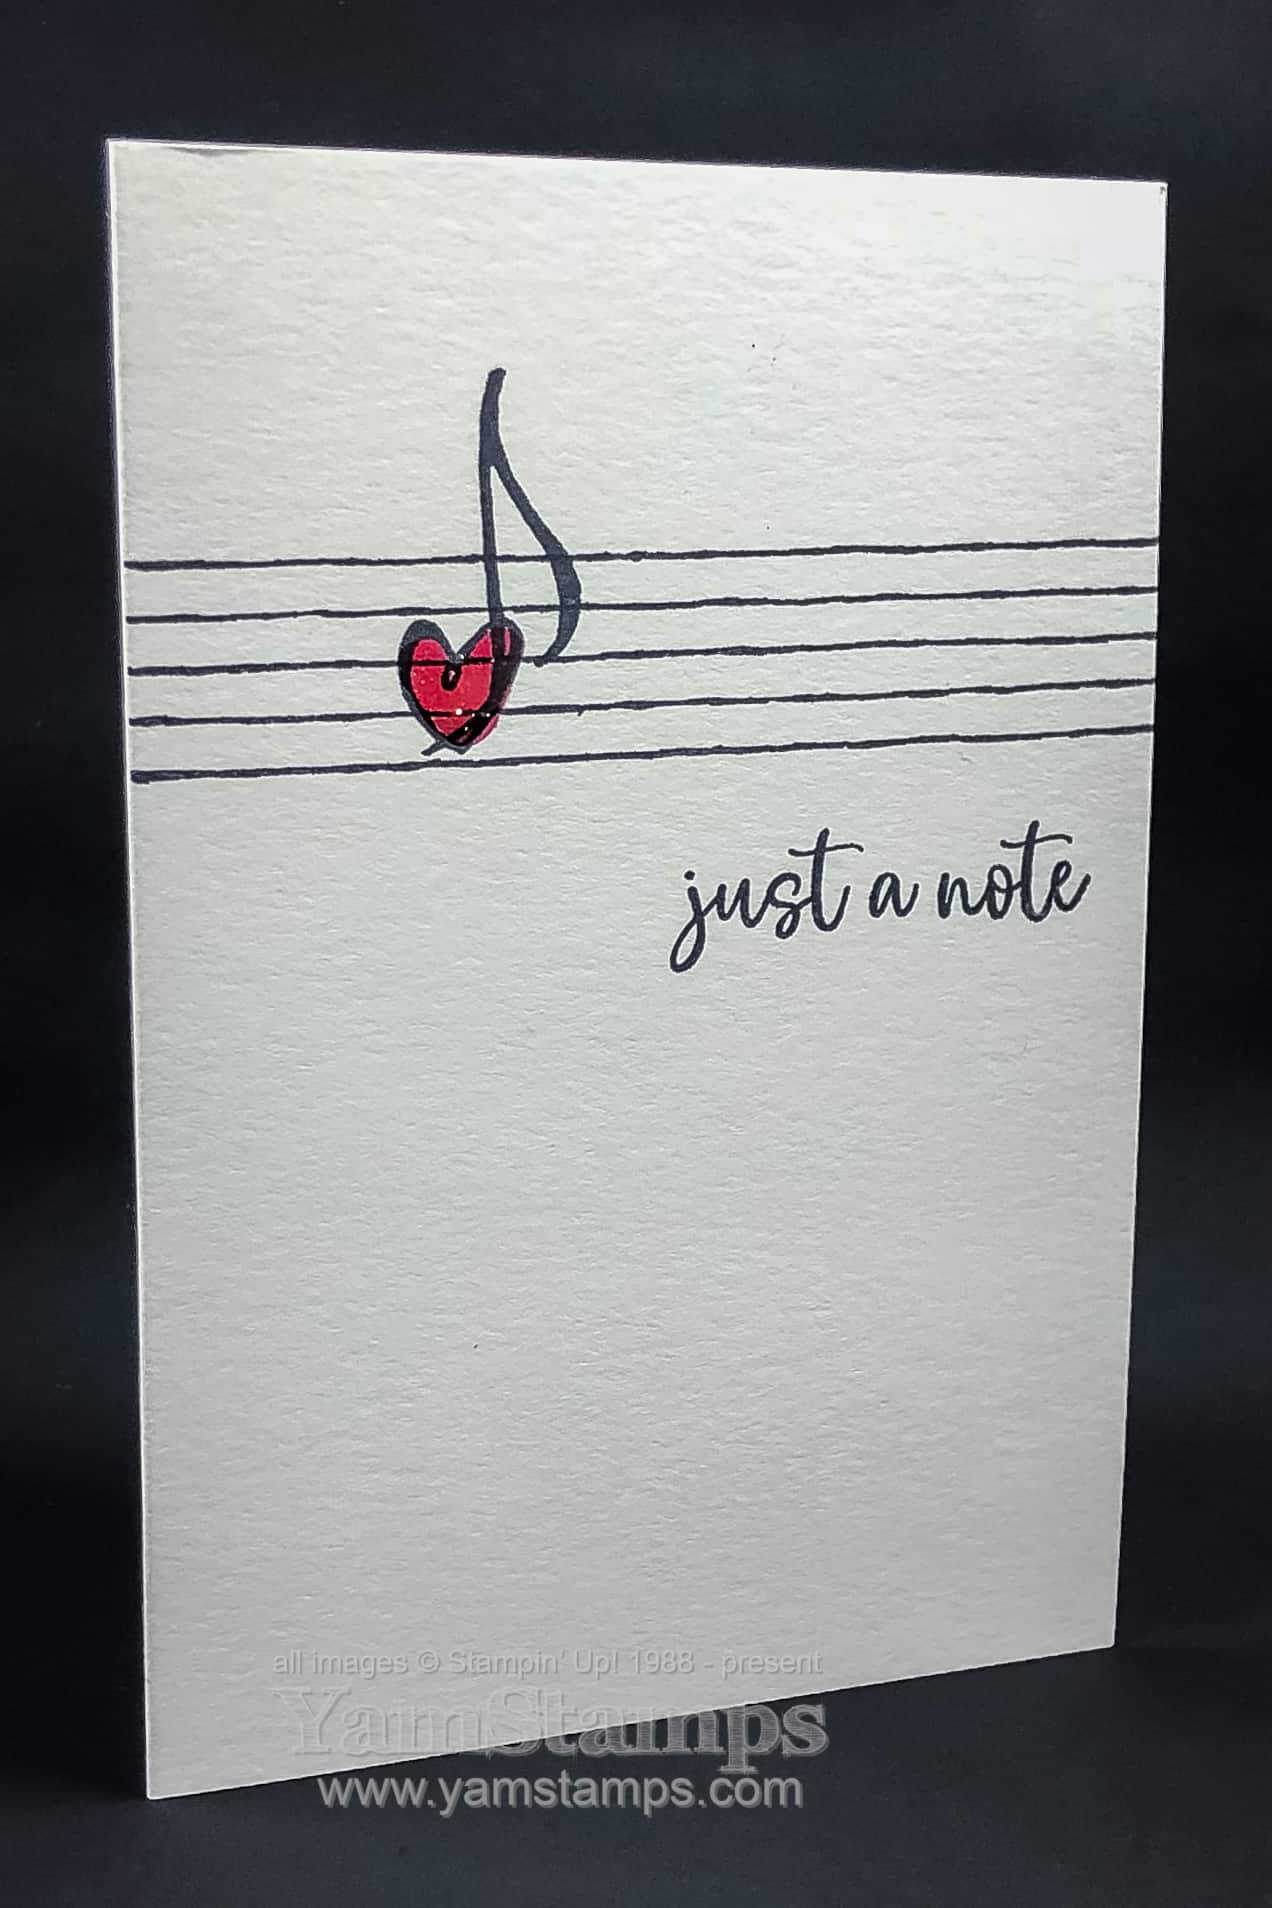
This is another take on a musical note card – like the birthday card I shared here, it has the same black/white/red theme, because why mess with something that works?!
I often think that the amount of thought that goes into creating a clean and simple design can be underrated. I know that as a cardmakers, we often think that “more is better” and that we need to be over the top in order for people to appreciate the hand-made-ness of the effort. Looking at some of the higher priced cards available in the stores, though, I have realized that a lot of them are of the clean and simple type, or featuring one main image, so as cardmakers, we need to be comfortable and confident when we choose not to overload our cardfronts.
Plus, lets be honest, once you’ve got the design, it’s easy to create/re-create a clean and simple card in a pinch! (#lazycrafter rules).
This Musical Note Card is great for any occasion (I’ve used it as a thank you card) but it could also be used for Valentine’s Day! Join us at Stampers Club/Monthly Card Class if you are local to Burlington ON and want to build up your card stash – or watch for my next Online Class Offering (I’m putting the finishing touches on it now) for ideas and inspiration wherever you are.
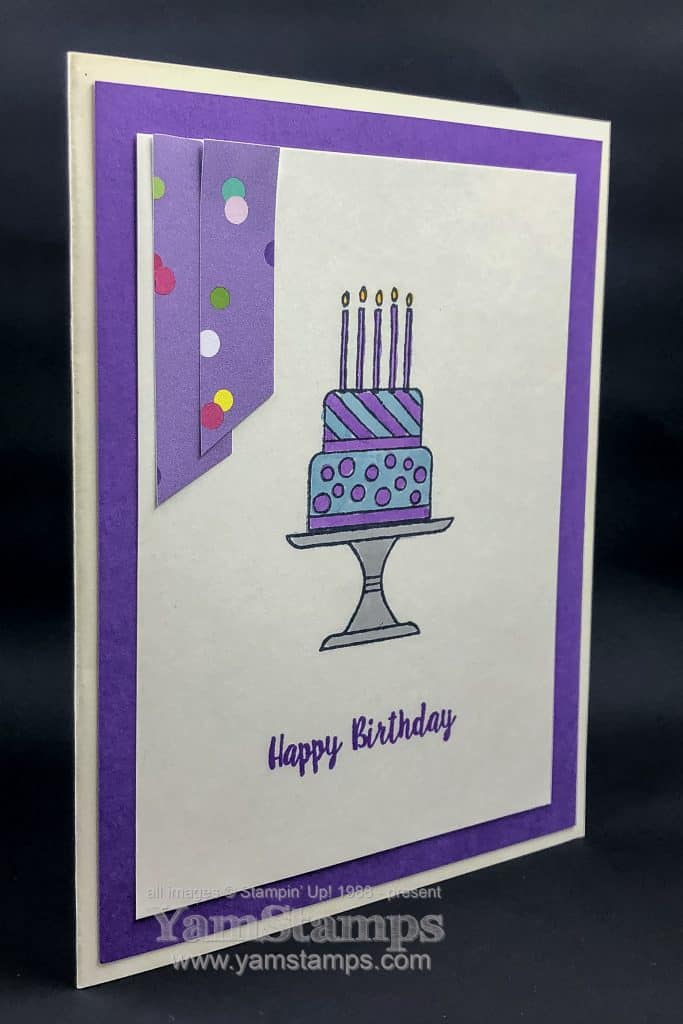
Piece of Cake Handmade Card! It refers to the stamp set as well as the process to make the card! The Piece of Cake stamp set (and coordinating Cake Builder punch) are NOT retiring – BUT the discounted bundle will not be available beyond June 3 – so why not get them together for a deal while you can?!
This was a recent class card – and we used the Stamparatus to make sure the images lined up perfectly – so this Piece of Cake Handmade Card really was a piece of cake to create! The images were stamped in Tuxedo Black Memento Ink, and then simply coloured with Stampin’ Blends. We only used one shade of each of the inks but you can still get a bit of shading and depth by colouring over a section again to enhance and deepen the tone. (main colours: (dark) Balmy Blue, (dark) Highland Heather and (light) Smoky Slate for the cake stand). I love the way that these alcohol based markers don’t leave “streaks” where you’ve coloured and gives a very solid look to the image.
Cardstock is Gorgeous Grape, combined with a few little strips of the How Sweet It Is Designer Series Paper. That paper was part of the Designer Series Paper share that I did for the Occasions Catalogue – and I will be offering a share for the Annual Catalogue as well – so stay tuned for details! Paper shares are a great way to get a sampling of everything – you have enough to use on a few projects, and you can also decide if you want to get full packages of your favourites. Sometimes you need to see the paper and designs in person to get the full effect!
In the meantime, please remember that retiring products are available while supplies last / until June 3 – so please don’t hesitate if you really want to get something that’s marked as retiring – especially if it’s anything but a stamp set!! Stampin’ Up! has a bit more immediate ability to react to demand with stamp sets since they make them in house so those rarely will sell out before the end of the catalogue period (but again, no guarantees!). Any questions, concerns, or assistance needed placing an order – as always – please contact me!
Final note – Wednesday is May 1st – yay, May! It’s also MONTHLY CARD CLASS DAY – the first Wednesday of the month – a bit of a shock when the first day of the month and the first Wednesday are the same day! Please contact me ASAP if you want to attend at 1pm or 7pm!! Space is limited. Check the YamStamps Events page to see all upcoming dates – including the special date for the June Monthly Card Class! Hope to see you in a class soon!
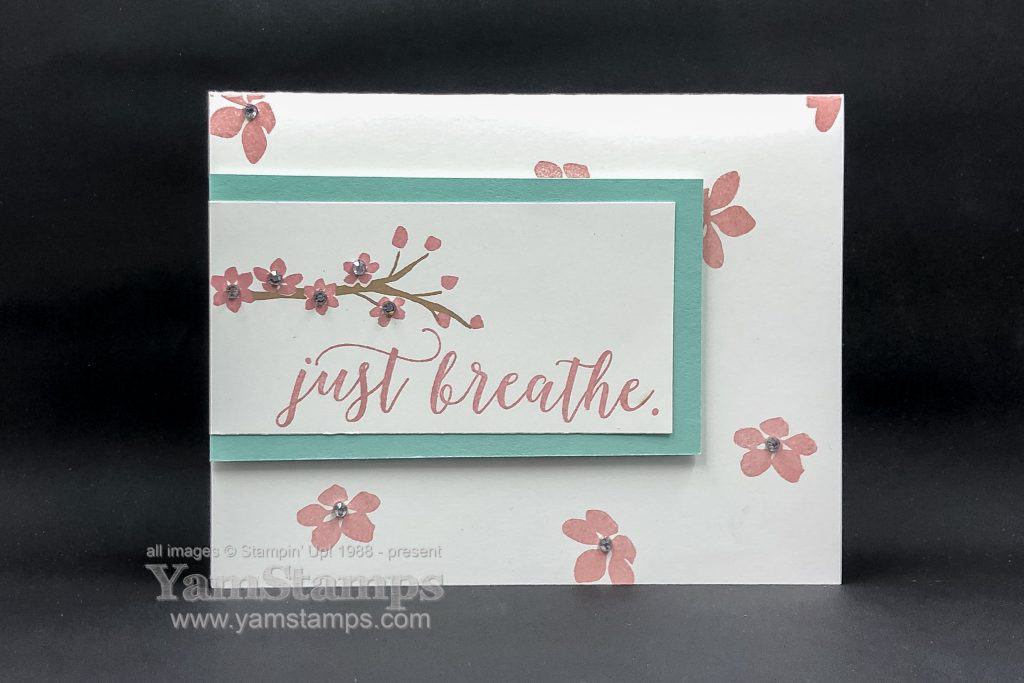
Happy Easter! Happy Passover! Happy Spring! I hope that you are able to enjoy this long weekend however you are celebrating. Today I’m sharing this cherry blossom card, created with the Colo(u)rful Seasons stamp set. If you stopped by my booth at the Kitchener Scrapfest, you may have made this tag as your make and take – and I’ve turned it into a card!
First of all, I did offset the tag on the Pool Party Cardstock background, so it’s a little different than the sample we shared at the YamStamps Scrapfest Booth. Other than that, I still used the Stamparatus to stamp the branch, blossoms and sentiment in place on the tag. I stamped the other flowers randomly across the cardfront, and then wanted to step it up a bit, so I added Rhinestone Basic Jewels to most of the visible full flowers. I think that the white space helps give that “breathe” type feeling to the design.
Happily, this stamp set is NOT retiring – so it will still be available when the new catalogue is in effect on June 4th. You’ll be able to create another version of a cherry blossom card, or a falling leaves card, snowflake card, or a beach card…because this set has all the seasons covered!
Do you want a copy of the new Stampin’ Up! Annual Catalogue? If you’ve placed an order with me in the past year, I will automatically put you on my list to receive a new catalogue. Otherwise, if you don’t already have a Stampin’ Up! Canada demonstrator, please fill out this questionnaire or go to yamstamps.com/2019catalogue and I’ll get in touch with you!
OK I am off to make a lemon meringue pie for Easter Dinner dessert – wish me luck, it’s been a while since I did meringue pie, and I don’t have one of those fancy, cheffy-type mini blow torch thingies. In the tradition of the Great British Bake Off, though, I will definitely aim for “no soggy bottom” on my pie.