My Stampers Club and Card Classes are being held virtually right now, and one of the Stampin’ Up! rules about class kits that I send out is that I can’t pre-stamp anything. It makes sense, especially when you want to learn about card making and stamping, but it has been stretching my creative brain cells a bit at times! This no stamping required card thankfully came together fairly quickly so that was nice!
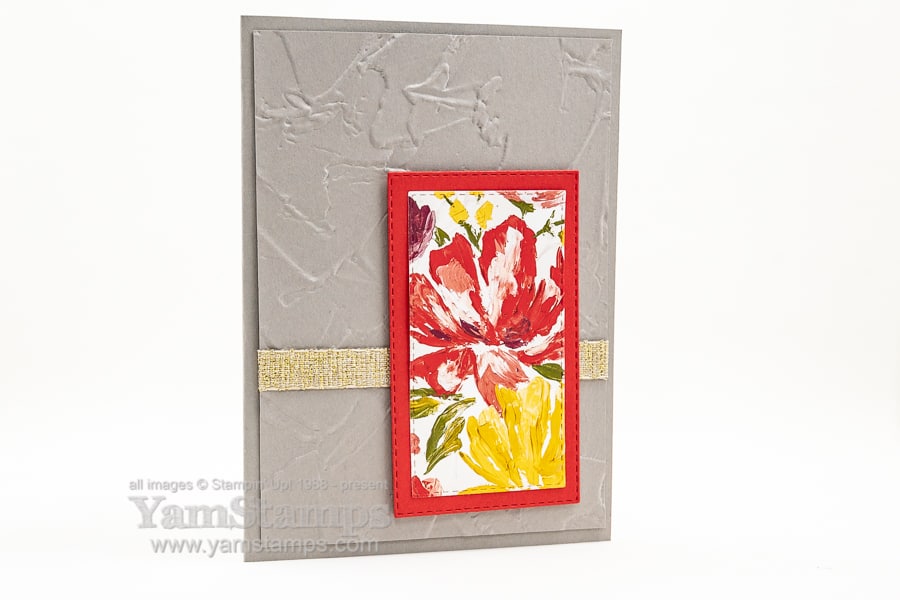
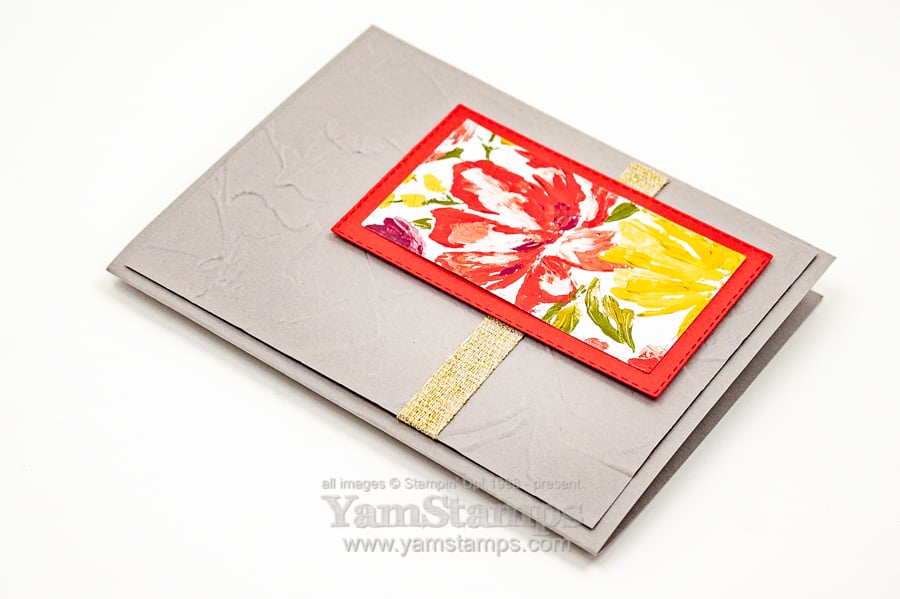
No Stamping Required Card
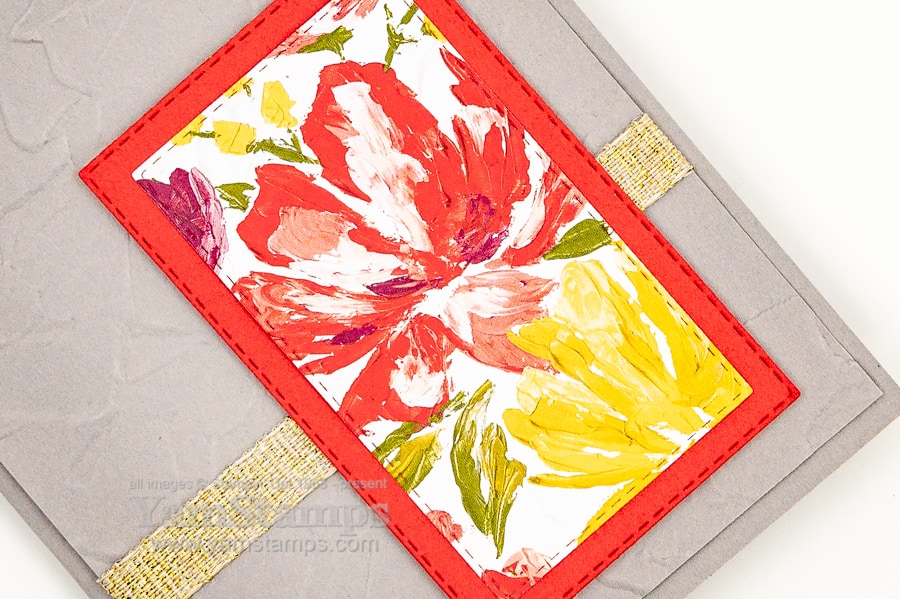
One thing that made this card easy was that I used items from the same suite. They’re all from the Fine Art Floral Suite Collection in the January-June 2021 Mini Catalogue. This is one of my favourite suites! (OK disclaimer, I’m not into the Gilded Leafing because I’m a messy crafter to start, and that stuff would be absolutely everywhere for a very long time). Anyway. I used my current favourite embossing folder, Painted Texture for the backing piece and then added some of the 3/8″ Fine Art Ribbon. It’s a subtle metallic – if there’s such a thing.
No Stamping Required Card
To finish the card, I simply die cut some Stitched Rectangles from Poppy Parade Cardstock and the Fine Art Floral Designer Series Paper. I actually used my new Mini Stampin’ Cut & Emboss machine for this step – it’s such a cute little machine! It would be perfect to take to a crop (whenever we get to do things like that again). I also love that it doesn’t take up much room on my crafting surface – so I have more room to spread out my crafting supplies and mess LOL.
I really like putting main elements towards the bottom right of my cardfronts….I think it adds a bit more interest than always centering the focal image, which I otherwise tend to do.
No Stamping Required Card
Last but not least – if you’re missing card classes, join me in March for my Online Card Class. This is one of the no stamping required cards we’ll make together. I’ll send you the packet of precut class materials ahead of time, then we’ll get together on a Zoom conference call March 10th. If you can’t make it on that date, no worries! You’ll have access to the recording afterward so that you can watch at your leisure.
Class fee is $20 and includes postage of class materials to your home in Canada. You can contact me to register and to get payment links. Deadline for registration is February 28 to allow for postage time. You will need an adhesive of your choice and something that you can score and cut cardstock with, plus Stampin’ Dimensionals are a nice option. You can add stamping from your stash on hand after the class! When I had in person events, a lot of people would actually opt to leave the sentiments out at the time anyway and add them later, once they knew the occasion for which they would be using the card.
I hope you’re enjoying your Family Day (or whatever it’s called in your neck of the woods…). I’m looking to spending time with some of my crafty family tonight – aka the Stampers Club! It’s our online class, and it’s always fun to see each other and catch up a bit, while also getting to share some crafting. I’m off to make sure everything’s charged up and that I have a reasonably cleared worktop!
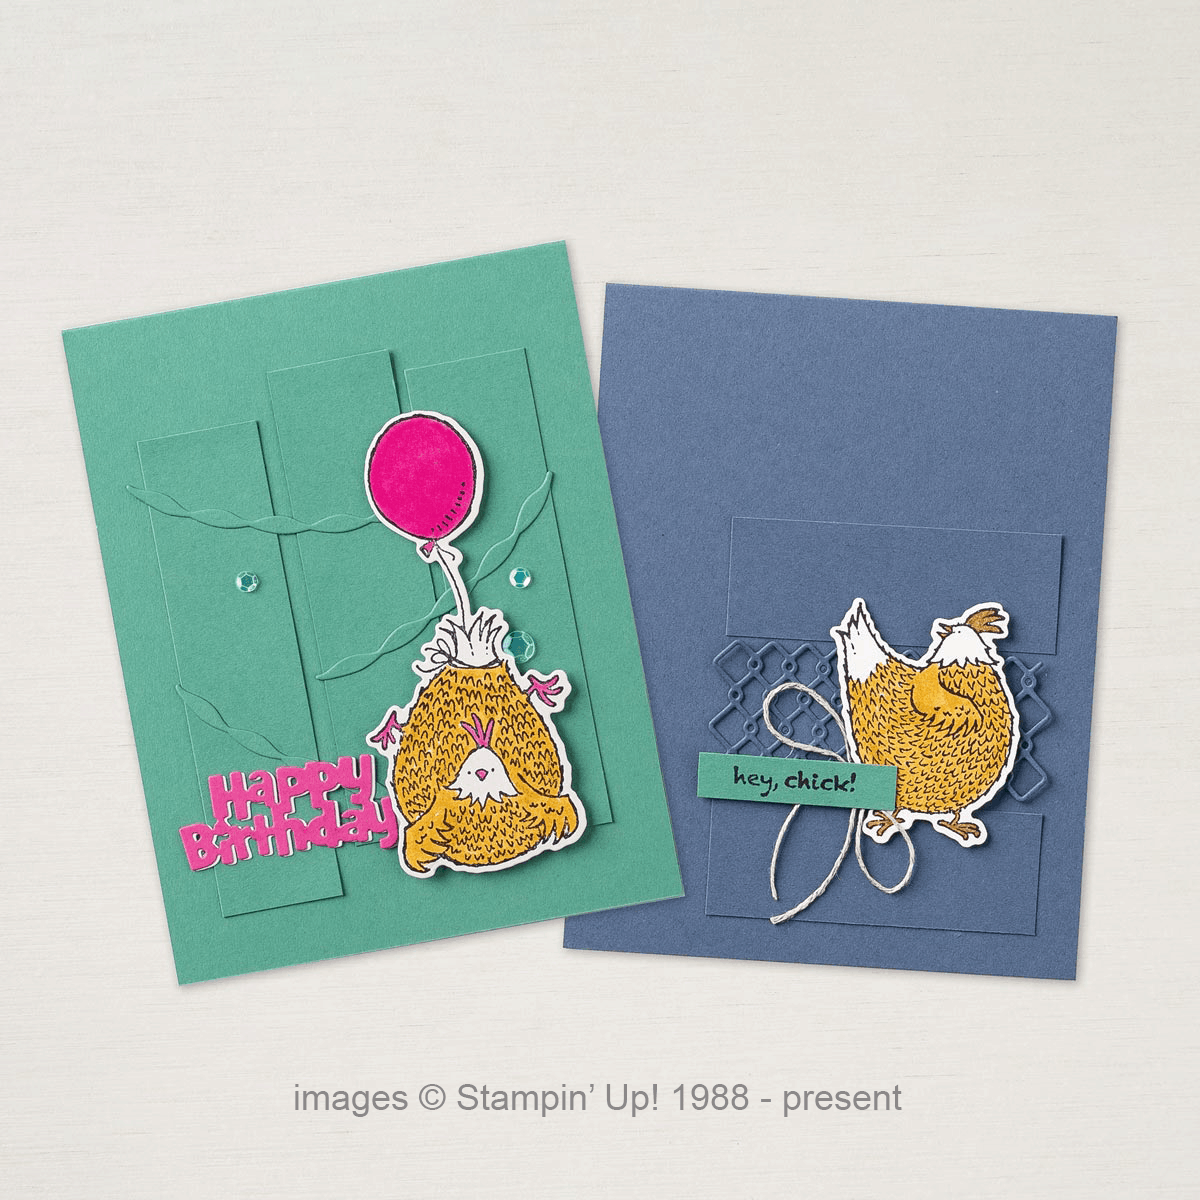
Do you remember the Sale-a-Bration set from the past, “Hey Chick!”? It was one of the most popular selections – and Stampin’ Up! has brought it back for a limited time, along with some additions!
Hey Chick – don’t forget – until the end of February, when you place a $60 product order (or multiples thereof…) you can select a Sale-a-Bration product for free! You can shop in the YamStamps Online Stampin’ Up! Canada store (shortcut yamstamps.com/shop) 24/7 and have your choices delivered directly to your door – or contact me for assistance placing an order (or if you want to pay by etransfer).
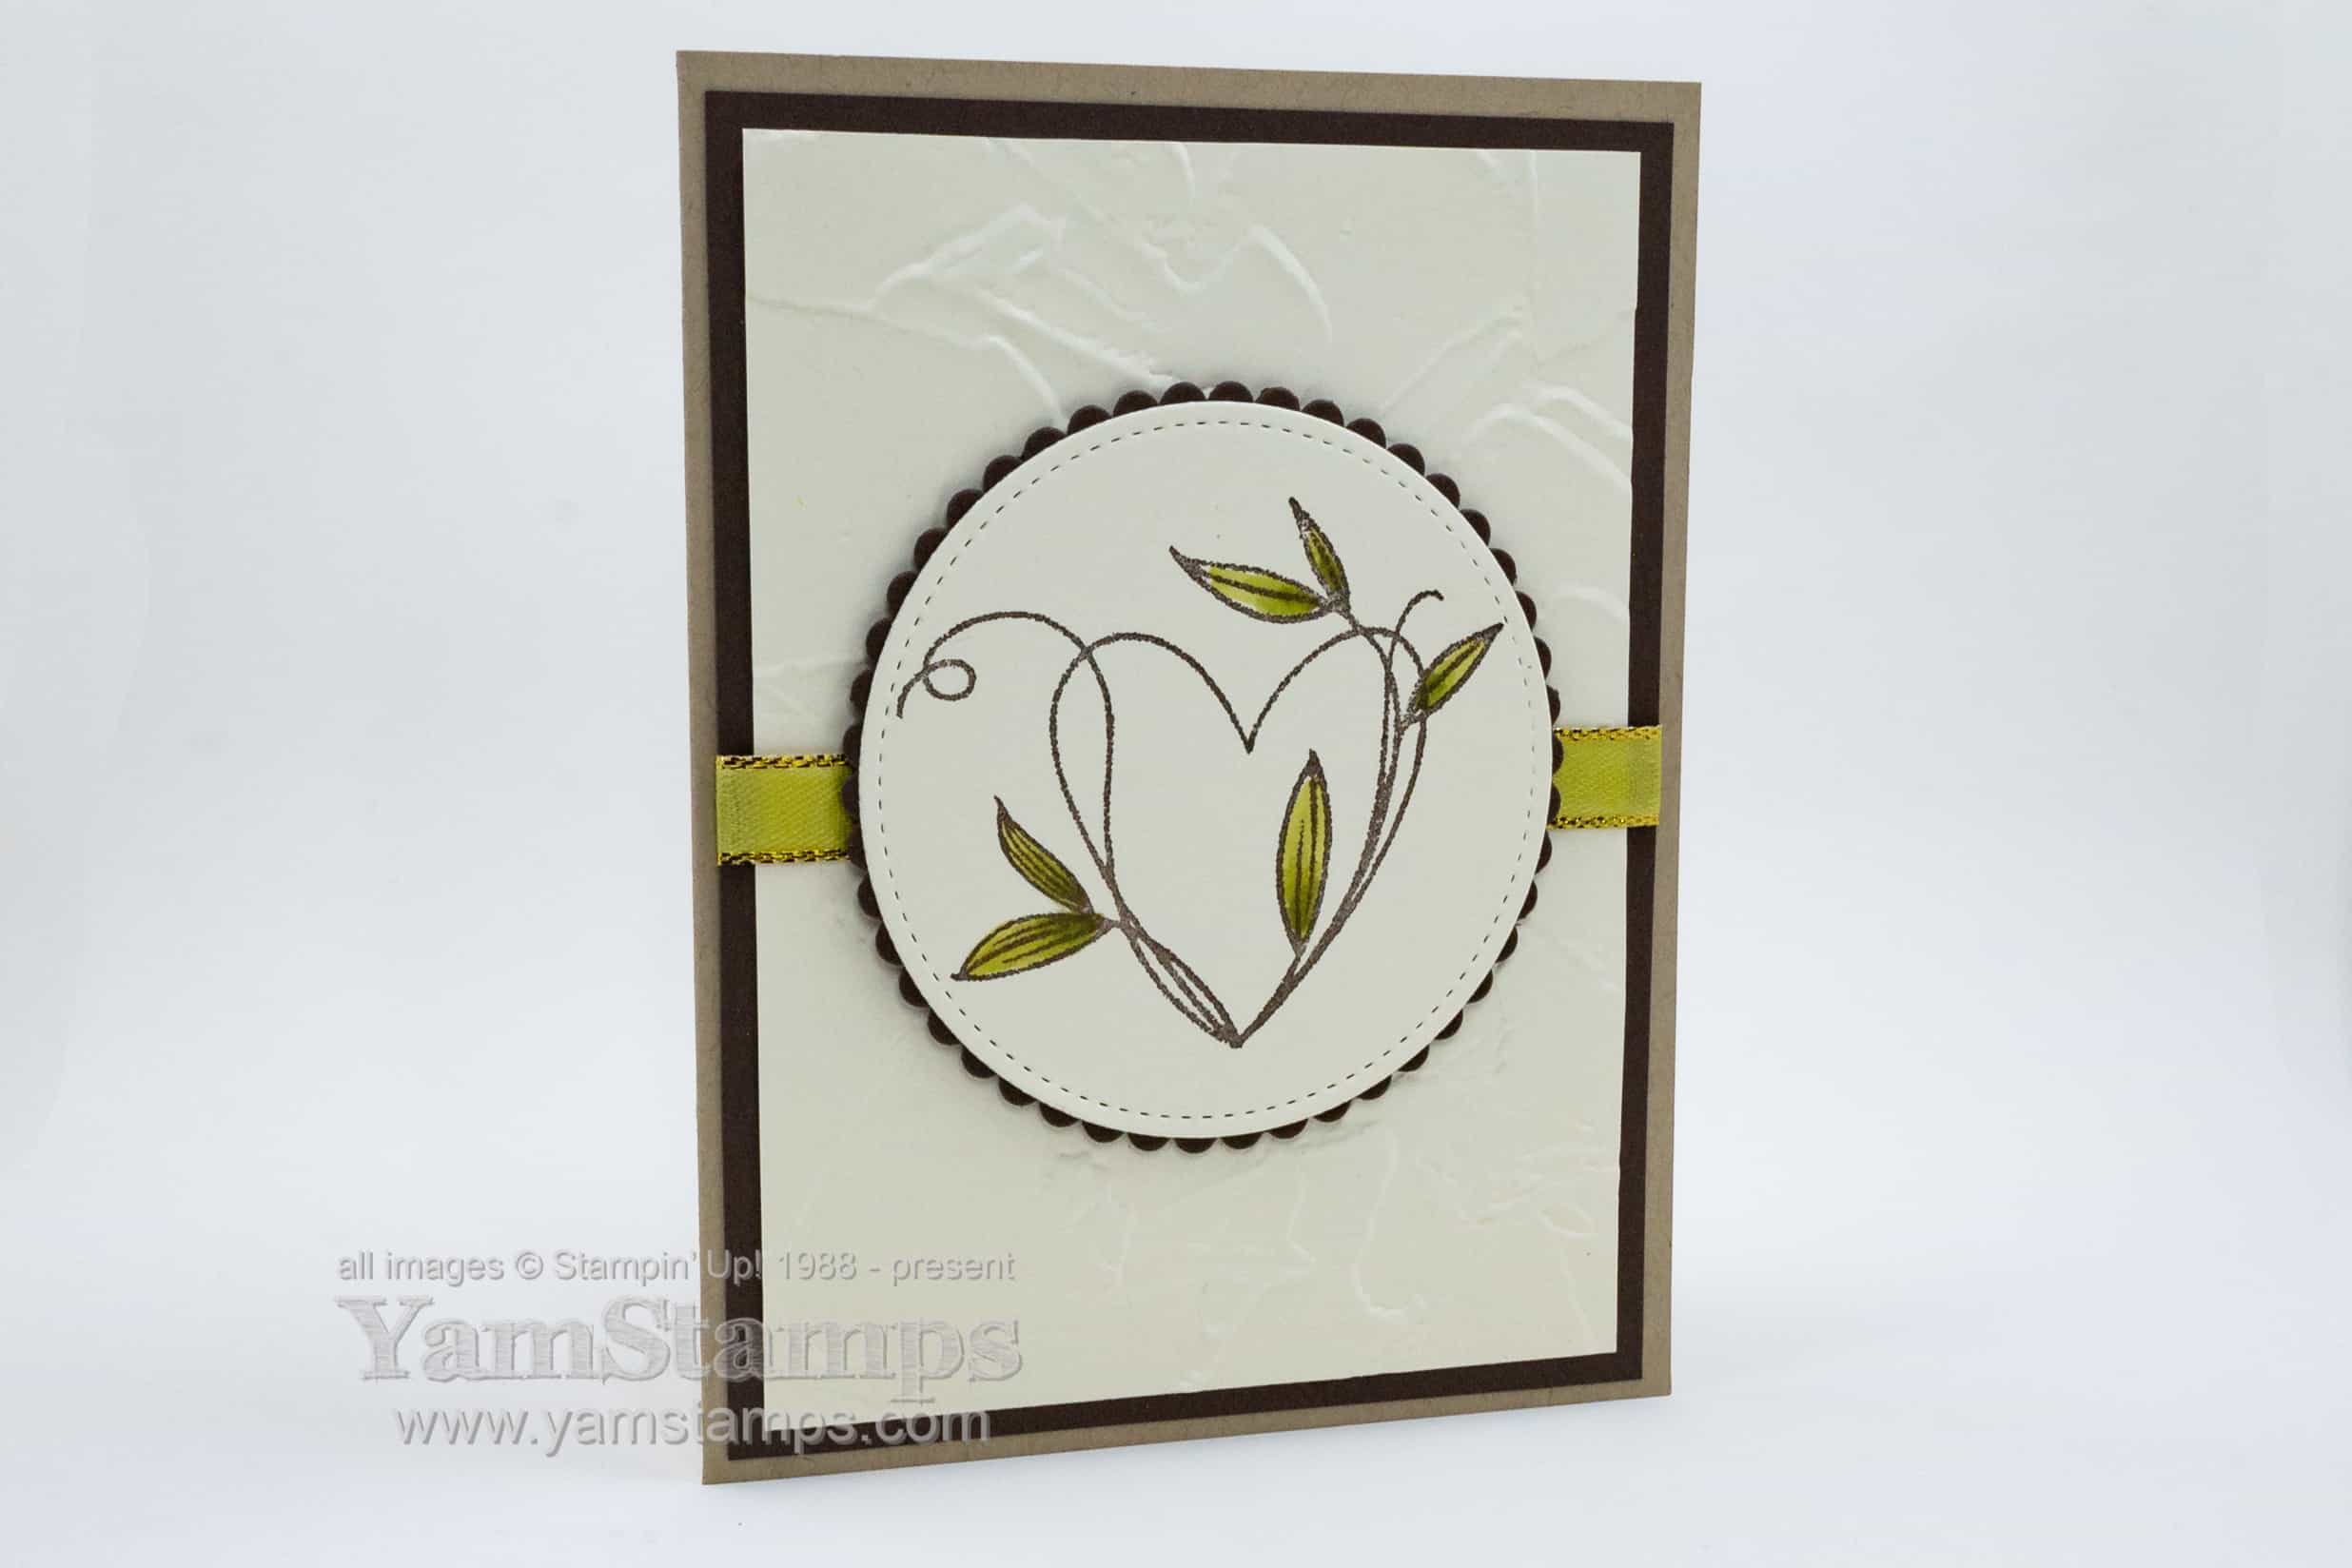
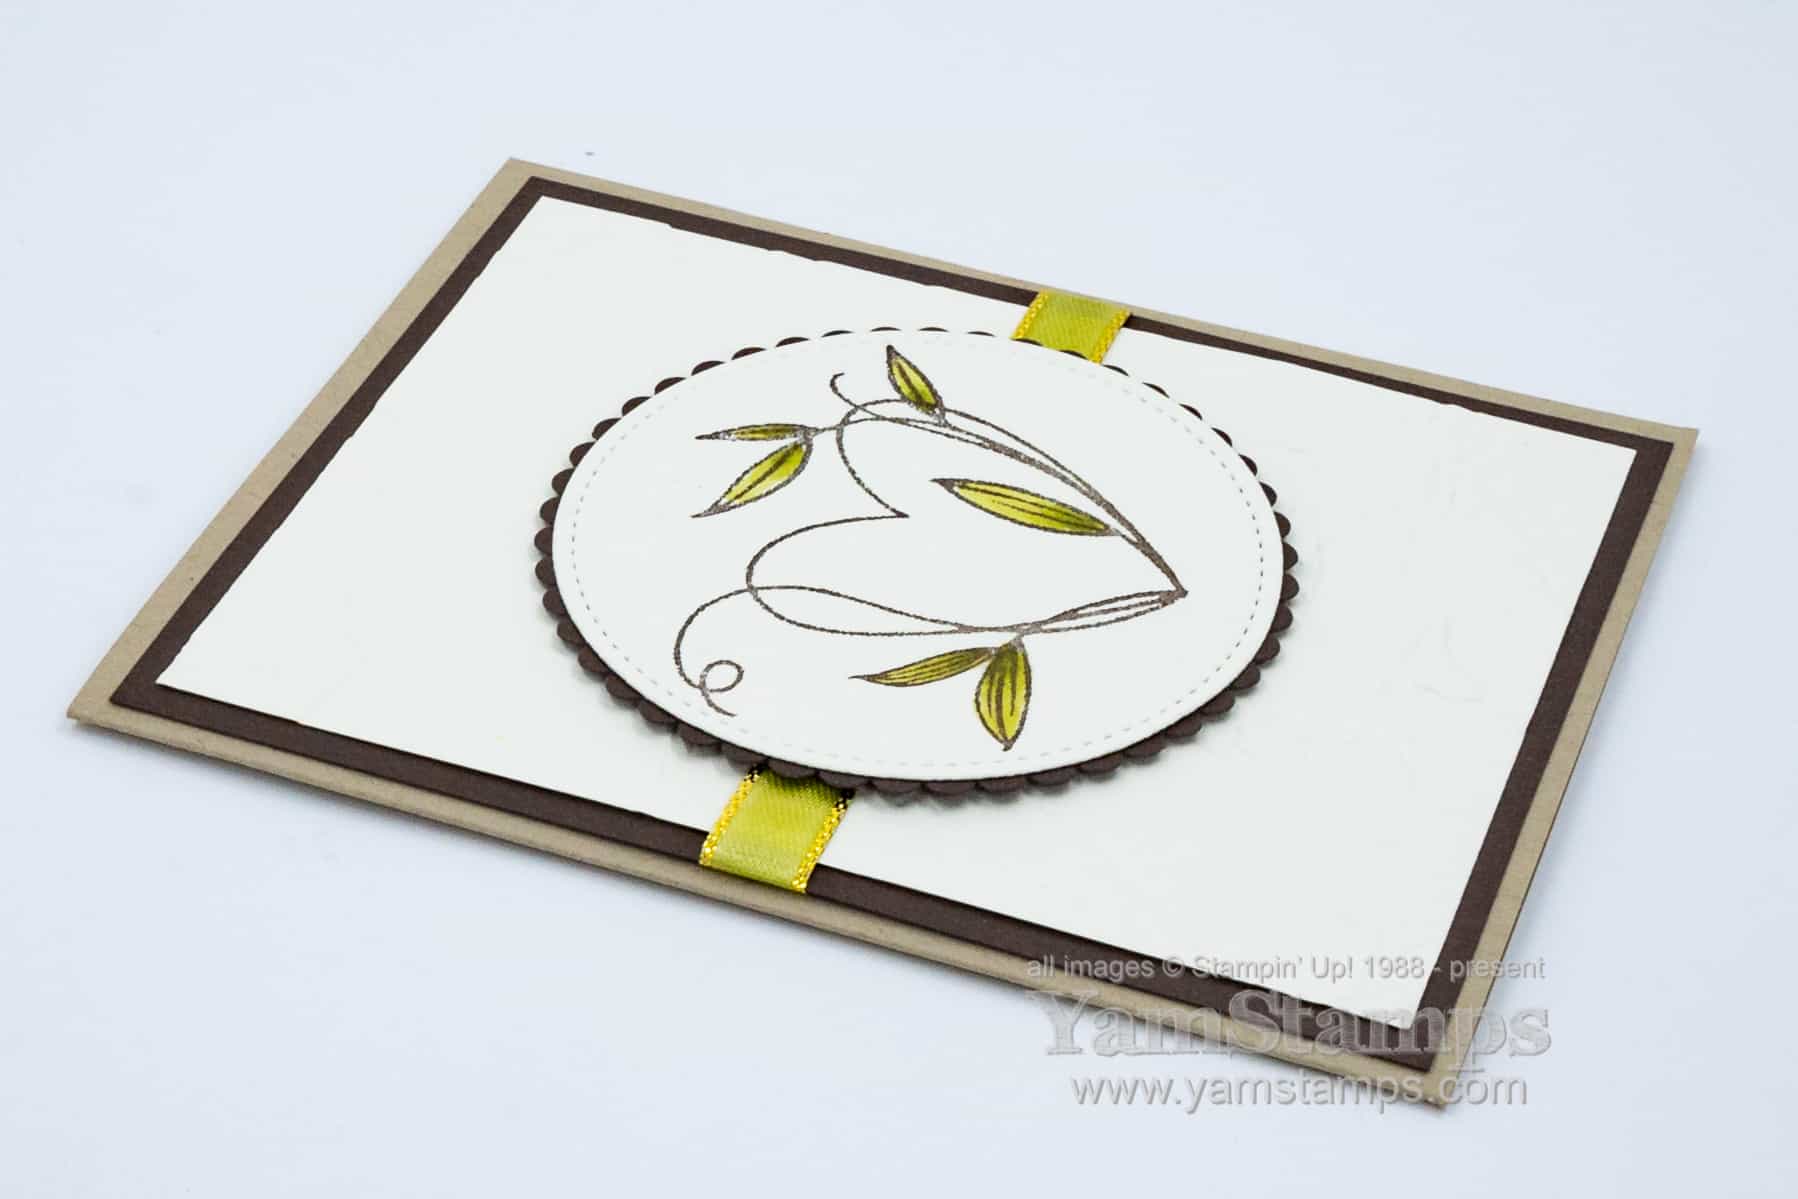
If you’ve visited my site or social media, you’ll know that my design preference leans towards clean & simple. This Touched My Heart Card is not really an exception to that! Touched My Heart is one of the host sets that you can select with Stampin’ Rewards. When sales hit $200CAD (in a single submission), you’ll start to earn a percentage back to spend on product of your choice – including exclusive ‘host’ products. You can hit this threshold by either stocking up on products, hosting a catalogue/online party with friends or joining my Stampers Club.
Touched My Heart Card
I created this card to send as a thank you to those who placed purchases recently, and also to send to members of my Demonstrator group, the “Eh” Team, with the reward certificates that I send out at the end of each quarter. I like this image because it allows me to do a bit of colouring with my Stampin’ Blends (I used Old Olive here) but isn’t overly time consuming. I think I did a whole bunch of these while binge watching Netflix. (I think it was Bridgerton to be specific LOL).
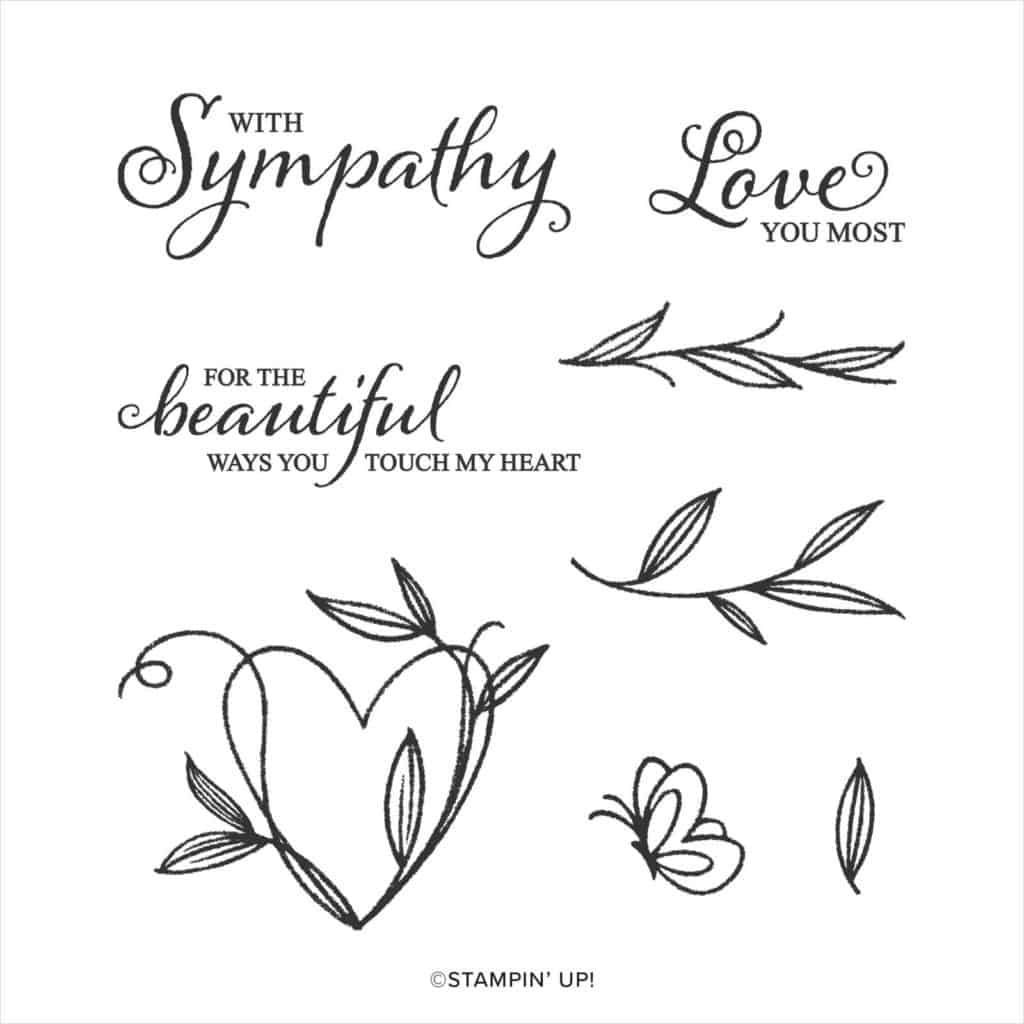
Touched My Heart – host stamp set
I used my current favourite 3D Embossing Folder, Painted Texture for the background. Can you figure out my trick for colour coordinating ribbon? I used the Gold 3/8″ Metallic Edged Ribbon, and used the Light Old Olive Stampin’ Blends Marker to colour the ribbon itself. It dries quite quickly, and is fairly forgiving in terms of hiding any streaks or uneven colour.
When I send out thank you cards to customers I tend to use sticky notes on the inside so that the cards can be re-used; I figure it’s an extra bonus?! The Touched My Heart Card could be used for a Valentine’s Day or Galentine’s Day card, with the heart motif. Perfect for someone who might not appreciate an overly fussy card…
If you are needing a crafty outlet, consider joining us in Stampers Club? We meet online each month to make a variety of card projects, and once during your membership you’ll earn the Stampin’ Rewards for the club orders that month (so you can select the Touched My Heart host set!). If you’re wary of commitment, there’s Monthly Card Class by Mail – with supplies and written instructions to create the projects (no need to get Zoom presentable LOL). Contact me for registration details! In the meantime, I hope you are keeping well during these crazy times.
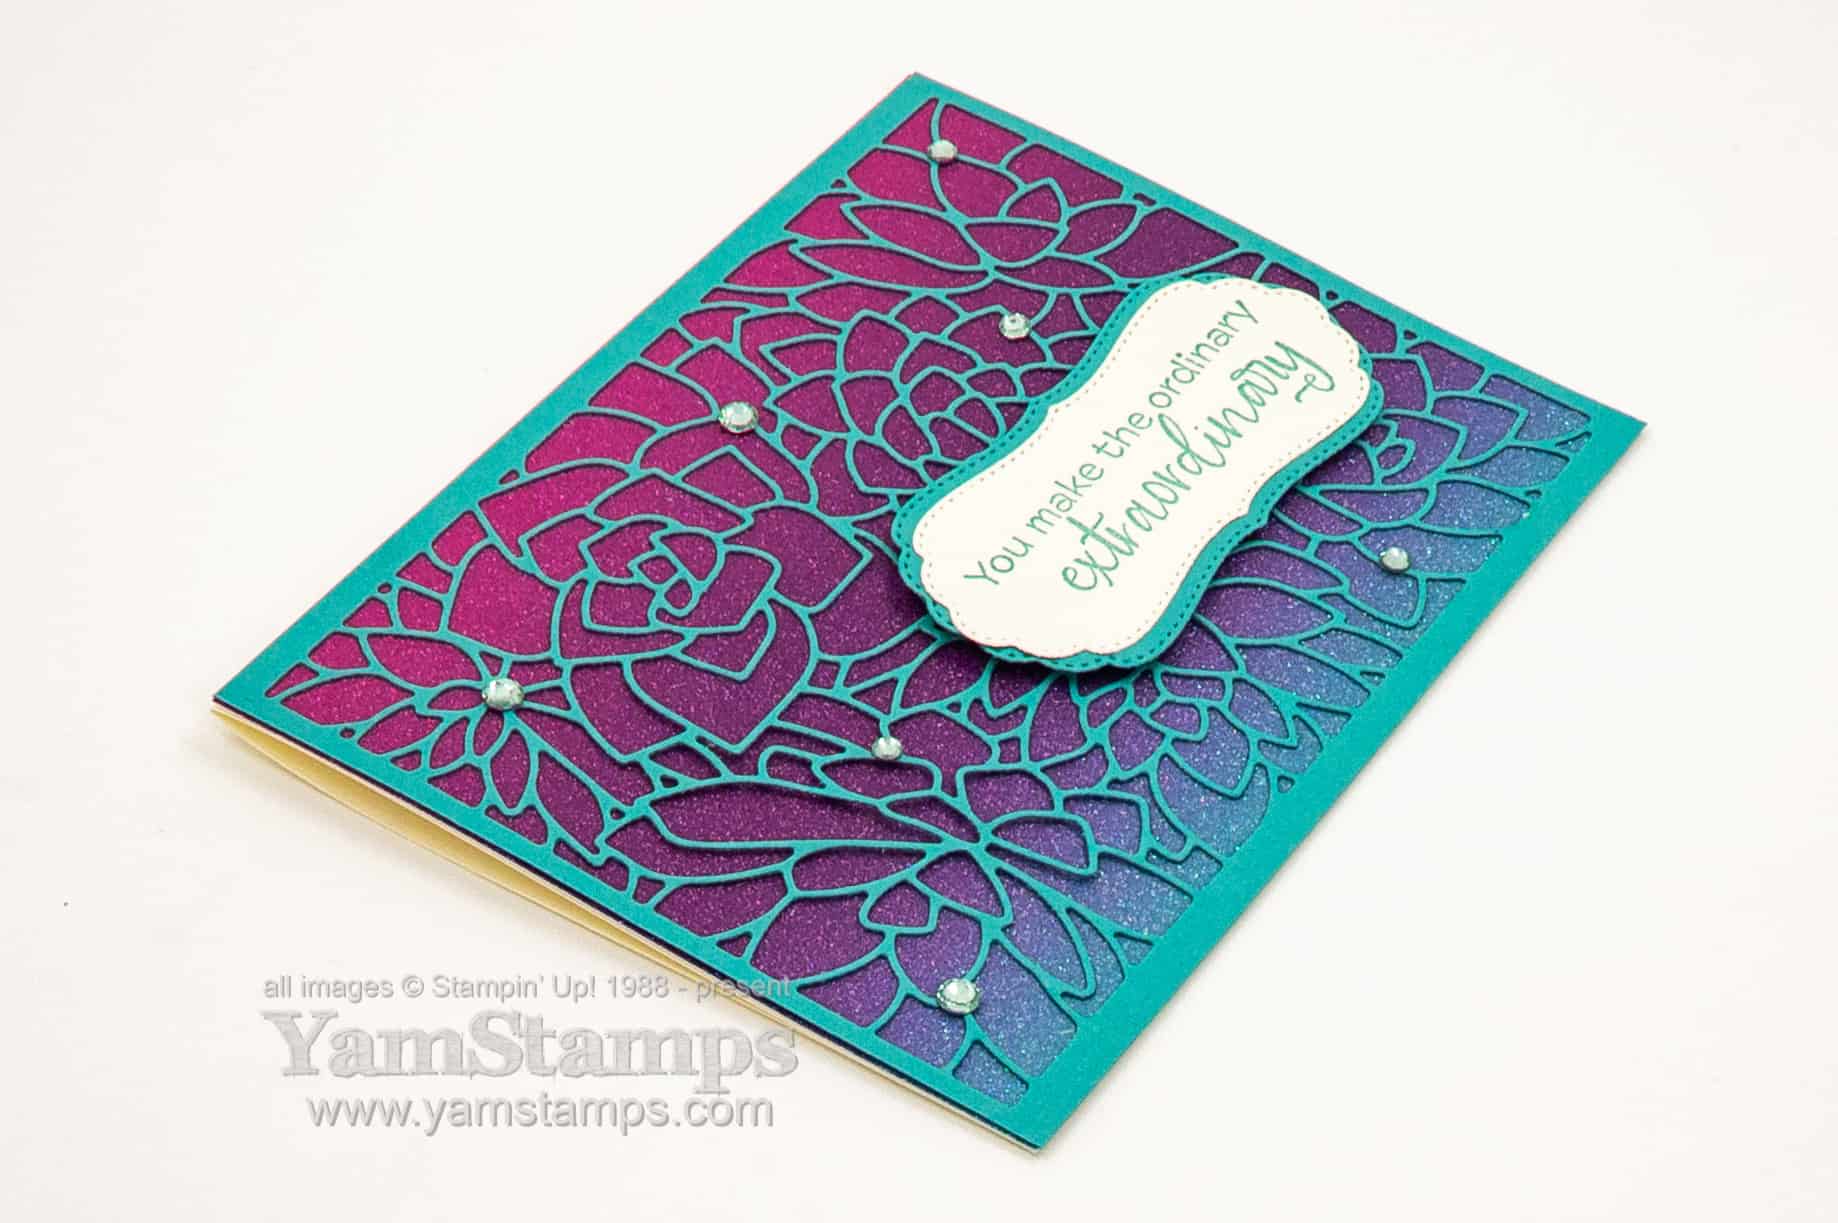
This card is right up my alley – because it’s definitely got the “wow” factor and it’s really easy to make! This sparkly ombre card shows off a few Stampin’ Up! products that are guaranteed to make your projects stand out.
Sparkly Ombre Card
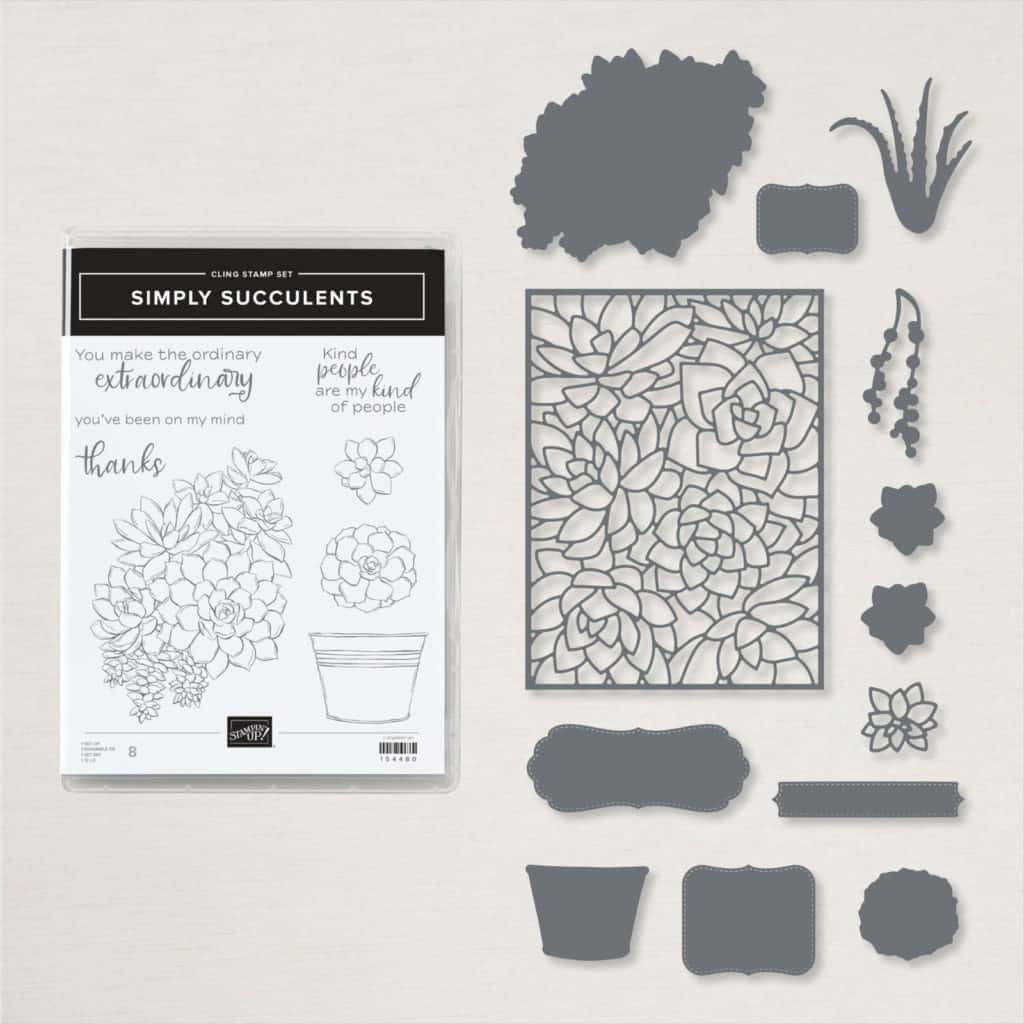
There’s a few stars on this card – the first being the Rainbow Glimmer Paper. It’s got a gradient of colour and stay put glitter so it makes it easy to make impressive paper crafting projects. For this easy but impressive card, I teamed it with some Bermuda Bay cardstock that was die cut with the large die from the Potted Succulents dies (this is the second star if you’re keeping track). I will freely admit that I bought the Simply Succulents Bundle (includes the dies and the coordinating Simply Succulents stamp set) on the basis of this die alone.
Seriously. I loved this die on first sight, and I often have ‘incompleteness’ issues if I buy one item without the coordinating other item….so the bundle. Even though I don’t have a green thumb and I can just barely keep succulents alive. BUT LOOK AT THIS DIE! It cuts the detailed centre portion and leaves the edges intact, so you could use this on the front of a card without an extra layer on top. Love it.
To complete the sparkly ombre card, I added a few Holiday Rhinestone Basic Jewels – I used the Coastal Cabana ones as the light blue shade complimented the colours from the portion of Rainbow Glimmer Paper used. We are going to be doing this card in February’s Stampers Club (though I think we may end up using Basic Rhinestones because I have more of those LOL).
If you’re looking for more paper crafting inspiration, you’ll want to be sure to be signed up for the YamStamps Newsletters! Each week, delivered to your inbox, you’ll get a newsletter with exclusive paper crafting tutorials, information and ideas. The first email of each month is the big projects newsletter, featuring three different tutorials – so if you sign up now, you’ll be sure to get the February edition next week!
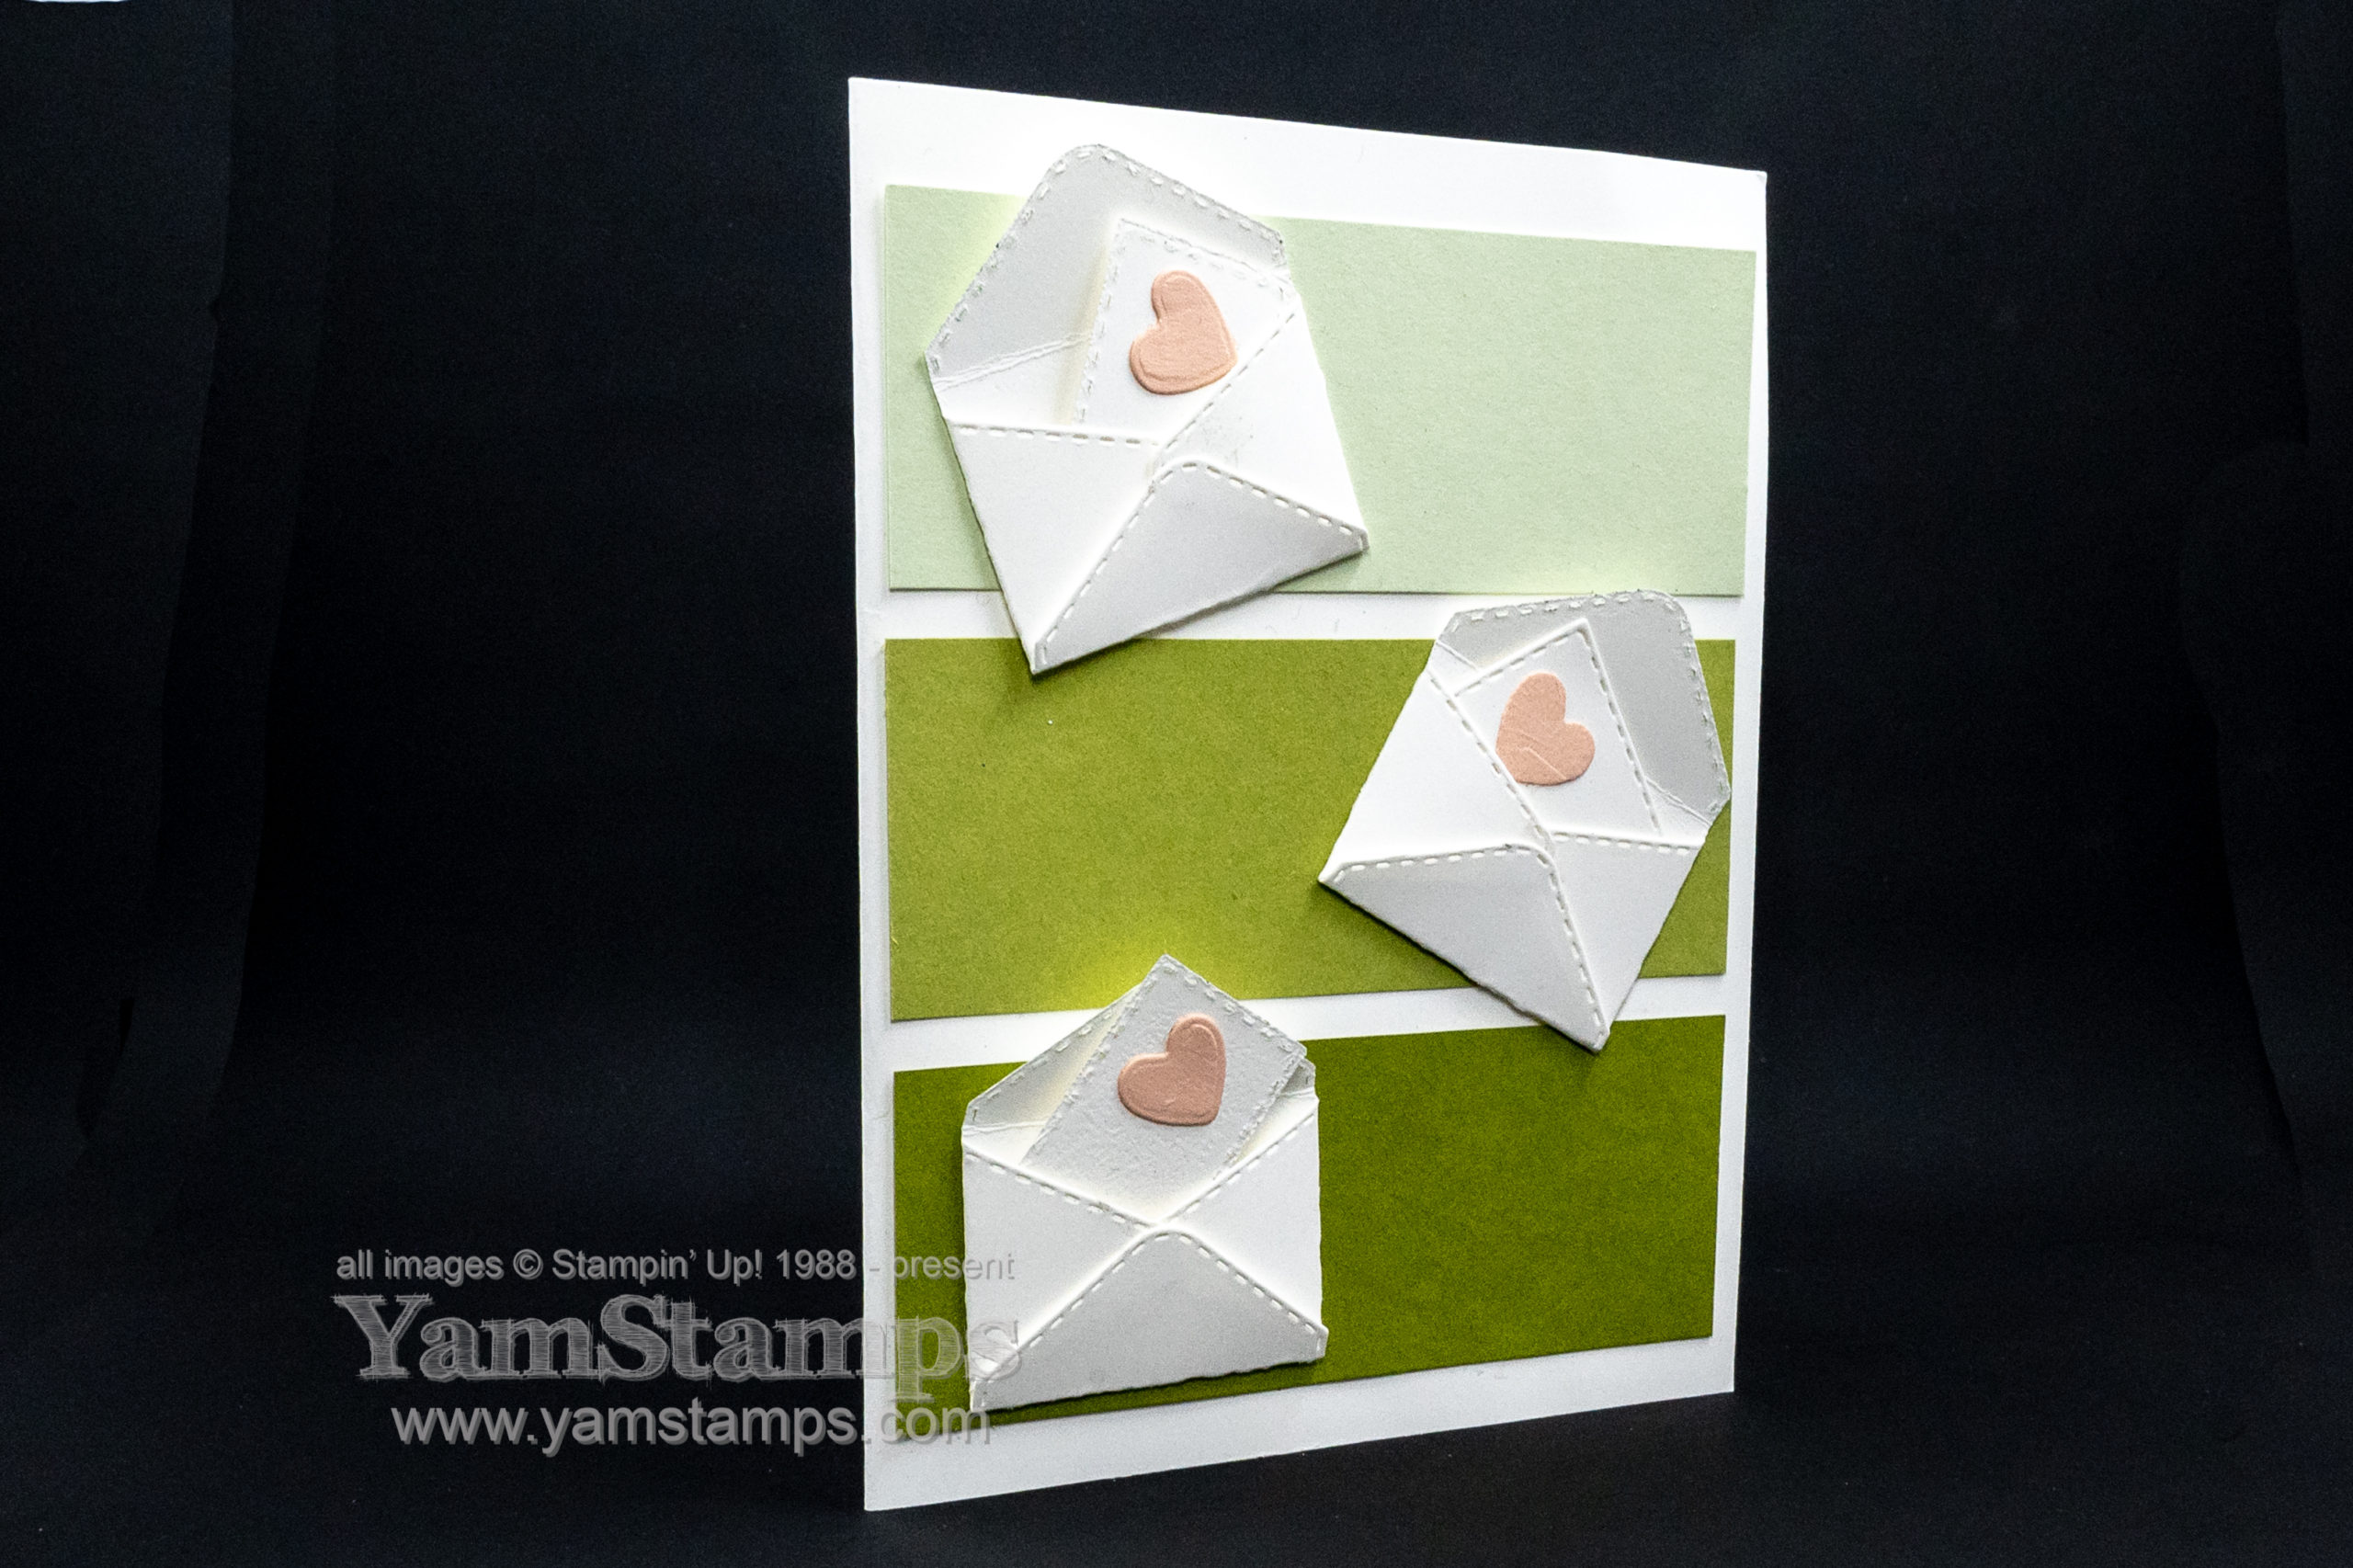
This is a card we’ll be doing in our Stampers Club (which I am contemplating renaming “Card Club”….anyway, I digress…). It’s a “sending love card” which could be used for Valentine’s Day or just to keep in touch with a friend.
Sending Love Card
I created this card with the Snailed It Bundle – which includes the Snailed It stamp set and the Snail Dies. I love the little envelope die! I used it to create three envelopes and then die cut a heart and the “letter” sized stitched rectangle to go inside. The stamp set has a cute cartoon feel to it – so I like that you can use some of the items to create a not over the top cutesy card.
For the club version of this sending love card, I focused on the die cuts, since I can include die cuts in the card kits. Stampin’ Up! regulations prohibit us from including any pre-stamped images in our kits, so for those club members who have the stamp set and bundle, (or non-club members who are seeing this card on the YamStamps site! LOL) my suggestion is to add the “hello” stamp to one of the little letters in the envelope, or to one of the strips of cardstock on the front of the card.
With the current stay at home regulations in Ontario, mailing cards is a great way to keep in touch while staying physically distanced – and you can get out for exercise by walking to the mailbox?! I will let you know that it seems that shipping may take a little longer than the usual due to the sheer volume of parcels in general that are being moved by the various companies – so you may want to keep that in mind. If you would like to use the Snailed It Bundle for your Valentine’s Day cards, you will likely want to place an order sooner rather than later. Plus if you order the bundle before the end of February, you’ll qualify for a Level One free Sale-a-Bration item since the bundle is just over the $60 product level! You can shop online from anywhere in Canada in the YamStamps Online Stampin’ Up! Canada store by clicking on this link or remembering the shortcut yamstamps.com/shop. The other option is to email me and I can place the order for you – you can either arrange to do a porch pickup in Burlington ON or I can have the order shipped directly to you in Canada. Trying to give you lots of options so that you can get fun new product to get crafty!
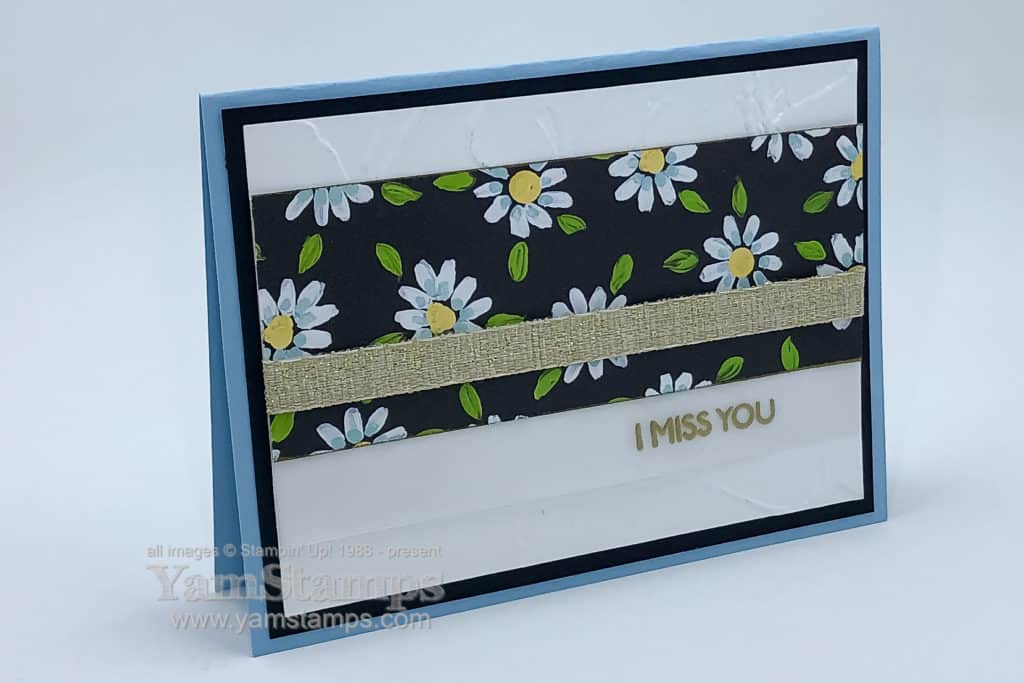
Seems like an appropriate type of card to make these days, doesn’t it? An “I Miss You Card” is one to send to someone who doesn’t live close by, or to someone you haven’t been able to meet up with because of current circumstances. This card also has a neat design feature that makes it easy to make easily customizable cards.
I Miss You Card
I made this card using products from the January-June 2021 Mini Catalogue (J-J Mini because too much typing) and Sale-a-Bration Catalogue. It’s a little hard to see in this photo, but the background cardstock is embossed using the Painted Texture 3D Embossing Folder from the Fine Art Suite in the J-J Mini. It gives the cardstock texture, without the mess of embossing paste (or the drying time). I cut a strip of the Flower & Field Designer Series Paper (Level 1 Sale-a-Bration option), tapped the top and bottom edges into my Versamark Ink Pad, then heat embossed with Gold Stampin’ Emboss Powder. I wrapped some of the 3/8″ Fine Art Ribbon around the bottom edge of the paper; can you see the gold flecks in the ribbon? Love it!
So my card design hack? I heat embossed the sentiment on a piece of Vellum Cardstock, cut slightly larger than the Designer Series Paper (but narrower than the White Textured Cardstock). I then adhered it between the layers with the sentiment showing underneath. This is a great way to add whatever sentiment you might need for your card sending occasions without pulling a lot of focus from the other elements of the card. My other design hack on this card – no knot or bow on the ribbon so that it’s easy to send through the mail.
It’s easy to change up this I Miss You Card by changing the Designer Series Paper strip or the sentiment on the vellum…and if you need some more patterned paper options (including the one shown on this card), you may want to get in on my January-June 2021 Mini Catalogue Designer Series Paper Share. You’ll get 1/4 of each of the packs included, plus the 3 Sale-a-Bration papers! You can check out more details about the share here or contact me for payment links. Cost is $55CAD plus actual postage costs if shipping is required (otherwise porch pick up in Burlington ON).
In the meantime, we all continue to cope as best as we can with the current situation. I hope that you’re hanging in there and able to take a few moments for yourself. For me, current self care includes music and shows that don’t require too much of me and aren’t too stressful. For those who have met me before, you’ll realize that this has not really changed…LOL though perhaps the amount media being consumed is slightly higher than usual. Happily, I can also usually multitask and can craft or prep for Stampers Club while listening/watching, so it makes me feel slightly productive. Slightly. Thanks for stopping by the YamStamps Blog!