A semi-regular feature here…maybe more semi than regular?! Anyway – thought I’d dust this category off again! Today’s featured tool is the Simply Scored Tool! Scoring your paper crafting projects means that your folds will be crisp and professional looking, especially if you’re using the Thick Whisper White or Thick Very Vanilla Cardstocks, or doing fancy fold type cards (like in my online Clever Cards Class!).
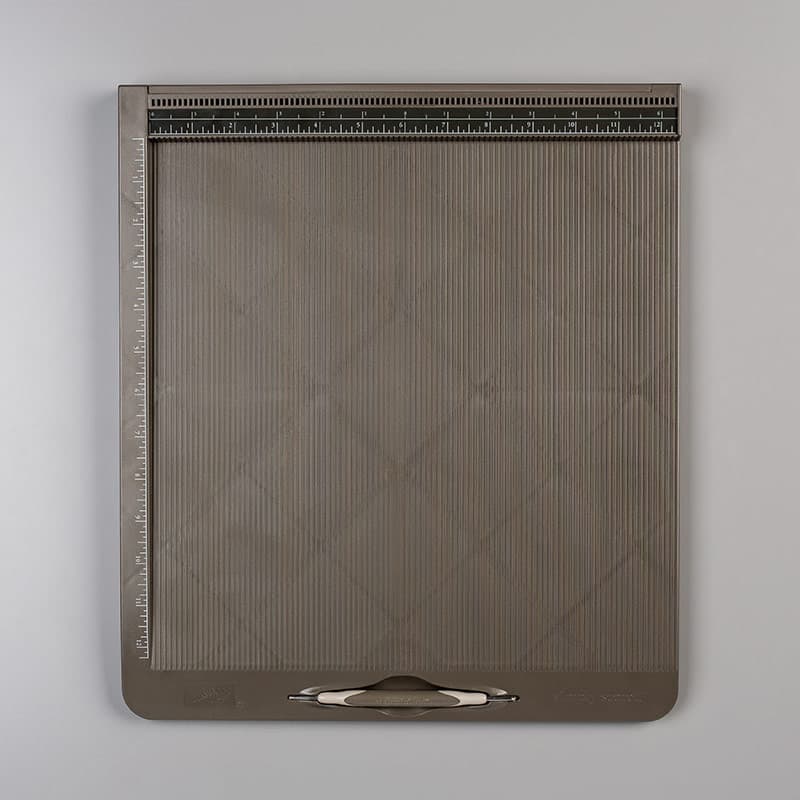
Simply Scored Tool – Item 122334
Stampin’ Up!’s Simply Scored is a grooved board that you can use to create precise scorelines in your paper crafting projects. It comes with a two headed scoring tool, and a set of place markers to mark your spot if you’re doing multiples with the same scorelines. It can accommodate 12″ x 12″ sheets of cardstock and is marked in 1/8″ increments.
Along the top there is also a centre zero line (that’s what I call it, I’m sure there’s a proper name for it but I don’t know what it is…) – so you can score/mark 1″ from the centre on either side (less math to do…).
Helpful Hints
Apply gentle pressure, and draw the scoring tool along the channel (vs trying to push down very hard)
I find it easier to hold my wrist still and move my whole arm
If you are having trouble keeping the scoring tool in the channel, try using the pointy end of a bone folder. Some of my customers prefer this method. I think because the bone folder is flat, there’s less chance of going off track?
I used a metallic marker (Stampin’ Up! used to sell them – you could also try the White Stampin’ Chalk Marker?) and drew along one of the channel lines. I find it helpful for if I’m doing a diagonal point-to-point score line – I line the points up along the marked channel.
If you misplace the scoring tool, the Take Your Pick Tool has a double sided scoring head. (Ask me why I know this….)
Even though you score, you may find that your edges don’t line up perfectly – for example, if you’re scoring your cardstock to create a card. Align the edges of your card, and then run the side of your bone folder along the fold where the score line is. You can kind of “cheat” the fold to be sure that it’s sharp but also so that the edges of your cardstock are aligned. (again, ask me how I know this…)
I really do value my Simply Scored Tool for my paper crafting. One of my favourite crafting tools for sure! Click on the link to see it in the YamStamps Online Stampin’ Up! Canada store.
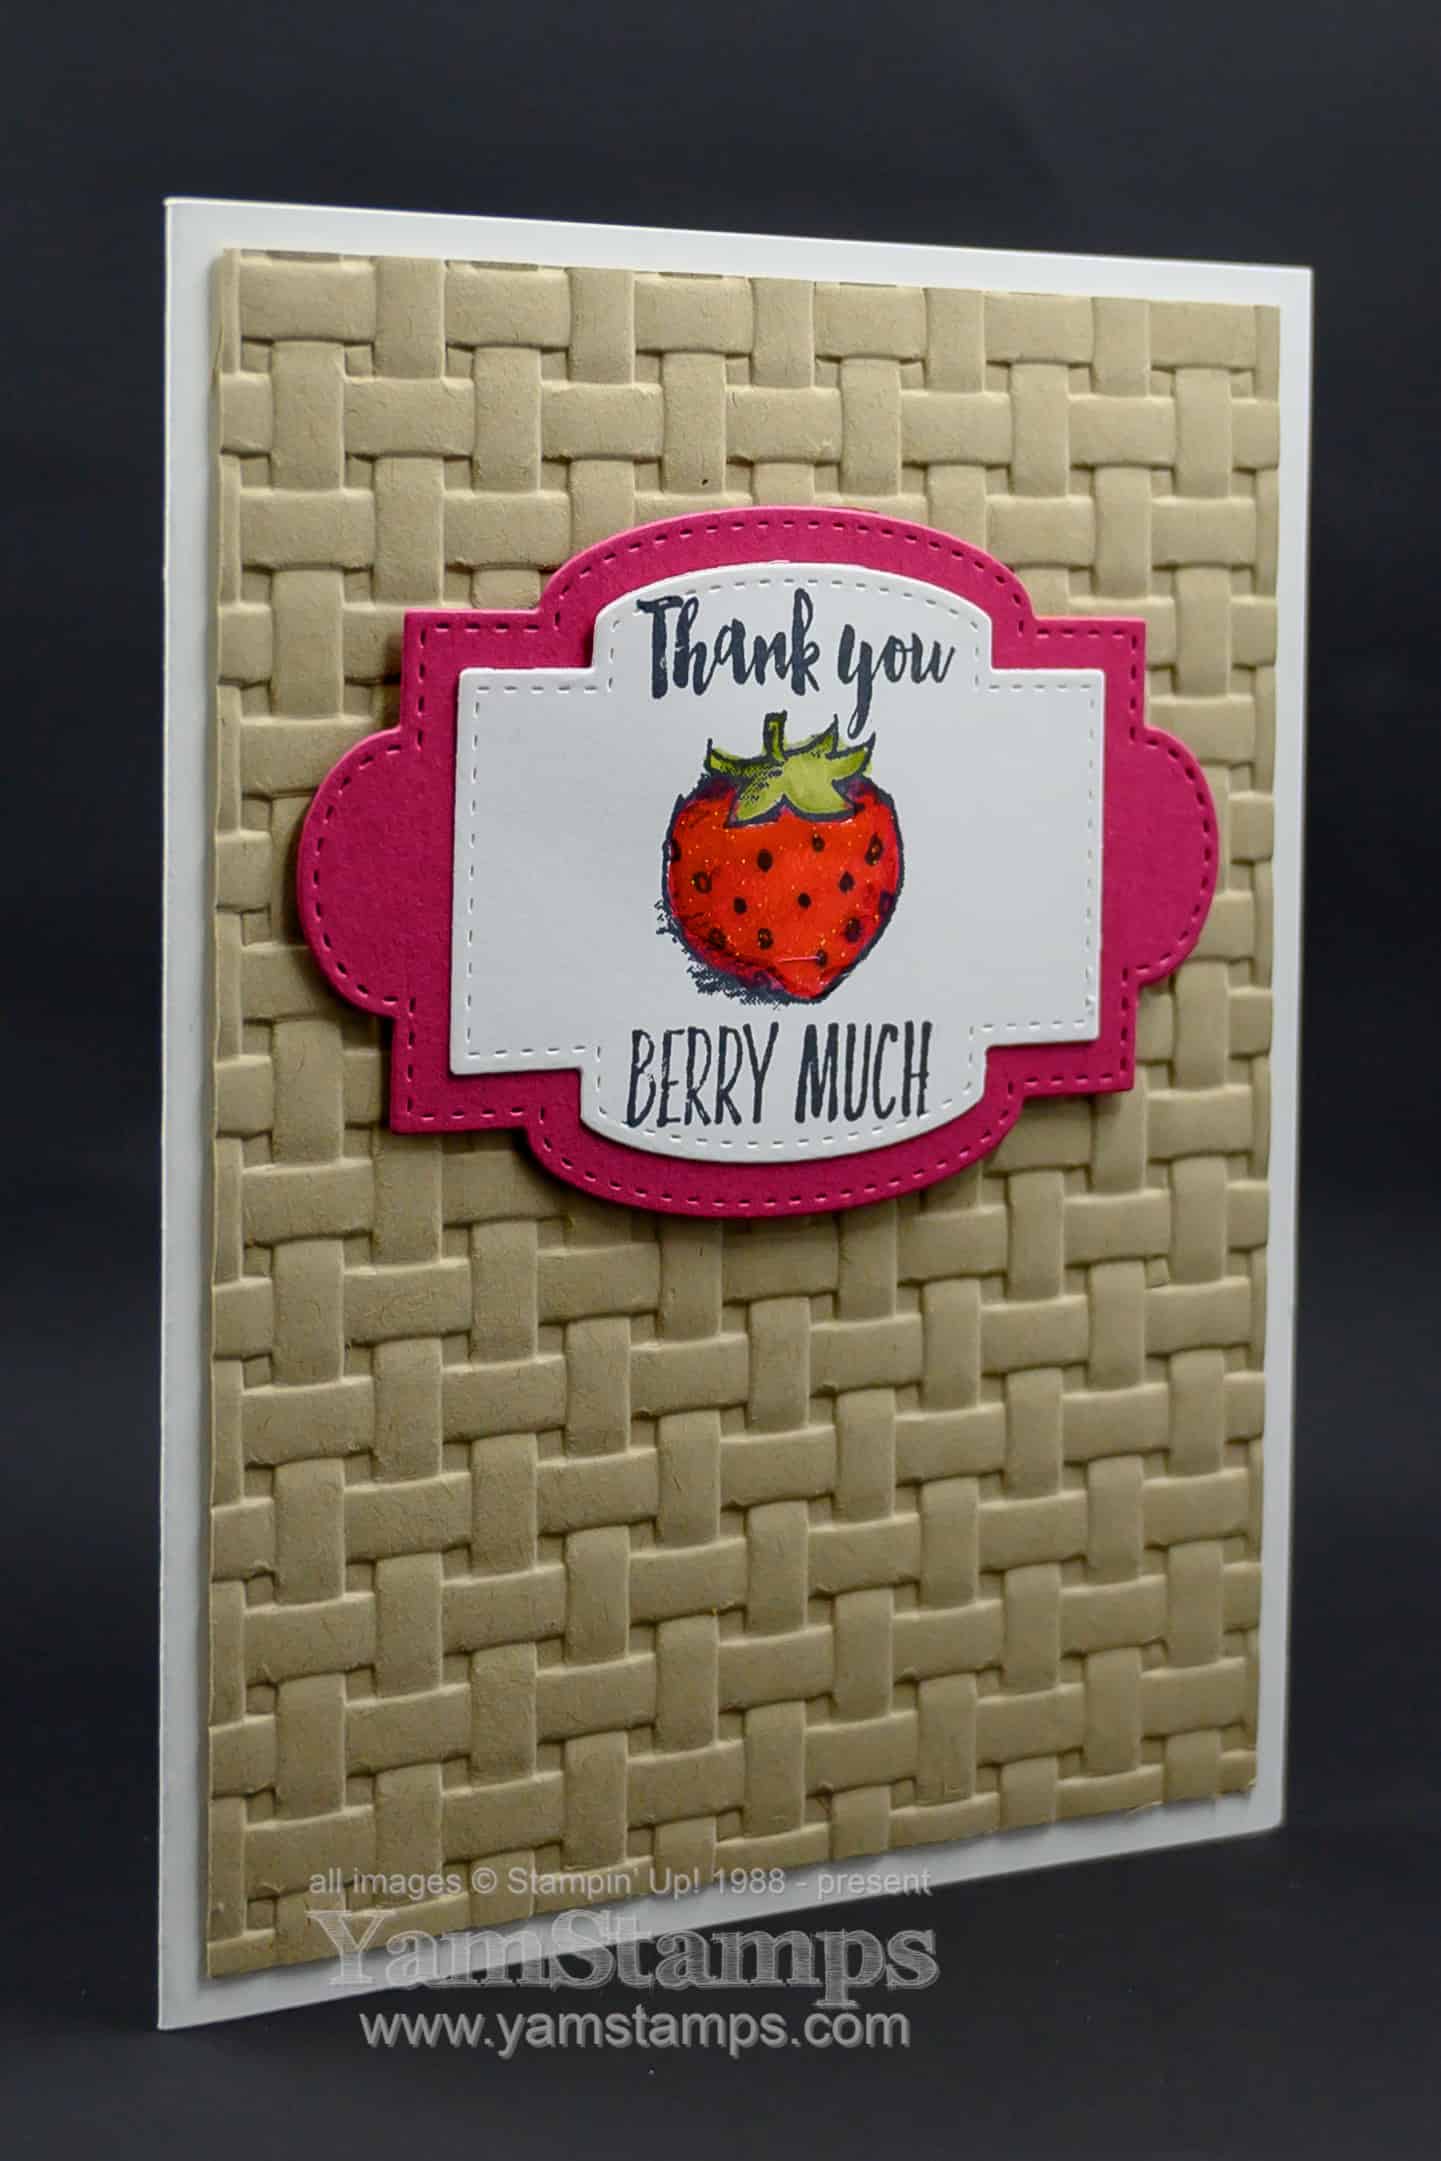
Thanks to voters on the YamStamps Facebook Page – this is the preferred photo version of this thank you card. I put up a poll there just the other day and have received lots of responses – and the photo with the black background was voted as the favourite. (Well, so far, I guess the poll is still open but it seemed like it was fairly clear).
This fun card uses the Witty-cisms stamp set, and my latest product obsession, Shimmery Crystal Effects. The stamp set is from the Jan-June Mini Catalogue, and the Shimmery Crystal Effects were featured in the Holiday Catalogue, which has now retired, but this product was carried over and is still available to be ordered. I love the 3D effect and the shiny, glittery touch it adds to my projects. In the case of this strawberry, I coloured it with Stampin’ Blends and I’m not sure if maybe it looks lighter/brighter after the Shimmery Crystal Effects application. Not that it would have stopped me from using it…LOL.
The other product I love on this card is the Basket Weave 3D Embossing Folder. I still can’t get over how effective this texture is, and I thought it was perfect for a strawberry image. I was thinking of a basket, but Carol on Facebook pointed out it looked like the lattice work on a fruit pie!
Just FYI – there is a Die Cutting & Embossing Accessories flyer you can download that has the product details for additional Cutting Plates and the 3D Embossing Folder Plate. The 3D Embossing Plate is great if you have one of the “newer” 3D Embossing Folders from Stampin’ Up! (starting with the current Annual Catalogue) which are a little thinner than the ones from previous catalogues. You can just add a bit of a “shim” using cardstock but you know me, I like when it’s not too difficult – so the 3D Folder Plate is just a bit thicker with no shims required to get a great impression.
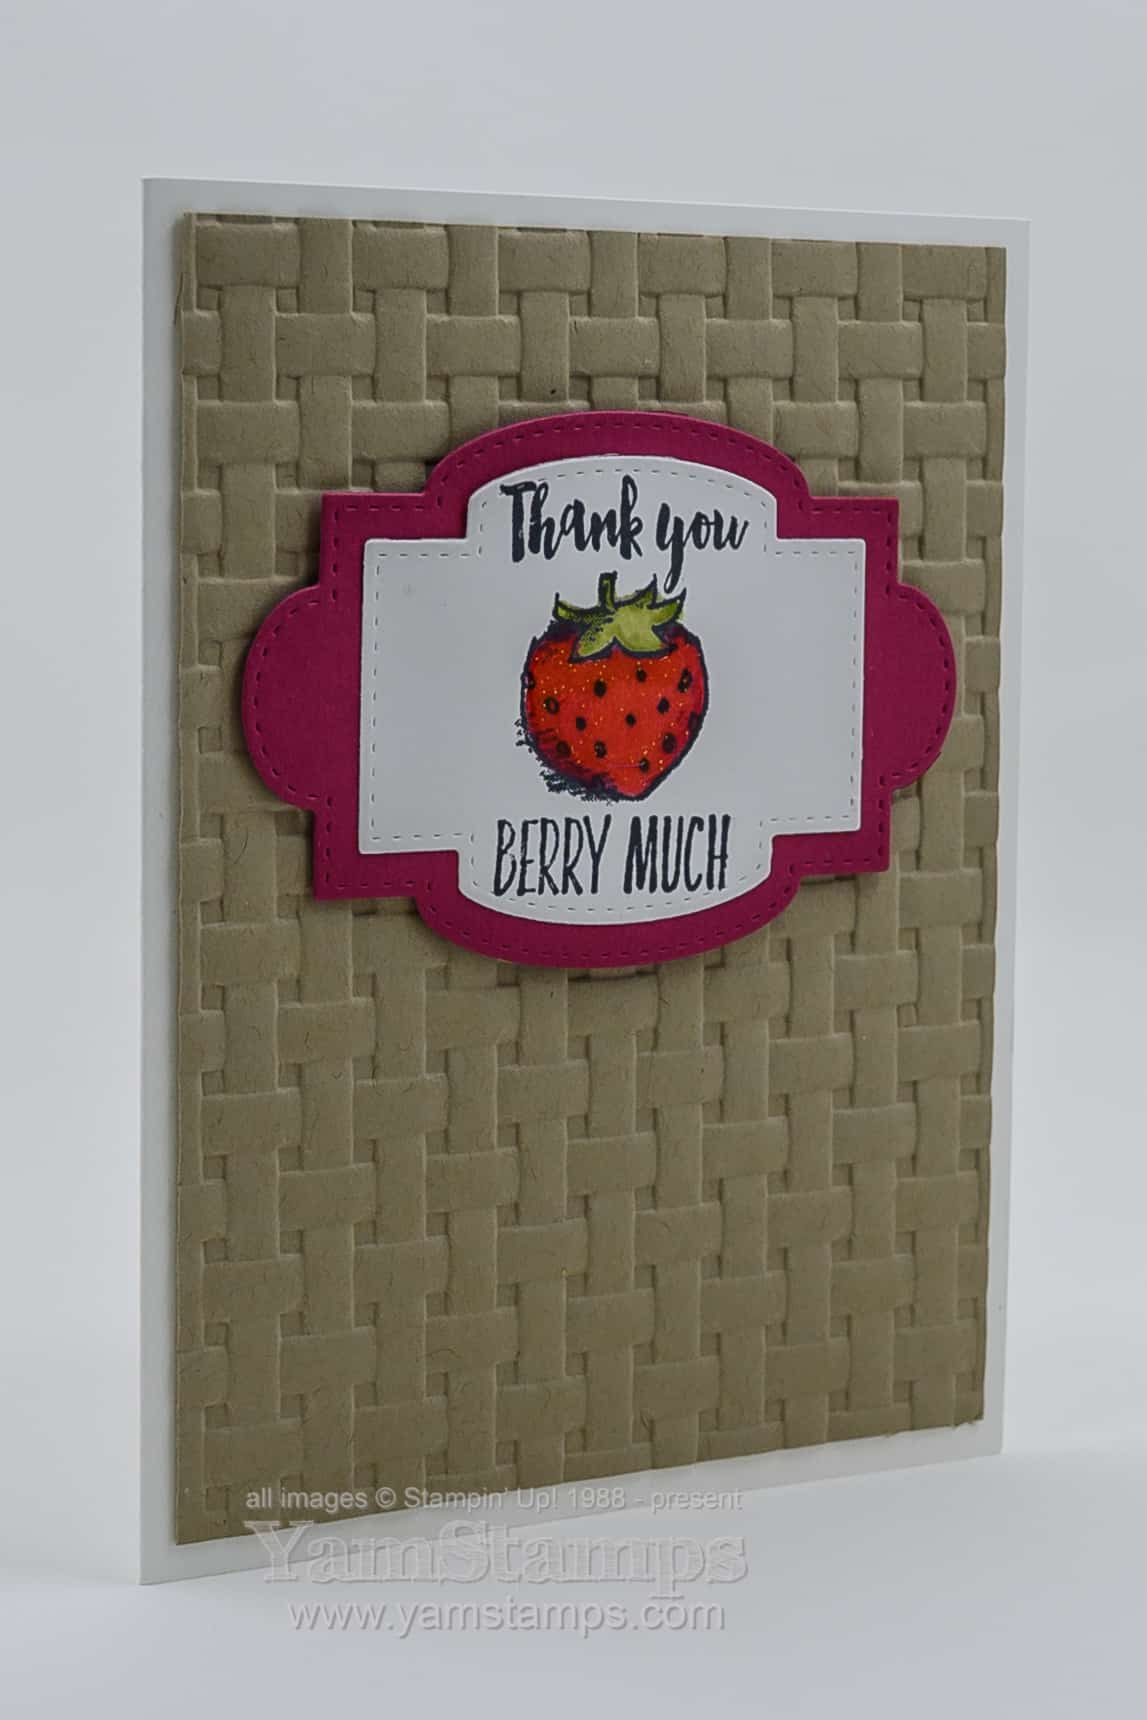
Just for reference – this is what the other background looked like. Do you agree with the Facebook Page majority?
Thanks to everyone who gave feedback on the thank you card photo on Facebook. If you want to get in on the next poll (whenever that might be LOL) be sure to “like” and “follow” the YamStamps Facebook Page!
When is Blue Monday not so blue? When you get THIS blue card for Blue Monday! The third Monday of January is apparently known as Blue Monday – the most sad day of the year. Around here – not so sad, because it’s also Stampers Club Day, and getting together with other crafty peeps will always make it a good day.
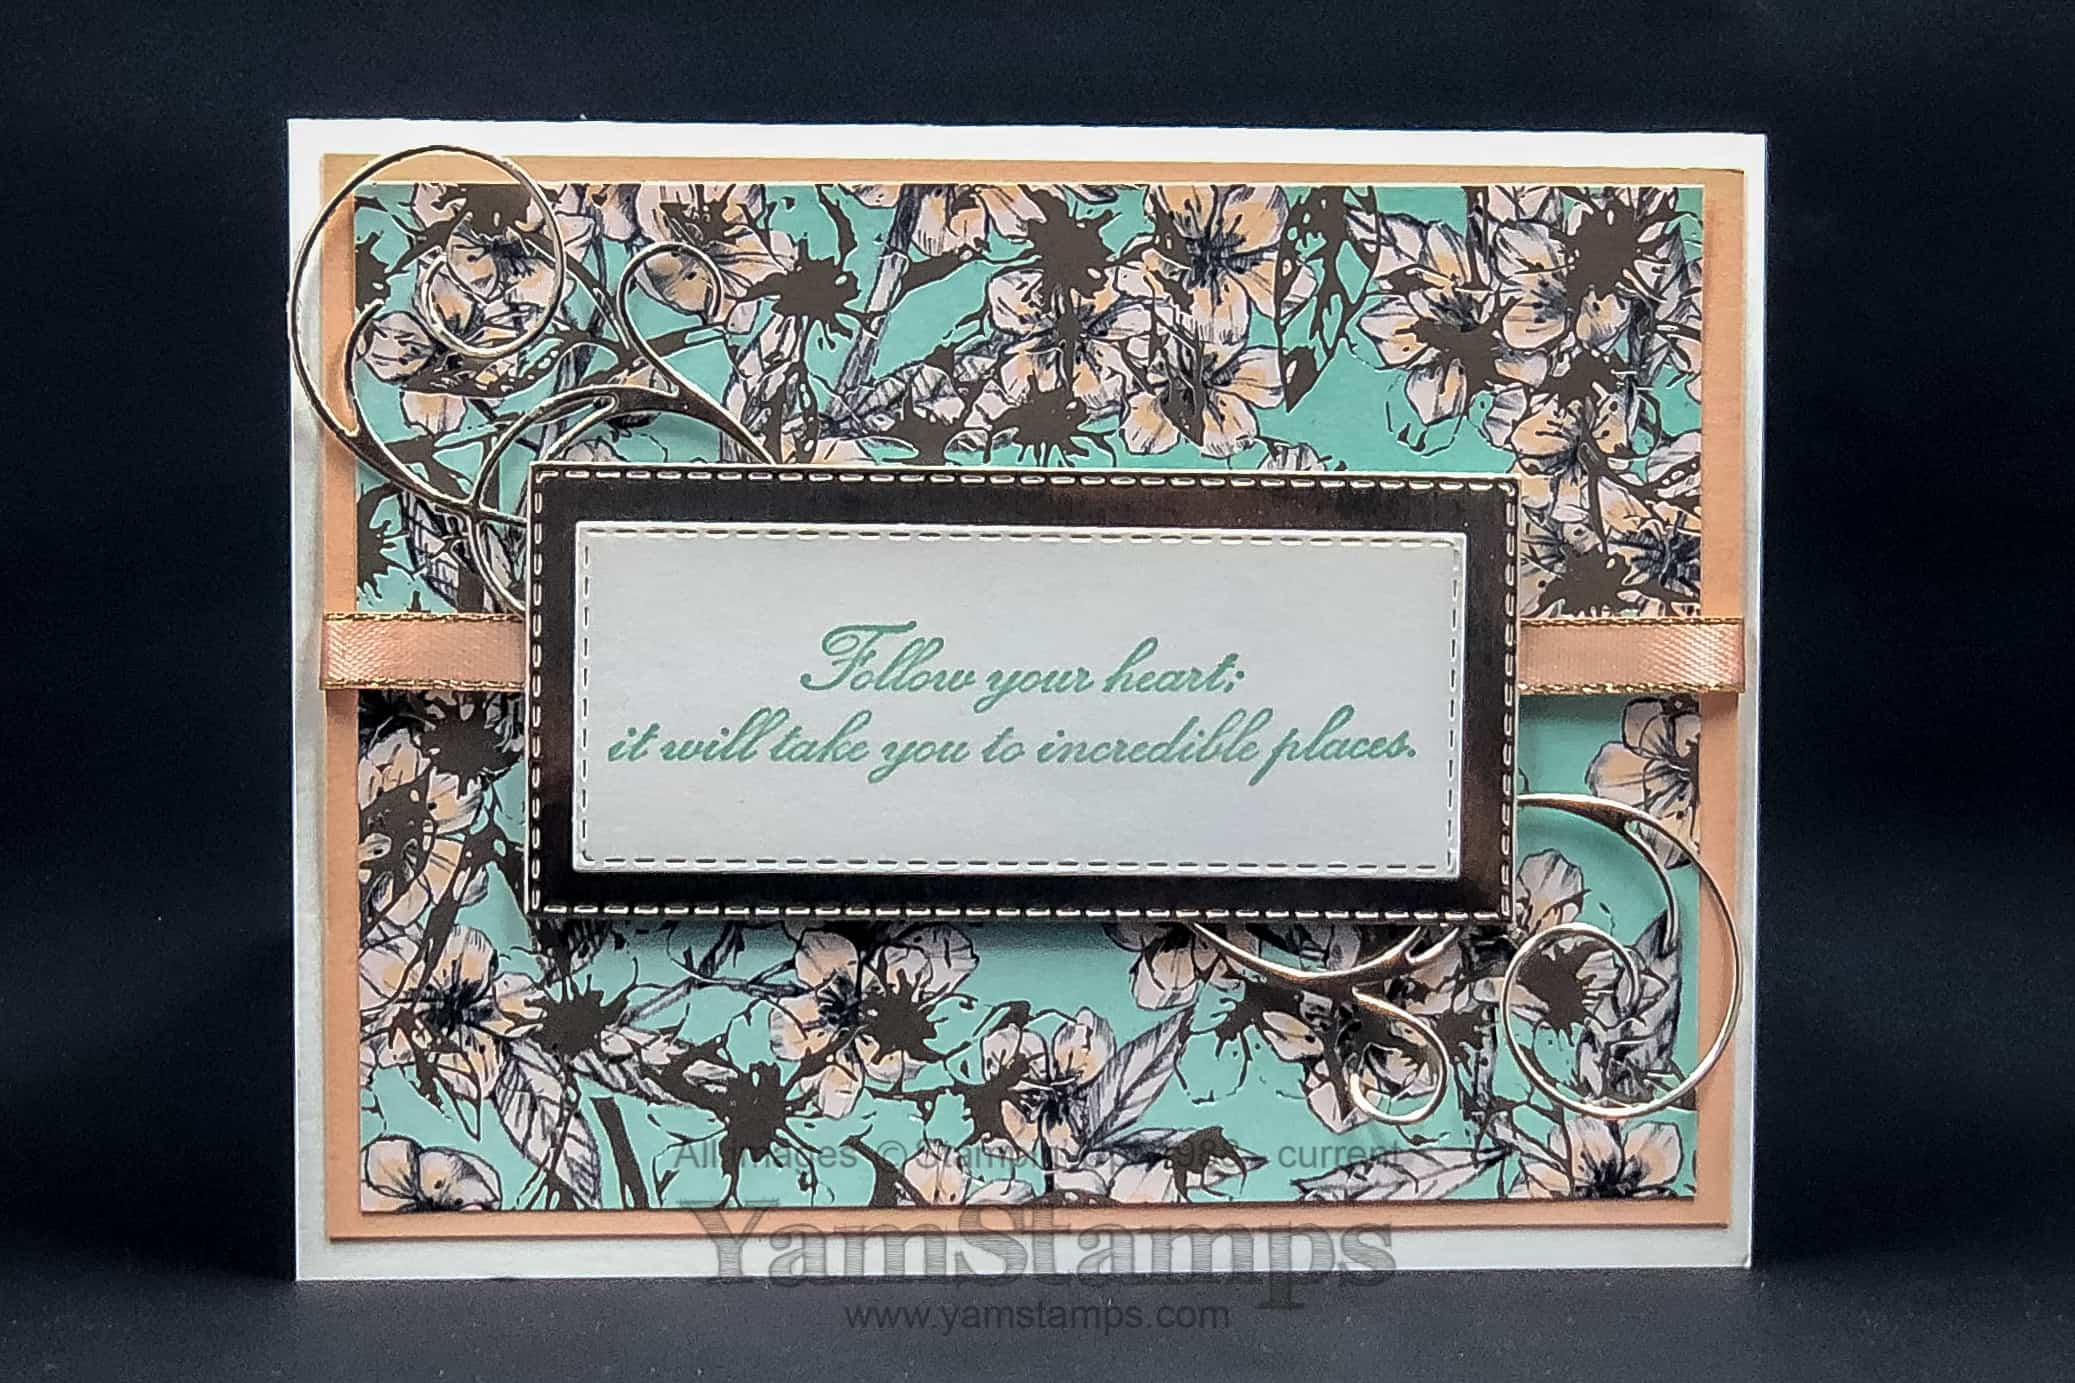
Here’s a card that I created featuring my favourite colour (blue) and one of my favourite suites from the Stampin’ Up! Jan-June Mini Catalogue – Parisian Blossoms.
This card was super easy and came together quickly – probably because I like the products so much LOL. If you are overwhelmed with trying to choose from the beautiful patterned papers available in the Mini Catalogue, don’t forget that I am offering a Designer Series Paper Share (until the end of the month). For $40CAD you can get a 6″ x 12″ piece of each double sided design available from the Mini and Sale-a-Bration Catalogues. If you are unable to pick up your paper in Burlington, ON, I can ship it to you for actual cost. I’m still working on trying to reduce the shipping costs even more, but it varies from approximately $10-20 depending on where you live in Canada. It’s a lot of paper! When you contact me to reserve your share, I can do a shipping quote for you if needed.
Hopefully this blue card for Blue Monday makes your day a little brighter! Thanks for stopping by.
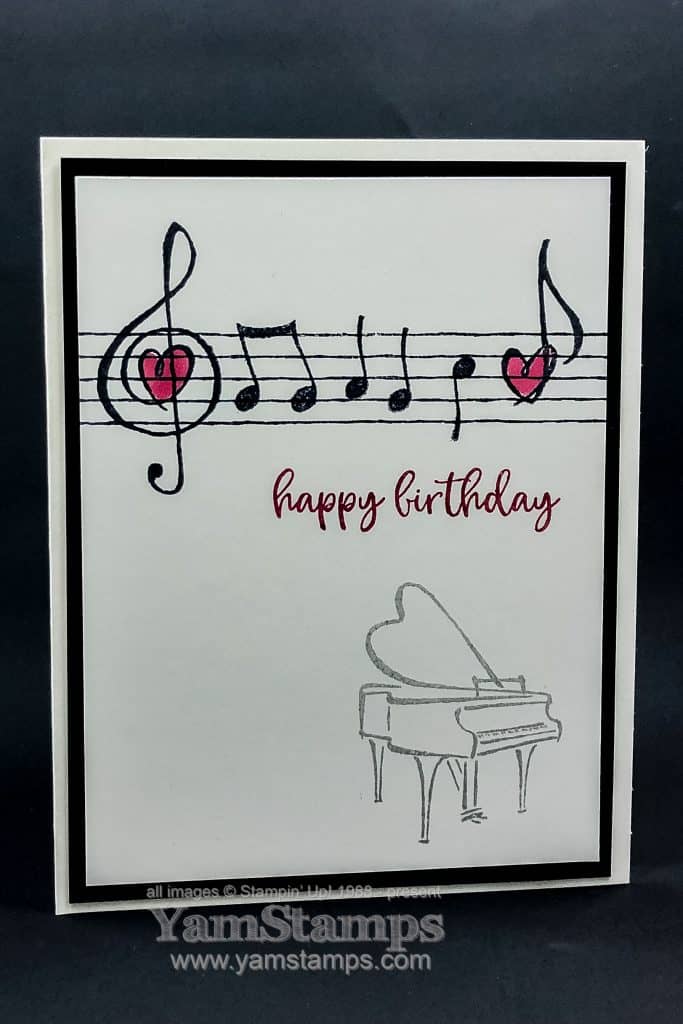
Are you in need of a birthday card for a musician? Or someone who loves music? The new Stampin’ Up! set Music from the Heart is perfect for creating music themed cards.
When I saw this set in the new January-June Mini Catalogue, I knew I would be buying it! Music is a big part of my life, so I knew I could come up with a few ways to use it. I also loved that the music notation is accurate…LOL.
For this card, I used my Stamparatus to be sure that the music staff lines were straight. I stamped the treble clef and the notes by hand – in part because I had to use the one note more than once. If you can read music, you will (hopefully!) recognize that I stamped out the first line of the Happy Birthday song. I figured that the hearts on the treble clef and last note would provide a bit of symmetry. I added in the piano image at the bottom just for a little extra design element. You could easily bling this cardfront up with rhinestones to make it even more flashy!
This stamp set will also be perfect for music-themed scrapbook pages. Given that I’ve committed to getting a bit more serious about memory keeping (read “I will actually make scrapbook pages rather than just think about making them…”) I am sure that this set will get a workout for at least a couple of pages for me.
Are you more of a scrapbooker or a cardmaker? While I’m not abandoning my cardmaking efforts, I will be making more of an effort in the scrapbooking area. I will post some of my pages on the various YamStamps outlets – here on the YamStamps site and on the Facebook Page. I am thinking of doing some more creative challenges in the Paper Crafting with YamStamps Facebook Group – is that something of interest to you? Please join us in the group and we’ll be getting that starting in the next little while.
In the meantime, I’ve now got a design for a birthday card for a musician…but there’s also need for a thank you card, just because card, encouragement card… It’s not just that I’m avoiding the snow removal outside, really! Stay warm everyone!
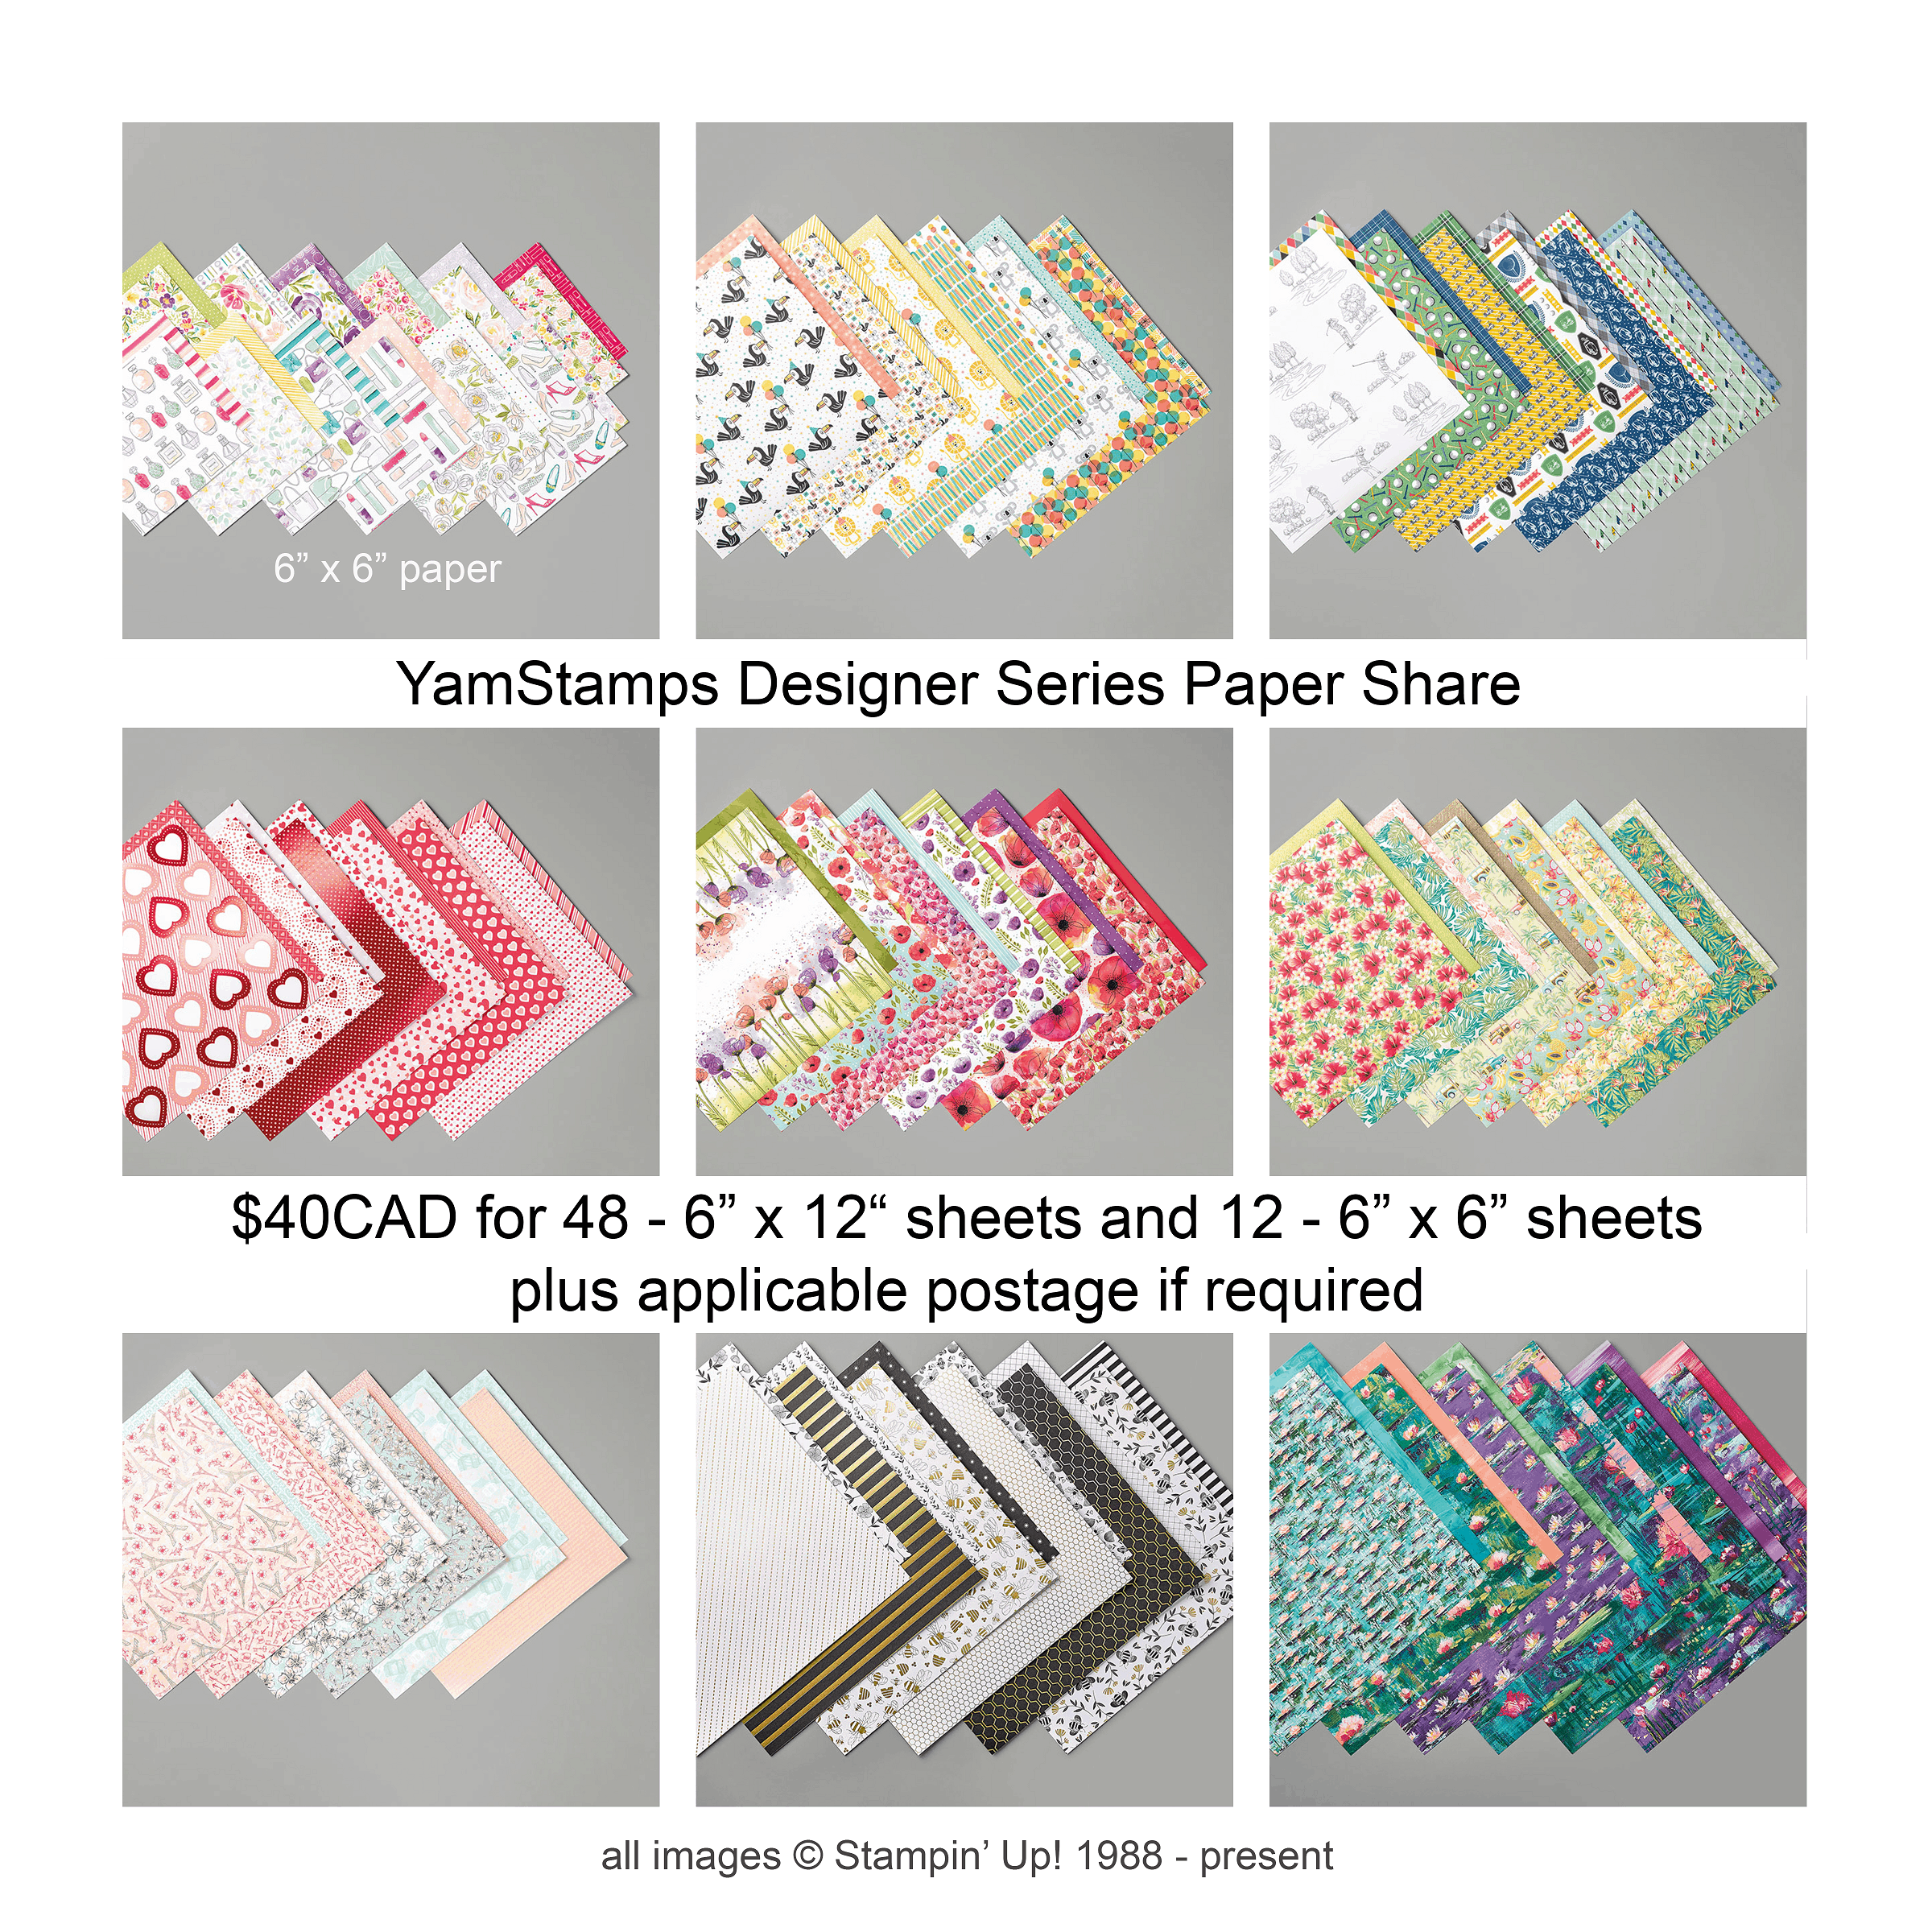
I’m doing another paper share! If you’d like a sampling of the Designer Series Papers that are available from the Stampin’ Up! January – June Mini Catalogue, this is your chance. For $40CAD (plus applicable shipping costs where required), you’ll get forty eight 6″ x 12″ pieces and twelve 6″ x 6″ pieces covering all the designs available, including the two Sale-a-Bration papers!
Your payment will secure your spot in the paper share. Spaces are limited. At this time I will be offering the Paper Share option until the end of January.
Pickup in Burlington: Cost $40CAD – contact me to arrange payment (etransfer/CC) and pickup when the share is ready.
Shipping to Canadian address: Cost $40CAD plus actual shipping – contact me to get a shipping quote. I will hold a spot for you until I send the shipping quote/total cost. If payment is not received 24 hours after shipping quote is sent, the spot will go to the next person on the list.
Please feel free to contact me if you have any questions, or want to grab your spot in the Paper Share!
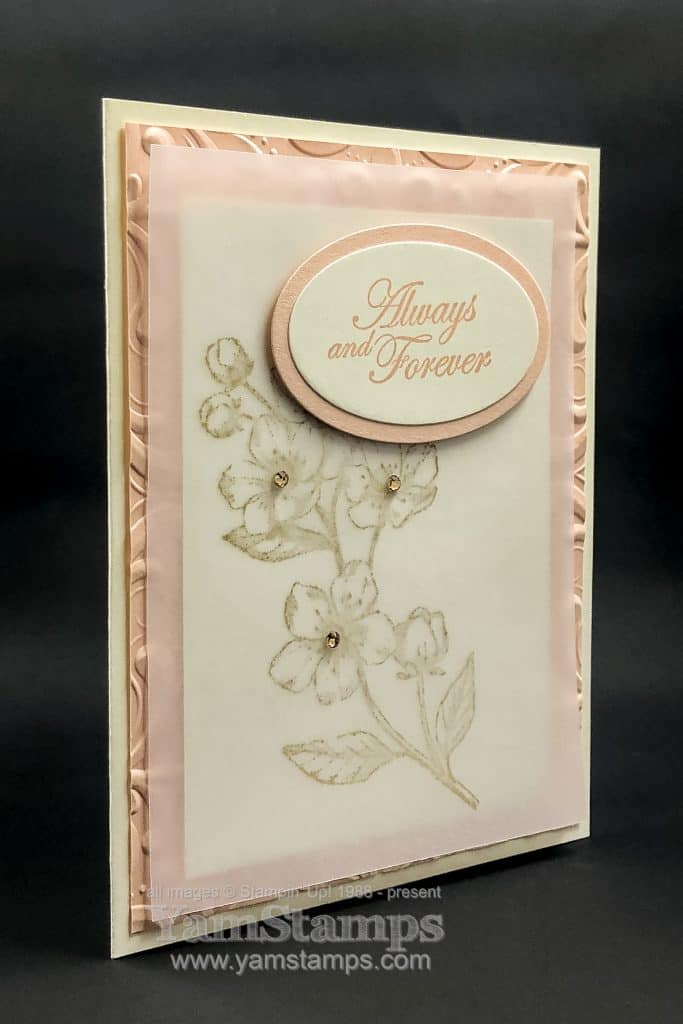
This soft pink cherry blossoms card will hopefully distract you from the weather outside – because it’s been pretty dreary and grey lately in my neighbourhood! It could be used for a wedding, anniversary, engagement or Valentine’s Day, or swap out the sentiment and make it a birthday card or “just because” card.
Forever Blossoms Card
This card features the Forever Blossoms stamp set from the Jan-June Mini Catalogue (click on the link to see all the catalogue items in the online Stampin’ Up! Canada YamStamps store). The embossing folder used on the Petal Pink Cardstock layer is the Parisian Flourish 3D Embossing Folder. I stamped the cherry blossoms image onto a piece of Vellum Cardstock, and then adhered it onto a layer of Very Vanilla Cardstock so the image showed up a bit more. I added some Champagne Rhinestone Basic Jewels to the flowers for some “bling” but also to hide the glue dots that I used to hold the vellum in place! There’s also some SNAIL adhesive on the vellum, hiding behind the sentiment.
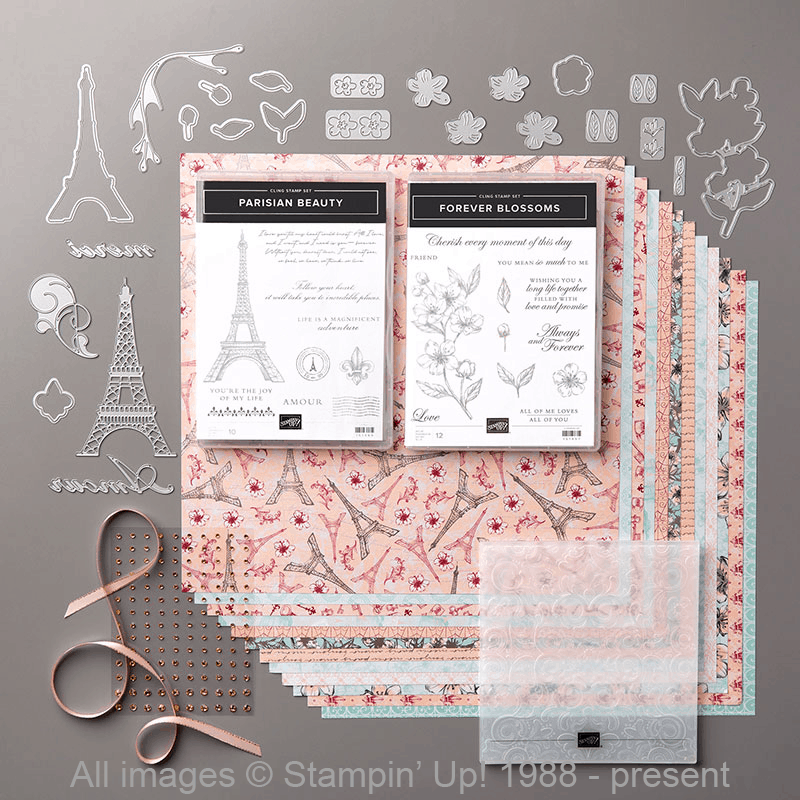
I have to admit – this is the first time that I purchased an entire suite bundle from a catalogue. When I saw the Parisian Blossoms Suite I knew I had to have everything in it….
Parisian Blossoms Suite Bundle
I mean, seriously. What is NOT to love about this suite?! The cherry blossoms card only uses a tiny portion of the product in it. I am talking myself into cutting up the Designer Series Paper rather than just hoarding it too! This is one of the suite of products that has me looking to get into scrapbooking a bit more. I am keeping my goals really low and low key, like a layout a month. Seriously. Since I haven’t done much personal memory keeping at all of late, I’m not going to put too much pressure on myself! If you’re a YamStamps Newsletter subscriber, you’ll have seen my layout in last week’s big monthly projects newsletter. I can only go up from there….LOL.
If you are looking to get some “me” time or “friends” time into your schedule, why not join a cardmaking class? The Monthly Card Classes are (generally) the first Wednesday of each month here in Burlington ON. Grab a friend and come to class, or come on your own and meet some new friends who like to try something crafty too! Afternoon session is 1pm, evening session is 7pm. You can see upcoming dates on the YamStamps Events Page. If that day or those times don’t work for you – contact me about a private card class! My place or yours!