Jun 1, 2018 | Announcements, Stampin' Up!
It’s here! The Stampin’ Up! Canada 2018-2019 Annual Catalogue is in effect as of today, June 1st! Happy New Catalogue Year! I’m in the midst of following up with those that should have received a catalogue by mail, and finishing my deliveries to those who are more local to me, if you aren’t able to pick it up on Saturday.
This Saturday, June 2nd is my Annual New Catalogue Open House and Retired Product Sale here in Burlington ON. Please RSVP to ensure I have a copy of the catalogue set aside for you, and that I’ve baked enough cherry pound cake…oh, and to get directions!
You will be able to place orders online as of 2pm Eastern (12 noon Mountain time) (quick link is yamstamps.com/shop ). Please be aware that new colour Stampin’ Blends and the Planner Kit are not yet available to order – likely mid-month (fingers crossed), though existing colour Stampin’ Blends are available to order once again. Somehow I’m sure that between that and all the new product available to order will keep you well stocked for your creative endeavours for the next little while at least!
You can be sure that we will be using some new products in the June Monthly Card Class – Wednesday June 6th at 1pm or 7pm. If you’d like to get in some creative time plus check out some of the new product, be sure to register! Space is limited. Class fee of $20 will cover all supplies required for the four cards we make in class.
Hope to see you very soon! Open House attendees will get the first look at some beautiful samples from the new catalogue – and shop the deals; Monthly Card Class members will get to use some of the new product in class! Please contact me for more information or to register.
May 25, 2018 | cards, Stampin' Up!
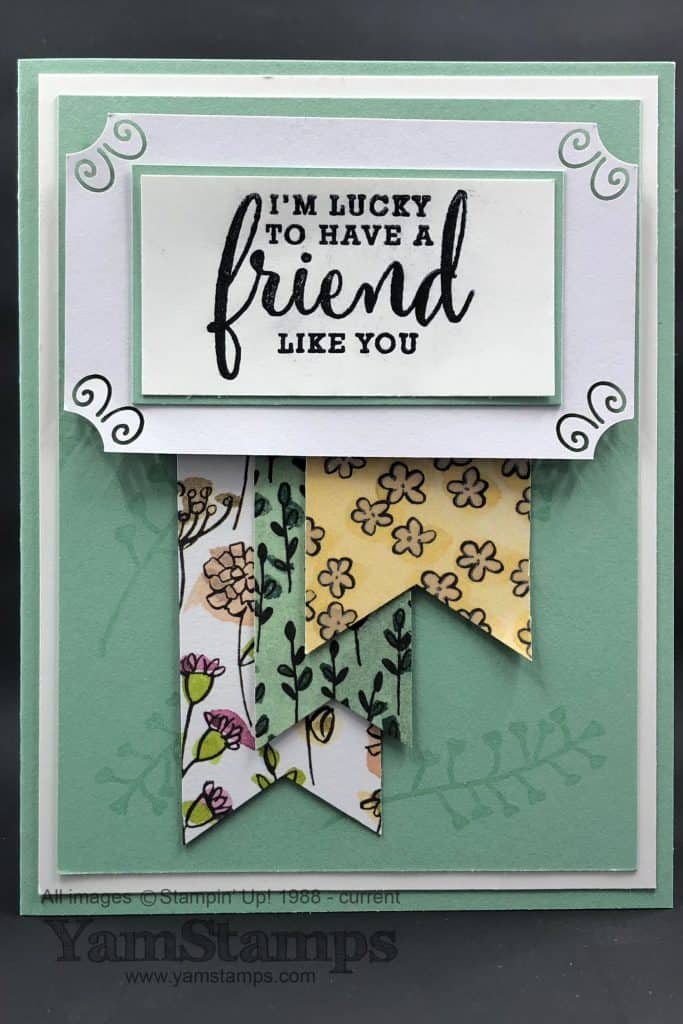
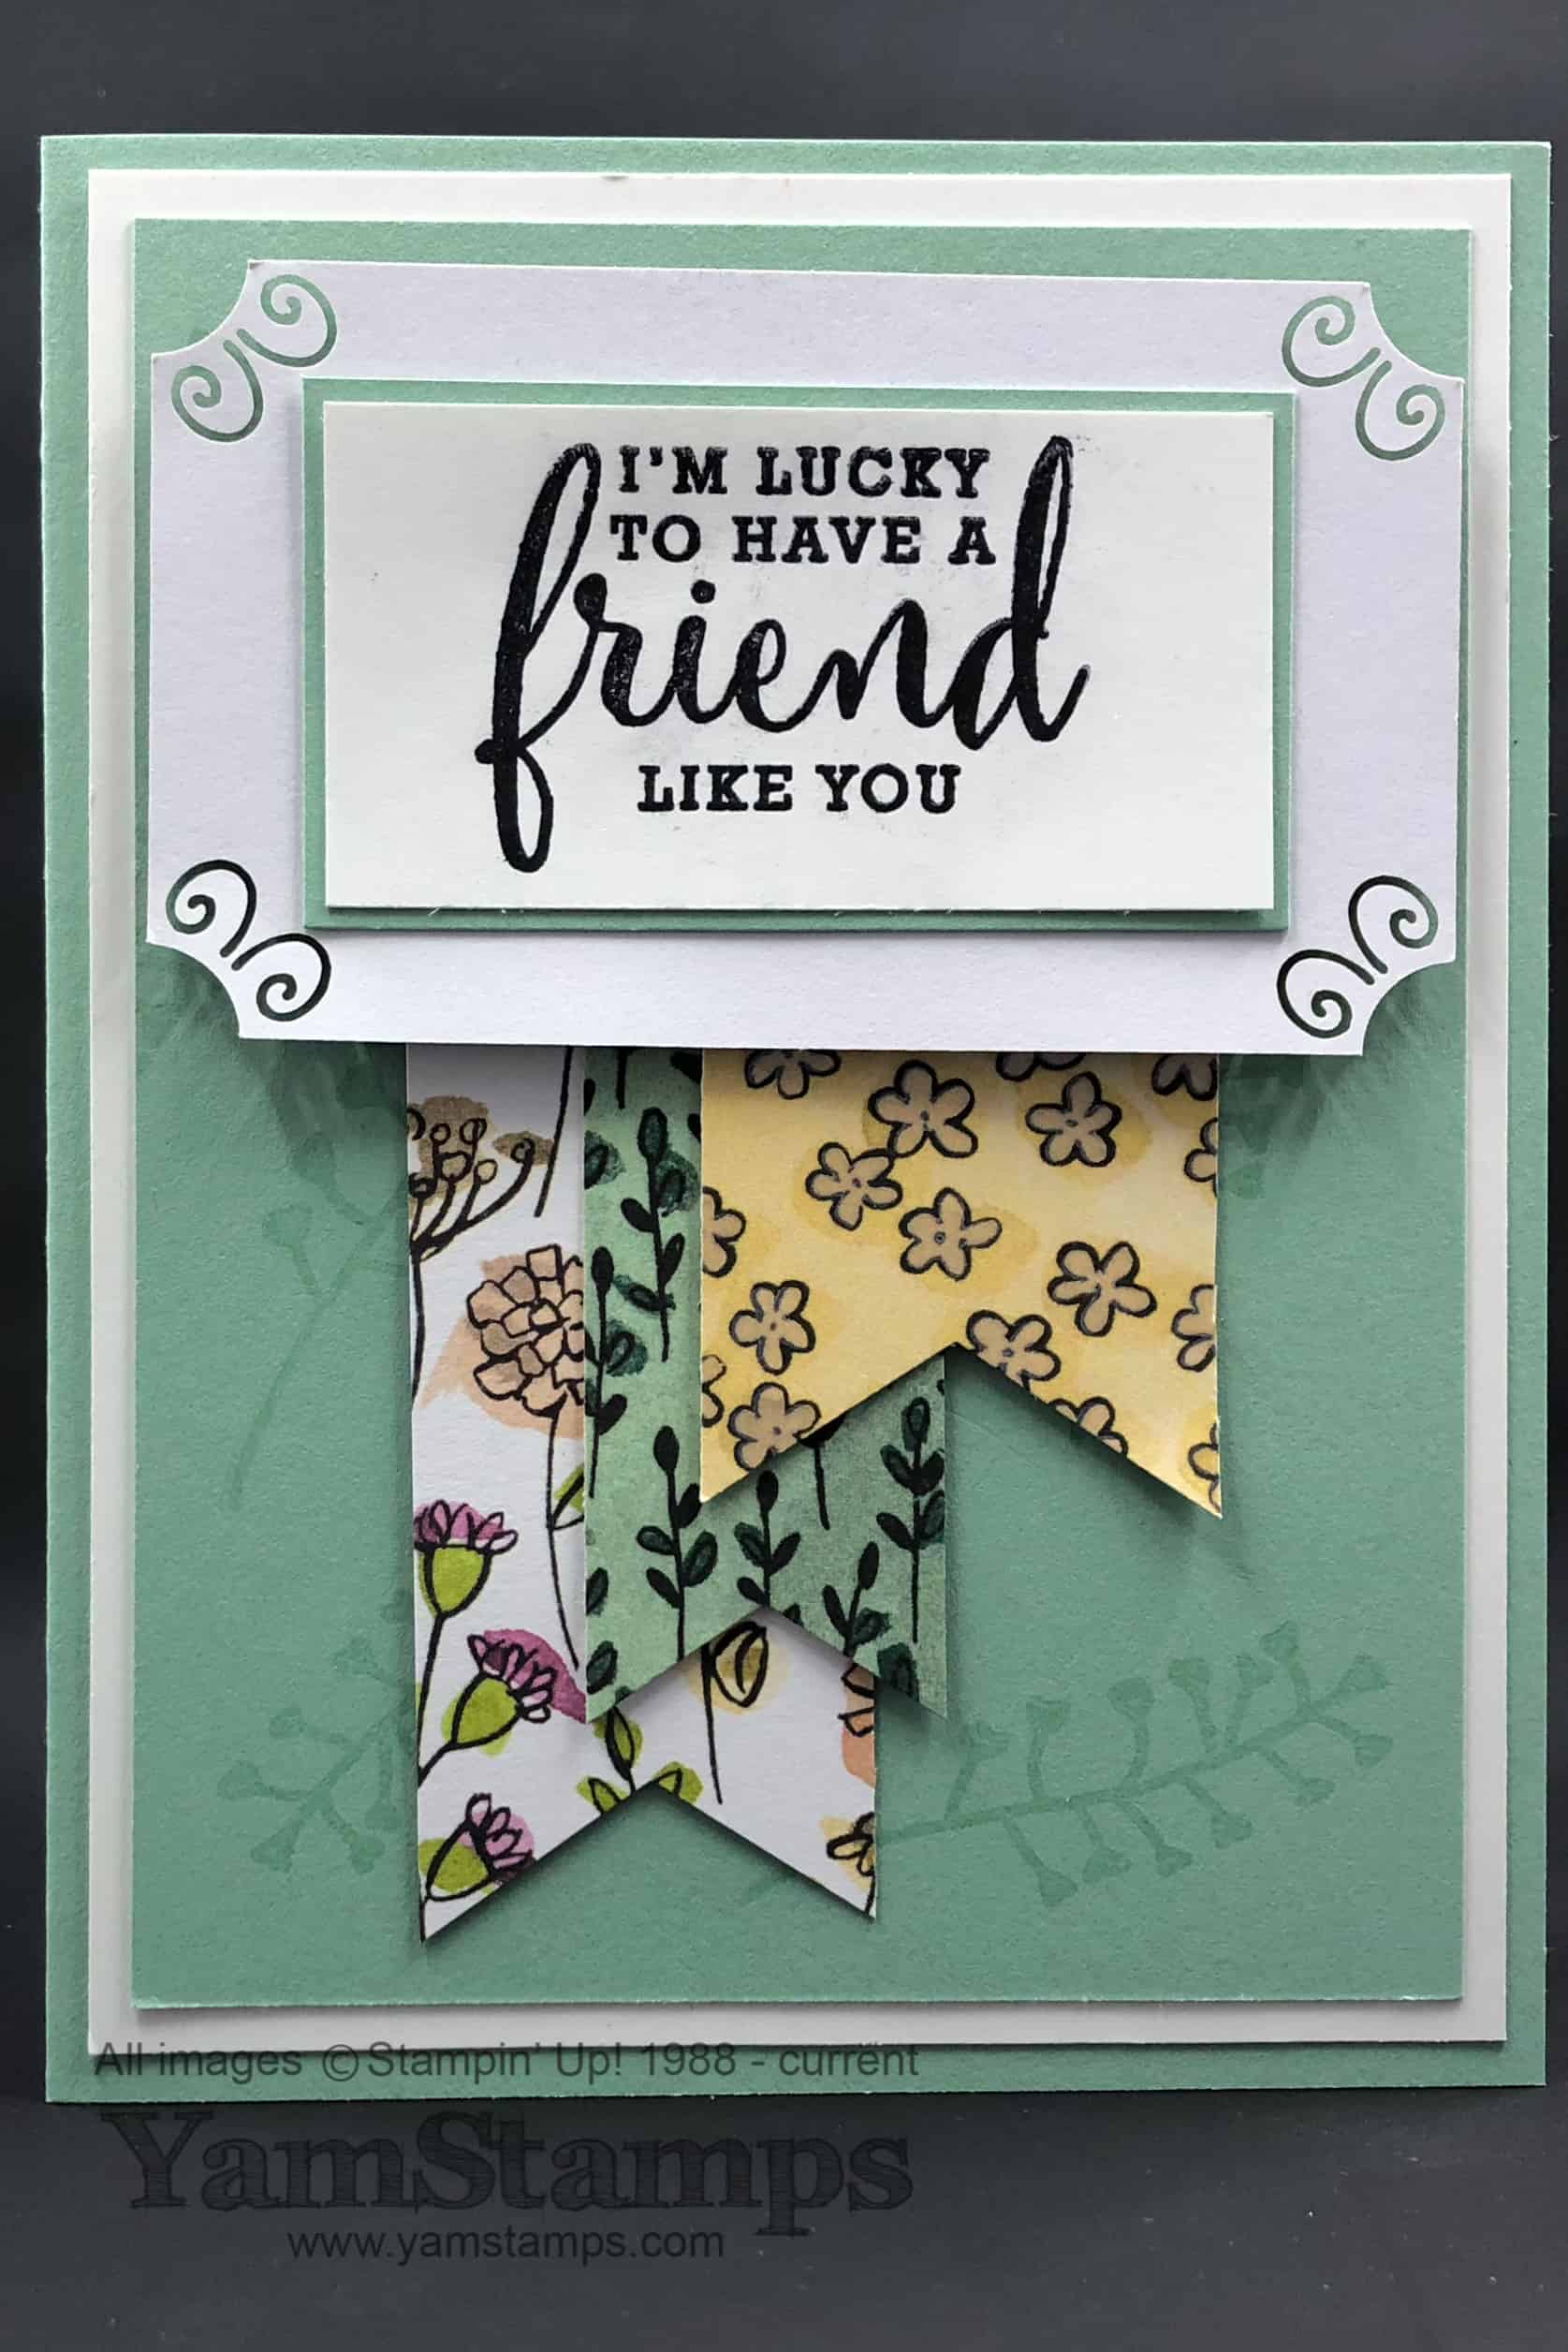
During May, Stampin’ Up! is offering three special bundles featuring the new Share What You Love Product Suite. This card uses the “Gotta Have it All” Bundle – which contains (amongst other products) the fantastic Share What You Love Specialty Designer Series Paper. The cardstock is the returning favourite, Mint Macaron – one of the colours in the Share What You Love Cardstock pack, in coordinating colours with the Designer Series Paper. The ends of the Designer Series Paper strips are shaped with the Banner Triple Punch, and the sentiment (from the Love What You Do stamp set) is mounted onto the larger tag from the Share What You Love Embellishment Kit.
These products will be available individually as of June 1st, but the bundles (with bonus items included) will only be available until the end of May. Also ending at the end of the month – the 2017-2018 Annual Catalogue! June 1st means a new catalogue year! Don’t forget that Saturday June 2nd is the YamStamps New Catalogue Open House and Retired Product Sale, so if you’re looking to get a new catalogue, grab some deals and join some upcoming classes, RSVP to get directions and reserve your catalogue!
If you purchase the Gotta Have It All Bundle through me, you’ll automatically receive free access to the Scrapbook in a Box Online Class, which is launching shortly. I’m also offering Class By Mail kits – so watch for that post in the next little while! In the meantime, if you need assistance placing an order, or have any questions, feel free to contact me!
May 16, 2018 | cards, Stampin' Up!
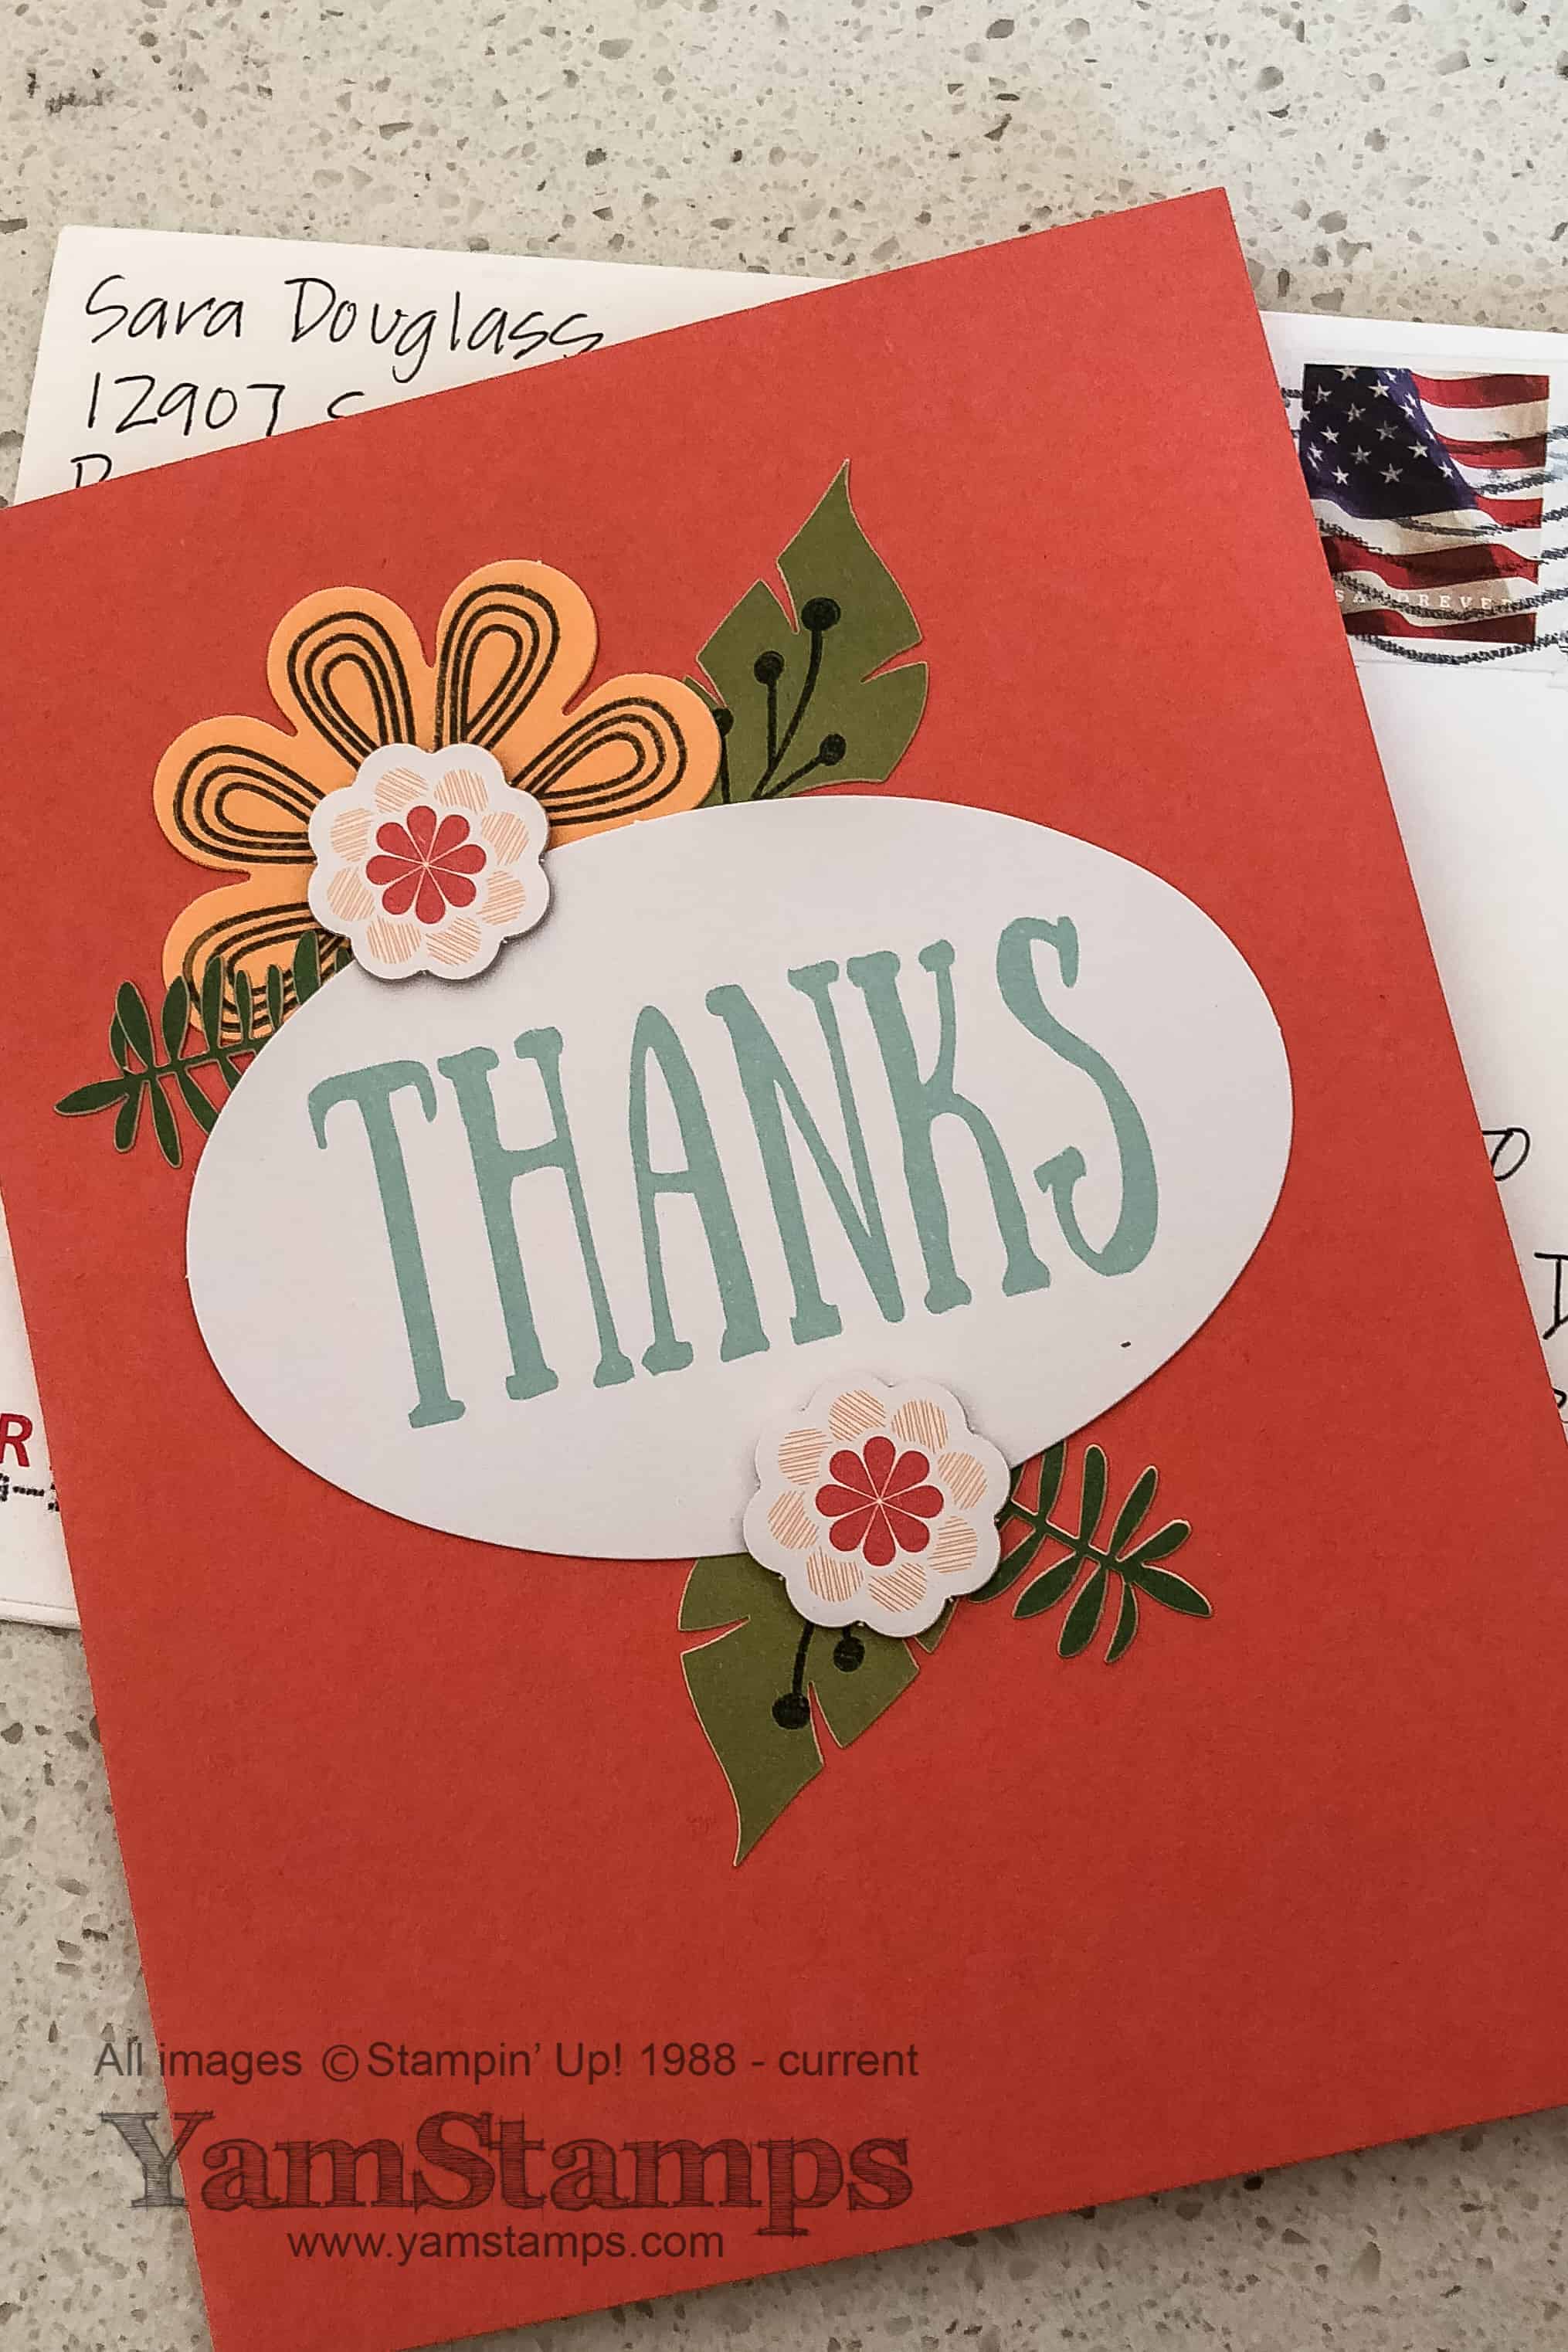
No Layer Notecard for the win! When you need a quick card, go for the clean and simple style. This one features the Love What You Do photopolymer stamp set, coming in the 2018-2019 Stampin’ Up! Annual Catalogue – and currently available in all three of the Share What You Love Bundle options, available exclusively during May.
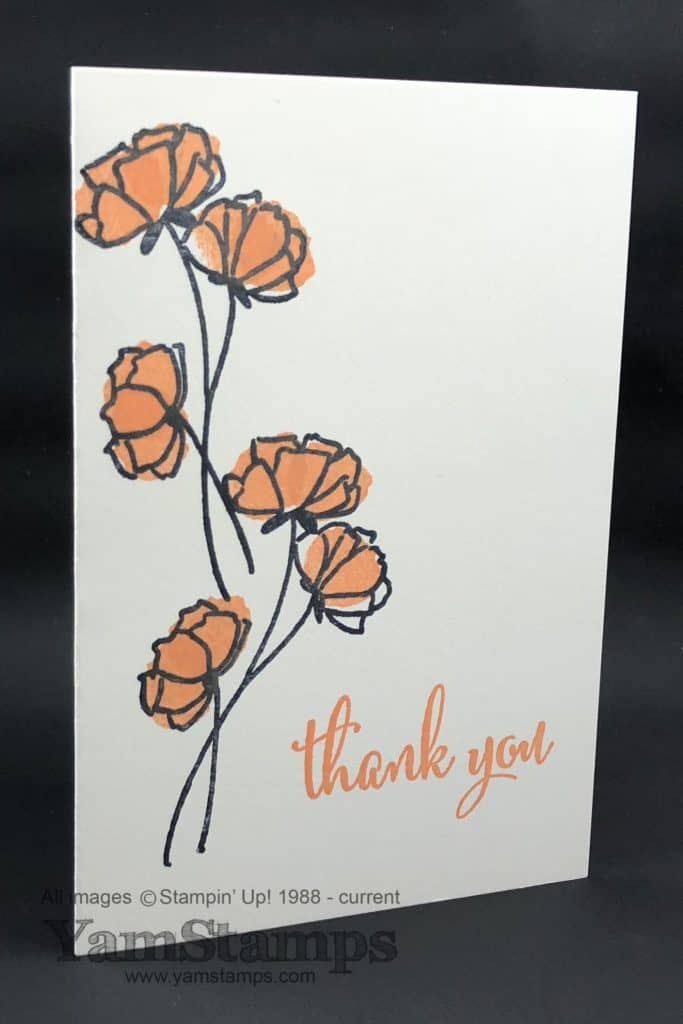
This stamp set has a great combination of outline images, sentiments and watercolour wash effects. For this card, the smaller wash shape was used to fill in the colour for the outline flowers. This notecard also features one of the new In Colours, Grapefruit Grove. I think that the clean and simple no layer notecard is perfect for a thank you card – because it’s good to get those cards done and mailed! (I say this in part to coach myself….because I always feel a little behind in the thank you card department!!).
Stampin’ Up! notecards are available in Whisper White, and will be available in Very Vanilla in the new catalogue (orderable in June). During May, though, they are available exclusively as part of the Just Getting Started or Gotta Have it All Bundles. You have a couple more weeks to take advantage of these specials!
One last note about the notecards…they are slightly smaller than the usual half sheet card, but they ARE within Canada Post mailing standards, so you don’t have to worry that way. Plus, a no layer notecard will not have extra bulk or weight, so you know you won’t have to pay extra postage to get the card to its destination.
I’m busy travelling in and out of Toronto this week, cheering on my son as he plays for the last time in the Nelson High School bands at MusicFest Nationals. It’s always great to see how well everyone rises to the occasion at these adjudicated performances. Hard to believe, though, that these will be his last few performances since he will be graduating in a month’s time! Where does the time go? Guess I’d better start working on a grad card….
If you need to build up your stash of cards, (grad or otherwise…) consider attending one of the Monthly Card Classes, or join Stampers Club….or if you can’t make those set dates, get a group of friends together and have a private card class! Check the YamStamps Events Page or contact me for more information/to book a date! And yes, there’s Summer School for Stampers – we run 12 months a year!!
May 9, 2018 | cards, Stampin' Up!

Handmade Cards Made Easy! There is nothing better than getting a handmade card – this one is from Sara Douglass, the CEO of Stampin’ Up! She sent this card to me (and other Events Council Members) to thank us for our work. Honestly, it was hardly like work – it was so much fun being part of the Stampin’ Up! Events Council, giving input and feedback on Demonstrator Events, and being able to present to fellow demonstrators at those events. This card reminded me how nice it is to receive something handmade in the mail. I shared this card on social media last week (I think), but realized I didn’t post it here. What I also realized, as I was tidying up my Craft Room (a never ending task, it seems….), is that this is a previous Paper Pumpkin kit card!
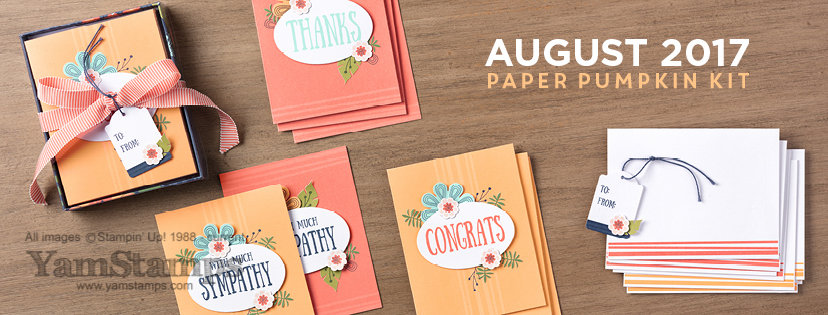
Paper Pumpkin is the monthly subscription crafting kit from Stampin’ Up! Each month subscribers receive a box that contains a photopolymer stamp set, an ink spot (or something to make a mark – there’s also been kits with watercolour pencils or Stampin’ Write markers), and all the supplies required to create that month’s projects. They are great for taking with you – if you’re going on a getaway, heading to the cottage – you’ve got everything there, and there’s usually enough supplies that you can share the experience with a friend! You get the fun of creating something without having to work too hard…perfect for summertime, downtime or….anytime?!
If you’re interested in trying it out, it’s your last chance to get 50% off your first two months! Click on this link and enter the code SAVEFIFTY0418 – by May 10th. Offer is good for new subscribers who purchase a month-by-month subscription. Paper Pumpkin subscribers can also purchase previous kits/refills if they are available, so if you missed a previous kit, or really loved a past kit, you may have the opportunity to grab more supplies! If you’d like more information about Paper Pumpkin, I have an information/FAQ page here.
Another way to have handmade cards made easy is to attend a class with me! Each month, I have a Card Class where you make four different cards using a variety of stamps, tools and supplies. Your class fee covers ALL the needed supplies (including adhesive) and you will walk away with four completed cards plus envelopes to mail them in. It’s great to have a card on hand to send to a friend, or give on a special occasion.You can see upcoming dates on the YamStamps Events Page. If you can’t make a date, get a group of friends or family together, and contact me to organize a private card class! Hope to see you in a class very soon.
May 5, 2018 | scrapbooking, Stampin' Up!
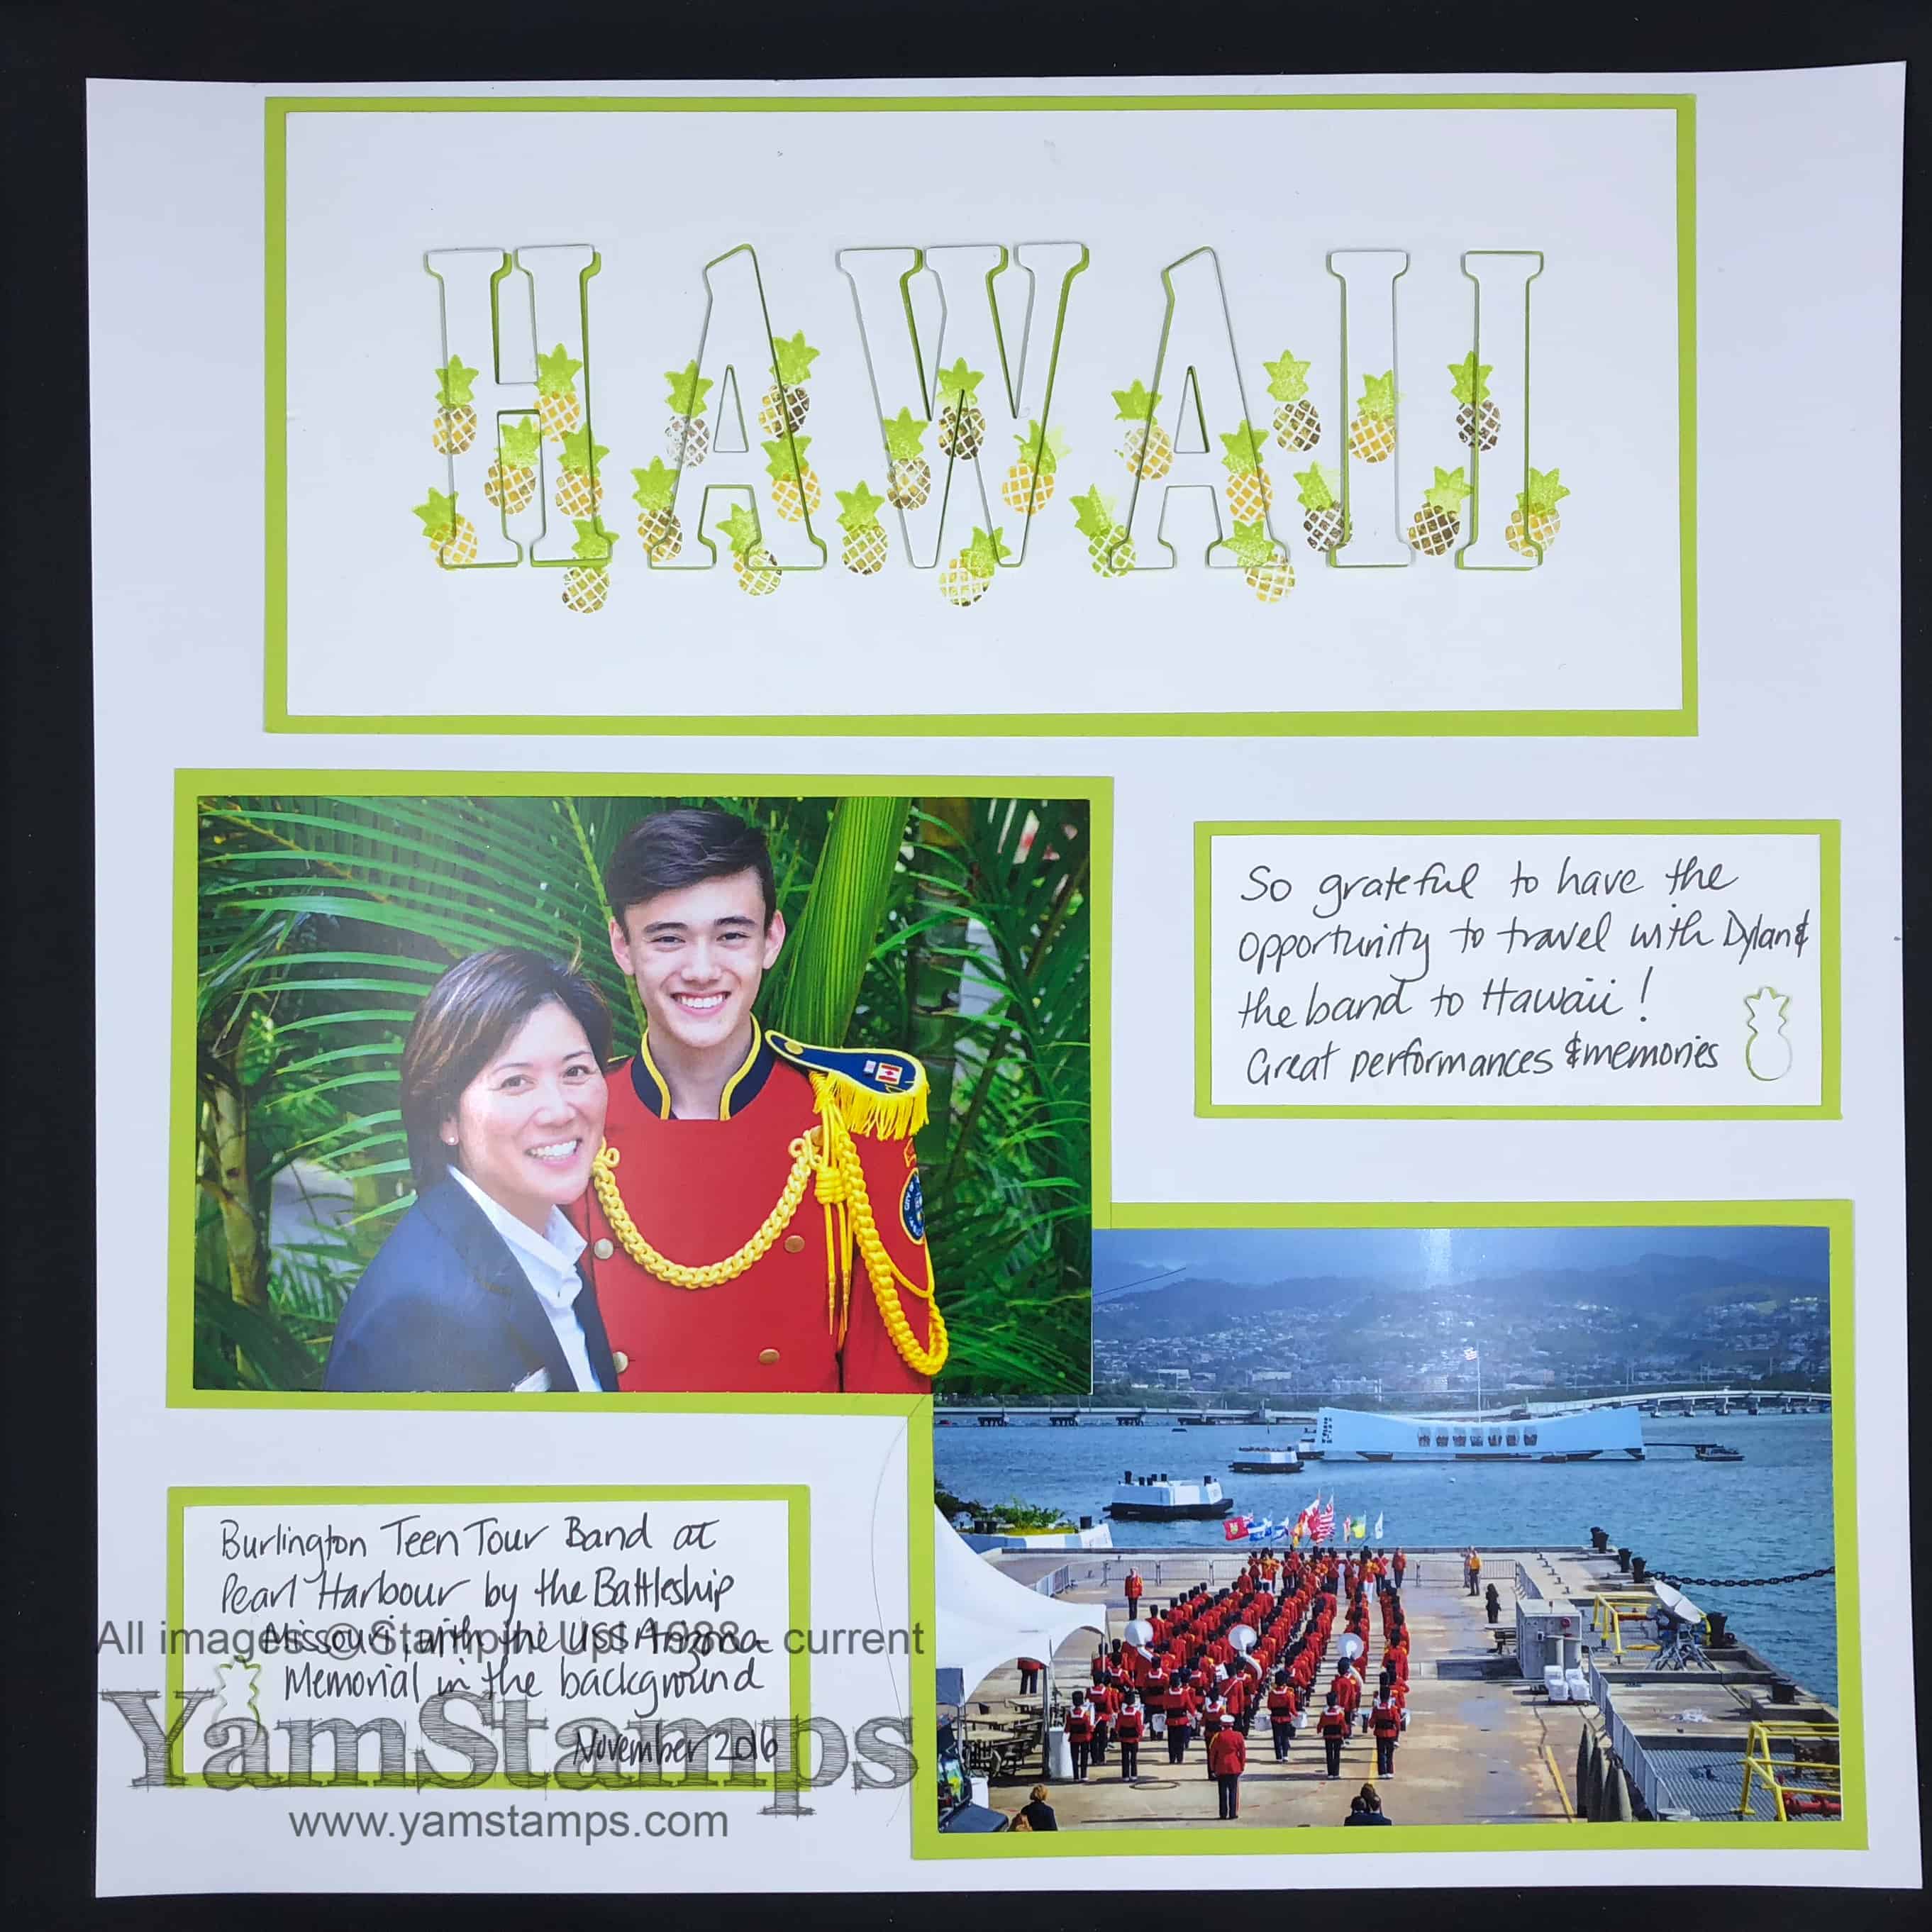
Happy (Inter) National Scrapbooking Day! Thought I’d pull out this favourite page using the Tutti Frutti Product Suite. I have to admit, I don’t scrapbook a whole lot, but I do try to get a few pages of significant events done. I have a large square frame that fits 12 x 12 images, so I can pop the page in there to share with others easily (aka force them to admire it!! haha). This page features a couple of my favourite photos from a trip to Hawaii with the Burlington Teen Tour Band. You don’t have to do an entire scrapbook to commemorate trips or events, one page can be enough to bring back those memories!
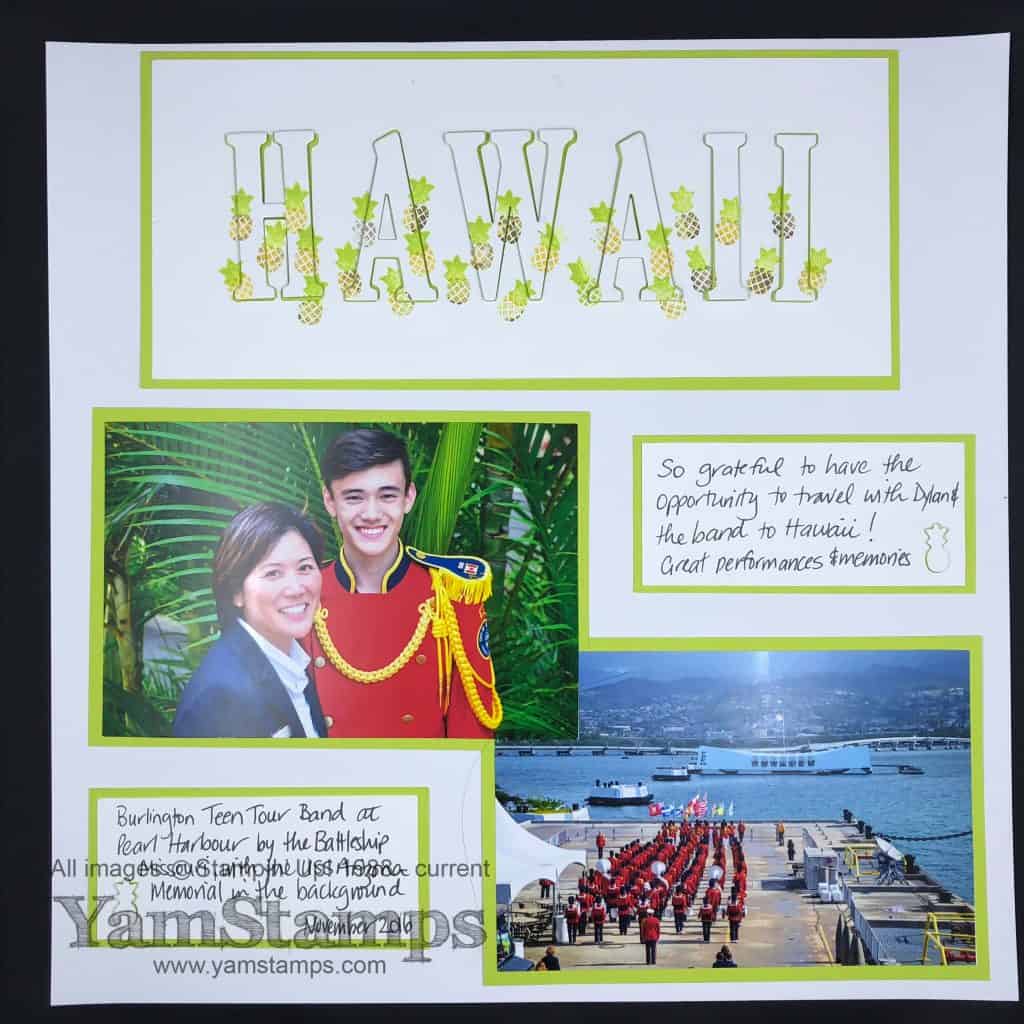
This page uses the great Large Letters Framelits for the title portion, and the Fruit Basket Stamp set and Itty Bitty Fruit Punch Pack. You can get these in a specially priced bundle, but these are all on the retiring list, so you’ll want to be sure to grab them while you can. They’ll be gone forever as of May 30th, or when supplies are exhausted. The Large Letters framelits will be staying around for another year, but the coordinating Large Numbers Framelits are retiring (along with the coordinating Number of Years Stamp Set) so you may want to consider grabbing those before they’re gone. The title is an example of the Eclipse Technique, where you cut shapes out of the cardstock, and then back them with a contrasting cardstock and set them back into place with dimensionals. It’s a technique that I shared in a previous YamStamps Newsletter, and it’s one of my favourites.
I hope that you have a Happy (Inter) National Scrapbooking Day! Make some good memories and preserve them too! It’s a gorgeous Saturday around our neck of the woods, which is great, considering the horrendous high winds we had late yesterday – so many pictures of downed trees (HUGE ones), knocked over fences and missing roof shingles. I’m hoping to spend a bit of time creating today before I head out to sing in a choir concert this evening (Kokoro Singers – we’ll be in Kitchener tonight and Hamilton tomorrow, join us if you can!).
I am extending the (Inter) National Scrapbooking Day celebrations to Wednesday – there are still a couple of spots available in the Scrapbook in a Box class at 1pm or 7pm. Cost of $25 includes all supplies. No previous experience is required! You’ll create the box in class and then add your photos at home later. Please visit this page for more information/to register, or contact me. Hope to see you in class!!
May 3, 2018 | birthday, cards, Retired List, Stampin' Up!

Isn’t this a fun card? This is one of the cards you can make with the Perennial Birthday Project Kit and the Perennial Birthday Stamp Set (available in wood mount or clear mount). The kit will be retiring at the end of the month (or when supplies are exhausted), but the stamp set will be around for another year. This kit makes 4 each of 4 different cards quickly and easily! The most time consuming thing on this card? Might be a tie – poking out the little die cut slats on the background piece….or tying the bow around the strings! haha
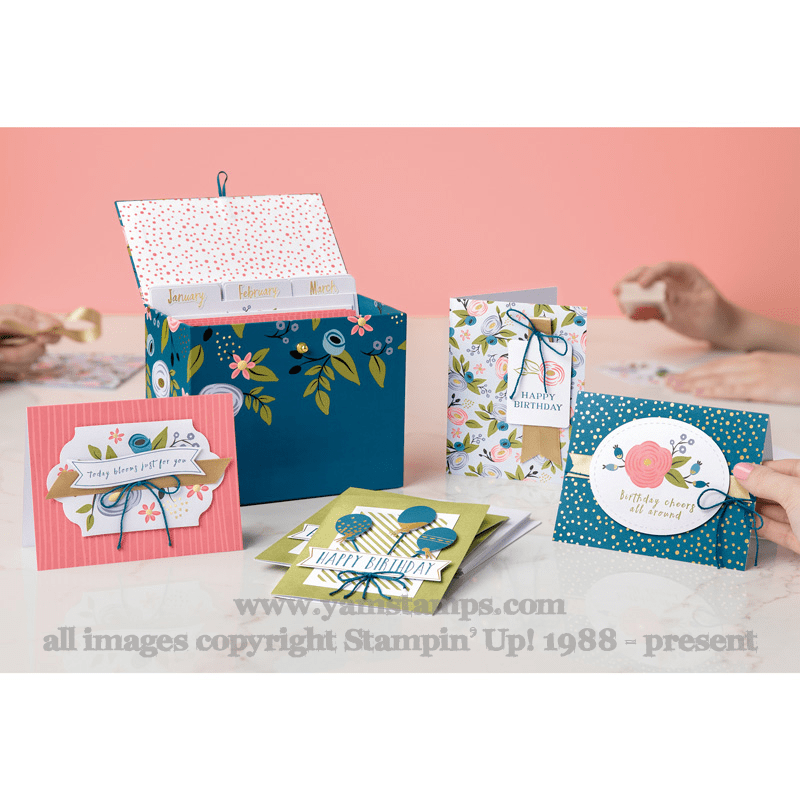
This is what the kit itself looks like – the box that holds all the project items then doubles as a card box with dividers so that you can be prepared for upcoming birthdays! If you’re interested in grabbing this kit, you’ll want to place your order sooner rather than later. If you want to complete the cards exactly as shown in the kit, you’ll also want the Dapper Denim, Flirty Flamingo and Old Olive ink pads and the stamp set, though you could easily substitute other ink colours or greeting sets.
Stampin’ Up! is going to do a Colour Revamp with the new catalogue – so we’ll say goodbye to some colours that have been in the catalogue, and make room for some new ones! Plus, there’s a new design to the ink pads – and they’re stackable!
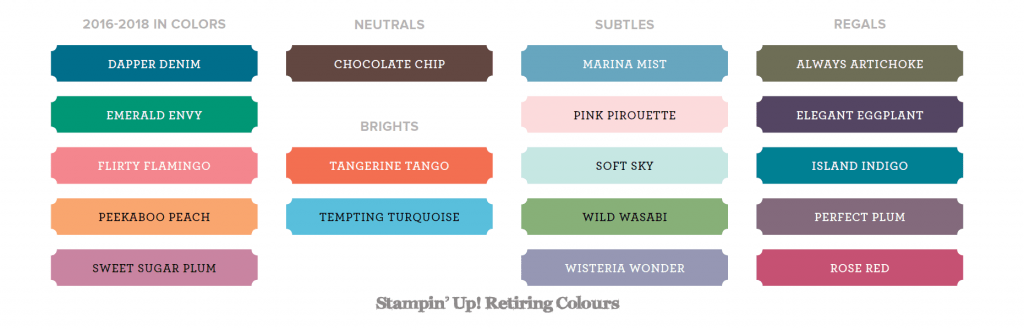
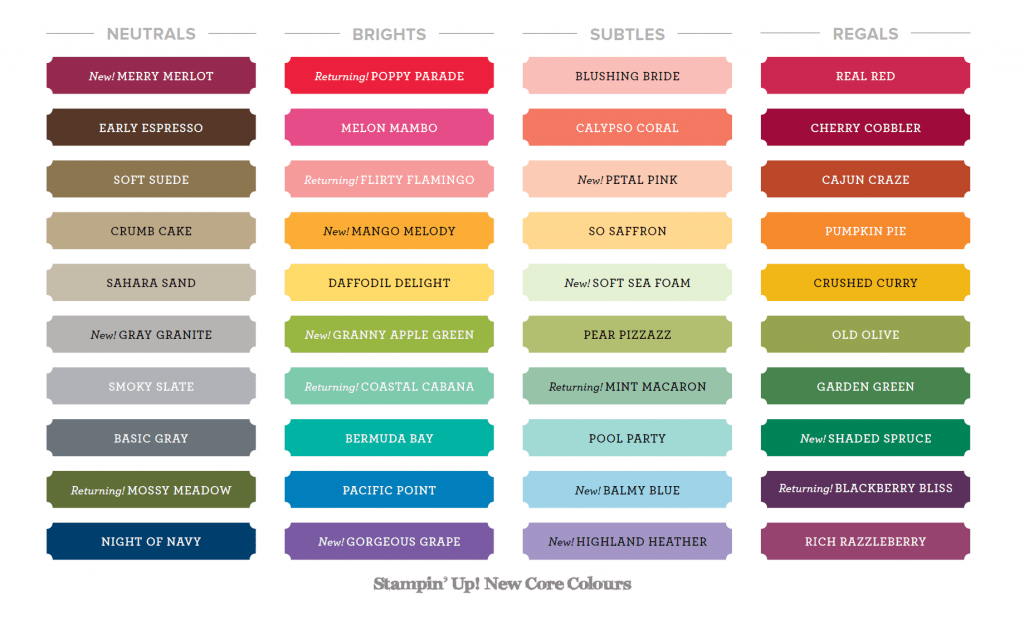 As you can see – there’s some old favourites coming back as core colours – many demonstrators were excited to see Mint Macaron and Blackberry Bliss on the list! And Flirty Flamingo leaves as an In Colour, but comes right back as a Core Colour. There’s also a new “Basics” Group that consists of Basic Black, Very Vanilla and Whisper White.
Last but not least….the In Colours So while we are sad to see some of our favourites leave, there’s lots to look forward to in the new catalogue! Demonstrators are able to order selected items from the upcoming catalogue this month so we can be prepared to share all sorts of new projects and ideas right away come June 1st! If you can’t wait for June 1st, you can join my demonstrator team NOW and select some of the new catalogue product in your starter kit! Details on being part of my demonstrator group here – or contact me for more information and the new catalogue preorder list! Otherwise – if yu’re local to Burlington ON, June 2nd is my New Catalogue Open House – rsvp to make sure there’s a copy of the catalogue waiting for you!